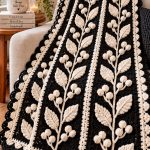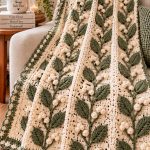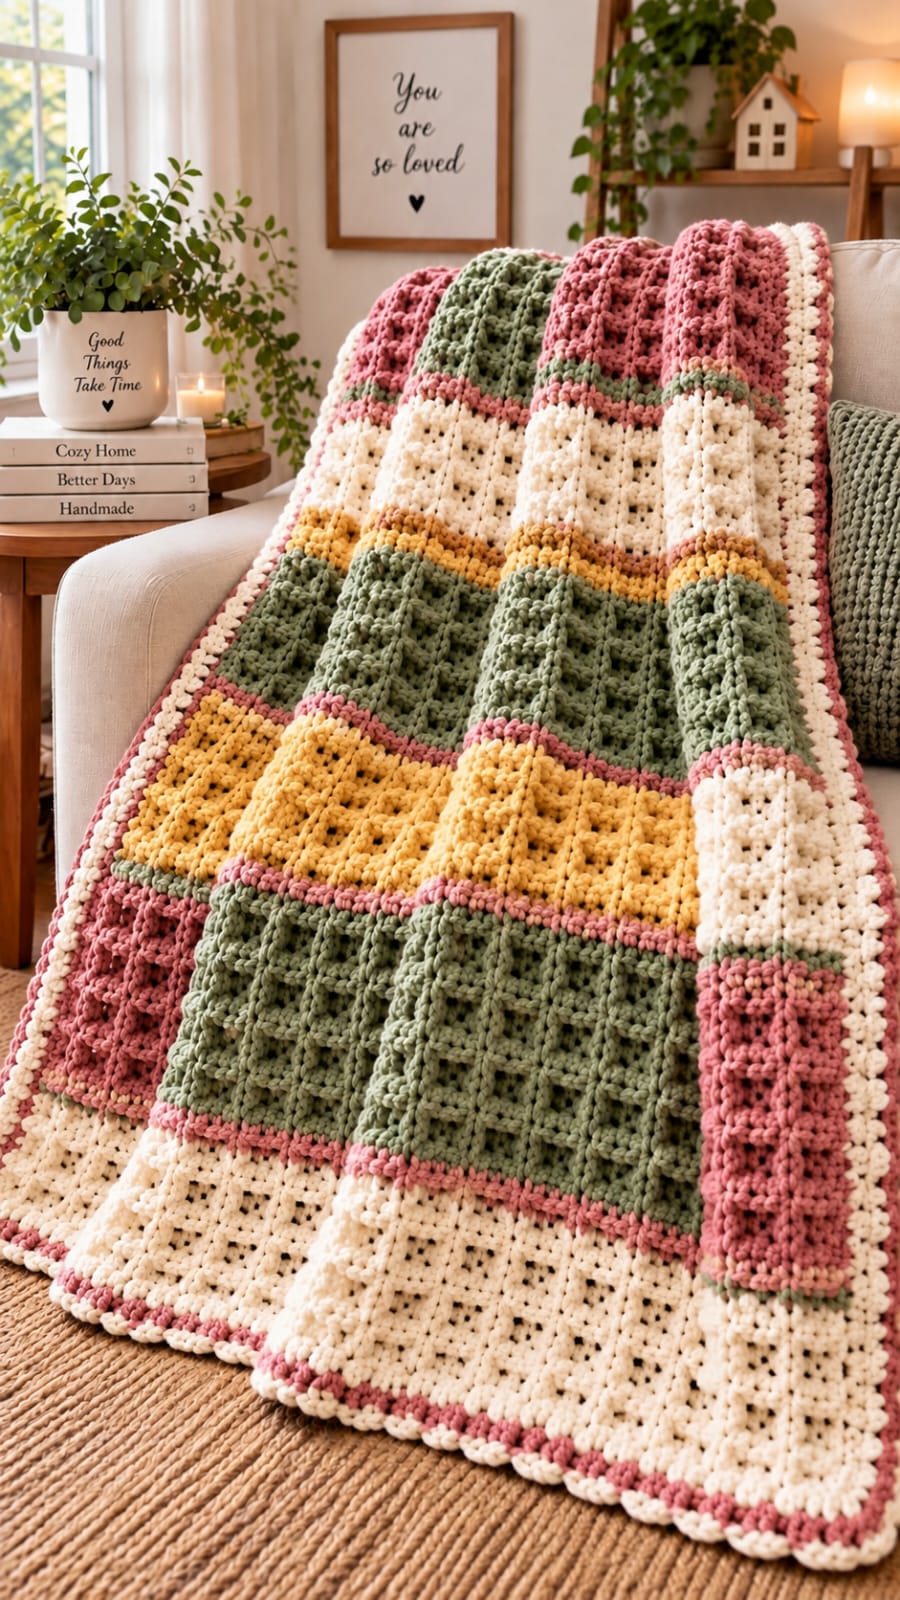
Five broad color bands only work when their textures remain distinct after the blanket is folded. This textured patchwork crochet blanket pattern recreates the photographed throw with sage green, dusty rose, warm cream and mustard sections separated by narrow contrast rows. Raised vertical ridges and open geometric texture give each panel definition. The photo-inspired target size is approximately 125 × 165 cm using bulky yarn.
The Design: What Makes This Textured Blanket Different
The blanket is constructed as one large rectangular fabric rather than dozens of individually sewn squares. Color changes create the patchwork effect, while alternating textured stitch sections make neighboring bands appear structurally different. Raised front-post columns divide several sage and rose panels, and cream sections use a lighter open texture to prevent the heavy yarn from producing an excessively dense fabric.
Narrow dusty-rose, sage and mustard transition rows act as visual separators. They matter. Without them, the large blocks can merge when similar textures meet. A common problem with a chunky textured crochet blanket is excessive width contraction in raised-stitch sections. Keeping the foundation and post stitches relaxed prevents the sides from pulling inward.
Project Info at a Glance
| Skill Level | Estimated Time | Target Size | Hook | Construction |
|---|---|---|---|---|
| Intermediate | 18–25 hours | Approx. 125 × 165 cm | 7–8 mm | One-piece striped rectangle |
The dimensions and yarn quantities below are reconstruction targets estimated from the photographed proportions rather than direct measurements of the pictured blanket. Gauge, yarn structure and personal tension will change the final dimensions.
Materials and Tools
Yarn
- Warm cream — Bulky #5 — approximately 850–1000 g
- Sage green — Bulky #5 — approximately 800–950 g
- Dusty rose — Bulky #5 — approximately 450–550 g
- Mustard yellow — Bulky #5 — approximately 300–400 g
Tools
- 7–8 mm crochet hook
- Large tapestry needle
- Locking stitch markers
- Sharp scissors
- Tape measure
- Blocking mats or a clean flat surface
- Rust-resistant blocking pins
Abbreviations
- ch — chain
- sc — single crochet
- hdc — half double crochet
- dc — double crochet
- sl st — slip stitch
- FPdc — front post double crochet
- BPdc — back post double crochet
- FLO — front loop only
- BLO — back loop only
- st/sts — stitch/stitches
- sp — space
A front-post double crochet is worked around the post of the stitch below rather than through its top loops, creating the raised vertical lines used throughout the blanket.
Gauge and Finished Measurements
Target approximately 11–12 stitches and 8–9 rows per 10 cm in the main double-crochet texture after light blocking.
The sample reconstruction targets approximately 125 cm in width and 165 cm in length, including the border.
Because raised post stitches can contract the fabric, measure after completing at least 15 cm of the first major textured panel. If the width falls below approximately 120 cm, increase hook size by 0.5 mm rather than forcing looser individual stitches.
Blanket Construction Overview
The blanket is worked from the bottom edge upward. Each major color section is approximately 20–27 cm deep, with narrow one- or two-row separators between them.
The photographed layout can be reconstructed in the following order:
- Warm cream lower section
- Dusty-rose separator
- Large sage textured section
- Dusty-rose separator
- Mustard textured section
- Dusty-rose separator
- Second sage textured section
- Mustard and cream transition
- Large warm-cream textured section
- Sage and dusty-rose separator
- Upper sage and dusty-rose textured section
Foundation
Yarn: warm cream.
Ch 143 loosely.
Row 1: Dc in fourth ch from hook and in each remaining ch. (140 sts)
Row 2: Ch 2, turn, hdc in each st across. (140)
The 140-stitch width is designed for the approximate 125 cm finished measurement. If your swatch produces a different width, adjust the foundation in multiples of four stitches.
Section 1 — Warm Cream Open Texture
Continue with warm cream.
Row 3: Ch 3, turn, dc in first 3 sts, *ch 1, skip 1 st, dc in next 3 sts*. Repeat across, adjusting the final repeat as necessary to maintain 140 working positions.
Row 4: Ch 2, turn, hdc in every dc and ch-1 sp across. (140)
Row 5: Ch 3, turn, dc across. (140)
Row 6: Ch 1, turn, sc across. (140)
Rows 7–16: Repeat Rows 3–6, ending after the required depth reaches approximately 23–25 cm.
The lower cream section should remain relatively open compared with the sage areas. Avoid adding post stitches here.
Dusty-Rose Lower Separator
Change to dusty rose.
Row 17: Ch 1, turn, sc across. (140)
Row 18: Ch 2, turn, hdc across. (140)
Fasten off dusty rose.
Section 2 — Large Sage Raised-Column Panel
Join sage green.
Row 19: Ch 3, turn, dc across. (140)
Row 20: Ch 3, turn, dc in first 3 sts, *FPdc around next dc, dc in next 3 sts*. Repeat across.
Row 21: Ch 3, turn, work dc across, placing a regular dc into the top of every previous stitch. (140)
Row 22: Repeat Row 20.
Row 23: Ch 1, turn, sc across. (140)
Row 24: Ch 3, turn, dc across. (140)
Rows 25–34: Repeat Rows 20–24 twice.
The repeated FPdc positions form vertical raised columns similar to the structured sage panels visible in the photograph.
Adding Secondary Ridges to the Sage Panel
For stronger texture, alternate one raised row with a slightly flatter row.
Row 35: Ch 3, turn, dc in first 5 sts, *FPdc around next st, dc in next 5 sts*. Repeat across.
Row 36: Ch 2, turn, hdc across. (140)
Row 37: Repeat Row 35.
Row 38: Ch 1, turn, sc across. (140)
Fasten off sage.
Dusty-Rose Separator
Join dusty rose.
Row 39: Ch 1, sc across. (140)
Row 40: Ch 2, hdc across. (140)
Fasten off.
Section 3 — Mustard Geometric Texture
Join mustard yellow.
Row 41: Ch 3, turn, dc across. (140)
Row 42: Ch 3, turn, dc in first 2 sts, *ch 1, skip 1, dc in next 3 sts*. Repeat across.
Row 43: Ch 2, turn, hdc in every dc and ch-1 sp. (140)
Row 44: Ch 3, turn, dc in first 4 sts, *FPdc around next st, dc in next 3 sts*. Repeat across.
Row 45: Ch 1, turn, sc across. (140)
Rows 46–52: Repeat Rows 42–45, stopping when the mustard panel measures approximately 18–20 cm.
Fasten off mustard.
Dusty-Rose Transition Line
Row 53: Join dusty rose and sc across. (140)
Row 54: Ch 2, turn, hdc across. (140)
Fasten off.
Section 4 — Central Sage Panel
Join sage.
Row 55: Ch 3, turn, dc across. (140)
Row 56: Ch 3, turn, dc in first 3 sts, *FPdc around next st, dc in next 3 sts*. Repeat across.
Row 57: Ch 3, turn, dc across. (140)
Row 58: Repeat Row 56.
Row 59: Ch 1, turn, sc across. (140)
Row 60: Ch 3, turn, dc across. (140)
Rows 61–72: Repeat Rows 56–60 until the sage section measures approximately 24–27 cm.
Fasten off.
Mustard Transition Stripe
Join mustard.
Row 73: Ch 1, sc across. (140)
Row 74: Ch 2, hdc across. (140)
Fasten off.
Section 5 — Large Cream Center Panel
Join warm cream.
Row 75: Ch 3, turn, dc across. (140)
Row 76: Ch 3, turn, dc in first 2 sts, *ch 1, skip 1, dc in next 3 sts*. Repeat across.
Row 77: Ch 2, turn, hdc in every stitch and ch-1 space. (140)
Row 78: Ch 3, turn, dc in first 4 sts, *FPdc around next st, dc in next 4 sts*. Repeat across.
Row 79: Ch 1, turn, sc across. (140)
Rows 80–90: Repeat the texture established in Rows 76–79.
The cream panel should finish approximately 23–25 cm deep.
Fasten off.
Sage and Rose Transition
Row 91: Join dusty rose, ch 1 and sc across. (140)
Row 92: Change to sage, ch 2 and hdc across. (140)
Row 93: Change back to dusty rose, ch 1 and sc across. (140)
Fasten off dusty rose.
Section 6 — Upper Sage Texture
Join sage.
Row 94: Ch 3, turn, dc across. (140)
Row 95: Ch 3, turn, *dc in next 3 sts, FPdc around next st*. Repeat across.
Row 96: Ch 3, turn, dc across. (140)
Row 97: Ch 1, turn, sc across. (140)
Row 98: Ch 3, turn, dc in first 5 sts, *FPdc around next st, dc in next 5 sts*. Repeat across.
Rows 99–106: Alternate Rows 95–98 until the upper sage block reaches approximately 18–20 cm.
Fasten off sage.
Section 7 — Dusty-Rose Upper Panel
Join dusty rose.
Row 107: Ch 3, turn, dc across. (140)
Row 108: Ch 3, turn, dc in first 3 sts, *FPdc around next st, dc in next 3 sts*. Repeat across.
Row 109: Ch 2, turn, hdc across. (140)
Row 110: Repeat Row 108.
Row 111: Ch 1, turn, sc across. (140)
Rows 112–120: Repeat the established dusty-rose texture until the final body length is approximately 158–160 cm before the border.
Fasten off.
Optional Raised Vertical Surface Lines
The photographed blanket shows particularly strong vertical definition in several large panels. Surface crochet can reproduce that appearance after the main rectangle is complete.
Insert the hook at the bottom of a selected sage panel and pull up a matching loop.
Work loose surface slip stitches vertically through the fabric, following one stitch column.
Stop at the opposite edge of that color section and fasten off on the wrong side.
Repeat every 8–12 cm across selected panels.
Do not pull the surface slip stitches tightly. The blanket should lie flat before and after the additional ridges are added.
Outer Border
Round 1 — Cream Foundation
Join warm cream in any corner.
Ch 1 and work sc evenly around the entire blanket.
Along the top and bottom, work one sc into each stitch. Along the sides, distribute stitches evenly so the edge remains flat.
Work (sc, ch 2, sc) into each corner.
Join with sl st.
Round 2 — Cream Texture
Ch 2.
Hdc in every stitch around, working (hdc, ch 2, hdc) into each corner space.
Join with sl st.
Round 3 — Sage Accent
Change to sage.
Ch 1 and sc around.
Work (sc, ch 2, sc) in each corner.
Join and fasten off.
Round 4 — Dusty-Rose Accent
Join dusty rose.
Ch 1 and sc in every stitch around.
Work three sc in each corner space.
Join and fasten off.
Round 5 — Cream Scalloped Edge
Join warm cream.
*Skip 1 st, 5 dc in next st, skip 1 st, sl st in next st.* Repeat around the blanket.
Adjust the spacing slightly near each corner so one scallop sits cleanly around the corner rather than folding underneath it.
Fasten off and weave in the tail.
Assembly and Finishing
- Complete all major color sections before adding any optional surface-crochet ridges.
- Lay the unfinished blanket flat and measure the width at the top, center and bottom.
- Add matching surface slip-stitch columns only to panels that need stronger vertical definition.
- Weave yarn tails horizontally through matching color sections rather than carrying dark tails beneath cream stitches.
- Work the first cream border round slowly, correcting any side-edge waviness by adjusting stitch placement.
- Add the cream hdc border followed by the sage and dusty-rose accent rounds.
- Work the final cream scallops without stretching the blanket edge.
- Pin the four corners to the target rectangular dimensions before pinning the long sides.
- Lightly block according to the fiber content and allow the blanket to dry completely while flat.
- Remove the pins, check the border for waves and trim only fully secured yarn ends.
The finished throw should form a rectangular fabric with broad cream, sage, mustard and dusty-rose sections separated by narrow contrast stripes and framed by a multi-round border.
7 Technical Tips
- Panel width contraction: FPdc rows can become 3–5 cm narrower than ordinary dc rows across a blanket this wide. Work post stitches with a slightly taller loop rather than tightening them against the fabric.
- Wavy color transitions: A loose separator row can flare between two dense textured sections. Keep every separator at the same 140-stitch count and measure the width after each color change.
- Uneven side edges: Place a stitch marker into the first and last stitch of every row. Accidentally losing one edge stitch repeatedly creates a diagonal blanket side that the border cannot fully correct.
- Heavy cream sections: Do not replace all ch-1 openings with solid stitches. The small spaces reduce weight and prevent the warm-cream panels from becoming noticeably stiffer than the surrounding colors.
- Tight surface crochet: Surface slip stitches should sit on the fabric without gathering it. If a 25 cm panel contracts by more than approximately 1 cm after a ridge is added, remove the ridge and repeat with looser loops.
- Border ruffling: Too many stitches along the side edges produce waves. Spread the blanket flat after Round 1 and remove side stitches if the edge rises instead of lying level.
- Visible dark tails: Weave sage, rose and mustard ends through stitches of the same color for at least 8–10 cm. Dark tails carried underneath the open cream texture can remain visible from the front.
How to Keep the Blanket Sides Straight
Count the first several rows after every major stitch-pattern change. Texture can disguise a missing edge stitch until the panel is already several centimeters deep.
Place one locking marker in the first stitch and another in the last stitch of the active row.
Measure the blanket every 20–25 cm of length. Compare the current width with the foundation measurement.
A difference of approximately 1–2 cm can usually be corrected during blocking. A larger difference indicates that tension or stitch count has changed and should be corrected before continuing.
Working Clean Color Changes
Complete the final yarn-over of the last stitch with the new color.
Turn the work and begin the next row normally.
When a color will not be used again for several rows, cut it and leave a tail of approximately 15–20 cm.
Do not carry dusty rose behind a wide cream section. The darker strand may show through the open stitches.
For narrow two-row transitions, weave the ends into the separator itself before the border is added.
Controlling the Raised Texture
Raised columns should remain visible without turning the blanket into a rigid fabric.
Insert the hook around the post from front to back and back to front, then complete the double crochet normally.
Draw the first loop up to approximately the same height as the surrounding stitches.
If the FPdc is worked too tightly, it pulls neighboring stitches inward. Repeated across 140 stitches, that small difference can noticeably reduce the panel width.
Adjusting the Blanket Width
For a narrower throw, begin with a foundation producing approximately 110–115 cm before the border.
For a wider blanket, target approximately 140–145 cm before the border.
Keep the stitch count divisible by four when possible. Most of the texture repeats are easier to distribute across multiples of four.
Make a gauge swatch before calculating the new foundation because bulky yarns with the same weight classification can differ substantially in diameter.
Adjusting the Blanket Length
Length changes are simpler because the blanket consists of independent horizontal sections.
For a shorter lap blanket, remove one large sage panel or reduce each major section by approximately 3–4 rows.
For a longer bed throw, add one additional 15–20 cm textured band before the final dusty-rose section.
Repeat an existing color rather than introducing a fifth shade. The photographed design depends on repeated sage, cream, rose and mustard relationships.
Alternative Color Placement
The same construction works with fewer colors.
For a neutral version, replace dusty rose with taupe and mustard with oatmeal while retaining cream and sage.
A stronger autumn palette can use olive, rust, ivory and ochre.
For a cooler version, substitute dusty blue for rose and soft gray for mustard.
Keep one pale neutral in several widely separated sections. Repeating that light color prevents the large textured bands from appearing visually disconnected.
Blocking the Finished Blanket
Check the yarn label before applying moisture or heat.
Lay the finished blanket on a clean flat surface and shape it to approximately 125 × 165 cm.
Pin the four corners first. Next, pin the centers of all four sides before filling the spaces between those points.
Do not stretch individual raised columns. The objective is to square the overall rectangle while retaining the relief of the stitch pattern.
Allow the blanket to dry completely before removing pins.
Care and Storage
Follow the care instructions for the specific yarn used. A finished bulky blanket can become very heavy when saturated, so support the full fabric when transferring it after washing.
Dry flat whenever the fiber instructions permit.
For storage, fold along broad color sections rather than compressing the blanket into a small container. Long-term compression can flatten raised post stitches and the scalloped border.
Final Finishing Check
Spread the blanket completely flat and inspect all four sides.
Check that the border corners remain square and that no scallop folds underneath the edge.
Run your hand across every raised vertical column to locate loose surface-crochet ends.
Inspect cream sections from both sides for visible dark yarn tails.
Finally, compare the top, center and bottom widths. A lightly blocked textured patchwork crochet blanket pattern should maintain a consistent rectangular outline despite the changing stitch structures.
Conclusion
Begin with a gauge swatch large enough to include both ordinary double crochet and a raised front-post column before committing to the full 140-stitch width. Work the cream foundation section first, then alternate sage, mustard and dusty-rose areas while keeping every row at the same working count. Add surface ridges only after the main rectangle lies flat, then finish with the layered cream, sage and rose border. Save this textured patchwork crochet blanket pattern to Pinterest or share the completed throw on Instagram with #SageRosePatchworkBlanket. For this specific blanket, would you keep the mustard sections or replace them with another warm neutral?