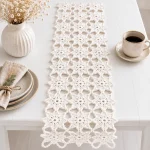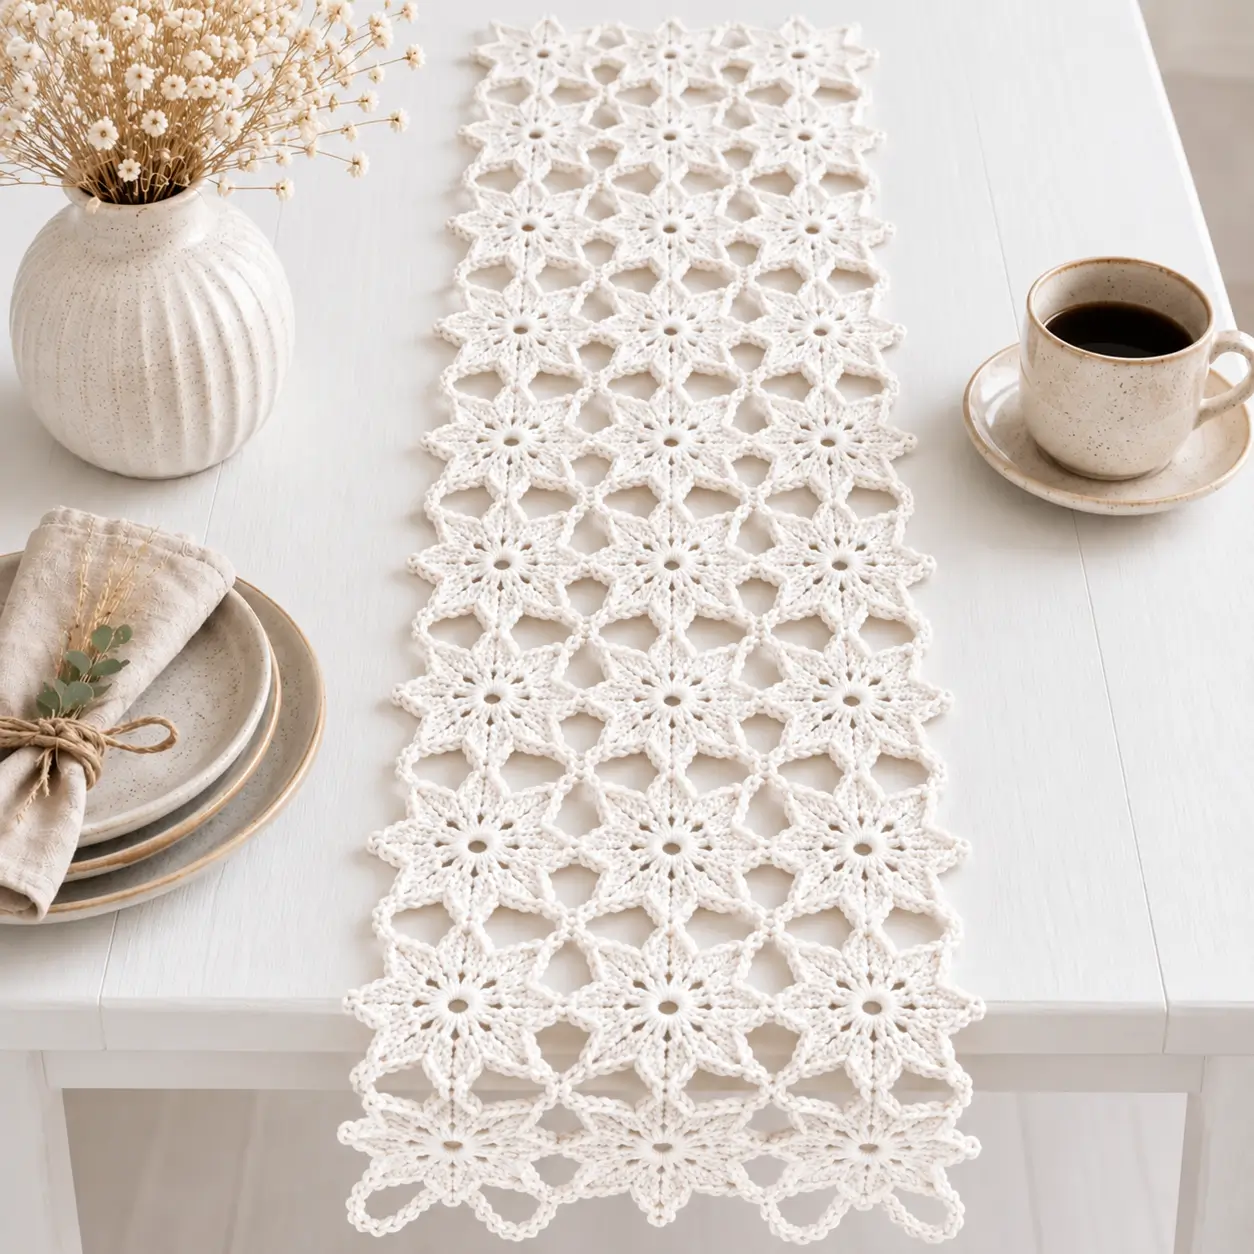
Eight pointed petals give this runner its geometry: each flower has to remain symmetrical or the open spaces between neighboring stars will immediately shift out of alignment. This crochet table runner pattern uses ivory cotton yarn, repeated star-flower motifs and open chain joins to create a narrow lace runner. The modular construction also makes the finished length easy to change without rewriting the entire pattern.
The Design: What Makes This Star Flower Runner Different
The runner is built from individual eight-point star flowers rather than from one long rectangular piece. Each motif combines a small open center with elongated points. When several motifs are positioned together, the spaces between their points become part of the overall lace pattern.
The second structural feature is the narrow three-motif width. That proportion keeps the piece suitable for the center of a dining table while allowing the repeated stars to remain clearly visible.
Joining tension matters more here than it does in a dense crochet table runner. Pull the connecting chains too tightly and the stars begin folding toward one another. Make them too loose and oversized holes appear between motifs.
The most common construction mistake is blocking each flower to a different diameter. Complete and block one master motif first, then use its measurements as the standard for every remaining star.
Project Info at a Glance
| Skill Level | Construction | Target Size | Hook | Best For |
|---|---|---|---|---|
| Intermediate | Joined motifs | Approx. 30 × 100 cm | 3.0–3.5 mm | Dining table / console |
The dimensions above are a target for this photo-inspired version rather than measurements extracted from the photograph. Make the runner longer or shorter by changing the number of motif rows.
Materials and Tools
Yarn
- Ivory or natural white cotton — sport or light DK weight — approximately 250–350 g
A smooth cotton is preferable for this construction because stitch definition affects the appearance of the pointed petals and open joins. Make one complete motif before purchasing the full quantity if an exact finished size is required.
Tools
- 3.0–3.5 mm crochet hook
- Tapestry needle
- Scissors
- Blocking mats
- Rust-resistant blocking pins
- Stitch markers
- Tape measure
Abbreviations
- MR — magic ring
- ch — chain
- sl st — slip stitch
- sc — single crochet
- hdc — half double crochet
- dc — double crochet
- tr — treble crochet
- sp — space
- ch-sp — chain space
- st — stitch
- rep — repeat
- RS — right side
Invisible decreases are not required because the star motifs are worked flat rather than shaped into three-dimensional pieces.
Star Flower Crochet Pattern
This motif is an original construction based on the visible geometry of the photographed runner. It is not presented as an exact transcription of an unidentified designer pattern.
Eight-Point Star Flower Motif
Use ivory cotton yarn.
Round 1: Make an MR. Ch 1 and work 16 sc into the ring. Pull the ring closed while leaving a small central opening. Join with sl st to the first sc.
Count: 16 sc.
The 16-stitch foundation divides evenly into eight sections, providing two base stitches for each star point.
Round 2: Ch 3. Work 1 dc in the same stitch. Ch 2. Work 2 dc in the next stitch. Ch 1.
Repeat the sequence around the ring, forming eight paired sections separated by ch-1 spaces.
Join with sl st.
Round 3: Sl st to the first ch-2 space. Ch 3, 2 dc, ch 3, 3 dc into the same space. Sc into the next ch-1 space.
Repeat (3 dc, ch 3, 3 dc) in the next ch-2 space, sc in the following ch-1 space around.
Join with sl st.
Count: Eight developing points.
Round 4: Sl st to the first ch-3 point space. Work the following sequence into that space:
1 sc, 1 hdc, 2 dc, 1 tr, ch 3, sl st into the first chain of the ch-3, 1 tr, 2 dc, 1 hdc, 1 sc.
Sl st into the sc between points.
Repeat the complete point sequence in each remaining ch-3 space.
Join with sl st.
You should now have eight defined star points.
Round 5: Work sl sts along the first side of a point until reaching its tip. Ch 5, then sl st into the tip of the next point.
Repeat around the motif to create eight connecting loops.
Join with sl st and fasten off.
Leave approximately 15 cm of yarn for secure weaving.
Motif Size and Gauge
Block the first completed star before making the remaining motifs. A practical target for sport or light DK cotton is approximately 9–11 cm from point to opposite point.
The exact diameter is less important than consistency. Every motif used in the runner should finish within approximately 3 mm of the master motif.
If the flower is substantially smaller than the target, increase the hook size. If the points appear loose and the chains collapse instead of holding their shape, reduce the hook size.
How Many Star Flower Motifs to Make
For the photographed proportions, construct the runner approximately three motifs wide.
A practical starting layout is:
- 3 motifs across
- 10 motifs long
- 30 full star motifs total
This creates a long rectangular runner while retaining the repeated floral geometry.
The exact motif count visible in the photograph cannot be established reliably because perspective and the overhanging end obscure parts of the arrangement. Treat 30 motifs as a construction target rather than a claimed count from the image.
Blocking the Crochet Stars
Blocking is a structural stage for this pattern rather than an optional finishing detail. The points and chain spaces must reach consistent positions before motifs are joined.
Place the first star on a blocking mat.
Insert one pin through each of the eight points. Measure from one point directly across the center to the opposite point.
Adjust the pins until all four opposing measurements are approximately equal.
Do not pull one point substantially farther than the others. Unequal blocking produces a distorted motif even when the crochet stitch count is correct.
Allow the motif to dry completely before removing it from the mat.
Use this first blocked star as the physical template for every subsequent motif.
Planning the Table Runner Layout
Place three blocked motifs side by side.
Position the second row directly beneath the first, checking where the star points naturally approach one another. The open areas between four neighboring motifs should remain approximately symmetrical.
Continue arranging motifs until the desired runner length is reached.
For a shorter centerpiece, reduce the number of rows. For a long dining table, continue adding complete three-motif rows.
Photograph the complete arrangement before joining. The image becomes a reference chart if the motifs are moved during assembly.
Joining the Star Flower Motifs
Join-as-you-go construction works particularly well for open motifs because it eliminates heavy seams. Published crochet instructions also use join-as-you-go methods for star-flower motifs.
Joining the Second Motif
Complete Rounds 1–4 normally.
During the final connecting round, work toward the point that will meet the completed motif.
Instead of making the complete ch-5 connecting loop, work:
Ch 2, sl st into the corresponding loop of the completed motif, ch 2.
Continue to the next point.
Repeat at the next corresponding joining position.
Finish the remaining sections normally.
The motifs should touch without overlapping.
Joining Additional Motifs
Continue the same method for each additional star.
Where one motif connects to two existing motifs, identify every joining point before beginning the final round. Mark those points with locking stitch markers.
Work the normal connecting loops everywhere else.
At a joining location, replace the center portion of the chain loop with a slip stitch into the corresponding loop of the neighboring star.
Check the work after every motif.
If the fabric begins curling upward, the joins are probably too tight. If the motifs move excessively and large irregular gaps develop, the connecting loops are too loose.
Joining the Runner in Rows
Build the first row of three motifs completely.
Start the second row beneath it. Join each new star to the motif directly above and to its neighbor in the current row.
Continue this sequence down the length of the runner.
Do not complete all 30 motifs independently before considering the joining structure. The open geometry is easier to control when the placement of each new motif is checked against the growing runner.
Creating the Open Diamond Spaces
The negative space between the flowers is one of the main characteristics of this design.
After joining four neighboring stars, inspect the opening formed between them. It should appear balanced rather than collapsing into a narrow slit.
If additional stabilization is required, join yarn at one connecting loop.
Ch 5, sc into the next motif connection, ch 5, sc into the next connection until the central opening is framed.
Fasten off and weave in the ends.
Use this additional connection only where required. Filling every opening with extra chains will substantially change the lace structure.
Optional Pointed End Treatment
The photographed runner finishes with visible flower points rather than a heavy rectangular border. Preserve that shape by avoiding several rounds of conventional edging.
At the short ends, leave the outer star points exposed.
If additional definition is needed, join the ivory yarn at the side of an outer point.
Work sc evenly toward the tip.
At the tip work:
Sc, ch 3, sl st into the first chain, sc.
Continue down the opposite side of the point.
Repeat across the exposed end motifs.
This small picot sharpens the star outline without turning the lace runner into a conventional rectangle.
Optional Side Edge
The long sides can remain open, as in the visual reference. If the chain connections need additional stability, add one restrained finishing row.
Join yarn at one end.
Ch 3, sc into the next available outer loop.
Repeat along the entire long side.
Fasten off.
Repeat on the opposite edge using the same number of chain spaces.
Do not work a dense single-crochet border around the runner. A heavy edge can pull the lightweight star motifs out of alignment.
Assembly
- Make one complete eight-point star motif and block it to establish the project gauge.
- Use the blocked master motif to check the diameter and point placement of every additional flower.
- Prepare a three-motif-wide layout and calculate the number of rows required for the intended table.
- Complete the first three motifs and connect them to establish the runner width.
- Add the next row using the join-as-you-go method, connecting each new flower to the motif above and the neighboring motif.
- Continue adding complete rows until the runner reaches the planned length.
- Inspect each four-motif intersection and correct tight or oversized joining loops before proceeding.
- Add stabilizing chains only where the central openings require additional structure.
- Finish the short ends with exposed star points or the optional picot treatment, then weave all yarn tails into matching stitches.
- Wet-block the complete runner, pin every outer star point symmetrically and allow the cotton to dry completely before removing the pins.
The finished runner should lie flat with clearly separated eight-point flowers, consistent open spaces and symmetrical pointed edges.
7 Technical Tips for a Flat Star Flower Table Runner
- Control the center opening. Measure the first motif’s center before producing the full set. A center that varies by more than approximately 2–3 mm will make otherwise identical stars look different.
- Count all eight points. Missing one repeat changes the entire joining geometry. Count the points after Round 4 before starting any connecting loops.
- Mark joining locations. Connecting a star to the wrong point rotates the motif and distorts the open spaces. Place locking markers in every joining loop before working the final round.
- Prevent tight connections. A join that pulls two star tips together will cause the runner to cup. The distance between joined motifs should remain approximately the same across the entire project.
- Measure motif diameter. Keep completed stars within roughly 3 mm of the master motif. Correct tension drift before adding the motif to the runner.
- Pin all eight points during blocking. Pinning only four points can leave the alternating petals shorter. Measure opposing tips through the center before the cotton dries.
- Secure the yarn tails. Leave approximately 12–15 cm at each fastening point. Weave the tail through several stitches, reverse direction once and trim it only after the final blocking.
Adjusting the Runner Size
The modular construction makes length adjustment simple. Keep the three-motif width and add or remove complete rows.
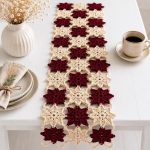
For a compact table centerpiece, try six to eight rows. A standard dining-table runner can use approximately ten rows, depending on the blocked motif diameter. Longer tables can accommodate additional rows without changing the star pattern.
Width can also be modified. Two motifs produce a narrow runner, while four motifs create a substantially wider centerpiece.
Calculate the final dimensions from the blocked master motif rather than the unblocked crochet. Include the joining distance between neighboring motifs when estimating the total length.
Final Blocking
Lay the complete runner on blocking mats with the right side facing upward.
Begin at one short end and establish a straight center line. Pin the opposite end at the required finished length without overstretching the cotton.
Pin the outer points along both long sides. Compare the width at several positions so the center does not become narrower than the ends.
Next, inspect the open spaces between motifs. Adjust individual points until those openings appear consistent throughout the runner.
Wet-block according to the care requirements of the chosen cotton yarn. Allow the runner to dry completely while pinned.
Do not remove the pins while the fibers remain damp. The lace can contract unevenly and reduce the definition of the star points.
Conclusion
Complete and block one star before committing the full yarn quantity to this star flower crochet table runner pattern. Record the finished diameter, yarn weight per motif and distance between joined stars, then use those measurements to calculate the required number of rows. The next practical step is to make three motifs and join them across the runner’s full width; any tension problem will become visible before dozens of flowers are completed. Pin the finished runner carefully, photograph the blocked lace for Pinterest, and share the completed piece on Instagram with #StarFlowerTableRunner. For this specific design, would you keep all eight-point flowers ivory or add one contrasting flower at each end? “`2