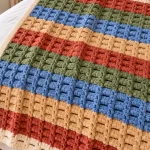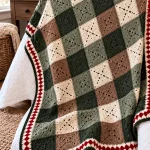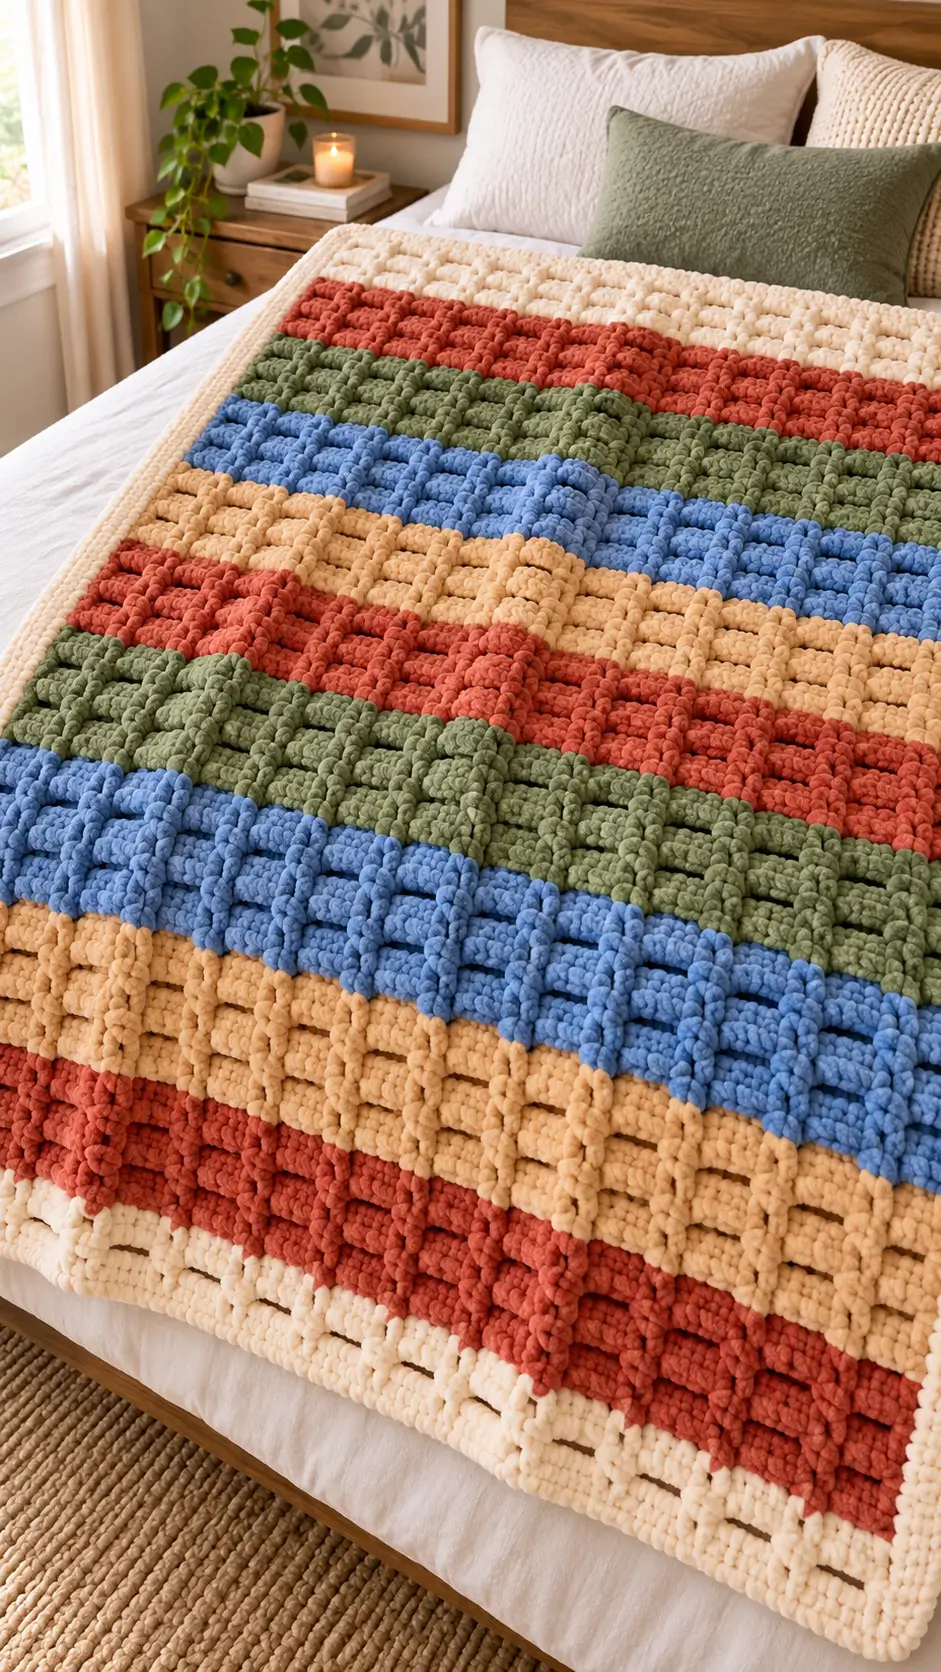
Five thick color bands turn the woven blocks of this blanket into stacked rows of terracotta, sage, blue, tan, and cream. This chunky basketweave crochet blanket uses super-bulky yarn, an 8 mm hook benchmark, and alternating post stitches to build a throw around 140 × 114 cm. Intermediate crochet skills are appropriate. The dense construction makes the project particularly useful when you need a substantial bed-end throw rather than an open-textured blanket.
The Design: What Makes This Basketweave Blanket Different
The photographed blanket combines two strong design systems: horizontal color blocking and vertical post-stitch relief. Keeping each color band several rows deep prevents the stripe sequence from competing visually with the basketweave crochet stitch. The raised columns also need consistent spacing; changing color in the middle of a texture block would break the apparent woven structure.
Super-bulky chenille creates much deeper relief than standard worsted yarn, so the hook must leave enough space around each post for the next row to remain workable. A substantial border controls the edges and visually frames the stripes.
One frequent mistake in a striped crochet blanket of this type is moving the FPdc/BPdc groups sideways by one stitch after turning. Mark the first and last pattern stitches so every woven block remains vertically aligned.
Project Info at a Glance
| Skill Level | Time | Finished Size | Hook | Best For |
|---|---|---|---|---|
| Intermediate | Multi-session project | Approx. 140 × 114 cm | 8 mm / L | Throw, bed-end blanket, textured home décor |
The finished size and hook are based on comparable super-bulky basketweave blanket construction. Your exact measurements will depend on yarn, hook, tension, and gauge.
Materials and Tools
Yarn
For a close match to the photographed blanket, use super-bulky polyester chenille or blanket yarn. Keeping every color in the same yarn line helps maintain consistent stitch height and stripe width.
- Cream / ivory — super bulky — approximately 500–600 g
- Terracotta / brick — super bulky — approximately 400–500 g
- Sage / olive green — super bulky — approximately 400–500 g
- Medium denim blue — super bulky — approximately 400–500 g
- Warm tan / camel — super bulky — approximately 400–500 g
The individual color amounts are project estimates. A finished blanket of this size and density can require more than 2 kg of super-bulky yarn, so purchase additional yarn when dye-lot matching is important.
Tools
- 8 mm / L crochet hook
- Large yarn needle
- Locking stitch markers
- Scissors
- Flexible measuring tape
Abbreviations
- ch — chain
- sc — single crochet
- hdc — half double crochet
- dc — double crochet
- FPdc — front post double crochet
- BPdc — back post double crochet
- sl st — slip stitch
- st(s) — stitch(es)
- rep — repeat
- RS — right side
- WS — wrong side
FPdc is worked around the post from the front, while BPdc is worked around the post from the back. Alternating these stitches produces the raised and recessed sections that form the basketweave effect.
Gauge and Sizing
Make a basketweave swatch before choosing the final foundation-chain length. Super-bulky chenille varies considerably between manufacturers, and post stitches pull the fabric inward more than ordinary double crochet.
A practical reference gauge for super-bulky basketweave fabric is approximately 8 stitches and 5 rows per 10 cm, although the actual measurement must come from your own swatch.
The target finished size for this version is approximately 140 × 114 cm. You can make the blanket wider or narrower by adding or removing complete basketweave repeats.
Do not calculate the finished width from the foundation chain alone. The post-stitch fabric contracts once several rows have been completed.
Chunky Basketweave Crochet Blanket Pattern
Construction: The blanket is worked flat in rows. The texture uses groups of four front post and four back post double crochet stitches.
Foundation and Setup
Yarn: cream.
Make a foundation chain wide enough for the planned blanket while maintaining complete texture repeats.
For accurate custom sizing, crochet a sample containing several four-stitch blocks first. Measure the sample without stretching it, then calculate how many complete repeats are required for the desired blanket width.
Setup Row: Work dc evenly across the foundation chain. Turn.
Place one stitch marker near each edge. These markers separate the edge stitches from the first and final post-stitch groups.
Basketweave Block A
Row 1: Work the edge stitch, then FPdc around each of the next 4 posts, BPdc around each of the next 4 posts. Repeat the sequence across the row. Work the final edge stitch. Turn.
Row 2: Maintain the raised and recessed groups established in Row 1.
Row 3: Repeat the established post-stitch alignment.
Row 4: Repeat the established post-stitch alignment once more.
After four rows, the fabric should show rectangular raised sections rather than narrow vertical ribs.
Basketweave Block B
Row 5: Reverse the texture groups. Work BPdc over the section that previously projected forward and FPdc over the recessed section.
Row 6: Maintain the new arrangement.
Row 7: Maintain the new arrangement.
Row 8: Maintain the new arrangement.
After eight texture rows, the fabric forms alternating raised rectangles that create the woven appearance.
Repeat Rows 1–8 throughout the main blanket body.
Cream Stripe
Begin with cream and work a complete texture section while maintaining the established FPdc/BPdc placement.
Change color at the edge. During the final stitch of the stripe, complete the last yarn-over with the next color. This produces a cleaner transition than fastening off after completing the stitch.
Terracotta Stripe
Join terracotta and continue the basketweave sequence.
Do not restart the texture repeat simply because the yarn color has changed. The horizontal stripe sequence and the vertical basketweave sequence operate independently.
Maintain the same number of rows selected for the cream stripe if uniform bands are required.
Sage Green Stripe
Change to sage or olive green at the edge.
Continue working FPdc and BPdc around the correct posts. Count the rows in the stripe rather than judging the depth while the blanket is hanging, since heavy chenille can stretch under its own weight.
Blue Stripe
Join medium denim blue.
Continue the established basketweave sequence. Check the reverse side after the first full blue row. An ordinary double crochet accidentally worked instead of a post stitch is usually easier to identify from the back.
Tan Stripe
Change to warm tan or camel.
Work the same stripe depth while maintaining the basketweave blocks. Complete the entire block before changing colors whenever possible.
Repeat the Five-Color Sequence
Continue the blanket using the following sequence:
Cream → Terracotta → Sage → Blue → Tan
Repeat these colors until the blanket approaches the required length.
The photographed design works particularly well when the cream stripe appears near the beginning and end of the blanket because it visually connects the striped body with the pale outer border.
Finish the final color band after a complete basketweave block instead of stopping halfway through the texture simply to reach an exact measurement.
Final Body Row
Complete the final basketweave block.
If necessary, work one plain stabilizing row before starting the border. This can make the upper edge easier to finish when the post stitches have produced an uneven visual line.
Fasten off and weave each color-change tail through stitches of the same color.
Cream Border
The photographed blanket uses a substantial pale frame. Several border rounds reproduce that proportion better than a single finishing round.
Border Round 1: Join cream yarn in one corner. Work sc evenly around all four sides. Add sufficient stitches at each corner to turn the corner without pulling the fabric inward. Join with sl st.
Do not automatically place the same number of stitches into every row end. Basketweave fabric is thick, and excessive side-edge stitches can produce a ruffled border.
Border Round 2: Ch 1. Work hdc around the blanket, adding the required corner stitches. Join with sl st.
Border Round 3: Work another hdc or sc round.
Border Round 4: Repeat the previous round if a thicker frame is required.
Fasten off. Weave the yarn tail through several stitches, reverse direction, and pass it through a second section before trimming.
How to Adjust the Blanket Size
Repeat-based sizing is more reliable than copying the starting chain from a pattern written for another yarn.
First, crochet a sample containing several complete eight-stitch texture repeats. Allow the sample to rest flat before measuring it.
Measure the width of one complete repeat. Divide the required blanket width by that measurement, then round the result to a whole repeat.
For example, if one texture repeat measures 10 cm and you want approximately 110 cm of basketweave fabric before the border, use about 11 complete repeats.
Length is easier to modify. Continue adding complete texture blocks until the blanket reaches the required measurement.
Remember that the border adds extra width and length. Measure the main body before beginning the border and account for the planned border depth on both sides.
Color Planning for the Photographed Look
The photographed blanket relies on muted colors rather than highly saturated primary shades. Cream forms the neutral frame. Terracotta supplies the strongest warm color, while sage introduces a subdued green. Medium blue provides the cooler contrast, and tan connects the stronger colors back to the cream border.
Use yarns from the same product family whenever possible. Two yarns may both carry a super-bulky label while having noticeably different diameters. That difference can alter row height and make one colored stripe wider than the others.
Arrange all five skeins in sequence before crocheting the blanket:
Cream → Terracotta → Sage → Blue → Tan
Check the colors together under the same lighting. The individual shades should remain distinguishable without one stripe dominating the entire blanket.
Assembly and Finishing
- Complete the final full basketweave texture block.
- Check both long edges for skipped or duplicated post stitches.
- Finish the final color change at a side edge.
- Weave stripe tails into sections of matching yarn.
- Join the cream border yarn at one corner.
- Work the first border round evenly around the complete rectangle.
- Add the remaining border rounds while checking that all four corners remain flat.
- Weave border tails through stable stitches and reverse direction before trimming.
- Lay the finished blanket flat and measure its width and length without stretching the fabric.
- Check the surface for loose chenille loops and secure any yarn tails that remain visible.
The completed blanket should lie flat without a ruffled border, pulled corners, or visible breaks in the basketweave alignment.
7 Technical Tips for a Cleaner Basketweave Blanket
- Mark every eight-stitch repeat. A missed post stitch shifts the next raised block sideways. The error becomes considerably more visible after another four rows have been added.
- Keep chenille tension consistent during color changes. Pulling the new color tighter than the working tension draws the side edge inward. Check the edge immediately after completing the first few stitches in a new color.
- Check FPdc/BPdc orientation before completing four rows. Working around the wrong side of one post creates a recessed stitch inside a raised block. Correct it before another texture block covers the error.
- Measure after at least 10 cm of textured fabric has been worked. The foundation chain alone gives an unreliable width because post stitches contract the finished fabric.
- Mark planned stripe boundaries. An accidental additional row changes the depth of that color band. Count rows rather than relying on visual width alone.
- Control border stitch density. Too many side-edge stitches create waves, while too few pull the blanket inward. Lay the work flat after every border round to identify either problem early.
- Weave chenille tails through several centimetres of dense stitches. Reverse direction before trimming. Very short tails positioned beside a color change can work loose during repeated handling or washing.
Why Super-Bulky Yarn Changes Basketweave Construction
Basketweave crochet uses more yarn than a simple flat double-crochet fabric of comparable dimensions. FPdc and BPdc travel around the vertical posts of previous stitches, adding yarn to every textured row.
This difference becomes substantial with super-bulky chenille. A medium throw can consume more than 2 kg of yarn depending on dimensions, gauge, border depth, and the particular blanket yarn selected.
Do not estimate yarn requirements from an ordinary double-crochet blanket of the same dimensions. The two stitch structures consume yarn differently.
Hook size also changes the result. A smaller hook creates a denser fabric and can increase the number of repeats required to reach the intended width. A substantially larger hook opens the spaces surrounding the posts and reduces the sharply defined block structure.
An 8 mm crochet hook provides a useful starting point for many super-bulky blanket yarns, but the swatch determines the final choice.
Common Basketweave Problems and Fixes
The Basketweave Blocks Lean Sideways
Check the first post stitch after the edge stitch. Moving the starting position by a single stitch shifts every later FPdc/BPdc group and creates a diagonal pattern rather than aligned rectangles.
The Blanket Becomes Narrower
Count the complete stitch repeats first. If no stitches have been lost, compare current tension with the first 10–15 cm of the blanket. Makers often tighten their post stitches after becoming familiar with the movement.
The Side Edge Waves
Inconsistent turning-chain treatment or edge-stitch placement is a common cause. Mark the first and final working stitches instead of trying to locate them visually through fuzzy chenille.
The Border Ruffles
Too many stitches have probably been placed along the side edges. Reduce the side-edge stitch density while retaining sufficient corner increases.
The Border Pulls Inward
The opposite problem indicates insufficient side-edge stitches or inadequate corner increases. Remove the affected border round and add stitches evenly rather than concentrating them in one section.
The Color Changes Look Bulky
Complete the final yarn-over of the last stitch with the incoming color. Avoid tying large knots between the two chenille strands because they can create hard bumps along the edge.
Care and Finishing Notes
Check the care label for the exact yarn used before washing the blanket. Polyester chenille blanket yarns are often washable, but temperature and drying instructions differ between manufacturers.
Secure every yarn tail before the first wash. Chenille can make short tails difficult to see, particularly when they are buried inside raised post stitches.
Lay the blanket flat after finishing and check the rectangular shape. Heavy blocking should not be required when stitch tension and border density are consistent.
Store the blanket folded rather than suspended from one edge for long periods. A large super-bulky blanket carries significant weight, and hanging can place unnecessary tension on individual stitches.
Conclusion
The five-color sequence is the feature to establish before beginning this project: cream, terracotta, sage, blue, and tan need to repeat without disrupting the FPdc/BPdc blocks. Make a measured basketweave swatch next, then calculate complete repeats for the required width instead of copying a foundation count from a different chenille yarn. That process gives the chunky basketweave crochet blanket predictable proportions and cleaner stripe placement. Save the finished color sequence to Pinterest and share the completed blanket on Instagram with #ChunkyBasketweaveBlanket. For your version, would you keep the photographed sage-and-terracotta combination or replace one of those two bands with another color?