Chunky Crochet Striped Blanket with Matching Pillow Covers – Free Pattern
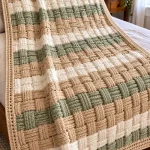
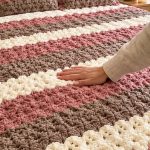
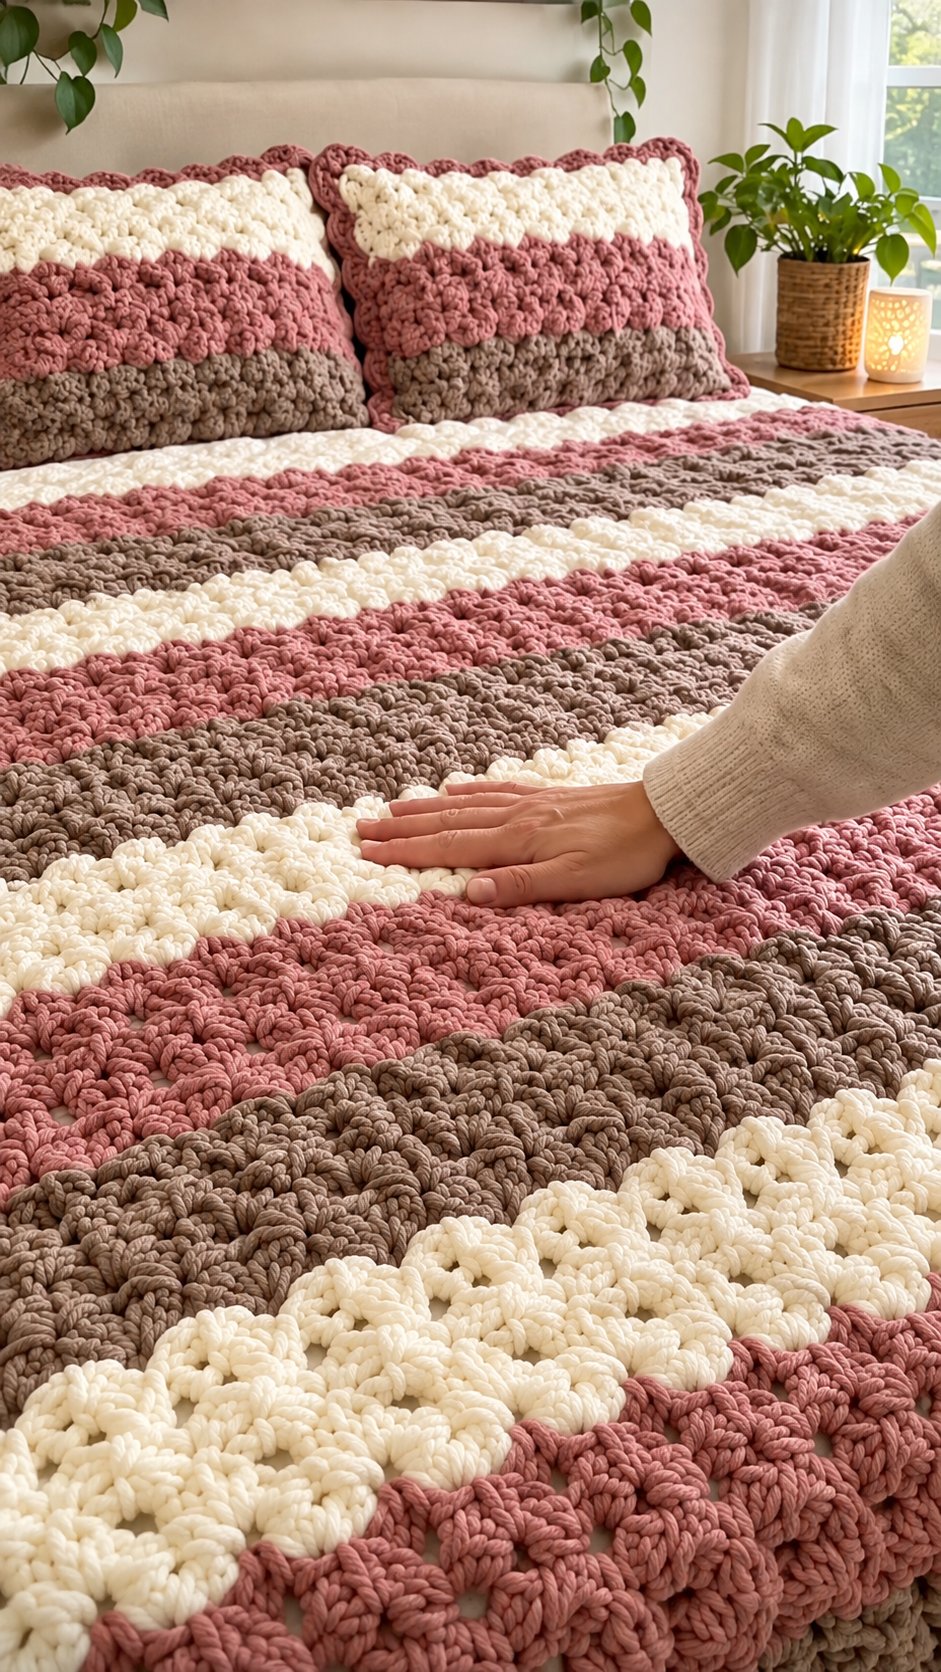
This design is a three-color chunky crochet bedding set featuring broad horizontal stripes, a pronounced raised crochet texture, and coordinated pillow covers. The palette combines dusty rose, warm ivory, and taupe. The blanket has a substantial drape, while the matching pillows repeat the same color sequence and textured surface.
Important pattern distinction: The photograph does not establish the exact stitch, yarn brand, hook size, dimensions, or stitch count. The instructions below are an original, reproducible interpretation of the visible design, rather than a claim that the photograph documents an existing pattern.
Introduction
Three broad color bands give this chunky crochet blanket its defining structure: dusty rose, warm ivory and taupe form a repeating horizontal arrangement across a raised crochet surface. This original pattern combines bulky yarn, an 8 mm starting hook and a three-double-crochet cluster stitch to create a proposed 140 × 180 cm blanket with two matching 45 cm pillow covers. The construction is suitable for confident beginners familiar with basic crochet stitches and color changes. This pattern is an original interpretation of the photographed design and has not been tested on a physical sample — please crochet one motif first and adjust the stitch counts to your yarn and gauge.
The Design: What Makes This Striped Crochet Blanket Different
The design depends on three structural decisions. First, wide horizontal color bands preserve the visual proportions of the photographed bedding instead of breaking the surface into small color blocks. Second, alternating cluster rows create raised texture across the blanket while simpler rows stabilize the fabric and prevent excessive thickness. Third, the matching pillows use the same color order, connecting the separate pieces into one coordinated bedding set.
The dusty rose yarn supplies the strongest color contrast, while ivory creates a bright dividing band. Taupe provides a darker neutral section that grounds the palette. A common mistake with chunky crochet blankets is selecting an overly small hook, producing a rigid fabric that becomes heavy and difficult to spread across a bed. Make a swatch before beginning the full striped crochet blanket.
Project Info at a Glance
| Skill Level | Time | Finished Size | Hook | Best For |
|---|---|---|---|---|
| Confident beginner | Approximately 18–30 hours | 140 × 180 cm | 8 mm starting size | Bedding and home décor |
Time is a project-planning estimate. Actual time depends on yarn, hook, experience and blanket dimensions.
Materials and Tools
Yarn
Choose yarn with consistent thickness throughout the project. A soft acrylic, acrylic-wool blend or washable polyester blanket yarn can work, provided its thickness is appropriate for the selected hook.
- Dusty rose — Bulky #5 or super bulky #6 — approximately 800–1,000 g.
- Warm ivory — Bulky #5 or super bulky #6 — approximately 800–1,000 g.
- Taupe — Bulky #5 or super bulky #6 — approximately 700–900 g.
These are preliminary purchasing allowances for the proposed blanket, not verified consumption figures. The textured cluster rows may use more yarn than a plain stitch pattern. Complete a swatch and weigh it before purchasing the full quantity.
For the two pillow covers, allow an additional approximately 400–600 g per pillow, depending on the closure and insert size.
Brand suggestions: Bernat Blanket, Paintbox Simply Chunky, Lion Brand Wool-Ease Thick & Quick and comparable yarns with matching weight classifications.
Tools
- 8 mm crochet hook as a starting point.
- 9 mm crochet hook for a looser super bulky fabric if needed.
- 45 cm × 45 cm pillow inserts, two.
- Locking stitch markers.
- Measuring tape.
- Scissors.
- Blunt yarn needle.
- Digital kitchen scale for yarn calculations.
- Row counter.
The Craft Yarn Council’s hook recommendations are guidelines rather than fixed rules. Its chart lists 6.5–9 mm for bulky and 9–15 mm for super bulky yarn.
Choosing the Correct Yarn
Avoid mixing different yarn constructions within the same stripe. Even when two yarns carry the same weight classification, their thickness, elasticity and surface texture can differ.
For a consistent result, select all three colors from one yarn range. Compare the skein labels for yardage, fiber content and care instructions. Purchase enough yarn from the same dye lot to complete each color section.
Abbreviations
The pattern uses US crochet terminology.
| Abbreviation | Meaning |
|---|---|
| ch | Chain |
| sc | Single crochet |
| dc | Double crochet |
| hdc | Half double crochet |
| sl st | Slip stitch |
| st / sts | Stitch / stitches |
| rep | Repeat |
| sk | Skip |
| BLO | Back loop only |
| ch-sp | Chain space |
| RS | Right side |
| WS | Wrong side |
| CL | Three-double-crochet cluster |
Invisible decrease: Not required for this rectangular project; the blanket and pillow panels are worked without shaping decreases.
Special Stitch: Three-Double-Crochet Cluster
This stitch creates the raised bumps visible in the blanket interpretation.
- Yarn over.
- Insert the hook into the designated stitch.
- Pull up a loop.
- Yarn over and pull through two loops.
- Repeat the process in the same stitch twice more.
- Yarn over and pull through all four remaining loops.
One completed cluster counts as one stitch.
Gauge Swatch
Work a 20-stitch by 12-row sample using the selected yarn and hook.
Measure the sample after allowing it to rest flat.
The proposed target is approximately 8.5 stitches per 10 cm across the sample. This is a design target, not a measured gauge from the photograph.
If the sample measures wider than expected, reduce the hook size. If the fabric is stiff or too narrow, try a larger hook.
The final blanket width should be calculated from the actual measured gauge:
Foundation stitches = (Desired width in cm × Stitches per 10 cm) ÷ 10
For example, at 8.5 stitches per 10 cm, a 140 cm blanket requires approximately 119 stitches. Use 120 stitches for the sample instructions.
Pattern — Step by Step
Before Starting: Color Sequence
Use the following arrangement to recreate the photograph’s broad horizontal bands.
| Section | Color | Rows |
|---|---|---|
| 1 | Ivory | 18 |
| 2 | Dusty rose | 18 |
| 3 | Taupe | 18 |
| 4 | Dusty rose | 18 |
| 5 | Ivory | 18 |
| Repeat | Repeat sections 1–5 | 2 times total |
This produces 180 rows. The final dimensions depend on row gauge. If the blanket is shorter than the proposed 180 cm, add another complete stripe sequence.
Main Blanket (Make 1)
Yarn: Ivory, dusty rose and taupe — original design interpretation.
Foundation
With ivory, ch 121.
The foundation chain is 120 stitches plus one turning chain.
Row 1: Sc in second ch from hook and in each remaining ch. Turn. (120)
Row 2: Ch 1, sc in first st, CL in next st, *sc in next st, CL in next st; rep from * across. Turn. (120)
Row 3: Ch 1, sc in each st across. Turn. (120)
Row 4: Ch 1, CL in first st, sc in next st, *CL in next st, sc in next st; rep from * across. Turn. (120)
Row 5: Ch 1, sc in each st across. Turn. (120)
Row 6: Repeat Row 2. (120)
Row 7: Repeat Row 3. (120)
Row 8: Repeat Row 4. (120)
Row 9: Repeat Row 3. (120)
Row 10: Repeat Row 2. (120)
Row 11: Repeat Row 3. (120)
Row 12: Repeat Row 4. (120)
Rows 13–18: Repeat Rows 5–10. (120 each)
Color change: Complete the final yarn-over of the last stitch using the next stripe color. Do not cut the working yarn until the next color has been secured.
Continue with the following color blocks:
- Rows 19–36: Dusty rose.
- Rows 37–54: Taupe.
- Rows 55–72: Dusty rose.
- Rows 73–90: Ivory.
- Rows 91–108: Dusty rose.
- Rows 109–126: Taupe.
- Rows 127–144: Dusty rose.
- Rows 145–162: Ivory.
- Rows 163–180: Dusty rose.
For each new block, work the same 18-row stitch sequence.
Finishing note: Keep the cluster stitches facing the same side. Fasten off after Row 180 and leave a 20 cm tail for weaving in.
Important stitch-count check: Every row contains 120 stitches. Each cluster replaces one existing stitch and counts as one stitch. Do not skip an additional stitch after making a cluster.
Blanket Border
Yarn: Dusty rose, ivory and taupe.
Join dusty rose at a corner.
Round 1: Ch 1, sc evenly along the first side. Work 3 sc in each corner. Continue around the blanket, placing 3 sc in each remaining corner. Join with sl st.
Round 2: Ch 1, hdc in every stitch around. Work 3 hdc in the middle stitch of each corner group. Join with sl st.
Round 3: Change to ivory. Repeat Round 2.
Round 4: Change to taupe. Repeat Round 2.
Round 5: Change to dusty rose. Sc in each stitch around, working 3 sc in the middle stitch of each corner group. Join with sl st.
Fasten off and weave in all ends.
Do not pull the border tight. The blanket should lie flat without curling at the corners.
Pillow Front Panels (Make 2)
Yarn: Ivory, dusty rose and taupe.
Each pillow front is designed to measure approximately 45 × 45 cm after blocking.
Foundation: Ch 39.
Row 1: Sc in second ch from hook and across. Turn. (38)
Row 2: Ch 1, sc in first st, CL in next st, repeat alternating sc and CL across. Turn. (38)
Row 3: Ch 1, sc across. Turn. (38)
Row 4: Ch 1, CL in first st, sc in next st, repeat across. Turn. (38)
Row 5: Sc across. Turn. (38)
Rows 6–18: Repeat Rows 2–5.
Continue the cluster and single crochet sequence until the panel measures 45 cm in length.
For the color arrangement, use:
- First third: Ivory.
- Middle third: Dusty rose.
- Final third: Taupe.
Repeat the construction for the second pillow.
Fasten off, leaving a 25 cm sewing tail.
Note: The 38-stitch starting width is a sample only. Measure the panel and adjust the foundation chain to obtain the intended 45 cm width.
Pillow Back Panels (Make 2)
An envelope closure allows the pillow insert to be removed without a permanent seam or zipper.
Yarn: Taupe.
Each pillow requires two overlapping back flaps.
Flap A
Ch 39.
Row 1: Sc across. (38)
Row 2: Ch 1, sc across. Turn. (38)
Repeat Row 2 until the panel measures approximately 30 cm.
Fasten off.
Flap B
Repeat Flap A.
The two flaps overlap by approximately 15 cm when assembled.
For a more decorative result, work one final row of dusty rose single crochet around the exposed flap edges.
Pillow Assembly
- Place the textured front panel facing upward.
- Position Flap A over the upper half.
- Position Flap B over the lower half.
- Allow approximately 15 cm of overlap.
- Pin all four edges.
- Sew the outer edges with a yarn needle.
- Reinforce the two points where the envelope opening begins.
- Turn the cover right side out.
- Insert the 45 cm cushion.
- Adjust the overlapping flaps so the opening remains covered.
Repeat for the second pillow.
The pillow cover should fit snugly without stretching the cluster stitches. If the insert pulls the seams outward, increase the panel dimensions slightly.
Assembly and Finishing
The blanket and pillows should be checked together before the final ends are woven in.
- Lay the blanket flat with the cluster texture facing upward.
- Check that all stripe transitions follow the planned color sequence.
- Inspect the four corners for distortion.
- Complete the border and secure its final joining stitch.
- Weave in all loose yarn ends on the reverse side.
- Measure both pillow fronts.
- Sew the envelope closures and inspect the seams.
- Insert the cushions.
- Place the pillows side by side against the headboard.
- Spread the blanket evenly across the bed and align the horizontal stripes.
The finished set consists of one striped crochet blanket and two matching textured pillow covers.
7 Technical Tips for a Better Finish
- Stitch-marker accuracy: Place a marker in the first stitch of every row. Losing the first or last stitch can gradually reduce the blanket’s width.
- Cluster tension: Do not tighten the final pull-through of the cluster excessively. A compressed cluster produces a flatter texture and makes adjacent rows harder to work.
- Border distortion: Measure the blanket edges before beginning the border. If the side edges pull inward, add more evenly spaced single crochet stitches.
- Color-change gaps: Change yarn on the final pull-through of the last stitch in the previous color. This prevents a loose loop at the beginning of the next stripe.
- Pillow dimensions: Check the front panel at 45 cm before constructing the envelope back. An undersized panel stretches the opening and can expose the cushion insert.
- Seam strength: Use a mattress-style seam or firm whipstitch along the pillow edges. Reinforce the two ends of the envelope opening to prevent separation.
- Yarn consumption: Weigh your swatch before calculating the full blanket quantity. A cluster pattern uses more yarn than a comparable plain single crochet fabric, and purchasing only the minimum estimate can leave the final stripe incomplete.
Conclusion
This striped crochet bedding set combines three coordinating colors with a raised cluster texture and matching pillow covers. The proposed 140 × 180 cm blanket can be adjusted by changing the foundation width or repeating the five-band color sequence. Before purchasing the complete yarn supply, make a gauge swatch and calculate consumption from its measured weight. For a coordinated bedroom finish, keep the pillow stripes in the same dusty rose, ivory and taupe palette. Share your finished project on Pinterest and Instagram using #ChunkyStripedCrochetBlanket. Would you keep the taupe stripe in the center or move it toward the foot of the bed?