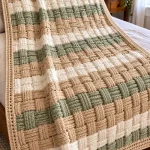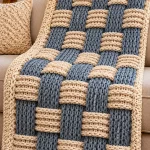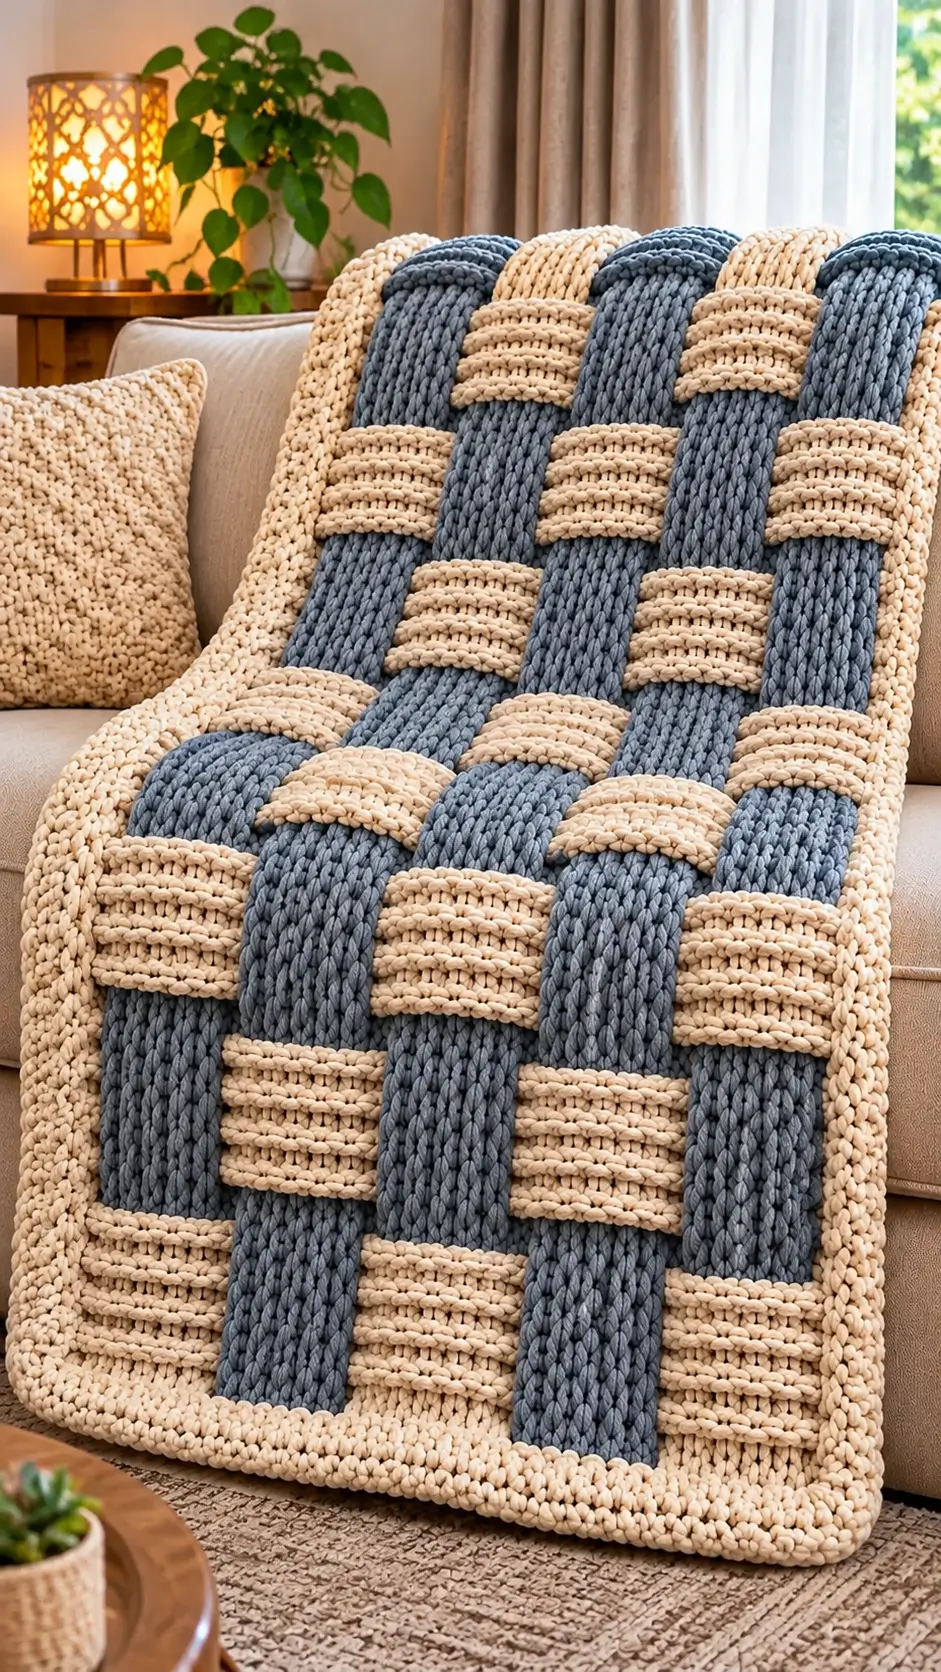
The wide blue bands in this blanket disappear beneath cream sections, then return several inches later as though the entire throw were built from oversized woven straps. This chunky basket-weave crochet blanket pattern recreates that architecture with separate super-bulky crochet strips, an over-under assembly sequence and a substantial cream border. The target is a sofa throw around 120 × 150 cm, worked with #6 yarn and a large hook. Intermediate construction skills are recommended.
The Design: What Makes This Woven Blanket Different
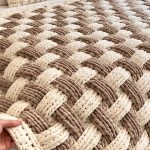
The basket effect comes from construction rather than a conventional post-stitch basketweave. Long blue-gray strips create the dominant vertical direction, while shorter cream bands cross them horizontally. Alternating which strip sits on top produces the oversized woven blocks visible across the surface.
That decision also solves a practical problem. Trying to imitate such large blocks with front-post and back-post stitches would create texture, but not the deep overlap shown here. Separate bands produce cleaner edges and stronger dimensional relief.
The final cream frame has another job: it locks the woven grid into a rectangular outline. A common mistake is securing every crossing before checking the blanket diagonals. That can permanently trap a skewed grid inside the border.
Project Information at a Glance
| Skill Level | Construction | Target Size | Hook | Yarn |
|---|---|---|---|---|
| Intermediate | Separate strips + woven assembly | Approx. 120 × 150 cm | 10–12 mm after swatching | Super Bulky #6 |
Materials and Tools
Yarn
- Blue Gray — Super Bulky #6 — main vertical bands
- Warm Cream — Super Bulky #6 — crossing bands and border
Choose a plied or stable super-bulky yarn rather than loose unspun roving when the blanket will receive regular use. The two colors should have closely matched thickness and elasticity.
For a throw around 120 × 150 cm, plan the yarn quantity from a finished test strip because the raised overlapping construction uses more material than a flat blanket of the same dimensions. Keep an additional 10–15% for the perimeter frame and finishing.
Tools
- 10–12 mm crochet hook, adjusted to the yarn
- Large yarn needle
- Locking stitch markers
- Scissors
- Measuring tape
- Blocking mats
- Rustproof pins
Abbreviations
- ch — chain
- sc — single crochet
- hdc — half double crochet
- sl st — slip stitch
- BLO — back loop only
- st/sts — stitch/stitches
- RS — right side
- WS — wrong side
Construction Overview
This blanket is assembled from two systems:
- Long blue-gray vertical strips.
- Cream horizontal crossing bands.
The pieces are woven together before the outside border is added.
For the proportions shown, aim for approximately five wide blue strips across the blanket. Cream crossing sections are then positioned at regular vertical intervals.
The exact strip count can be changed. What cannot change is consistency: every blue strip must finish at the same width, and every crossing level must align from one side to the other.
Make a Structural Swatch First
Do not begin with the full blanket.
Crochet one blue test strip approximately 15 cm wide and 30 cm long. Make a cream strip of identical width.
Cross the pieces at 90 degrees.
The fabric should bend around the crossing without becoming rigid. If two layers feel excessively stiff, increase the hook size by 1 mm or choose a slightly lighter super-bulky yarn.
Record the number of stitches required to produce the chosen strip width.
Blue-Gray Vertical Strips
Make 5 for the pictured proportion.
The strips can be worked in half double crochet for a substantial fabric that remains flexible enough to weave.
Foundation
Chain enough stitches to create a strip approximately 14–17 cm wide after blocking.
The exact chain depends on your yarn and gauge.
Row 1
Hdc in the second appropriate chain from the hook according to your preferred turning-chain method. Hdc across.
Turn.
Row 2
Ch 1 or ch 2 according to your established edge method. Hdc across.
Turn.
Rows 3 onward
Repeat Row 2 until the strip measures approximately 140–145 cm, excluding the final blanket border.
Fasten off, leaving a 25 cm tail.
Repeat until all five blue-gray strips are identical.
Optional Ribbed Blue Strips
If stronger vertical channels are wanted, work every hdc through the back loop only.
Row 1: Hdc across normally.
Row 2: Hdc BLO across.
Rows 3 onward: Repeat Row 2.
This creates raised longitudinal ridges similar to the thick vertical definition visible in the reference blanket.
Checking the Five Main Strips
Lay all five blue strips side by side.
Their lengths should differ by no more than approximately 1 cm before assembly.
If one strip is substantially longer, do not stretch the shorter pieces to compensate. Correct the long strip before weaving.
Mark the top end of every strip so all pieces maintain the same orientation.
Cream Horizontal Bands
The cream bands create the visible basket crossings.
For a modular construction, crochet cream strips to the same approximate width as the blue pieces: 14–17 cm.
The required length should cross the entire five-strip field with enough additional length to reach the planned side border.
Cream Strip — Row 1
Chain to the measured crossing length.
Hdc across.
Row 2
Ch 1 or ch 2. Hdc BLO across.
Rows 3–6
Continue in BLO hdc.
Row 7
Hdc across normally.
Fasten off.
Adjust the number of rows until the cream strip width matches the blue strips closely.
Creating the Raised Cream Texture
The cream crossings in the photograph contain several pronounced horizontal ridges.
To reproduce this without excessive bulk, alternate normal and back-loop rows:
Row A: Hdc across.
Row B: Hdc BLO across.
Row C: Hdc across.
Row D: Hdc BLO across.
Repeat until the band reaches its target width.
The unused front loops form horizontal lines across the cream sections.
Planning the Basket Grid
Place the five blue strips vertically on a large flat surface.
Keep approximately equal spacing between them.
Lay the first cream band horizontally across all five strips.
The basic weaving sequence is:
over blue strip 1 → under strip 2 → over strip 3 → under strip 4 → over strip 5.
The next cream band reverses the sequence:
under strip 1 → over strip 2 → under strip 3 → over strip 4 → under strip 5.
Continue alternating these two arrangements from the bottom to the top.
Why the Alternation Matters
Every crossing must reverse the previous level.
If two adjacent cream bands pass over the same blue strip, the eye reads the area as stacked stripes instead of woven fabric.
Use locking stitch markers to identify the first crossing of each horizontal level:
- Odd level — cream starts above blue.
- Even level — cream starts below blue.
This simple marker system prevents a weaving error several rows later.
Spacing the Horizontal Bands
For a 150 cm blanket, approximately 8–10 horizontal crossing levels create proportions close to the image.
Place the bands provisionally before sewing anything.
Measure the exposed blue section between consecutive cream crossings.
Keep that measurement consistent throughout the blanket.
A practical target is approximately 12–16 cm, adjusted according to the actual band width.
Alternative Modular Block Method
If full-width horizontal strips feel difficult to weave through thick yarn, construct the cream sections as shorter rectangular bridges.
Each bridge covers one blue strip and extends to the adjacent gap.
Arrange the bridges in a checkerboard sequence, then sew their ends to hidden foundation connectors underneath.
This method reduces bulk during assembly but creates more yarn tails.
For the cleanest woven illusion, the continuous-strip version is preferred.
Squaring the Blanket Before Sewing
Once all bands are woven, measure the complete rectangle.
Then measure both diagonals from corner to corner.
The diagonals should be within approximately 1–2 cm of each other for a throw this size.
If one diagonal is longer, slide the woven pieces slightly rather than pulling the outside corners.
Only begin permanent attachment after the grid lies square.
Securing the Crossings
The blanket does not need heavy sewing across every visible intersection.
Use matching yarn and a large needle.
At each crossing, sew through the underside of the upper strip and catch a small amount of the lower strip.
Make approximately 3–4 hidden stitches per crossing.
Do not sew completely through to the front surface.
The crossing should remain slightly dimensional rather than being flattened against the lower band.
Securing the Outer Strip Ends
After the center crossings are stable, align every strip end along the planned outside rectangle.
Baste the ends temporarily.
Measure width at the top, center and bottom.
Measure height along the left edge, center and right edge.
Correct discrepancies before adding the frame.
Foundation Round for the Border
Join cream at one corner.
Round 1: Sc evenly around the entire woven rectangle.
At each corner work:
(sc, ch 2, sc)
When crocheting across a strip end, place stitches evenly without forcing one sc into every visible chunky loop.
The goal is a flat edge.
If the border begins to flare, too many stitches have been added.
Second Border Round
Round 2: Ch 1, hdc in each stitch around.
At each corner work:
(2 hdc, ch 2, 2 hdc)
Join with sl st.
Lay the blanket flat after this round.
Third Border Round
Round 3: Sc BLO in each stitch around.
At the corners work:
(sc, ch 2, sc)
The BLO round creates a subtle raised line around the perimeter.
Fourth Border Round
Round 4: Hdc in each stitch around.
At each corner work:
(2 hdc, ch 2, 2 hdc)
Join.
Rounded Outer Frame
The reference blanket has a substantial cream frame with softened corners.
For a heavier edge, add two more rounds:
Round 5: Sc around, maintaining the four corner spaces.
Round 6: Hdc around. At each corner work 3 hdc, ch 2, 3 hdc.
If the corners begin to cup, return to the smaller corner increase from Round 4.
Fasten off and weave in the tail.
Suggested Finished Sizes
| Blanket | Approximate Finished Size | Suggested Use |
|---|---|---|
| Baby | 75 × 95 cm | Stroller or nursery |
| Lap | 90 × 120 cm | Chair or reading blanket |
| Sofa Throw | 120 × 150 cm | Closest to the pictured proportion |
| Large Throw | 140 × 180 cm | Large sofa or bed-end layer |
Resizing the Woven Pattern
Resizing is easier when the blanket is treated as a grid.
First select a strip width. Suppose the blocked strips measure 15 cm.
Five vertical strips provide 75 cm of solid strip width before the visual contribution of crossings and border is considered.
For a wider blanket, add vertical strips in pairs whenever possible. An odd total strip count keeps the over-under sequence visually balanced around the center.
For additional length, add more horizontal crossing levels rather than making each exposed block excessively tall.
Calculating Yarn More Accurately
Super-bulky yarn consumption varies significantly by fiber and stitch density, so calculate from a sample.
Make one complete blue strip measuring 15 × 50 cm.
Weigh it.
Calculate its area:
15 × 50 = 750 cm²
If the sample weighs 120 g, the consumption is:
120 ÷ 750 = 0.16 g per cm²
Use the same method for the cream strip because its ridged construction may consume a different amount.
Add the calculated strip requirements, then reserve another 10–15% for the border, swatching and finishing.
Color Placement
The blue-gray should dominate the long vertical direction while cream controls the horizontal rhythm and frame.
A useful distribution is approximately:
- 55–60% blue-gray
- 40–45% warm cream
This is a visual planning ratio rather than a yarn-weight calculation.
Because the cream border surrounds the entire blanket, actual cream consumption can be higher than the visible center suggests.
Alternative Colorways
Navy and Ivory
Use deep navy for the long strips and ivory for the crossings. The stronger contrast emphasizes every over-under transition.
Sage and Oatmeal
Replace blue with muted sage and use warm oatmeal for the crossing bands and frame.
Charcoal and Cream
Charcoal creates a sharper architectural grid while cream keeps the border visible.
Terracotta and Beige
Use burnt terracotta for the long strips with sand beige across the width for a warmer palette.
Making the Blanket Lighter
A large super-bulky woven blanket can become heavy because every crossing contains two fabric layers.
To reduce weight, use bulky #5 yarn and a hook appropriate to the swatch.
Maintain the same physical strip width rather than copying the #6 stitch count.
Another option is to work the strips in hdc with a slightly larger hook, producing more flexible fabric without introducing open holes.
Making a Matching Cushion
The same weaving system scales well to a cushion cover.
Make three blue vertical strips and three cream horizontal strips.
Weave them in the same alternating sequence.
Square the panel and work a cream border.
For the back, crochet a plain cream rectangle in hdc.
Join three sides permanently and add buttons or an overlapping crochet flap to the remaining side.
Assembly
- Crochet and block one blue-gray test strip and one cream test strip to establish the exact width and fabric density.
- Make five identical blue-gray strips, checking their lengths against one another every 25–30 cm.
- Make the required cream crossing strips to the same blocked width as the blue pieces.
- Lay the blue strips parallel on a flat surface with equal spacing from top to bottom.
- Weave the first cream band over-under-over-under-over, then reverse that sequence for the next crossing level.
- Continue alternating the crossing sequence until the complete rectangle is filled.
- Measure both diagonals and reposition the strips until the difference is no greater than approximately 1–2 cm.
- Secure each intersection from the back with 3–4 concealed stitches while retaining the raised overlap.
- Work the cream foundation and border rounds around all four sides, correcting any flare before adding the next round.
- Block the completed blanket flat, shape the corners and allow it to dry completely before placing it on the sofa.
The finished blanket should show an uninterrupted alternating over-under sequence enclosed by a firm cream frame.
7 Technical Tips
- The strips gradually become wider: a missed edge stitch or accidental increase changes the basket grid. Count the strip stitches every 10 rows and keep the width within approximately 5 mm of the original blocked measurement.
- The crossings look flat instead of woven: sewing has been pulled too tightly. Use only 3–4 concealed anchoring stitches at each intersection and leave the upper band free across most of its width.
- The blanket twists diagonally: the grid was secured before being squared. Compare both corner-to-corner diagonals and correct any difference greater than approximately 1–2 cm before permanent stitching.
- The cream border ripples: too many stitches have been placed along the strip ends. Remove the round and reduce the pickup rate rather than trying to flatten the excess with blocking.
- One color produces narrower strips: the two yarns do not share the same effective gauge. Adjust the hook or stitch count for that color until both blocked strip widths match within approximately 5 mm.
- Chunky joins create hard lumps: several yarn tails have been woven into the same crossing. Spread tails along at least 8–10 cm of their matching strip and avoid placing multiple joins at one intersection.
- The completed blanket becomes excessively heavy: the fabric density is too high for a double-layer woven construction. Before making full strips, cross two 15 × 30 cm swatches and evaluate the doubled fabric; increase hook size if the crossing cannot bend easily.
Care and Blocking
Follow the care instructions printed on the chosen yarn label.
Support the blanket fully when wet. Lifting a saturated super-bulky throw from one corner can stretch both the border and individual strips.
Dry flat whenever the fiber requires it.
During final blocking, straighten each vertical blue strip before shaping the outside frame. Check that the cream bands remain perpendicular to the blue strips.
Do not flatten the woven crossings aggressively. Their raised profile is part of the design.
Conclusion
This chunky basket-weave crochet blanket pattern is controlled by strip width, crossing order and final squaring rather than complicated stitch combinations. Begin with one blue-gray and one cream test strip, cross them, and check the doubled thickness before committing to the full throw. Once the fabric is suitable, make the long strips, weave every horizontal level in alternating order and secure the grid only after both diagonals match. Finish with the substantial cream frame to stabilize the structure. Share the completed blanket on Pinterest or Instagram with #ChunkyWovenBasketBlanket. For this specific design, would you keep the blue-gray strips or replace them with sage green while leaving the cream crossings unchanged?