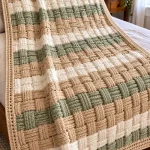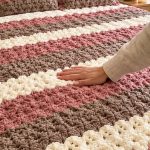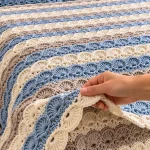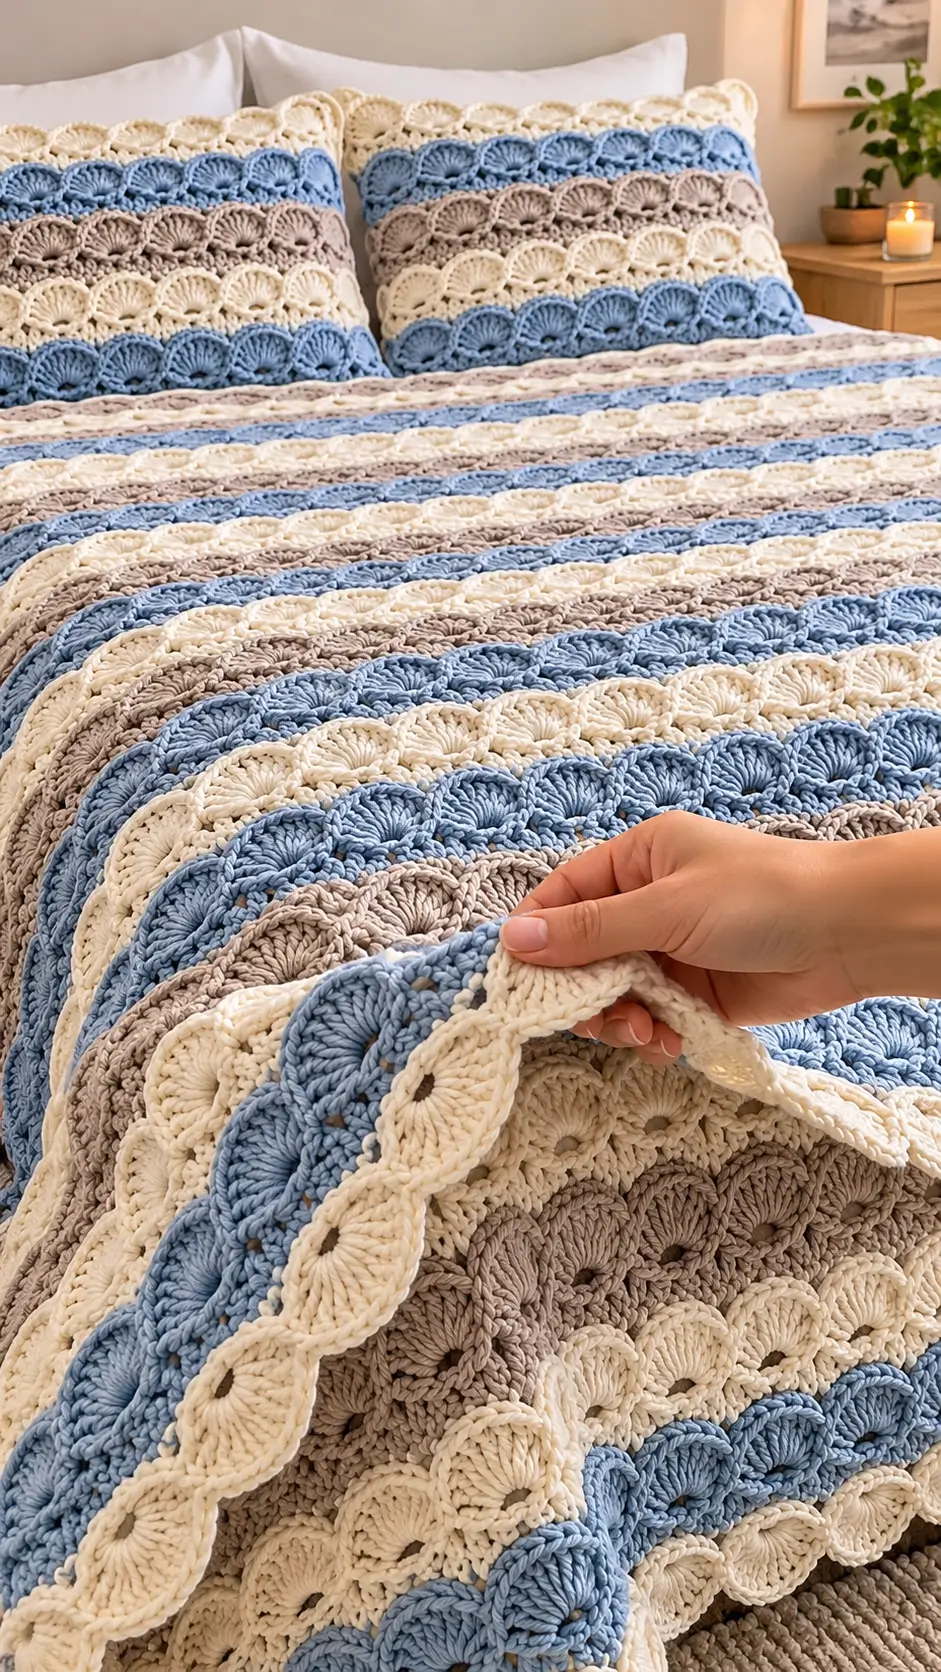
The overlapping fan-shaped shells give this blue, cream and taupe crochet blanket its distinctive raised texture. This free crochet shell stitch blanket pattern uses repeating rows of double crochet clusters, single crochet anchors and carefully planned color changes. Designed for intermediate beginners, the project uses medium-weight yarn and a 5.5 mm crochet hook. The instructions include an adjustable blanket size, a scalloped edging and optional matching pillow covers.
The Design: What Makes This Shell Stitch Blanket Different?
This blanket combines three neutral and muted colors with a repeating shell stitch structure. Dusty blue creates contrast, ivory cream highlights the curved edges, and warm taupe separates the brighter sections.
Unlike a basic double crochet blanket, the shell stitch produces a series of overlapping fans. Each fan is formed by working several double crochet stitches into one location. Single crochet stitches between the fans create the recessed points that define the pattern.
The photographed blanket has a particularly pronounced scalloped texture. The instructions below use a classic five-double-crochet shell as a practical adaptation. The resulting fabric will resemble the photograph in color and overall structure, although the exact photographed stitch arrangement cannot be established from the image alone.
For the best result, work with consistent tension and keep the color stripes balanced. Uneven shell placement is one of the most common causes of distorted edges in a crochet shell stitch blanket.
Project Information at a Glance
| Feature | Details |
|---|---|
| Project | Striped shell stitch blanket |
| Skill level | Intermediate beginner |
| Estimated time | 25–40 hours, depending on size and speed |
| Suggested size | Approximately 120 × 150 cm |
| Crochet hook | 5.5 mm (US I/9) |
| Yarn weight | Medium / Worsted / Aran, Category 4 |
| Technique | Flat rows, shell stitch, color changes |
| Construction | One-piece blanket with optional edging |
| Terminology | US crochet terms |
Note: Finished dimensions, working time and yarn quantities are project estimates, not measurements verified from the photograph. Measure a gauge swatch before purchasing the full yarn quantity.
Materials and Tools
Yarn
Choose a smooth, machine-washable worsted-weight yarn with consistent thickness across all three colors. A soft acrylic or acrylic-cotton blend is suitable for a frequently used blanket.
- Dusty blue yarn: Approximately 700 g, Category 4 worsted weight.
- Ivory cream yarn: Approximately 700 g, Category 4 worsted weight.
- Warm taupe yarn: Approximately 550 g, Category 4 worsted weight.
- Optional extra cream yarn: Approximately 100–150 g for a wider border.
These quantities are preliminary allowances for a medium throw blanket. Actual consumption depends on yarn length per skein, stitch height, tension, border width and final dimensions. Compare yarn by meterage as well as weight.
Suitable yarn ranges include Stylecraft Special Aran, Paintbox Yarns Simply Aran and comparable washable medium-weight yarns. Use the same yarn range for all colors whenever possible.
Tools
- 5.5 mm crochet hook or the size needed to achieve the desired fabric.
- Stitch markers for identifying row ends and repeat positions.
- Tapestry needle for weaving in yarn tails.
- Sharp scissors for clean yarn cuts.
- Measuring tape for checking width and length.
- Blocking mats and rust-resistant pins if appropriate for the chosen yarn.
Crochet Abbreviations
| Abbreviation | Meaning |
|---|---|
| ch | Chain |
| sc | Single crochet |
| dc | Double crochet |
| hdc | Half double crochet |
| sl st | Slip stitch |
| st(s) | Stitch(es) |
| sk | Skip |
| rep | Repeat |
| RS | Right side |
| WS | Wrong side |
Special Stitch: Five-Double-Crochet Shell
Work five double crochet stitches into the same stitch. The stitches spread outward to form a curved fan. This cluster is referred to as a shell throughout the instructions.
Before You Begin: Gauge and Blanket Size
The blanket is worked flat in turned rows. Its width is determined by the foundation chain, while the length is determined by the number of rows completed.
The stitch pattern uses a foundation chain multiple of six, plus two additional chains.
Foundation chain formula: (6 × number of shell repeats) + 2.
For example, a foundation chain of 146 stitches provides 24 shell repeats using the pattern below. The actual width depends on the yarn and hook.
Make a Gauge Swatch
- Chain 38 using your selected yarn and hook.
- Work the shell stitch pattern for at least 12 rows.
- Allow the sample to relax before measuring.
- Measure the width of the central repeats, avoiding the edge stitches.
- Calculate the number of repeats required for your chosen blanket width.
For a blanket approximately 120 cm wide, divide 120 by the measured width of one shell repeat. Round to a whole number and use the foundation chain formula.
Do not assume that 146 chains will produce exactly 120 cm. A different yarn, hook or crocheting tension can change the finished measurement considerably.
Free Crochet Shell Stitch Blanket Pattern
The following instructions create a staggered shell pattern with alternating full shells and half shells along the edges.
Important: Turning chains are identified in each row. Do not add extra stitches at the beginning or end of a row.
Step 1: Foundation Chain
Using ivory cream yarn, chain 146, or any multiple of six plus two.
Keep the foundation chain relaxed. If the chain is significantly tighter than the rest of the fabric, use a hook 0.5 mm larger for the foundation only.
Step 2: First Shell Row
Row 1: Work 1 sc into the second chain from the hook.
Repeat the following sequence across:
- Skip the next 2 chains.
- Work 5 dc into the next chain.
- Skip the next 2 chains.
- Work 1 sc into the next chain.
Continue to the end of the foundation chain. Chain 3 and turn.
For a foundation of 146 chains, the row contains 24 complete five-double-crochet shells, with single crochet stitches at the boundaries.
Step 3: Second Shell Row
Row 2: The turning chain 3 counts as the first double crochet.
Work 2 additional dc into the first sc. This creates a three-double-crochet half shell at the beginning of the row.
Repeat the following across the row:
- Skip the next 2 dc.
- Work 1 sc into the center dc of the next five-dc shell.
- Skip the remaining 2 dc of that shell.
- Work 5 dc into the next sc.
Continue until the final shell is reached. Work 1 sc into its center dc, skip the remaining 2 dc and work 3 dc into the final sc.
Chain 1 and turn.
The row now has a half shell at each end, with full shells between them. This staggered arrangement positions each new fan between the fans below it.
Step 4: Third Shell Row
Row 3: Work 1 sc into the first stitch.
Repeat the following sequence across:
- Skip the next 2 dc.
- Work 5 dc into the next sc.
- Skip the next 2 dc.
- Work 1 sc into the center dc of the next shell.
Continue across the row, treating the half shells at the edges as the boundary sections. Finish with 1 sc in the top of the beginning chain-3 from the previous row.
Chain 3 and turn.
The third row restores the full-shell arrangement established in Row 1.
Step 5: Repeat the Shell Pattern
Continue alternating Rows 2 and 3 until the blanket reaches the desired length.
Each pair of rows creates another layer of overlapping fans. Maintain the same number of shells across the entire blanket.
Check the width after every 10 rows. A gradual increase usually indicates that an extra shell has been added near an edge. A narrowing blanket may indicate that a center stitch was missed.
If a row has the wrong number of shells, correct it before adding another color section. Shell errors become more noticeable after several repeats.
How to Create the Blue, Cream and Taupe Stripes
The photographed blanket uses horizontal bands of dusty blue, cream and taupe. The colors repeat throughout the fabric, creating a coordinated arrangement rather than isolated decorative stripes.
For a similar appearance, use the following six-row color sequence:
| Rows | Yarn Color |
|---|---|
| 1–2 | Ivory cream |
| 3–4 | Dusty blue |
| 5–6 | Warm taupe |
| 7–8 | Ivory cream |
| 9–10 | Dusty blue |
| 11–12 | Warm taupe |
Repeat this sequence until the blanket reaches its intended length. Each two-row band contains one of each shell-row type, keeping the color arrangement consistent.
Changing Colors Cleanly
- Work the final stitch of the current row until two loops remain on the hook.
- Place the new yarn over the hook.
- Pull the new color through the remaining loops.
- Make the required turning chain using the new color.
- Turn and continue the shell stitch pattern.
Leave a yarn tail of approximately 15 cm at every color change. Weave each tail securely into stitches of the same color.
Do not pull the new color tightly at the edge. Tight color changes can shorten one side of the blanket and cause the finished fabric to curve.
How to Make the Scalloped Crochet Border
The border completes the blanket and emphasizes the curved shell shapes. Ivory cream is recommended because it creates a continuous outline around the blue and taupe stripes.
Round 1: Stabilizing the Edges
With the right side facing, join cream yarn at a corner.
Work single crochet stitches evenly along the first side. As a starting point, place approximately two sc for each double-crochet-height row end, adjusting the spacing to keep the edge flat.
At each corner, work 3 sc into the corner location.
Continue around all four sides, working into existing stitches along the top and bottom edges. Join with a slip stitch to the first sc.
Check the border before beginning the next round. If the edge ripples, remove some stitches. If it pulls inward, add stitches at regular intervals.
Round 2: Scalloped Shell Edging
Chain 1 and work 1 sc into the first stitch.
Repeat the following sequence along each side:
- Skip 2 stitches.
- Work 5 dc into the next stitch.
- Skip 2 stitches.
- Work 1 sc into the next stitch.
At each corner, adjust the spacing so a shell sits centrally around the turn. If necessary, work a larger seven-double-crochet shell in the corner stitch to accommodate the curve.
Continue around the blanket, modifying the final repeat slightly where needed to meet the starting stitch without bunching.
Join with a slip stitch, fasten off and weave in the yarn tail.
This edging produces a classic scalloped finish. It is a simplified alternative to the more densely layered shell border visible in the reference photograph.
Optional Matching Crochet Pillow Covers
The photograph also includes two pillows with the same horizontal shell design. Matching covers can be made using the blanket stitch pattern at a smaller scale.
For a standard 45 × 45 cm pillow insert, make a gauge swatch and calculate the foundation chain needed for a panel approximately 45 cm wide.
Front Panel
- Make a foundation chain using the multiple-of-six-plus-two formula.
- Work Rows 1–3 of the blanket pattern.
- Continue alternating Rows 2 and 3.
- Change between cream, blue and taupe every two rows.
- Stop when the panel measures approximately 45 cm high.
Back Panel
Make a second panel to the same dimensions. The back may use the same shell stitch or a simpler solid crochet fabric.
For an envelope-style closure, make two overlapping back sections rather than one complete panel. Each section should extend beyond the halfway point to create sufficient overlap.
Joining the Pillow Cover
Place the front and back sections with the correct sides facing outward. Join around the edges using single crochet stitches.
Work three stitches at each corner to prevent pulling. Insert the pillow form before closing the final side, or leave the envelope opening accessible at the back.
Finish with an optional cream scalloped border around the front edges.
Seven Technical Tips for Better Shell Stitch Results
- 1. Prevent missed repeats. Place a stitch marker after every sixth shell during the first row. This makes it easier to identify an incorrect repeat before the blanket becomes wider.
- 2. Avoid tight foundation chains. Use a hook 0.5 mm larger if the starting edge contracts. A tight foundation can create a curved lower edge even when subsequent rows are correct.
- 3. Control shell tension. Keep all five double crochet stitches approximately the same height. Uneven stitch height causes the fan to lean toward one side.
- 4. Check the center stitch. Work the anchoring single crochet into the third double crochet of a five-stitch shell. Placing it into the second or fourth stitch shifts the next row out of alignment.
- 5. Prevent color-change gaps. Complete the final yarn-over of the last stitch with the new color. Changing yarn after finishing the stitch can leave a visible step between stripes.
- 6. Test border spacing. Work approximately 15–20 cm of the stabilizing border and lay it flat before continuing. Rippling indicates too many stitches, while curling indicates too few.
- 7. Secure yarn tails. Leave approximately 15 cm at each color change and weave the tail in more than one direction. Short tails may loosen after repeated washing.
Common Shell Stitch Blanket Problems and Fixes
Why Are the Blanket Edges Uneven?
Uneven edges usually result from incorrect turning chains, misplaced end stitches or inconsistent shell counts.
Count the shells in the first completed row and compare that number with subsequent rows. The number of full shells alternates between the two row types, but the overall repeat structure should remain consistent.
Use stitch markers at the first and last stitch of each row until the edge arrangement becomes familiar.
Why Does the Blanket Curl?
Curling may be caused by a foundation chain that is too tight, a crochet hook that is too small or excessive tension around the shell clusters.
Make a sample using a slightly larger hook. If the fabric lies flatter and the shells retain their shape, use that hook for the full project.
Blocking may help minor tension differences, but it cannot reliably correct major stitch-count errors.
Why Are the Shells Not Aligned?
The shell pattern relies on alternating the position of the five-double-crochet fans and their single crochet anchors.
If the single crochet is not worked into the correct center stitch, the next shell moves away from its intended position.
Check the third double crochet of each shell before completing the anchoring stitch.
How Can I Make the Blanket Softer?
Yarn composition, hook size and stitch tension determine the flexibility of the finished blanket.
Choose a yarn intended for blankets and use a hook that produces a flexible fabric. A tightly crocheted shell stitch may feel dense even when the yarn itself is soft.
Wash and dry a gauge swatch according to the yarn label before committing to the full project.
How to Adjust the Blanket for Different Bed Sizes
The stitch repeat can be adapted for a baby blanket, sofa throw or larger bed covering. Always calculate the foundation chain from your measured shell width rather than relying on a fixed chain count.
| Blanket Type | Suggested Finished Dimensions |
|---|---|
| Baby blanket | 75 × 90 cm |
| Lap blanket | 90 × 120 cm |
| Sofa throw | 120 × 150 cm |
| Single bed blanket | 140 × 200 cm |
| Double bed blanket | 200 × 220 cm |
These dimensions are suggested project targets, not universal bedding standards.
For a larger blanket, increase the number of foundation repeats until the desired width is reached. Continue adding rows until the required length is achieved.
Remember to account for the border. A scalloped edging may add several centimeters to the overall dimensions.
Finishing and Blocking the Blanket
Once the final border is complete, inspect the entire blanket for loose ends, missed stitches and irregular shell shapes.
Weave in all yarn tails with a tapestry needle. Work through several stitches, change direction and pass the needle back through the fabric to secure each tail.
Wash the blanket according to the care instructions for the selected yarn. Avoid applying excessive heat to acrylic fibers.
For suitable fibers, lay the blanket flat and gently arrange the edges into the intended shape. Use rust-resistant pins if necessary, keeping the scallops evenly spaced.
Allow the fabric to dry completely before removing it from the blocking surface.
How to Care for a Crochet Shell Stitch Blanket
A shell stitch blanket contains raised clusters that may catch on rough surfaces or sharp objects. Proper washing and storage help maintain the stitch definition.
- Follow the yarn manufacturer’s washing instructions.
- Use a gentle washing cycle when machine washing is permitted.
- Place the blanket inside a large laundry bag if appropriate.
- Avoid high-temperature drying unless the yarn label specifically permits it.
- Dry flat when possible to reduce stretching.
- Store the blanket folded rather than hanging for extended periods.
Inspect the scalloped edging periodically. If a yarn tail begins to loosen, weave it back into the surrounding stitches before laundering the blanket again.
Frequently Asked Questions
Is the shell stitch suitable for beginners?
Yes, once the basic chain, single crochet and double crochet stitches are familiar. The main challenge is maintaining the correct placement of the shells and anchoring stitches across each row.
How much yarn is needed for a shell stitch blanket?
The amount depends on blanket dimensions, yarn thickness, stitch density and border design. For the suggested 120 × 150 cm project, the preliminary allowance is approximately 1,950 g across three colors, plus any additional border yarn. Use a weighed gauge swatch to calculate a more reliable requirement.
Can I use chunky yarn?
Yes. Chunky yarn produces larger shells and a thicker fabric. Use the hook size recommended for the yarn, make a gauge swatch and reduce the foundation repeats as needed to maintain the intended width.
Can I make this blanket with cotton yarn?
Yes. Cotton creates clearly defined stitches but may produce a heavier finished blanket. Consider the total weight before making a large bed covering.
How do I keep the stripes even?
Change colors after a complete two-row repeat. This keeps each stripe consistent and prevents the alternating shell rows from creating noticeably different band heights.
Can the blanket be made in one color?
Yes. A single-color version emphasizes the raised shell texture without horizontal stripes. Continue the same row sequence and omit the color changes.
Conclusion
The blue, cream and taupe crochet shell stitch blanket combines a repeating fan structure with a controlled three-color stripe arrangement. The main construction requirements are consistent shell placement, even tension, accurate row transitions and a border that lies flat.
Before making the full blanket, complete a gauge swatch and calculate the foundation chain for your preferred dimensions. Use the same color sequence for matching pillow covers if you want a coordinated bedding set.