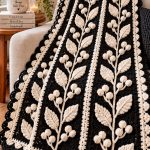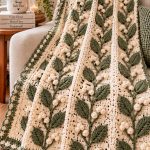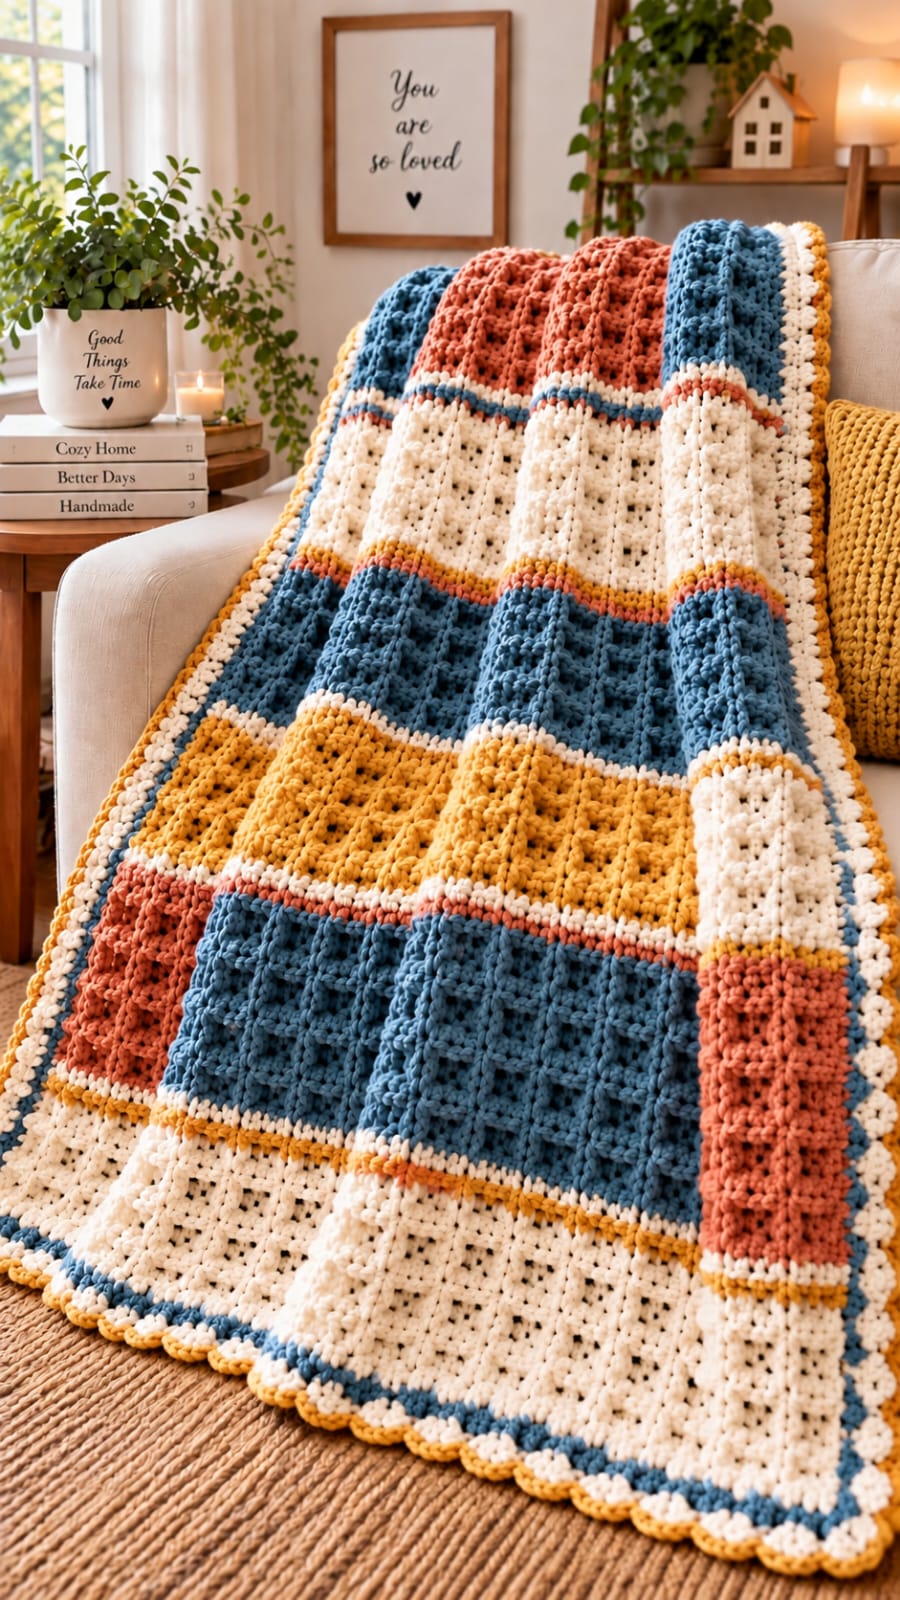
Deep denim-blue blocks change the balance of this striped throw because they carry more visual weight than the narrow rust separators around them. This blue mustard crochet blanket pattern recreates the photographed design with broad cream, denim blue, mustard and burnt-rust sections, raised vertical ridges, open geometric stitches and a multicolor scalloped border. Target approximately 125 × 165 cm using bulky #5 yarn and a 7–8 mm hook.
The Design: What Makes This Blanket Different
The photographed blanket looks patchworked, but the main fabric can be worked continuously from the lower edge upward. Large horizontal color bands provide the structure. Texture then breaks those bands into smaller visual blocks: raised post columns appear in the blue and rust areas, while cream sections use a more open stitch arrangement and mustard introduces another geometric texture.
Narrow separator rows are critical. Cream, mustard and rust lines create boundaries between the larger fields and prevent neighboring textures from merging. The border repeats several interior colors, tying the entire composition together. One common problem with a chunky striped crochet blanket is contraction across post-stitch rows. Those stitches must be worked with enough height to maintain the same width as the flatter sections.
Project Info at a Glance
| Skill Level | Estimated Time | Finished Size | Hook | Construction |
|---|---|---|---|---|
| Intermediate | 18–25 hours | Approx. 125 × 165 cm | 7–8 mm | Bottom-up one-piece rectangle |
The dimensions and yarn quantities are photo-inspired reconstruction targets rather than direct measurements from the pictured blanket. Yarn thickness, gauge and blocking will affect the final size.
Materials and Tools
Yarn
- Warm cream — Bulky #5 — approximately 850–1000 g
- Denim blue — Bulky #5 — approximately 750–900 g
- Mustard yellow — Bulky #5 — approximately 400–500 g
- Burnt rust — Bulky #5 — approximately 400–500 g
Tools
- 7–8 mm crochet hook
- Large tapestry needle
- Locking stitch markers
- Sharp scissors
- Tape measure
- Blocking mats or another clean flat surface
- Rust-resistant blocking pins
Abbreviations
- ch — chain
- sc — single crochet
- hdc — half double crochet
- dc — double crochet
- sl st — slip stitch
- FPdc — front post double crochet
- BPdc — back post double crochet
- BLO — back loop only
- FLO — front loop only
- st/sts — stitch/stitches
- sp — space
A front-post double crochet is worked around the vertical post of the stitch below, producing the raised columns visible across several blue and rust sections.
Gauge and Finished Measurements
Target approximately 11–12 stitches and 8–9 rows per 10 cm in the main textured fabric after light blocking.
The finished reconstruction should measure approximately 125 cm wide and 165 cm long including the border.
Make a swatch containing ordinary double crochet, front-post double crochet and one openwork row. The swatch should remain approximately the same width from bottom to top. If the post-stitch area contracts noticeably, increase the hook by 0.5 mm for those rows.
Color Sequence
The photo-inspired layout is built from the following broad sections, starting at the bottom:
- Warm cream open-texture section
- Mustard and denim-blue transition
- Large denim-blue textured section
- Cream and rust separator
- Mustard textured section
- Cream separator
- Second denim-blue textured section
- Rust and mustard transition
- Large warm-cream section
- Blue, cream and rust transition
- Upper rust textured section
- Upper denim-blue accent section
Pattern — Step by Step
Foundation
Yarn: warm cream.
Foundation: Ch 143 loosely.
Row 1: Dc in fourth ch from hook and in each remaining ch across. (140)
Row 2: Ch 2, turn, hdc in each st across. (140)
Measure the width without stretching. Target approximately 118–120 cm before the border.
Section 1 — Lower Cream Open Texture
Row 3: Ch 3, turn, dc in first 3 sts, *ch 1, skip next st, dc in next 3 sts*. Repeat across, maintaining 140 working positions.
Row 4: Ch 2, turn, hdc in every dc and ch-1 sp across. (140)
Row 5: Ch 3, turn, dc across. (140)
Row 6: Ch 1, turn, sc across. (140)
Rows 7–16: Repeat Rows 3–6 until the cream panel measures approximately 22–24 cm.
The small openings keep the lower section lighter than the dense raised blue panels.
Mustard Lower Separator
Change to mustard yellow.
Row 17: Ch 1, turn, sc across. (140)
Fasten off mustard.
Denim-Blue Lower Accent
Join denim blue.
Row 18: Ch 2, turn, hdc across. (140)
Row 19: Ch 1, turn, sc across. (140)
Fasten off.
Section 2 — Large Denim-Blue Raised Panel
Rejoin denim blue.
Row 20: Ch 3, turn, dc across. (140)
Row 21: Ch 3, turn, dc in first 3 sts, *FPdc around next st, dc in next 3 sts*. Repeat across.
Row 22: Ch 3, turn, dc across. (140)
Row 23: Repeat Row 21.
Row 24: Ch 1, turn, sc across. (140)
Row 25: Ch 3, turn, dc across. (140)
Rows 26–37: Repeat Rows 21–25 until the panel reaches approximately 23–26 cm.
Keep the FPdc loops slightly taller than ordinary dc stitches. This prevents the blue section from narrowing.
Cream Separator
Join warm cream.
Row 38: Ch 1, turn, sc across. (140)
Row 39: Ch 2, turn, hdc across. (140)
Fasten off.
Rust Accent Line
Join burnt rust.
Row 40: Ch 1, turn, sc across. (140)
Fasten off.
Section 3 — Mustard Geometric Panel
Join mustard yellow.
Row 41: Ch 3, turn, dc across. (140)
Row 42: Ch 3, turn, dc in first 2 sts, *ch 1, skip next st, dc in next 3 sts*. Repeat across.
Row 43: Ch 2, turn, hdc in every dc and ch-1 sp across. (140)
Row 44: Ch 3, turn, dc in first 4 sts, *FPdc around next st, dc in next 4 sts*. Repeat across.
Row 45: Ch 1, turn, sc across. (140)
Rows 46–53: Repeat the established texture until the mustard panel measures approximately 18–20 cm.
Fasten off mustard.
Cream and Rust Transition
Row 54: Join cream, ch 1, sc across. (140)
Row 55: Change to burnt rust, ch 1, sc across. (140)
Fasten off rust.
Section 4 — Central Denim-Blue Panel
Join denim blue.
Row 56: Ch 3, turn, dc across. (140)
Row 57: Ch 3, turn, dc in first 3 sts, *FPdc around next st, dc in next 3 sts*. Repeat across.
Row 58: Ch 3, turn, dc across. (140)
Row 59: Ch 1, turn, sc across. (140)
Row 60: Ch 3, turn, dc in first 5 sts, *FPdc around next st, dc in next 5 sts*. Repeat across.
Row 61: Ch 2, turn, hdc across. (140)
Rows 62–72: Alternate the two raised-column arrangements until the blue panel measures approximately 24–26 cm.
Fasten off.
Rust Transition Stripe
Join burnt rust.
Row 73: Ch 1, turn, sc across. (140)
Fasten off.
Mustard Transition Stripe
Join mustard.
Row 74: Ch 2, turn, hdc across. (140)
Fasten off.
Section 5 — Large Cream Openwork Panel
Join warm cream.
Row 75: Ch 3, turn, dc across. (140)
Row 76: Ch 3, turn, dc in first 3 sts, *ch 1, skip next st, dc in next 3 sts*. Repeat across.
Row 77: Ch 2, turn, hdc in every dc and ch-1 sp. (140)
Row 78: Ch 3, turn, dc across. (140)
Row 79: Ch 1, turn, sc across. (140)
Rows 80–90: Repeat Rows 76–79 until the cream panel reaches approximately 23–25 cm.
Fasten off.
Mustard, Rust and Blue Transition
Row 91: Join mustard, ch 1, sc across. (140)
Row 92: Change to burnt rust, ch 1, sc across. (140)
Row 93: Change to denim blue, ch 2, hdc across. (140)
Fasten off.
Section 6 — Upper Rust Raised Panel
Join burnt rust.
Row 94: Ch 3, turn, dc across. (140)
Row 95: Ch 3, turn, dc in first 3 sts, *FPdc around next st, dc in next 3 sts*. Repeat across.
Row 96: Ch 3, turn, dc across. (140)
Row 97: Repeat Row 95.
Row 98: Ch 1, turn, sc across. (140)
Rows 99–107: Repeat the established texture until the rust section measures approximately 18–20 cm.
Fasten off.
Upper Cream Separator
Row 108: Join cream and sc across. (140)
Row 109: Ch 2, turn, hdc across. (140)
Fasten off.
Upper Denim-Blue Section
Join denim blue.
Row 110: Ch 3, turn, dc across. (140)
Row 111: Ch 3, turn, dc in first 3 sts, *FPdc around next st, dc in next 3 sts*. Repeat across.
Row 112: Ch 3, turn, dc across. (140)
Row 113: Ch 1, turn, sc across. (140)
Rows 114–122: Repeat Rows 111–113 until the body reaches the target length before bordering.
Fasten off.
Optional Raised Surface Columns
The photographed throw has several strongly defined vertical lines that can be emphasized after the main blanket is finished.
Join matching yarn at the lower edge of a selected blue, mustard or rust section.
Work loose surface slip stitches vertically along one stitch column.
Stop when the color block ends and fasten off on the wrong side.
Space additional surface ridges approximately 8–12 cm apart.
After each ridge, place the blanket flat. If the fabric gathers, remove the surface stitches and repeat them with less tension.
Multicolor Border
Border Round 1 — Cream
Join warm cream in any corner.
Ch 1 and sc evenly around the complete blanket.
Across the top and bottom, work one sc in each stitch. Along the long sides, distribute stitches evenly according to row height.
Work (sc, ch 2, sc) in every corner.
Join with sl st.
Border Round 2 — Denim Blue
Join denim blue.
Ch 1 and sc around.
Work (sc, ch 2, sc) into every corner space.
Join and fasten off.
Border Round 3 — Cream
Join cream.
Ch 2 and hdc around.
Work (hdc, ch 2, hdc) in every corner.
Join and fasten off.
Border Round 4 — Mustard Scallops
Join mustard.
*Skip 1 st, 5 dc in next st, skip 1 st, sl st in next st.* Repeat around.
At each corner, adjust the spacing so a full scallop sits around the corner without pulling the adjoining sides inward.
Fasten off.
Assembly and Finishing
- Complete the entire 140-stitch blanket body and confirm that the top and bottom widths are within approximately 2 cm of each other.
- Lay the fabric flat and inspect every color transition for missed edge stitches or visibly tight rows.
- Add optional surface slip-stitch columns to selected blue, mustard and rust panels before working the outer border.
- Weave dark yarn tails through matching color sections for at least 8–10 cm so they cannot show beneath cream openwork.
- Work the cream foundation border around all four sides, adjusting side-edge placement until the fabric remains flat.
- Add the denim-blue and second cream rounds while maintaining consistent corner spaces.
- Finish with the mustard scalloped edge and correct the repeat near each corner rather than forcing an extra shell into insufficient space.
- Pin all four corners to the target dimensions, then pin the centers of the long and short sides.
- Block according to the yarn fiber instructions and allow the blanket to dry completely while flat.
- Remove the pins, reshape the scallops and trim only yarn ends that have already been securely woven into the fabric.
The finished blanket should display broad cream, denim-blue, mustard and burnt-rust sections with raised vertical definition and a narrow multicolor frame.
7 Technical Tips
- Contracted blue panels: FPdc rows can reduce a 125 cm blanket by several centimeters when worked tightly. Pull the first loop of each post stitch to the full height of the surrounding dc stitches before completing it.
- Diagonal side edges: Mark the first and last stitch of every row. Losing only one edge stitch repeatedly across a 20 cm panel creates a visible taper that blocking will not fully correct.
- Wavy separator stripes: Keep every transition row at exactly 140 working stitches. Adding stitches into turning chains can make narrow rust or mustard lines flare outward.
- Dense cream fabric: Retain the ch-1 openings in the large cream sections. Replacing them with solid dc stitches increases weight and changes the drape relative to the blue panels.
- Gathered surface ridges: A vertical surface-slip-stitch line should not shorten a panel by more than approximately 1 cm. If it does, remove it and remake the ridge with longer loops.
- Ruffled border: Excess side stitches are the main failure mode. After Border Round 1, spread the blanket flat and remove stitches anywhere the edge begins forming waves.
- Uneven scallops: Do not force the standard shell repeat through every corner. Adjust by one skipped stitch near the corner so the mustard scallop remains centered and the adjacent sides lie flat.
How to Keep the Blanket Square
Measure the width after every large section rather than waiting until the blanket is finished.
Take three measurements: one near the previous color transition, one through the middle of the active section and one across the current working edge.
A difference of approximately 1–2 cm is usually manageable during blocking. Larger differences indicate a tension change.
Raised stitches are the most likely source. If the blue or rust panel is narrowing, use a slightly larger hook for the post-stitch rows while retaining the main hook for ordinary rows.
Working Clean Color Transitions
On the final stitch of the old color, stop before the final yarn-over.
Complete that last yarn-over with the new color and pull it through the remaining loops.
Turn and begin the new row.
For single-row separator colors, cut the yarn after the row rather than carrying it behind several centimeters of contrasting fabric.
Leave tails approximately 15–20 cm long. Short ends are difficult to secure in bulky openwork.
Creating Strong Denim-Blue Texture
The denim-blue sections carry the largest raised motifs, so their stitch definition should remain clear.
Keep ordinary double crochet moderately relaxed. Work front-post stitches around the full post below rather than catching only part of the stitch.
Every few rows, run a hand across the fabric and check that the raised columns remain vertical.
If a column shifts sideways because of a missed post, correct it immediately. The error becomes more visible as additional rows are added.
Keeping the Cream Sections Light
The cream areas cover a substantial percentage of the blanket. Working them entirely in dense stitches would make the finished throw heavier and stiffer.
The repeated ch-1 openings reduce yarn consumption and introduce small areas of negative space.
Do not make those chains excessively tight. Each ch-1 space should remain large enough to accept one hdc comfortably on the following row.
When blocking, open these spaces gently without stretching them into large holes.
Balancing Mustard and Rust
Mustard is the brightest color in the photographed palette, so it works best in one substantial middle section plus narrow border details.
Burnt rust can occupy a larger upper block because its darker value competes less aggressively with the denim blue.
If changing the color sequence, avoid placing two equally wide mustard bands next to the largest blue areas. That can shift attention away from the texture.
Narrow cream separator rows help control both warm colors.
Adjusting the Blanket Width
For a smaller throw, target approximately 105–110 cm before the border.
For a wider sofa blanket, target approximately 140 cm before bordering.
Adjust the starting chain in multiples of four whenever possible. This keeps most of the openwork and raised-column repeats easier to distribute.
Calculate the starting chain from your own blocked swatch rather than relying only on the yarn label gauge.
Adjusting the Length
For a lap blanket, shorten each large panel by two to four rows.
Another option is to remove one complete upper color block while preserving the remaining transitions.
For a longer blanket, add rows to the cream and blue sections rather than expanding every narrow separator.
Keep the transition stripes narrow. Their function is to divide the broad blocks, not compete with them.
Alternative Color Palettes
A coastal version can combine navy, pale blue, ivory and sand.
For an autumn variation, use forest green, burnt orange, oatmeal and ochre.
A neutral version can combine charcoal, taupe, cream and camel.
For a softer palette, replace denim blue with dusty blue, burnt rust with muted rose and mustard with light ochre.
Whatever palette is selected, retain one pale neutral across multiple sections and the border. Repeating that color helps connect otherwise separate blocks.
Blocking the Finished Throw
Follow the care requirements of the yarn fiber.
Place the blanket flat and shape it to approximately 125 × 165 cm.
Pin all four corners first. Next, pin the center of each side.
Add additional pins between those points until the edges form straight lines.
Do not flatten the FPdc columns aggressively. Blocking should square the blanket while preserving the raised relief.
Shape each mustard scallop individually around the perimeter and allow the blanket to dry completely.
Care and Storage
A bulky blanket becomes significantly heavier when wet. Support the full fabric rather than lifting it from one corner after washing.
Dry flat when permitted by the yarn manufacturer’s instructions.
For storage, fold the blanket into broad sections. Avoid prolonged compression under heavy objects because raised post stitches can flatten.
Before returning the throw to use, shake it gently and reshape the scalloped border by hand.
Final Finishing Check
Spread the blanket on a flat surface and compare the two long sides.
Check that the denim-blue raised columns remain vertical and that no surface ridge gathers the fabric.
Inspect every cream section from the front for dark woven ends.
Confirm that the mustard border scallops lie flat at all four corners.
Finally, measure the width at the top, middle and bottom. Consistent measurements indicate that the changing textures in the blue mustard crochet blanket pattern have been worked at compatible tension.
Conclusion
Start with a swatch containing cream openwork and a denim-blue post-stitch section, because those two textures establish the width behavior of the complete throw. Maintain 140 working positions through every major color change, use the rust and mustard rows as narrow separators, and add optional surface ridges only after the blanket body lies flat. Finish with cream and blue border rounds followed by mustard scallops. Save this blue mustard crochet blanket pattern to Pinterest or share the finished throw on Instagram with #BlueMustardTexturedBlanket. For this specific color layout, would you keep the burnt-rust blocks or replace them with a softer terracotta?