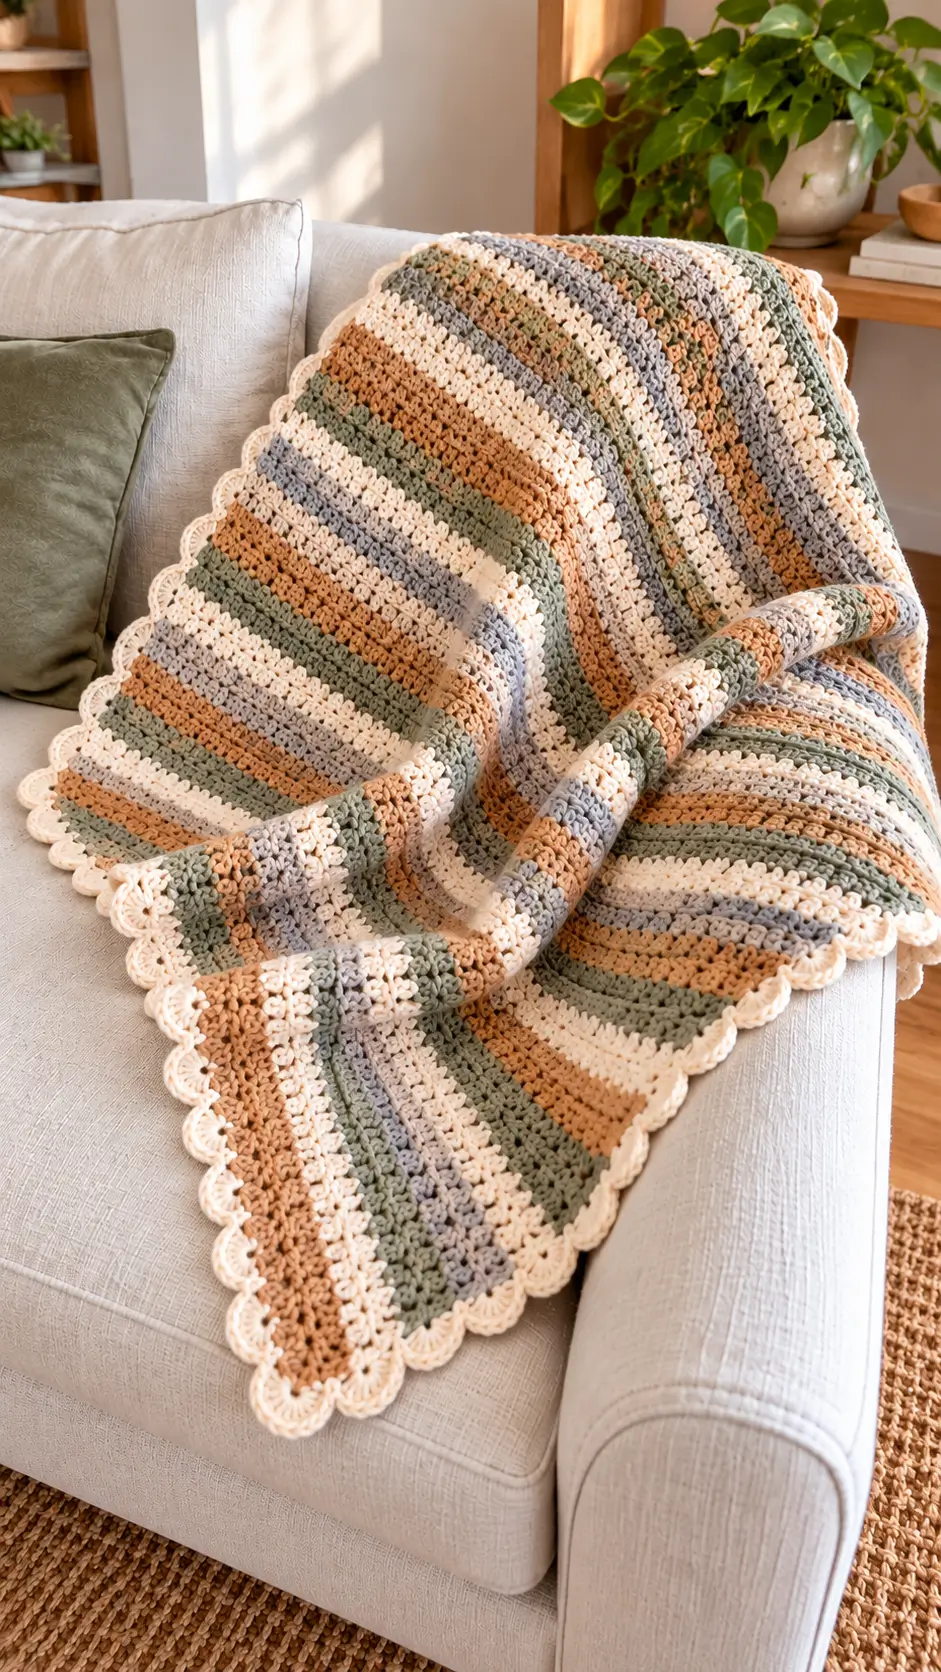
Four muted stripe colors stop abruptly at a cream row of scallops, which defines this blanket before its stitch texture does. This striped crochet blanket pattern uses worsted-weight yarn, a 5 mm hook, and a 102 × 139 cm reference size. The construction suits an easy/intermediate maker familiar with basic stitches. Unequal stripe widths also make it practical for combining several coordinated yarn colors without complex shaping.
The Design: What Makes This Striped Blanket Different
The photographed blanket depends on three structural decisions. First, cream, sage, camel, and gray-blue appear in bands of changing depth rather than rigidly identical stripes. That prevents the surface from reading like a simple two-row repeat. Second, the striped crochet throw keeps its main fabric comparatively restrained so the outer cream edging can carry more visual structure. Third, the scalloped crochet blanket border uses repeated shells to soften a rectangular foundation.
A frequent mistake with this construction is adding a shell directly to an uneven raw edge. The border then amplifies every spacing error. A preparatory single-crochet round creates controlled attachment points before the shells are added. The same principle is particularly important along row ends, where stitch placement is less obvious than across the foundation and final rows.
Project Info at a Glance
| Skill Level | Time | Finished Size | Hook | Best For |
|---|---|---|---|---|
| Easy/Intermediate | Multi-session project | Approx. 102 × 139 cm | 5.0 mm (H) | Sofa throw / lap blanket |
The size and hook are based on a documented worsted-weight striped lapghan with the same 102 × 139 cm proportions.
Materials and Tools
Yarn
Use one consistent yarn weight across all four colors. Worsted-weight #4 yarn works well with the 5 mm hook used for this construction.
- Cream — worsted #4 — approximately 300–400 g — smooth acrylic or acrylic/wool worsted
- Sage green — worsted #4 — approximately 200–250 g — same yarn line
- Camel/tan — worsted #4 — approximately 200–250 g — same yarn line
- Gray-blue — worsted #4 — approximately 150–200 g — same yarn line
Allow roughly 1,000 g total as a working estimate. Stitch choice, gauge, border depth, fiber, and stripe distribution can change the final yarn consumption.
Tools
- 5.0 mm (H) crochet hook
- Tapestry needle
- Scissors
- Locking stitch markers
- Tape measure
- Blocking mats and rust-resistant pins — optional
Abbreviations
- ch — chain
- sc — single crochet
- hdc — half double crochet
- dc — double crochet
- sl st — slip stitch
- st/sts — stitch/stitches
- sk — skip
- sp — space
- rep — repeat
Invisible decrease is an amigurumi shaping technique and is not required for this flat rectangular blanket.
Striped Crochet Blanket Pattern — Step by Step
The blanket is worked back and forth in rows. Keep the stitch count at 131 stitches throughout the main body.
Blanket Body
Yarn: cream, sage, camel, and gray-blue. Use a 5 mm crochet hook.
Foundation: With cream, ch 132.
Row 1: Hdc in 2nd ch from hook and in each ch across. (131)
Row 2: Ch 1, turn. Hdc in each st across. (131)
Rows 3–8: Repeat Row 2 in cream. (131)
Change to sage.
Rows 9–16: Hdc in each st across. (131)
Change to camel.
Rows 17–26: Hdc in each st across. (131)
Change to cream.
Rows 27–34: Hdc in each st across. (131)
Change to gray-blue.
Rows 35–40: Hdc in each st across. (131)
Change to sage.
Rows 41–48: Hdc in each st across. (131)
Change to cream.
Rows 49–58: Hdc in each st across. (131)
Change to camel.
Rows 59–66: Hdc in each st across. (131)
Change to sage.
Rows 67–74: Hdc in each st across. (131)
Change to gray-blue.
Rows 75–82: Hdc in each st across. (131)
Change to cream.
Rows 83–92: Hdc in each st across. (131)
Change to camel.
Rows 93–102: Hdc in each st across. (131)
Change to sage.
Rows 103–110: Hdc in each st across. (131)
Change to cream.
Rows 111–118: Hdc in each st across. (131)
Change to gray-blue.
Rows 119–126: Hdc in each st across. (131)
Change to camel.
Rows 127–136: Hdc in each st across. (131)
Change to cream.
Rows 137–144: Hdc in each st across. (131)
Change to sage.
Rows 145–154: Hdc in each st across. (131)
Change to gray-blue.
Rows 155–162: Hdc in each st across. (131)
Change to cream.
Rows 163–172: Hdc in each st across. (131)
Change to camel.
Rows 173–180: Hdc in each st across. (131)
Change to sage.
Rows 181–188: Hdc in each st across. (131)
Change to cream.
Rows 189–196: Hdc in each st across. (131)
Fasten off.
This sequence intentionally changes stripe depth. The objective is to preserve the defining feature visible in the photographed blanket: alternating neutral bands with no dominant rigid repeat.
Measure the blanket body before beginning the border. Row gauge varies among crocheters, so add or remove complete stripe sections if the required length has not been reached.
Foundation Border
Yarn: cream.
Join cream yarn in one corner.
Round 1: Ch 1. Work sc evenly around all four sides. Place approximately one stitch into each stitch across the top and bottom while distributing stitches consistently along both row-end edges. Work 3 sc into each corner. Join with sl st.
Do not force a predetermined stitch count down the long sides. Flatness matters more than an arbitrary total because individual row gauge controls the available edge length.
Round 2: Ch 1. Sc in each st around, working 3 sc in the center corner stitch at each corner. Join with sl st.
The two foundation rounds stabilize the rectangle before the decorative shells are introduced.
Scalloped Shell Border
Yarn: cream.
Round 3: Ch 1. Sc in first st, *sk 2 sts, 5 dc in next st, sk 2 sts, sc in next st*. Repeat around the entire blanket.
At each corner, adjust the final one or two skipped stitches so a complete 5-dc shell falls as close to the corner as possible. Keep all four corners symmetrical.
Join with sl st to the first sc.
Fasten off, leaving a 15 cm tail.
For a deeper edge closer to the prominent border visible in the photograph, work one additional single-crochet round before making the shells.
Optional Round: Ch 1, sc evenly around, maintaining the corner increases. Join with sl st. Work the shell round after completing this additional foundation round.
Color Placement
The photographed blanket works because cream functions as both a stripe color and the border color. It therefore repeats more frequently than the three accent shades.
Sage acts as the principal muted accent. Camel provides warmer contrast, while gray-blue separates the warmer and greener sections without becoming dominant. Keeping all four colors in the same yarn line reduces differences in strand diameter, gauge, and laundering behavior.
Do not carry unused yarn continuously up the edge across long color sections. Cut the strand when necessary and weave the tail into stitches of the corresponding color. Long carried strands can remain visible beneath the cream border and may also produce local tension differences.
How to Adjust the Blanket Size
The reference finished size is approximately 102 × 139 cm. Your actual dimensions depend on yarn, hook, individual tension, stitch height, and blocking.
For a wider blanket, add foundation chains while retaining the same flat-row construction. Keep the number of stitches identical from one row to the next.
For a longer blanket, add complete stripe sections before starting the cream border. Repeating complete color sections preserves the intentional variation in stripe width.
A gauge swatch provides the most accurate width calculation. For example, if 14 stitches measure 10 cm, divide the desired width in centimeters by 10 and multiply the result by 14. Round to a practical whole-stitch count.
Remember that the shell border increases both width and length. When an exact final measurement is required, make the striped body slightly smaller than the intended finished dimensions.
Finishing and Assembly
- Lay the completed rectangle flat and inspect all four edges for pulling or flaring.
- Weave each color-change tail back through stitches of the same color.
- Measure the body through its center rather than along an outer edge.
- Attach cream yarn at one corner for the foundation border.
- Work the first sc round evenly around all four sides.
- Check that every corner lies flat before beginning the second border round.
- Complete the second sc round while maintaining consistent corner increases.
- Work the cream shell edging, adjusting spacing only when approaching a corner.
- Weave the final border tail through several stitches before trimming it.
- Block the blanket to its target rectangular dimensions without overstretching the scallops.
The finished blanket should have a rectangular four-color striped field surrounded by an evenly distributed cream scalloped edge.
7 Technical Tips for a Cleaner Crochet Blanket
- Mark every 25 stitches while working the first rows. A missing stitch near either edge can reduce the 131-stitch width without becoming obvious until several stripes have been completed.
- Measure the width after Row 10. If the fabric differs substantially from the intended 102 cm reference width, correcting hook size or tension at this point prevents dozens of unnecessary rows.
- Keep the turning chain outside the stitch count. Accidentally crocheting into it can increase a 131-stitch row to 132 stitches and gradually distort the side edge.
- Change color on the final pull-through of the preceding stitch. Changing after completing the stitch leaves a visible section of the previous color at the beginning of the new stripe.
- Place stitch markers in all four corners during the foundation border. A missed corner increase pulls the border inward, while repeated extra stitches can make the corner ruffle.
- Test six shell repeats before continuing around the blanket. If those six shells overlap, cup, or flare noticeably, correct the spacing before repeating the problem across the full perimeter.
- Leave at least 15 cm for every yarn tail. Short tails are harder to weave through several stitches and can work toward the surface after repeated laundering.
Final Notes
Measure the body before adding the edging; that check determines whether additional stripe repeats are required and prevents the border from fixing an unwanted length in place. Once the dimensions are correct, work two stable cream rounds followed by the shell sequence, then block the corners and scallops evenly.
Save this striped crochet blanket pattern to Pinterest with the finished dimensions in the pin description, or share the completed four-color version on Instagram using #MutedStripeBlanket. For another version, record the exact yarn and final gauge before changing the palette. Which stripe would you make widest in this design: sage, camel, gray-blue, or cream?









