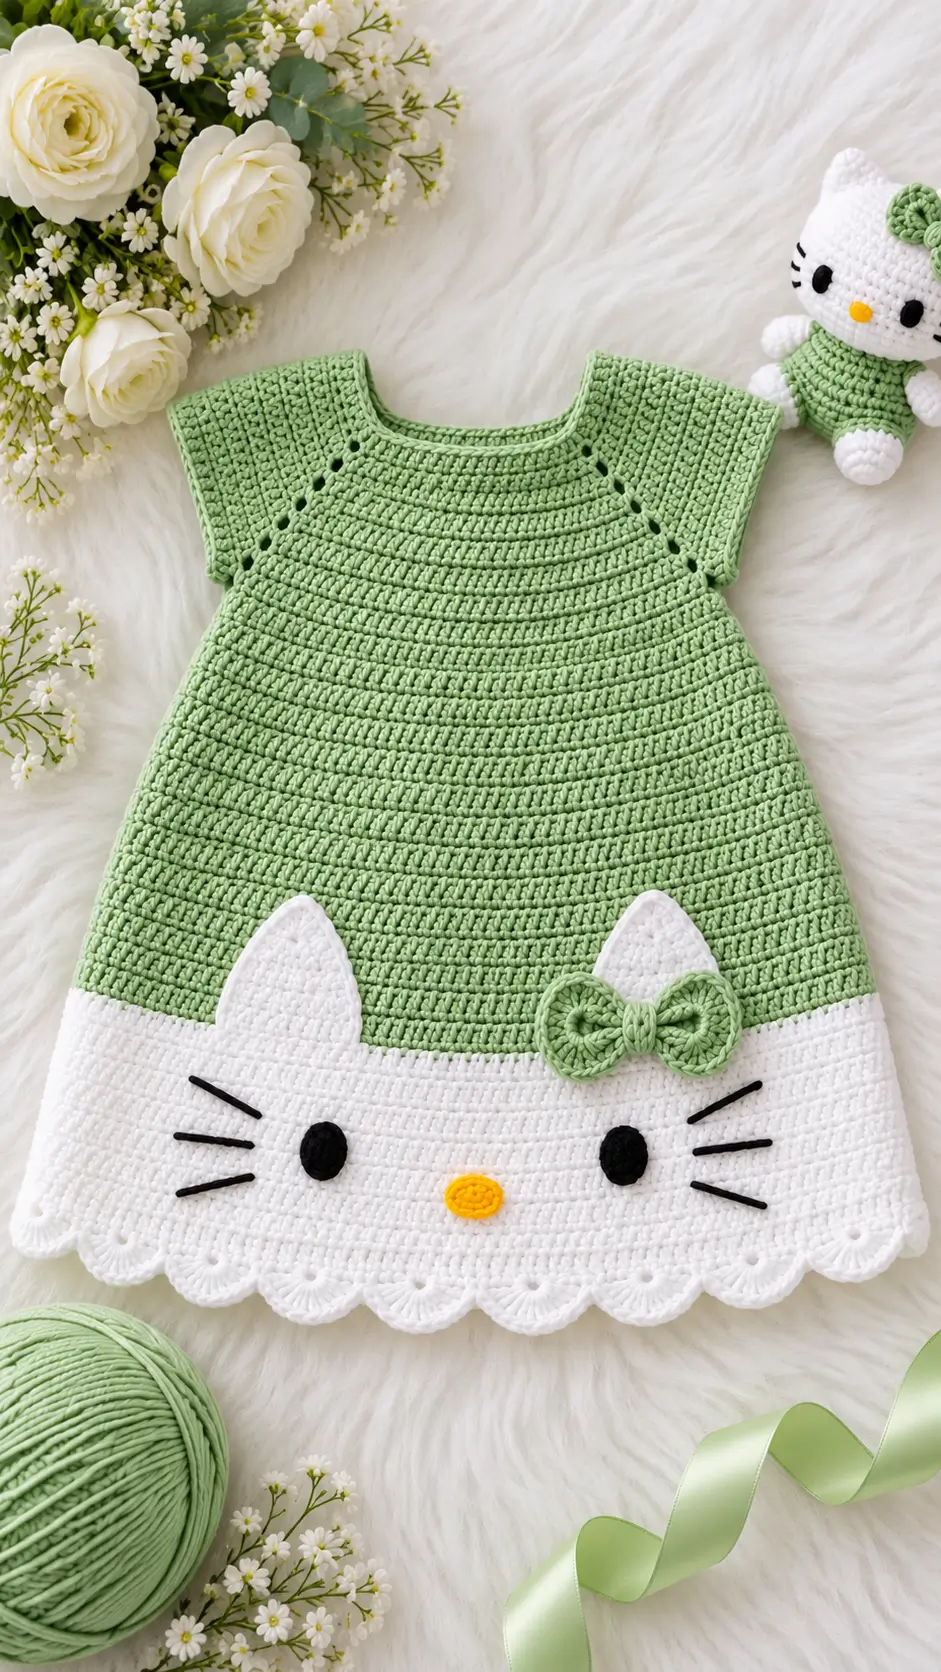
A white cat with three whiskers per cheek needs an unusually empty face: add too much detail and the proportions stop working. This Hello Kitty-inspired amigurumi crochet pattern uses DK cotton, a 2.75 mm hook and a compact 14–16 cm format at confident-beginner level. The yellow outfit and matching bow reproduce the photo’s palette, while the seated construction makes the finished figure practical for shelf display.
The Design: What Makes This White Cat Different
The head carries most of the visual weight, so it reaches a 36-stitch plateau while the torso remains narrower. Short triangular ears are sewn near the outer head edges; moving them inward makes a white cat amigurumi pattern read as a round-headed bear instead. The yellow body section is deliberately compact because the photographed figure shows more head than torso.
A second structural decision concerns the legs. They project forward rather than hanging vertically, creating the seated silhouette visible beside the dress. The bow cat crochet pattern also needs an off-center accessory: placing the bow directly in the middle destroys the characteristic asymmetry. A frequent mistake is spreading the eyes too far apart while simultaneously making the nose too large. The face should remain sparse, with the whiskers providing most of its horizontal width.
Project Info at a Glance
| Skill Level | Time | Finished Size | Hook | Best For |
|---|---|---|---|---|
| Confident beginner | 4–6 hours | 14–16 cm | 2.75 mm | Shelf figure, photo prop, coordinated crochet set |
Materials and Tools
Yarn
- White — smooth DK cotton — allow 25 g
- Golden yellow — smooth DK cotton — allow 15 g
- Black — cotton or embroidery floss — under 2 g
- Yellow embroidery yarn — under 1 g for the nose if a finer oval is preferred
Tools
- 2.75 mm crochet hook
- 6 mm safety eyes — optional
- Polyester stuffing
- Tapestry needle
- Stitch markers
- Sewing pins
- Scissors
- Black embroidery floss if matching the stitched-eye appearance in the photo
Abbreviations
- MR — magic ring
- sc — single crochet
- inc — two single crochet stitches in one stitch
- dec — single crochet decrease
- sl st — slip stitch
- ch — chain
- BLO — back loop only
- dc — double crochet
For an invisible decrease, insert the hook through the front loops of the next two stitches, yarn over and complete one single crochet through both.
Pattern — Step by Step
Work in a continuous spiral unless a section says otherwise. Use a stitch marker to identify the first stitch of each round. The main spherical pieces follow six-stitch increase and decrease intervals, while the head reaches a medium 36-stitch plateau.
Head
Yarn: white — 36-stitch medium plateau.
R1: 6 sc in MR (6)
R2: inc ×6 (12)
R3: (sc, inc) ×6 (18)
R4: (2 sc, inc) ×6 (24)
R5: (3 sc, inc) ×6 (30)
R6: (4 sc, inc) ×6 (36)
R7–R13: sc around (36)
R14: (4 sc, dec) ×6 (30)
R15: (3 sc, dec) ×6 (24)
Install 6 mm eyes before closing if using safety eyes. Place them approximately between R9 and R10, testing a spacing of 7–8 stitches. Stuff the head firmly while keeping the front facial area relatively flat.
R16: (2 sc, dec) ×6 (18)
R17: (sc, dec) ×6 (12)
R18: dec ×6 (6)
Fasten off. Thread the tail through the six remaining front loops, pull closed and secure.
Body
Yarn: golden yellow.
R1: 6 sc in MR (6)
R2: inc ×6 (12)
R3: (sc, inc) ×6 (18)
R4: (2 sc, inc) ×6 (24)
R5: (3 sc, inc) ×6 (30)
R6: (4 sc, inc) ×6 (36)
R7–R9: sc around (36)
R10: (4 sc, dec) ×6 (30)
R11: (3 sc, dec) ×6 (24)
R12: sc around (24)
R13: (2 sc, dec) ×6 (18)
R14: sc around (18)
R15: (sc, dec) ×6 (12)
R16: dec ×6 (6)
Stuff firmly at the base and slightly less firmly around the neck.
Fasten off. Leave approximately 25 cm of yarn for assembly.
Arms / Front Legs — Make 2
Yarn: white.
R1: 6 sc in MR (6)
R2: inc ×6 (12)
R3–R4: sc around (12)
R5: (sc, dec) ×4 (8)
R6–R8: sc around (8)
Add a small amount of stuffing to the lower half. Flatten the opening.
R9: sc through both layers across the top (4)
Fasten off. Leave a 15 cm sewing tail.
Back Legs — Make 2
Yarn: white.
R1: 6 sc in MR (6)
R2: inc ×6 (12)
R3: (sc, inc) ×6 (18)
R4–R5: sc around (18)
R6: (sc, dec) ×6 (12)
R7: sc around (12)
R8: dec ×6 (6)
Stuff before completing R8. Keep the front of each leg rounded so the feet remain visible when the figure is seated.
Fasten off. Leave a 20 cm sewing tail.
Ears — Make 2
Yarn: white.
R1: 6 sc in MR (6)
R2: (sc, inc) ×3 (9)
R3: (2 sc, inc) ×3 (12)
R4: (3 sc, inc) ×3 (15)
R5: sc around (15)
Do not stuff heavily. Add only a small pinch of fiberfill near the base if additional structure is required. Flatten the lower edge before sewing.
Fasten off. Leave a 20 cm sewing tail.
Tail
Yarn: white.
R1: 6 sc in MR (6)
R2: inc ×6 (12)
R3–R4: sc around (12)
R5: (sc, dec) ×4 (8)
R6: sc around (8)
Keep the tail behind one hip for a front-view appearance close to the reference photo.
Fasten off. Leave a 15 cm sewing tail.
Yellow Ear Bow
Yarn: golden yellow.
Ch 7.
Row 1: Starting in second ch from hook, 6 sc (6)
Row 2: ch 1, turn, 6 sc (6)
Row 3: ch 1, turn, 6 sc (6)
Row 4: ch 1, turn, 6 sc (6)
Fasten off the rectangle. Cut a separate 20 cm strand of yellow yarn. Pinch the rectangle at the center and wrap the strand around it four or five times to form two bow loops.
Knot the strand securely on the reverse and retain the remaining yarn for sewing. The finished bow should measure approximately 3–3.5 cm across.
Yellow Nose
Yarn: golden yellow.
R1: 6 sc in MR (6)
R2: inc ×6 (12)
Sl st and fasten off. Compress the circle horizontally while sewing it to the face to create a small oval.
For a finer facial result, substitute a 7–9 mm horizontal satin-stitch oval.
Cheek Patches — Make 2
Yarn: white.
R1: 6 sc in MR (6)
R2: inc ×6 (12)
Fasten off.
The supplied photograph does not show contrasting cheek circles. For the closest visual match, omit these pieces or place them beneath the face as subtle shaping pads rather than visible colored cheeks.
Eyes and Whiskers
Yarn: black.
For embroidered eyes, make two compact vertical satin-stitch ovals approximately 7–8 mm high. Position each eye an equal distance from the center of the nose.
Add three whiskers to each cheek. Keep the middle whisker nearly horizontal. Angle the upper whisker slightly upward and the lower whisker slightly downward.
Each finished whisker should measure approximately 15–20 mm.
Yellow Romper Edge
Yarn: golden yellow.
Join yellow yarn to the lower body around R8.
R1: ch 1, sc evenly around (36)
R2: sc around (36)
Sl st to the first stitch and fasten off. This shallow overlay defines the clothing edge without creating a bulky skirt.
Assembly
- Pin the head to the body with the facial centerline aligned with the center of the yellow torso. Sew through complete stitches rather than individual yarn strands.
- Attach the body firmly around the neck opening. Add a final small amount of stuffing before closing any remaining gap.
- Complete the face before attaching the bow. Center the yellow nose below the eyes, then embroider three black whiskers on each cheek.
- Sew the arms high on the torso so they angle slightly forward. Keep their lower ends visible beside the yellow outfit.
- Position the back legs at the lower front of the body. Pin both before sewing so the doll rests evenly.
- Attach the ears near the outer edges of the head. Angle their points slightly outward rather than toward the center.
- Sew the tail behind one hip. It should contribute to the rear silhouette without becoming prominent from the front.
- Position the yellow bow beside one ear. Keep it off-center and avoid covering the entire ear point.
- Inspect the yellow romper edge. Weave yellow yarn tails through yellow stitches so dark or colored strands do not show beneath the white sections.
- Remove all pins, weave each remaining yarn tail through at least 2 cm of dense crochet, trim the ends and reshape the stuffing by hand.
The completed figure should sit independently and measure approximately 14–16 cm when made with DK cotton and a 2.75 mm hook.
7 Technical Tips for a Cleaner Amigurumi Finish
- Control stitch-marker drift. Continuous spiral rounds can shift the apparent starting point sideways. Move the marker after every round and recount all 36 stitches whenever the head is on its plateau.
- Avoid an understuffed head. Too little filling allows the face to collapse around the eyes. Fill until the head holds its shape, but stop if the white stitches begin opening enough to expose stuffing.
- Use invisible decreases. Standard decreases can produce visible gaps in smooth white cotton. Work the decrease through the front loops of the next two stitches to reduce this effect.
- Place safety eyes before the opening becomes too small. Eye backs cannot be fitted after the head is nearly closed. Test the selected 6 mm eyes while at least 24 stitches remain around the opening.
- Keep yarn thickness consistent. A thicker yellow yarn can make the torso disproportionately wide compared with the white head. Use the same DK yarn line for the major white and yellow sections.
- Pin both legs before sewing. Attaching one foot permanently before positioning the other can produce a leaning figure. Keep the lowest points of the two feet within roughly 3 mm of the same horizontal line.
- Do not trim assembly tails too short. Short buried ends can work back through a firmly stuffed surface. Weave each assembly tail through at least 2 cm of dense crochet, reverse direction once, then trim.
Final Checks
Check the face before cutting the final black yarn: eye height, nose width and whisker angles have more visual impact here than an extra round in the torso. After assembly, photograph the figure directly from the front and compare the two ears, feet and eye positions on a grid. Small alignment differences become easier to identify in a flat image.
Record the finished height, hook size and actual yarn consumption before starting another version. Those measurements make it possible to reproduce the same scale or intentionally resize the Hello Kitty-inspired amigurumi crochet pattern.
Save the finished project to Pinterest or share the yellow version on Instagram with #YellowBowCatAmigurumi. Did you keep the bow completely yellow like the photographed figure, or use a contrasting center wrap?









