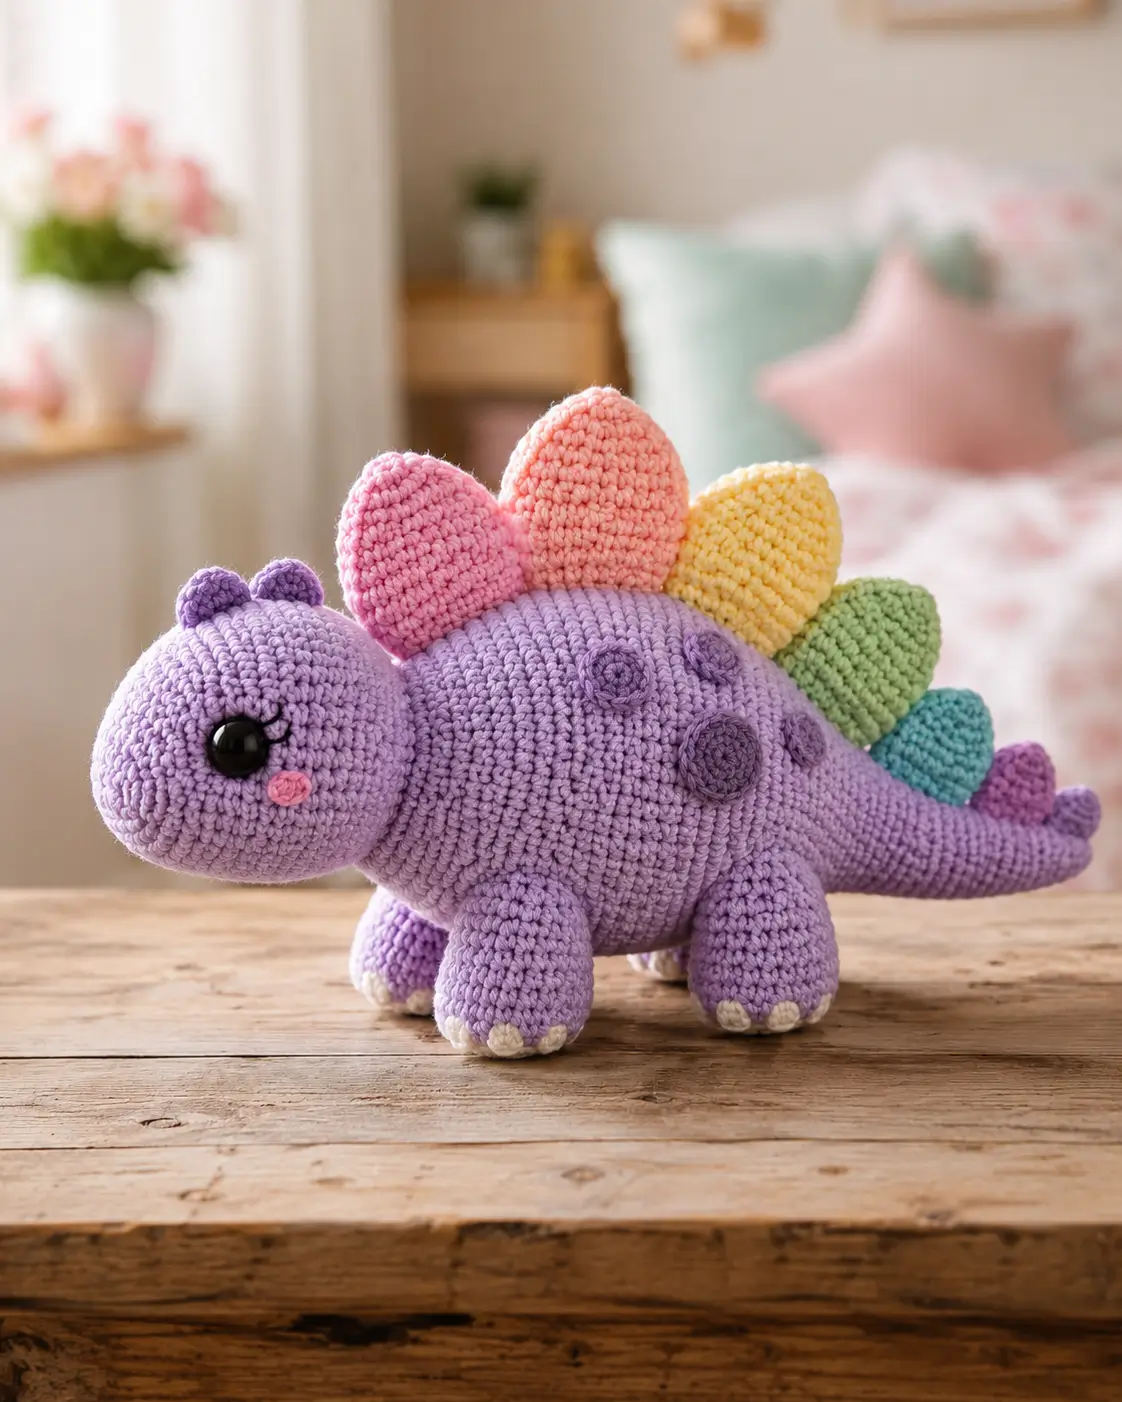
A stegosaurus looks wrong the moment the plates shrink or drift off the spine. This stegosaurus amigurumi crochet pattern fixes that first, then builds a rounded lavender body in DK cotton with a 4 mm hook, 10 mm eyes, and a finished length close to published 26–27 cm examples. It suits an intermediate maker and works well as nursery decor or a shelf plush.
The Design: What Makes Stegosaurus Different
A stegosaurus plush depends on silhouette more than surface detail. The back plates must read as a rising line from neck to hip, not a row of equal tabs. That is why this version uses six separate stuffed plates in graduated sizes rather than one strip. Published patterns often split between tiny quick-make dinos and no-sew pocket versions, but a larger crochet dinosaur plush needs more control over height and spacing.
The second structural choice is a heavy oval body with a narrower head. Real stegosaurus-inspired amigurumi reads better when the belly stays low and the tail thins late, not early. Otherwise the plush tips backward. A third choice is separate cheek patches and side spots, because a rainbow stegosaurus amigurumi can lose facial focus once the plates become the loudest element. One common mistake is placing the eyes too high and too far forward, which makes the muzzle disappear under the forehead curve. Published eye sizes around 8–10 mm support this scale.
Project Info at a Glance
| Skill Level | Time | Finished Size | Hook | Best For |
|---|---|---|---|---|
| Intermediate | 6–8 hours | 26 cm long / 14–15 cm tall | 4.0 mm | Shelf plush, nursery decor, gift make |
Project dimensions and materials align with current stegosaurus listings that use DK or worsted yarn and a 4.0 mm hook for a medium display plush.
Materials and Tools
Yarn
- Lavender purple — DK cotton — 56 m main yarn target — Paintbox Yarns Cotton DK or similar
- Pink — DK cotton — small amount — for plate 1 and cheek patches
- Coral — DK cotton — small amount — for plate 2
- Yellow — DK cotton — small amount — for plate 3
- Green — DK cotton — small amount — for plate 4
- Teal — DK cotton — small amount — for plate 5
- Deep purple — DK cotton — small amount — for plate 6 and side spots
- Cream — DK cotton — scrap amount — for claws
- Black embroidery thread — scrap amount — for lashes or mouth detail
Published stegosaurus patterns commonly call for DK cotton, or worsted plus lighter contrast yarn for the plates. Accent usage is often listed between about 22 m and 43 m total.
Tools
- Hook 4.0 mm
- 10 mm safety eyes
- Polyester stuffing
- Tapestry needle
- Stitch markers
- Scissors
These specs match the current medium-size pattern range, where 4 mm hooks and 8–10 mm eyes are common.
Abbreviations
MR / sc / inc / dec / sl st / ch / BLO / FO
Use invisible decrease for all closing rounds. It reduces cornering on the muzzle and belly seam compared with a standard front-to-back decrease.
Pattern — Step by Step
Continuous spiral unless noted.
Head (Make 1)
Yarn: lavender DK cotton — Source: verified project specs
R1: 6 sc in MR (6)
R2: inc x6 (12)
R3: (sc, inc) x6 (18)
R4: (2 sc, inc) x6 (24)
R5: (3 sc, inc) x6 (30)
R6: (4 sc, inc) x6 (36)
R7–R12: sc around (36)
R13: (4 sc, dec) x6 (30)
R14: sc around (30)
R15: (3 sc, dec) x6 (24)
R16: sc around (24)
Insert 10 mm eyes between R11 and R12, spaced 8 stitches apart. Add embroidered lashes now if used.
R17: (2 sc, dec) x6 (18)
Stuff firmly, with extra fill in the muzzle.
R18: (sc, dec) x6 (12)
R19: dec x6 (6)
Fasten off. Leave a 25 cm tail.
Body and Tail (Make 1)
Yarn: lavender DK cotton — Source: verified project specs
R1: 6 sc in MR (6)
R2: inc x6 (12)
R3: (sc, inc) x6 (18)
R4: (2 sc, inc) x6 (24)
R5: (3 sc, inc) x6 (30)
R6: (4 sc, inc) x6 (36)
R7: (5 sc, inc) x6 (42)
R8–R14: sc around (42)
R15: (5 sc, dec) x6 (36)
R16–R18: sc around (36)
R19: (4 sc, dec) x6 (30)
R20–R21: sc around (30)
R22: (3 sc, dec) x6 (24)
R23–R24: sc around (24)
R25: (2 sc, dec) x6 (18)
R26–R28: sc around (18)
R29: (sc, dec) x6 (12)
R30–R31: sc around (12)
R32: dec x6 (6)
Stuff the belly and hips firm. Keep the last 8 cm of tail lightly stuffed so it tapers instead of bulging.
Fasten off. Leave a 30 cm tail.
Front Legs (Make 2)
Yarn: cream + lavender DK cotton — Source: verified project specs
With cream:
R1: 6 sc in MR (6)
R2: inc x6 (12)
R3: BLO sc around (12)
Change to lavender:
R4–R7: sc around (12)
R8: (2 sc, dec) x3 (9)
R9–R10: sc around (9)
Stuff the foot firmly and the upper leg lightly.
Fasten off. Leave a 20 cm tail.
Back Legs (Make 2)
Yarn: cream + lavender DK cotton — Source: verified project specs
With cream:
R1: 6 sc in MR (6)
R2: inc x6 (12)
R3: BLO sc around (12)
Change to lavender:
R4–R8: sc around (12)
R9: (2 sc, dec) x3 (9)
R10–R11: sc around (9)
Back legs sit slightly fuller than the front. Add one pinch more stuffing to each rear foot.
Fasten off. Leave a 20 cm tail.
Head Nubs (Make 2)
Yarn: lavender DK cotton — Source: standard amigurumi math based on project yarn
R1: 6 sc in MR (6)
R2: sc around (6)
Fasten off. Leave a 12 cm tail.
Back Plates A — Largest (Make 2)
Yarn: pink and coral DK cotton — Source: plate construction supported by separate spike/plate handling in current stegosaurus patterns
R1: 6 sc in MR (6)
R2: inc x6 (12)
R3: (sc, inc) x6 (18)
R4–R5: sc around (18)
R6: (sc, dec) x6 (12)
R7: sc around (12)
R8: dec x6 (6)
Flatten lightly after stuffing. Make one in pink and one in coral.
Fasten off. Leave a 15 cm tail.
Back Plates B — Medium (Make 2)
Yarn: yellow and green DK cotton — Source: standard amigurumi math plus verified plate-focused constructions
R1: 6 sc in MR (6)
R2: inc x6 (12)
R3: (sc, inc) x6 (18)
R4: sc around (18)
R5: (sc, dec) x6 (12)
R6: sc around (12)
R7: dec x6 (6)
Flatten lightly after stuffing.
Fasten off. Leave a 15 cm tail.
Back Plates C — Small (Make 2)
Yarn: teal and deep purple DK cotton — Source: standard amigurumi math plus verified plate-focused constructions
R1: 6 sc in MR (6)
R2: inc x6 (12)
R3: sc around (12)
R4: (sc, dec) x3 (9)
R5: sc around (9)
R6: dec x3 (6)
Flatten only. Do not overstuff the tail-end plate pieces.
Fasten off. Leave a 12 cm tail.
Side Spots (Make 3)
Yarn: deep purple DK cotton — Source: image-based design choice + standard amigurumi math
Large spot:
R1: 6 sc in MR (6)
R2: inc x6 (12)
R3: sc around (12)
Fasten off. Leave 12 cm tail.
Medium spot:
R1: 6 sc in MR (6)
R2: inc x6 (12)
Fasten off. Leave 12 cm tail.
Small spot:
R1: 6 sc in MR (6)
Fasten off. Leave 12 cm tail.
Cheek Patches (Make 2)
Yarn: pink DK cotton — Source: image-based design choice + standard amigurumi math
R1: 6 sc in MR (6)
R2: inc x6 (12)
Fasten off. Leave a 12 cm tail.
Claw Caps (Optional Embroidery)
Yarn: cream DK cotton — Source: image detail
Embroider three small claws on each foot using 1 straight stitch per claw. Keep each stitch about 4 mm long.
Assembly
- Sew the head to the front third of the body, angling the muzzle slightly downward. The neck seam should span about 18 stitches on the body.
- Attach the front legs directly under the head-body join, spaced 8 stitches apart.
- Attach the back legs 10 stitches behind the front pair, aligned so the body sits level on a flat surface.
- Sew the two head nubs to the crown, one round behind the eye line and 4 stitches apart.
- Place the cheek patches below the eyes, slightly toward the muzzle. Keep them small; each patch should sit clear of the mouth embroidery.
- Sew the large side spot at mid-body, the medium spot just forward of it, and the small spot near the neck.
- Pin the six plates along the spine before sewing. Start with the tallest pair behind the head, then step down in height toward the tail.
- Stitch each plate through the flattened base only. Keep 1–2 stitches of body space between plates so the rainbow line reads as separate elements.
- Embroider the mouth and any lash detail after the plates are fixed. That keeps the face aligned with the final head angle.
- Add the cream claw embroidery and shape the body by hand so the belly sits flat.
The completed plush should stand as a low, oval stegosaurus with the plate line rising highest over the shoulders.
7 Technical Tips
- Mark the top spine line before sewing plates. A drifting plate row is the fastest way to lose the stegosaurus profile, especially on a rounded 42-stitch body.
- Keep the body firmer than the tail. If the tail is packed as tightly as the belly, the plush lifts at the rear and the front feet lose contact with the surface.
- Use invisible decreases on the head. Standard decreases leave ridges that show on smooth cotton, and those ridges catch light across the muzzle.
- Install eyes before the last two decrease rounds. On this head shape, waiting past Round 17 makes washer placement awkward and can distort the eye spacing.
- Flatten each plate before sewing. Overstuffed plates roll sideways, while underfilled plates collapse into the back instead of standing upright.
- Pin all four legs and test the stance on a table. Even a 3 mm difference in front-leg height will tilt the head and make the cheek patches look uneven.
- Weave tails across stitch direction changes. On the belly and plate bases, a short straight weave can pull free after handling, so change direction at least twice over 4–5 cm.
Conclusion
The plate line decides the result before the face does. That is the main lesson in any stegosaurus amigurumi crochet pattern, and it matters even more on a rainbow build like this one. Follow the spacing map, keep the belly dense, and attach the plates only after the legs are fixed and the plush stands flat. Next, photograph your finished stegosaurus from the side so the silhouette is visible, then post it to Pinterest and Instagram with #RainbowStegosaurusPattern. One question remains useful for revisions: did your tallest plate sit closer to the neck or the center back?









