Introduction
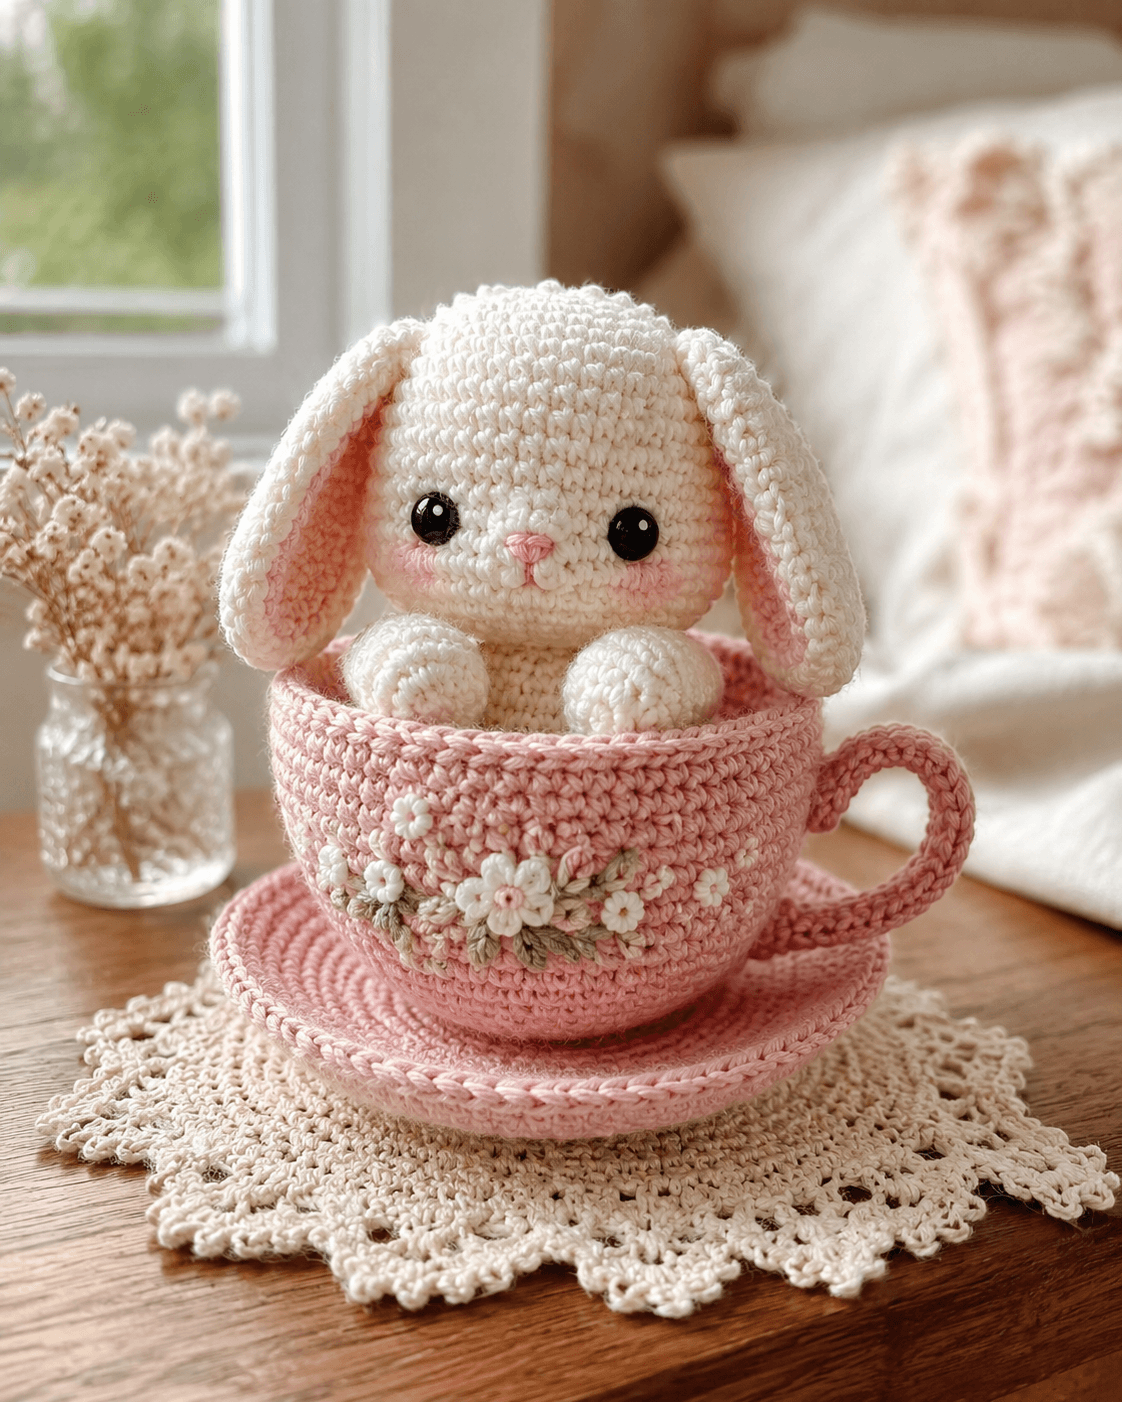
Long ears change the center of gravity before the first decrease round. This bunny amigurumi crochet pattern is built for DK yarn, a 2.5–3.0 mm hook, and a finished bunny in the small display range, with a crocheted teacup added for staging. You make it when a shelf piece needs a stable face-forward pose instead of a full standing rabbit.
The Design: What Makes This Bunny Different
The photographed bunny works because the head is visually dominant, the body is compressed, and the ears drop from a low attachment point rather than standing upright. You need that sequence. Raise the body too much and the rabbit stops looking like it is peeking from a cup; shorten the ears too far and the silhouette becomes generic. A second structural choice is the forward paw placement. Those paws sit high, close, and symmetrical, so the face reads first and the cup remains secondary. The third choice is cheek treatment: small flat patches or blush placement widen the muzzle area without adding a true snout piece. Many makers miss proportion here and overstuff the lower head, which pushes the eyes too wide. That is the fastest way to lose the soft small bunny amigurumi look associated with a floppy ear bunny crochet pattern.
Project Info at a Glance
| Skill Level | Time | Finished Size | Hook | Best For |
|---|---|---|---|---|
| Easy–Intermediate | 4–6 hours | Bunny about 10–12 cm seated; teacup display larger | 2.5–3.0 mm | shelf decor, nursery styling, tea-party gift set |
Materials and Tools
Yarn
- Cream/white — DK cotton or cotton blend — about 15–20 g for bunny — Ricorumi Cotton DK / Yarn and Colors Must-Have style yarn
- Soft pink — DK cotton — about 20–25 g for teacup and saucer — same yarn line for even tension
- Light pink — small amount — inner ears, nose, cheek detail
- White — small amount — flower embroidery or appliqué
- Muted sage or taupe — small amount — floral stem embroidery
Tools
- Hook 2.5 mm or 3.0 mm
- 8 mm safety eyes
- Stuffing
- Yarn needle
- Stitch markers
- Fine embroidery needle
- Optional fabric blush or pastel for cheeks
Verified market references for small bunny builds commonly pair DK yarn with a 2.5–3.0 mm hook and 8 mm eyes.
Abbreviations
MR / sc / inc / dec / sl st / ch / BLO / FLO
Invisible decrease joins the front loops of two stitches first, which keeps the outside line cleaner than a standard two-stitch decrease.
Pattern — Step by Step
Continuous spiral unless noted. The following photo-match pattern is an original build drafted from the image, using standard amigurumi math and size ratios anchored to verified small bunny references above.
Head (Make 1)
Yarn: cream — reference architecture based on verified bunny head builds.
R1: 6 sc in MR (6)
R2: inc x6 (12)
R3: (sc, inc) x6 (18)
R4: (2 sc, inc) x6 (24)
R5: (3 sc, inc) x6 (30)
R6: (4 sc, inc) x6 (36)
R7–12: sc around (36)
R13: (4 sc, dec) x6 (30)
R14: (3 sc, dec) x6 (24)
Place 8 mm safety eyes between R9 and R10 with 7 visible stitches between them. Embroider the nose centered one round below.
R15: (2 sc, dec) x6 (18)
Start stuffing firmly, but do not hard-pack the muzzle.
R16: (sc, dec) x6 (12)
R17: dec x6 (6)
Fasten off. Close opening. Leave a 20 cm tail.
Body (Make 1)
Yarn: cream — original compact body sized for a cup-seated pose, using standard amigurumi math.
R1: 6 sc in MR (6)
R2: inc x6 (12)
R3: (sc, inc) x6 (18)
R4: (2 sc, inc) x6 (24)
R5–7: sc around (24)
R8: (2 sc, dec) x6 (18)
R9: sc around (18)
R10: (sc, dec) x6 (12)
Stuff the lower half only. Keep the top edge slightly compressible for sewing.
R11: sc around (12)
Fasten off. Leave a 25 cm tail.
Front Paws (Make 2)
Yarn: cream — shaped to sit above the cup rim.
R1: 6 sc in MR (6)
R2: inc x6 (12)
R3–4: sc around (12)
R5: (sc, dec) x4 (8)
R6–7: sc around (8)
Light stuffing only in the lower half.
Fasten off. Leave a 20 cm tail.
Back Legs (Make 2)
Yarn: cream — mostly hidden inside cup, but useful for body support.
R1: 6 sc in MR (6)
R2: inc x6 (12)
R3: sc around (12)
R4: (sc, dec) x4 (8)
R5–6: sc around (8)
Fasten off. Leave a 20 cm tail.
Floppy Ears (Make 2)
Yarn: outer cream, inner pink optional overlay — proportions adapted from verified floppy-ear bunny references.
R1: 6 sc in MR (6)
R2: inc x6 (12)
R3: (sc, inc) x6 (18)
R4: (2 sc, inc) x6 (24)
R5–8: sc around (24)
R9: (2 sc, dec) x6 (18)
R10–13: sc around (18)
R14: (sc, dec) x6 (12)
R15–16: sc around (12)
Flatten. Sc through both layers across 6 sts to close.
Fasten off. Leave a 25 cm tail.
Inner Ear Panels (Make 2)
Yarn: pale pink — flat appliqué to match the photo.
Ch 7.
Row 1: starting in second ch from hook, sc 5, 3 sc in last ch; work on opposite side of chain: sc 4, inc in last st (14)
Row 2: inc, sc 4, 3 inc, sc 4, 2 inc (20)
Row 3: sc around (20)
Fasten off. Leave a 20 cm tail. Sew onto ears.
Cheek Patches (Make 2)
Yarn: blush pink — flat circles, then lightly brushed or embroidered over if preferred.
R1: 6 sc in MR (6)
R2: inc x6 (12)
Fasten off. Leave a 12 cm tail.
Tail (Make 1)
Yarn: cream.
R1: 6 sc in MR (6)
R2: inc x6 (12)
R3: sc around (12)
R4: dec x6 (6)
Stuff lightly before final decreases.
Fasten off. Leave a 15 cm tail.
Teacup Base (Make 1)
Yarn: soft pink — original accessory drafted to match photo.
R1: 6 sc in MR (6)
R2: inc x6 (12)
R3: (sc, inc) x6 (18)
R4: (2 sc, inc) x6 (24)
R5: (3 sc, inc) x6 (30)
R6: (4 sc, inc) x6 (36)
R7: BLO sc around (36)
R8–13: sc around (36)
R14: (4 sc, inc) x6 (42)
R15: sc around (42)
Fasten off. Weave tail inside.
Teacup Rim (Make 1)
Join pink yarn to top edge.
R1: FLO sc around (36)
R2: sl st around loosely (36)
Fasten off.
Teacup Handle (Make 1)
Yarn: pink.
Ch 18.
Row 1: starting in second ch, sc 17
Row 2: ch 1, turn, sc 17
Row 3: ch 1, turn, sc 17
Fasten off. Curve and sew both ends to cup side.
Saucer (Make 1)
Yarn: pink.
R1: 6 sc in MR (6)
R2: inc x6 (12)
R3: (sc, inc) x6 (18)
R4: (2 sc, inc) x6 (24)
R5: (3 sc, inc) x6 (30)
R6: (4 sc, inc) x6 (36)
R7: (5 sc, inc) x6 (42)
R8: BLO sc around (42)
R9: sc around (42)
R10: (6 sc, inc) x6 (48)
R11: sc around (48)
Fasten off.
Flower Appliqués (Make 3–5)
Yarn: white.
In MR: *(ch 2, 2 dc, ch 2, sl st in MR)* x5.
Pull ring closed.
Fasten off. Sew to cup front. Add stem stitches in sage.
Assembly
- Sew the head to the body with the face centered and the chin slightly forward.
- Attach the ears low on the head, roughly aligned with the eye line or one round below it.
- Sew the inner ear panels to the front of each ear before final ear placement if not already attached.
- Add the nose and mouth embroidery, then place cheek patches low and slightly outward from the nose.
- Sew the front paws high on the body so they clear the teacup rim.
- Attach the back legs low and slightly forward to help the seated angle.
- Sew the tail to the back of the body, keeping it small so it does not force the bunny forward.
- Attach the teacup handle to one side of the cup and check that the cup sits level on the saucer.
- Sew or embroider the flowers on the cup front, then place the bunny inside and tack the body to the cup base.
- Set the cup onto the saucer with a few hidden stitches if the display will stay assembled.
The finished piece should sit upright with the face visible above the rim and the paws resting forward.
7 Technical Tips
- Mark the increase rounds on the head. Losing one increase before the 36-stitch plateau shifts the eye spacing and narrows the forehead.
- Keep head stuffing firmer than body stuffing. A soft head collapses under ear weight, while an overfilled body rides too high in the cup.
- Use invisible decreases on visible shaping rounds. Standard decreases leave a dotted ridge that reads clearly on pale cotton.
- Install eyes before the final third of head closure. On this scale, adding washers after R15 is awkward and can distort the cheek line.
- Pin ears before sewing and check drop length. The ear tips should fall to about jaw level or slightly lower for this silhouette.
- Tack the bunny into the teacup if it is a display piece. Loose placement lets the body rotate and turns the face away from center.
- Weave floral tails sideways through cup rounds. Pulling them vertically can pucker the cup wall and break the smooth bowl shape.
Conclusion
This bunny amigurumi crochet pattern works because the shaping stays controlled: a broad head, short body, long ears, and a cup that frames the face instead of hiding it. Keep the stitch counts exact, keep the paws high, and keep the body lightly stuffed before fixing it into the teacup. Publish the finished piece as a shelf display, then share one front view and one side view to Pinterest and Instagram so the cup depth reads clearly. Use #BunnyInATeacupPattern. For this bunny specifically, did you attach the ears at eye level, or did you drop them one round lower for a softer fold?









