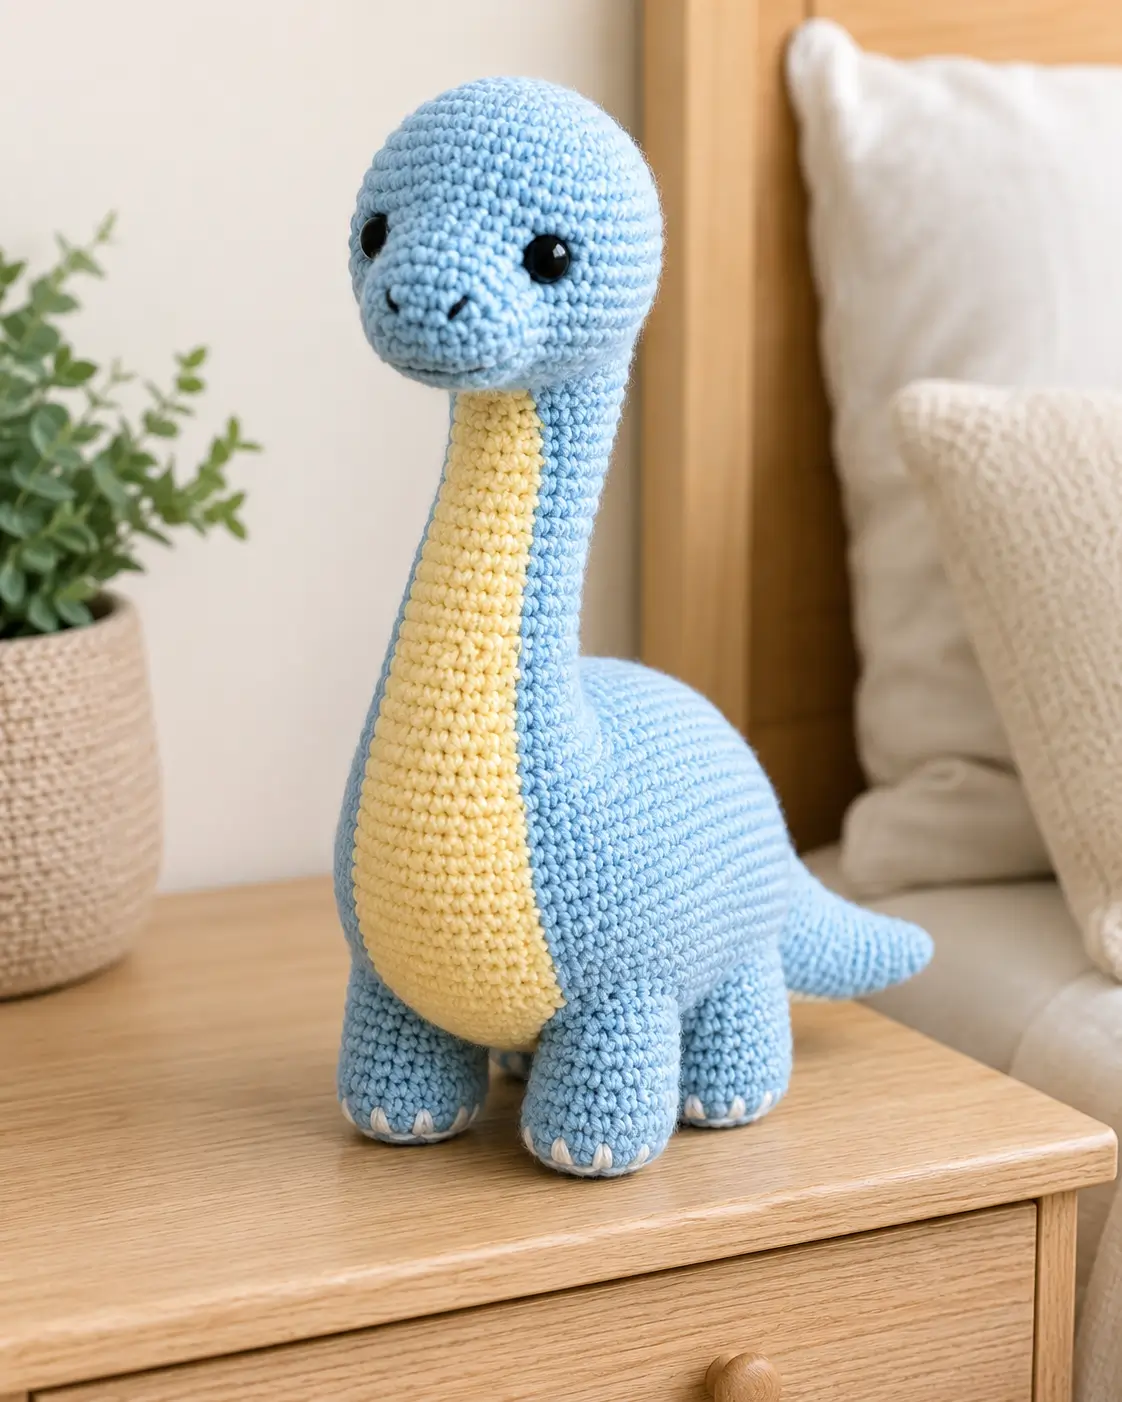
A brontosaurus only looks stable until its neck outweighs its feet. This brontosaurus amigurumi crochet pattern solves that with worsted yarn, a 3.75 mm hook, a 24 cm target height, and an intermediate build that favors shaping over ornament. Make it as nursery decor, shelf display, or a sturdy dinosaur gift with a broad base and low tail.
The Design: What Makes Brontosaurus Different
A long-neck dinosaur is mostly a balance problem. The neck has to read tall without pulling the head forward, so the body needs more width than a generic four-legged amigurumi. That is why this version uses a medium 36-stitch plateau for the torso rather than a narrow tube. The pale belly panel matters too. It visually lengthens the neck and separates front anatomy from side shaping, which keeps the dinosaur from looking like a plain snake-neck plush. A third choice is the short, low tail. On a long neck dinosaur crochet pattern, a long whip tail can flatten the silhouette; this photo shows a compact taper instead. The common mistake is placing the eyes too low or too late, which makes the muzzle read turtle-like rather than sauropod. In many published dinosaur patterns, head direction and eye timing are recurring trouble points.
Project Info at a Glance
| Skill Level | Time | Finished Size | Hook | Best For |
|---|---|---|---|---|
| Intermediate | 6–8 hours | 24 cm tall | 3.75 mm | Nursery decor, shelf plush, dinosaur gift |
Published brontosaurus patterns and listings commonly place similar projects in the beginner-to-intermediate range, with worsted yarn and 3.5–4.0 mm hooks.
Materials and Tools
Yarn
- Pastel blue — worsted — 80 g — Paintbox Cotton Aran or similar cotton/acrylic blend
- Pale yellow — worsted — 12 g — matching brand for the belly panel
- White — worsted — small scraps — claw embroidery
- Black — embroidery floss or fine yarn — small scrap — nostrils
Tools
- Hook 3.75 mm
- 12 mm safety eyes
- Polyester stuffing
- Yarn needle
- Stitch markers
- Pins or clips for placement
These material choices align with published brontosaurus patterns that use medium/worsted yarn, 3.5–4.0 mm hooks, and 12 mm safety eyes at this size range.
Abbreviations
MR / sc / inc / dec / sl st / ch / BLO / FO
Use invisible decrease by working through the front loops of the next two stitches; that keeps the head and neck shaping cleaner than a standard sc2tog.
Pattern — Step by Step
Continuous spiral unless noted.
Head (Make 1)
Yarn: pastel blue — Source: standard amigurumi math built to a medium 36-st body and photo proportions
R1: 6 sc in MR (6)
R2: inc x6 (12)
R3: (sc, inc) x6 (18)
R4: (2 sc, inc) x6 (24)
R5: (3 sc, inc) x6 (30)
R6: (4 sc, inc) x6 (36)
R7–R12: sc around (36)
R13: 12 sc, dec, 4 sc, dec, 16 sc (34)
R14: 11 sc, dec, 4 sc, dec, 15 sc (32)
R15: 10 sc, dec, 4 sc, dec, 14 sc (30)
R16: sc around (30)
Place 12 mm safety eyes between R11 and R12, with 9 stitches between them. Add firm stuffing to the muzzle first.
R17: (3 sc, dec) x6 (24)
R18: (2 sc, dec) x6 (18)
R19: (sc, dec) x6 (12)
R20: dec x6 (6)
Embroider two small nostrils centered on the muzzle between R12 and R13.
Fasten off. Leave a 20 cm tail.
Neck (Make 1)
Yarn: pastel blue — Source: standard amigurumi math
R1: 6 sc in MR (6)
R2: (sc, inc) x3 (9)
R3: (2 sc, inc) x3 (12)
R4–R18: sc around (12)
R19: (3 sc, inc) x3 (15)
R20: sc around (15)
R21: (4 sc, inc) x3 (18)
R22: sc around (18)
Stuff lightly through R12, then medium-firm through the final rounds so the neck stays upright without bowing.
Fasten off. Leave a 25 cm tail.
Body (Make 1)
Yarn: pastel blue — Source: standard amigurumi math; medium plateau chosen to match upright photo silhouette and published dinosaur body ranges that commonly peak around 30 sts in smaller versions.
R1: 6 sc in MR (6)
R2: inc x6 (12)
R3: (sc, inc) x6 (18)
R4: (2 sc, inc) x6 (24)
R5: (3 sc, inc) x6 (30)
R6: (4 sc, inc) x6 (36)
R7–R12: sc around (36)
R13: (4 sc, dec) x6 (30)
R14: sc around (30)
R15: (3 sc, dec) x6 (24)
R16: (2 sc, dec) x6 (18)
Begin stuffing firmly at the lower belly. Add a little more stuffing toward the front than the back so the dinosaur sits upright.
R17: (sc, dec) x6 (12)
R18: dec x6 (6)
Fasten off. Leave a 20 cm tail.
Belly Panel (Make 1)
Yarn: pale yellow — Source: custom shaping from photo anatomy
Ch 7.
Row 1: Starting in 2nd ch from hook, 6 sc, ch 1, turn (6)
Row 2: inc, 4 sc, inc, ch 1, turn (8)
Row 3: 8 sc, ch 1, turn (8)
Row 4: inc, 6 sc, inc, ch 1, turn (10)
Row 5: 10 sc, ch 1, turn (10)
Row 6: inc, 8 sc, inc, ch 1, turn (12)
Row 7: 12 sc, ch 1, turn (12)
Row 8: inc, 10 sc, inc, ch 1, turn (14)
Row 9–18: 14 sc, ch 1, turn (14)
Row 19: dec, 10 sc, dec, ch 1, turn (12)
Row 20: 12 sc, ch 1, turn (12)
Row 21: dec, 8 sc, dec, ch 1, turn (10)
Row 22: 10 sc, ch 1, turn (10)
Row 23: dec, 6 sc, dec, ch 1, turn (8)
Row 24: 8 sc, ch 1, turn (8)
Row 25: dec, 4 sc, dec (6)
Fasten off. Leave a 35 cm tail.
Front Legs (Make 2)
Yarn: pastel blue — Source: standard amigurumi math
R1: 6 sc in MR (6)
R2: inc x6 (12)
R3–R8: sc around (12)
R9: (4 sc, dec) x2 (10)
R10–R11: sc around (10)
Stuff firmly only in the foot and lower half. Keep the top flatter for easier sewing.
Fasten off. Leave a 20 cm tail.
Back Legs (Make 2)
Yarn: pastel blue — Source: standard amigurumi math
R1: 6 sc in MR (6)
R2: inc x6 (12)
R3: (sc, inc) x6 (18)
R4–R6: sc around (18)
R7: (4 sc, dec) x3 (15)
R8: sc around (15)
R9: (3 sc, dec) x3 (12)
R10–R11: sc around (12)
The back legs are slightly larger than the front pair because the photo reads rear-weighted at table level.
Fasten off. Leave a 22 cm tail.
Ears (Make 2)
Yarn: pastel blue — Source: custom micro-shaping from photo; ears are minimal
R1: 4 sc in MR (4)
R2: (sc, inc) x2 (6)
R3: sc around (6)
Flatten.
Fasten off. Leave a 12 cm tail.
Tail (Make 1)
Yarn: pastel blue — Source: custom taper informed by published brontosaurus tail growth patterns that widen gradually instead of jumping by sixes.
R1: 6 sc in MR (6)
R2: sc around (6)
R3: 2 sc, inc, 3 sc (7)
R4: sc around (7)
R5: 3 sc, inc, 3 sc (8)
R6: sc around (8)
R7: 4 sc, inc, 3 sc (9)
R8: sc around (9)
R9: 5 sc, inc, 3 sc (10)
R10: sc around (10)
R11: 6 sc, inc, 3 sc (11)
R12–R13: sc around (11)
Stuff lightly. A dense tail will push the body forward.
Fasten off. Leave a 20 cm tail.
Snout Bump (Make 1)
Yarn: pastel blue — Source: custom shaping from photo muzzle
R1: 6 sc in MR (6)
R2: inc x6 (12)
R3: sc around (12)
R4: (4 sc, dec) x2 (10)
Flatten lightly.
Fasten off. Leave a 15 cm tail.
Cheek Patches (Make 2)
Yarn: pale blue or pale yellow — Source: standard flat circle; optional soft sculpt detail
R1: 6 sc in MR (6)
R2: inc x6 (12)
Fasten off. Leave a 12 cm tail.
Toe Claws (Make 8)
Yarn: white — Source: simple embroidery detail from photo
Cut eight short strands about 8 cm each.
These are embroidered after assembly as straight satin stitches.
Assembly
- Sew the neck to the center top front of the body, spanning about 12 stitches. Pack extra stuffing into the join before closing.
- Sew the head to the top of the neck with the muzzle angled slightly downward, not level.
- Pin the belly panel from the underside of the chin down the front neck and onto the belly, then sew evenly on both sides.
- Attach the snout bump to the lower front of the head, centered below the eyes.
- Sew the ears on the top sides of the head around R5–R6, small and low-profile.
- Attach the front legs directly under the front body, leaving a gap of about 4 stitches between them.
- Attach the back legs under the widest rear section of the body, spaced to form a stable sitting rectangle.
- Sew the tail to the lower back so it points slightly upward and outward rather than dragging flat.
- Add the cheek patches just below and slightly behind the eyes if a softer face is wanted; omit them for a cleaner sample that matches the photo more closely.
- Embroider toe claws with white yarn on each foot and weave in every tail on the inside of the body line.
The completed dinosaur should stand on four feet with the tail acting as a visual counterweight, not a fifth leg.
7 Technical Tips
- Mark the center front before attaching the belly panel. If the yellow strip drifts even 1 stitch off-center, the whole neck will look twisted from the front.
- Stuff the neck in stages, not all at once. Overpacked upper rounds create a forward bend that pulls the head past the foot line.
- Use invisible decreases on the head and body. Standard decreases leave ridges that show clearly on smooth worsted yarn, especially along the muzzle.
- Insert safety eyes before the final head decreases. At 30 stitches, the eye backs still fit cleanly; at 18 stitches, access gets cramped and placement accuracy drops.
- Keep the front legs firmer than the tail. A soft front pair makes the chest sink, which shortens the neck visually.
- Pin all four legs and test the pose on a flat table first. Move each leg by as little as 3–4 mm until all feet touch at once.
- Weave tails back through direction changes, not just straight lines. On a seated dinosaur, the neck seam and tail seam take load every time the toy is lifted.
Conclusion
This brontosaurus amigurumi crochet pattern works because the silhouette is managed in three places: neck firmness, front-belly alignment, and rear leg spacing. That is the whole structure. Start with the body and legs first, check the stance on a hard surface, then attach the neck only after the base sits flat. When you publish your version, share one front view for Pinterest and one side profile for Instagram so the long-neck shaping reads clearly. Use the tag #BlueBrontosaurusPattern. For this dinosaur in particular, did you angle the head slightly down like the sample, or keep it level for a more alert sauropod look?









