Introduction
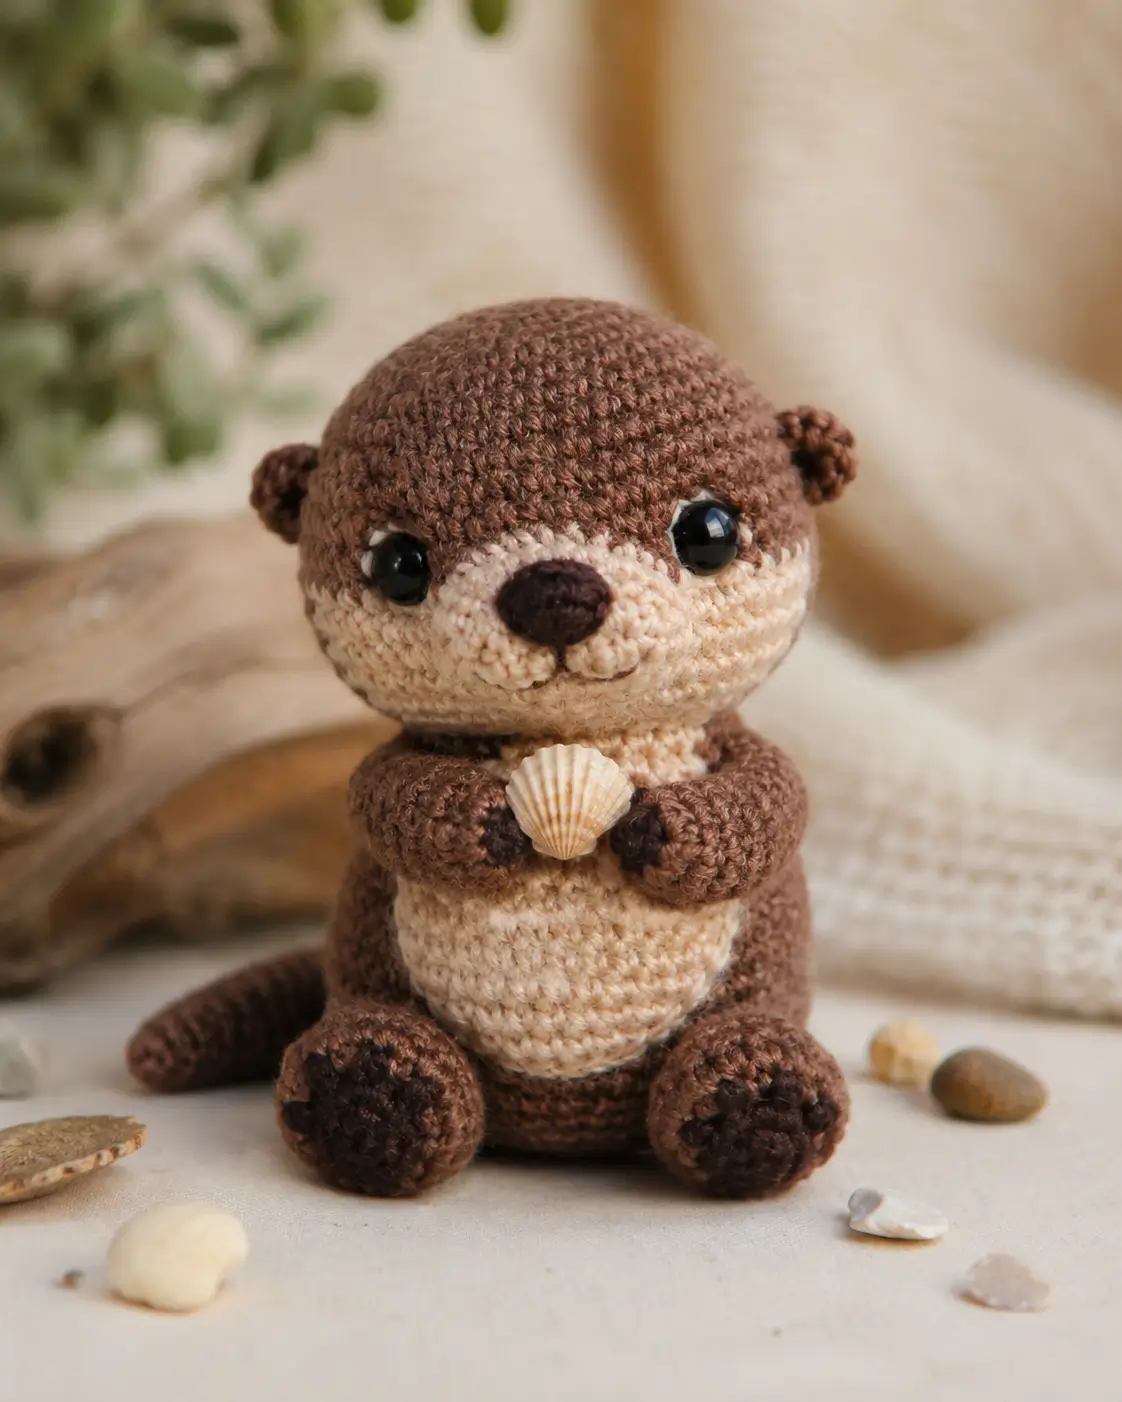
A sea otter reads wrong the moment the muzzle stops dominating the face. This sea otter amigurumi crochet pattern uses worsted yarn, a 3.5 mm hook, and a seated medium-size build that finishes near 18 cm. Skill level is easy to lower intermediate. The shell prop gives the piece a clear front-facing pose, which makes it useful for shelf display, nursery decor, or market tables.
The Design: What Makes Sea Otter Different
The first structural choice is the oversized cream muzzle. You need that broad light area to separate a sea otter from a bear, and the face loses species accuracy fast when the brown head color runs too low. The second choice is the low, centered arm placement. That keeps the shell close to the belly, which matches the reference pose and stabilizes the silhouette from the front. Third comes the tail: short, tapered, and grounded behind the body rather than flared outward. The toy then reads as seated instead of upright. A common mistake in a sea otter crochet pattern is placing the ears too large or too high, which shifts the look toward a cub. In this build, the otter amigurumi free pattern references were useful for proportion checks, but the final shaping is adjusted to match the photo more closely.
Project Info at a Glance
| Skill Level | Time | Finished Size | Hook | Best For |
|---|---|---|---|---|
| Easy–Intermediate | 4–5 hours | about 18 cm / 7 in | 3.5 mm | display plush, gift, market sample |
Materials and Tools
Yarn
- Brown — worsted — about 35–40 g — WeCrochet Comfy Worsted or similar reference
- Cream — worsted — about 15–20 g — WeCrochet Comfy Worsted or similar reference
- Dark brown — small amount — nose, paw pads, mouth detail
- Shell beige — small amount — accessory
Tools
- Hook 3.5 mm
- 12 mm safety eyes
- Stuffing
- Tapestry needle
- Stitch markers
- Small amount of embroidery thread for mouth detail
Abbreviations
MR / sc / inc / dec / sl st / ch / BLO
Use invisible decrease for all shaping rounds because it reduces the gaps that appear on dark yarn at the cheeks, crown, and tail base.
Pattern — Step by Step
Continuous spiral unless noted.
Head (Make 1)
Yarn: brown and cream
R1: 6 sc in MR (6)
R2: inc x6 (12)
R3: (sc, inc) x6 (18)
R4: (2 sc, inc) x6 (24)
R5: (3 sc, inc) x6 (30)
R6: (4 sc, inc) x6 (36)
R7–12: sc around (36)
R13: change to cream for the front 18 sts only, brown for remaining 18 sts (36)
R14–15: maintain color placement, sc around (36)
R16: (4 sc, dec) x6 (30)
R17: (3 sc, dec) x6 (24)
Insert safety eyes between R11 and R12, 7 sts apart, angled slightly outward. Stuff firmly before closing to preserve the dome.
Fasten off. Leave 25 cm tail.
Body (Make 1)
Yarn: cream lower front, brown rest
R1: 6 sc in MR (6)
R2: inc x6 (12)
R3: (sc, inc) x6 (18)
R4: (2 sc, inc) x6 (24)
R5: (3 sc, inc) x6 (30)
R6–9: sc around (30)
R10: work 12 cream sts at front, 18 brown sts at back (30)
R11–12: maintain color placement, sc around (30)
R13: (3 sc, dec) x6 (24)
R14: sc around (24)
R15: (2 sc, dec) x6 (18)
Stuff the lower body densely so the otter sits without collapsing at the front belly.
Fasten off. Leave 25 cm tail.
Front Arms (Make 2)
Yarn: brown
R1: 6 sc in MR (6)
R2: (sc, inc) x3 (9)
R3–7: sc around (9)
R8: flatten and sc through both sides across 4 sts (4)
Light stuffing only in the paw end. Do not overfill.
Fasten off. Leave 20 cm tail.
Back Legs (Make 2)
Yarn: brown with dark brown paw pad detail
R1: 6 sc in MR (6)
R2: inc x6 (12)
R3–4: sc around (12)
R5: (2 sc, dec) x3 (9)
Add a pinch of stuffing. The leg should stay slightly flat at the sewn edge.
Fasten off. Leave 20 cm tail.
Ears (Make 2)
Yarn: brown
R1: 6 sc in MR (6)
R2: sc around (6)
Flatten lightly into a half-moon before sewing.
Fasten off. Leave 15 cm tail.
Tail (Make 1)
Yarn: brown
R1: 6 sc in MR (6)
R2–3: sc around (6)
R4: (sc, inc) x3 (9)
R5–7: sc around (9)
R8: (2 sc, inc) x3 (12)
R9–11: sc around (12)
R12: (2 sc, dec) x3 (9)
Stuff the first half only. Keep the tip unstuffed so it bends behind the body.
Fasten off. Leave 22 cm tail.
Snout (Make 1)
Yarn: cream
R1: ch 5, starting in 2nd ch from hook: 3 sc, 3 sc in last ch, working on opposite side: 2 sc, inc in last st, sl st to first sc (10)
R2: ch 1, inc, 2 sc, 3 inc, 2 sc, 2 inc, sl st (16)
This piece should sit wide, not tall. Sew it low on the face.
Fasten off. Leave 20 cm tail.
Cheek Patches (Make 2)
Yarn: cream
R1: 6 sc in MR (6)
R2: inc x6 (12)
Flatten. These circles soften the lower face and widen the cream mask visually.
Fasten off. Leave 12 cm tail.
Nose Patch (Make 1)
Yarn: dark brown
R1: 6 sc in MR (6)
R2: (sc, inc) x3 (9)
R3: sc around (9)
Shape into a small oval while sewing.
Fasten off. Leave 15 cm tail.
Shell Accessory (Make 1)
Yarn: shell beige
R1: ch 7
R2: starting in 2nd ch from hook: sl st, sc, hdc, 2 dc, hdc, sc
R3: working back across the top edge with 6 surface sl sts to suggest shell ridges
Steam-free finger shaping is enough. Do not overwork the ridges.
Fasten off. Leave 18 cm tail.
Assembly
- Sew the head to the body, centering the cream face over the cream belly.
- Attach the snout to the lower half of the face, roughly spanning rounds 12–16.
- Sew the cheek patches to the lower sides of the snout so they slightly overlap its edges.
- Attach the nose patch at the center top of the snout.
- Embroider the mouth in dark brown with a short vertical line and two shallow curves.
- Sew the ears to the sides of the head, about two rounds below the crown line.
- Attach the front arms at the upper body so the paws angle inward.
- Sew the back legs to the lower front body, wide enough to support a seated pose.
- Attach the tail low on the back and angle it toward one side.
- Sew the shell between the front paws and tack each paw to the shell edge.
The piece is complete when it can sit upright with the shell centered and the muzzle facing forward.
7 Technical Tips
- Mark the first stitch of every round. Losing the round start on the color-change section shifts the cream mask off-center by one or two stitches, which is immediately visible on an otter face.
- Pack the head firmer than the body. A soft head flattens at the muzzle seam and makes the safety eyes sink inward more than about 2–3 mm.
- Use invisible decrease on brown rounds only. Standard decrease leaves small horizontal gaps that show most clearly around the crown and tail base.
- Install eyes before the final head decrease. On this scale, placing 12 mm eyes after stuffing usually distorts rounds 11–12 and widens the spacing beyond the target 7 stitches.
- Pin the arms with the shell in place before sewing. Without that check, one paw often lands 5–8 mm higher and the prop twists off the centerline.
- Leave the tail tip unstuffed. Full stuffing turns the tail into a cylinder and it will push the body forward instead of acting like a rear support.
- Weave in dark yarn tails through dark sections only. Pulling a brown tail under the cream cheek area can shadow through the stitches and dull the muzzle outline.
Conclusion
This sea otter amigurumi crochet pattern works because the face stays wide, the paws meet at center, and the tail supports the seated posture instead of competing with it. Keep the cream sections symmetrical, check eye spacing before locking the backs, and sew the shell only after both arms are pinned. That sequence solves most proportion errors. Next step: make one sample in worsted cotton, record your actual height and yarn usage, then adjust hook size only if the muzzle looks too narrow. Share the finished otter on Pinterest and Instagram with #SeaOtterShellPattern. One question remains useful here: did your shell sit flat between the paws, or did you need to cant it slightly upward?









