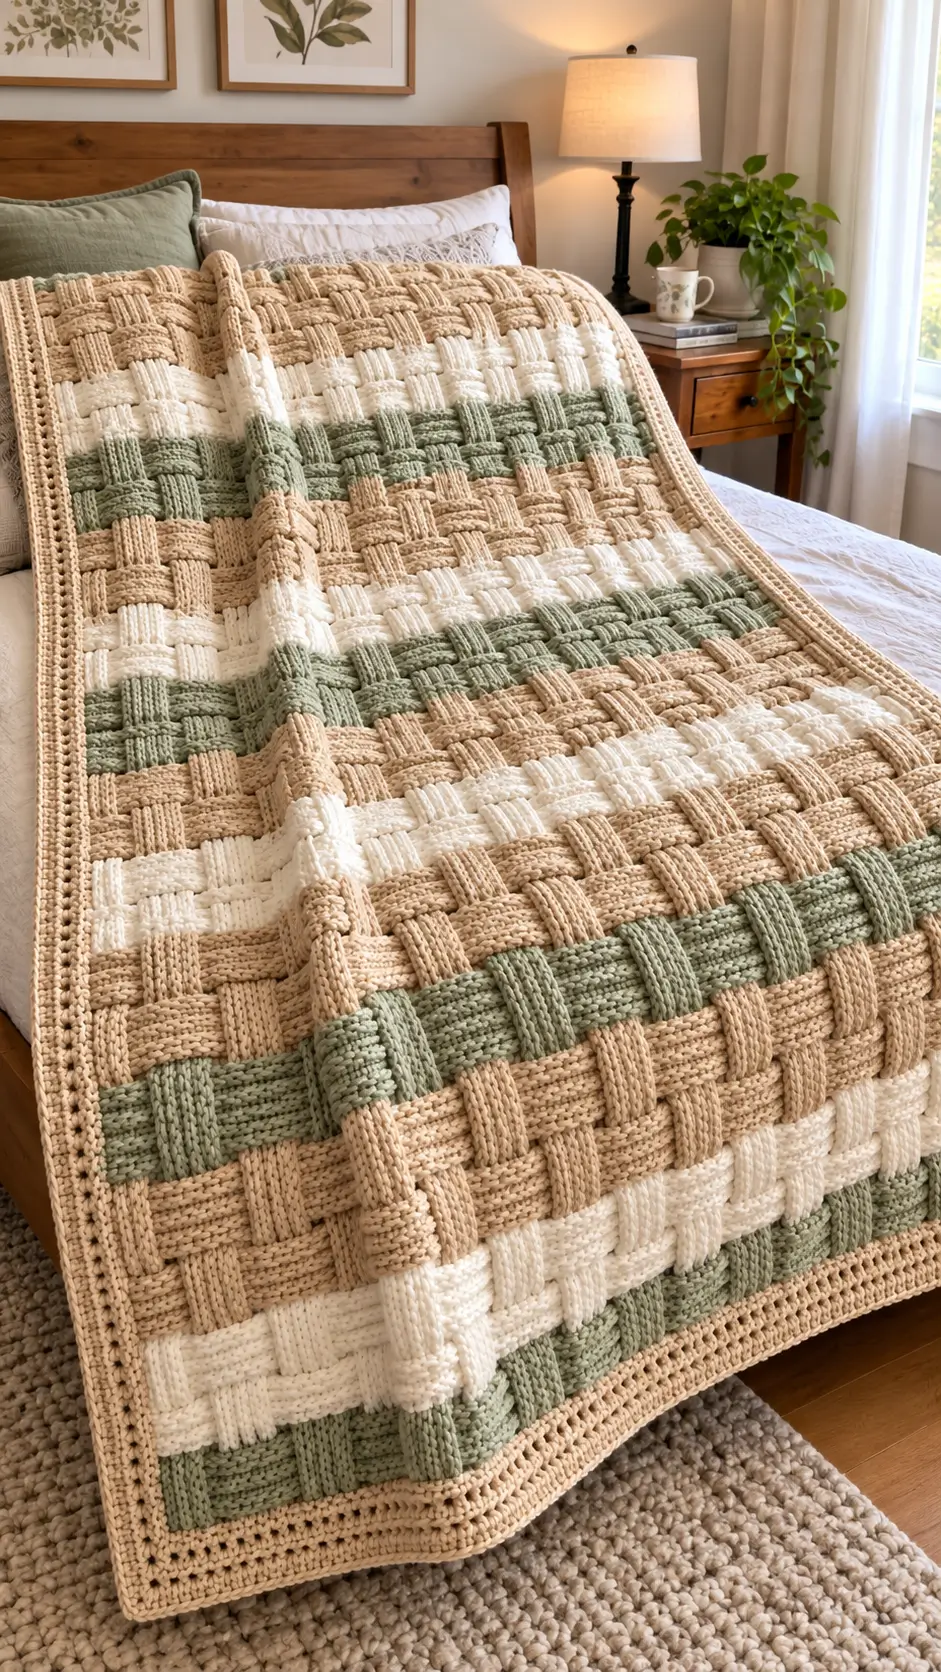
Basket-weave blocks only look convincing when every raised strip appears to pass over one neighbor and under the next. This basket weave crochet blanket pattern translates that geometry into beige, ivory, and sage post-stitch bands. It uses super-bulky yarn, a 9 mm hook, and intermediate crochet skills, with a reference size of approximately 127 × 144.5 cm. The dense construction makes it particularly practical as a substantial bed or sofa throw.
The Design: What Makes This Blanket Different
Three decisions control the look of this blanket. First, four-stitch post groups create broad raised sections rather than narrow ribbing. Front-post stitches project while back-post stitches recede, producing the woven illusion without physically interlacing separate strips.
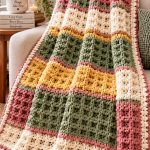
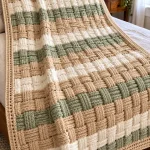
Second, the color arrangement is intentionally larger than the individual stitch repeat. Beige dominates the palette, while ivory and muted sage interrupt it in broad horizontal bands. This prevents the sage green crochet blanket from reading as a small checkerboard.
Third, the border is visually quieter than the center. It frames the heavy basket-weave texture instead of competing with it.
A common mistake in a basketweave crochet blanket is pulling BPdc stitches more tightly than FPdc stitches. The result is a narrowing rectangle and distorted blocks. Measure the blanket after several complete repeats rather than waiting until the project is half finished.
Project Info at a Glance
| Skill Level | Time | Finished Size | Hook | Best For |
|---|---|---|---|---|
| Intermediate | Multi-session project | Approx. 127 × 144.5 cm | 9 mm | Bed or sofa throw |
Finished dimensions are a reference size. Your final measurements will depend on yarn, gauge, tension, and the number of repeats worked.
Materials and Tools
Yarn
- Warm beige — Super Bulky (6) — approximately 1,200 g
- Muted sage green — Super Bulky (6) — approximately 600 g
- Ivory/cream — Super Bulky (6) — approximately 600 g
Plan for approximately 2,400 g of yarn for a substantial throw in this size range. The exact amount depends on gauge, border depth, yarn construction, and any changes to the finished dimensions.
Tools
- 9 mm crochet hook
- Yarn needle
- Locking stitch markers
- Scissors
- Flexible tape measure
Abbreviations
- ch — chain
- sc — single crochet
- dc — double crochet
- FPdc — front-post double crochet
- BPdc — back-post double crochet
- sl st — slip stitch
- st(s) — stitch(es)
- RS — right side
- WS — wrong side
- rep — repeat
FPdc is worked around the post from the front, while BPdc is worked around the post from the back. Alternating these two placements produces the raised and recessed sections responsible for the basket-weave appearance.
Gauge and Sizing
A useful starting gauge for super-bulky basket-weave crochet is approximately 8 stitches and 5 rows per 10 cm in the established pattern. Treat this as a reference rather than an automatic result.
Make a swatch larger than 10 cm before calculating the blanket. Post stitches consume more yarn and pull the fabric inward compared with ordinary double crochet.
Do not measure only the foundation chain. Work at least two complete basket-weave cycles, place the swatch flat without stretching it, and measure across the central portion.
For a finished blanket close to 127 × 144.5 cm, calculate the number of complete basket-weave modules required from your measured gauge.
Basket Weave Crochet Blanket Pattern
Construction: Work the blanket flat in turned rows. The basket-weave texture is formed with repeating groups of four front-post and four back-post double crochet stitches.
Important: Maintain complete eight-stitch modules when changing the width. Do not add random individual stitches to the textured section.
Foundation and Setup
Choose a foundation-chain length that accommodates complete groups of eight stitches plus the stitches required for your chosen side edges and turning chain.
Setup Row: Work dc across the foundation to establish the vertical posts required for the first basket-weave row.
The setup row is important because every FPdc and BPdc in the following rows is worked around the post of an existing stitch.
Basket-Weave Block A
Yarn: Warm beige.
Row 1: Work the edge stitch, then repeat FPdc around each of the next 4 sts, BPdc around each of the next 4 sts across. Finish with the edge stitch.
Row 2: Turn. Maintain the same visible four-stitch blocks, accounting for the reversed working direction.
Row 3: Continue the established FPdc/BPdc orientation.
Row 4: Repeat the established orientation once more.
These four rows produce the first rectangular section of the woven texture.
Basket-Weave Block B
Row 5: Reverse the groups. Work the edge stitch, then repeat BPdc around each of the next 4 sts, FPdc around each of the next 4 sts across. Finish with the edge stitch.
Row 6: Maintain the new block orientation.
Row 7: Continue the established post-stitch groups.
Row 8: Repeat the same orientation across.
Rows 1–8 form one complete basket-weave cycle.
Repeat Rows 1–8 for the required length, changing colors according to the stripe arrangement below.
Beige Sections
Work approximately two complete eight-row cycles in beige for the larger neutral sections, or continue until the band reaches your planned measurement.
Measure rather than relying exclusively on the number of rows. Super-bulky yarn can vary considerably in thickness, loft, and compression.
Ivory Sections
Change to ivory at the edge after completing the final stitch of the previous beige row.
Continue the same eight-row basket-weave structure. Do not restart the FPdc/BPdc sequence merely because the yarn color changes. The woven geometry should remain continuous across the stripe.
Cut the previous color with a sufficiently long tail for weaving rather than carrying unused super-bulky yarn through an entire color section.
Sage Green Sections
Join sage green at the beginning of the planned band.
Continue the established FPdc/BPdc sequence. Pay particular attention to the first post stitch after the color change. Pulling this stitch too tightly creates a visible indentation along the side of the blanket.
The sage bands work best as accents. Keeping them narrower than some of the beige sections produces a color balance similar to the photographed blanket.
Suggested Color Sequence
For a photo-inspired arrangement, work the main color sections in this order:
Sage Green → Ivory → Beige → Sage Green → Beige → Ivory → Sage Green → Beige
The bands do not need identical depths. Using wider beige sections and narrower green sections produces a more varied layout.
Continue until the main blanket body reaches approximately 137–140 cm long if aiming for a final length close to 144.5 cm after adding the border. Adjust this measurement according to the actual depth of your border.
How to Change Colors Cleanly
Work the final stitch of the old color until the last yarn-over remains. Complete that final yarn-over using the incoming color.
The new shade is now positioned on the hook before the first stitch of the next color section begins.
Keep both tails on the wrong side of the blanket. Avoid tying hard knots between the two colors because thick yarn can make those joins visible from the front.
Leave approximately 15 cm of yarn at each color change for weaving. Weave each end through dense areas of matching color and change direction at least once before trimming.
Blanket Border
The central basket weave already contains strong texture, so the border should be comparatively restrained. Use beige to frame all three colors.
Border Round 1
Join beige at one corner.
Work sc evenly around the entire blanket. Across the top and bottom, place stitches consistently into the established stitches. Along the sides, distribute the stitches evenly across the row ends.
Work 3 sc in each corner.
Join with a sl st.
Border Round 2
Ch 1.
Work sc in every stitch around. At each corner, work 3 sc into the center corner stitch.
Join with a sl st.
Border Round 3
Repeat Border Round 2.
Place the blanket flat before proceeding. Examine all four sides and corners.
If the edge begins to ripple, too many stitches have been placed around the perimeter. If the blanket cups inward, the border requires additional stitches.
Border Rounds 4–6
Continue working in beige using sc for a simple structured edge.
Maintain the established corner increases on every round. Stop once the border reaches the desired depth.
Fasten off and leave a tail of at least 15 cm for weaving.
Why Basket-Weave Crochet Uses More Yarn
A normal double crochet is primarily worked through the top of the stitch. A post stitch takes the hook around the vertical body of the stitch instead.
That longer yarn path contributes to the thickness of basket-weave fabric. Multiple rows of FPdc and BPdc also compress into raised and recessed sections rather than forming a flat surface.
For this reason, a chunky crochet blanket worked in basket weave can require considerably more yarn than a blanket of similar dimensions made entirely with ordinary double crochet.
Keep extra yarn from the same dye lot when possible. Running short near the final color band can make matching beige, ivory, or sage shades difficult.
How to Adjust the Blanket Size
Resize the center using complete basket-weave modules.
The main texture in this version is based on eight-stitch groups: four stitches form one post orientation and four form the opposite orientation.
To make the blanket wider, add complete eight-stitch modules to the foundation calculation. To make it narrower, remove complete modules.
Do not add two or three stitches simply to reach a target chain length. Doing so interrupts the alternating basket geometry.
Length is more flexible. Continue working complete row cycles until the blanket reaches the required measurement.
Account for the border before determining the final body length. For example, a border measuring approximately 4 cm deep adds close to 8 cm to the total blanket length.
Finishing the Blanket
Place the finished blanket on a large flat surface and inspect each color transition before trimming any tails.
Weave beige ends into beige sections, ivory ends into ivory sections, and sage ends into sage sections. This prevents contrasting yarn tails from becoming visible between post stitches.
Change the direction of each woven tail at least once. Super-bulky yarn requires enough internal friction to prevent the end from gradually moving back through the stitches.
Check the border corners after all tails have been secured. Each corner should lie flat without curling upward or producing a large wave.
Measure the blanket at the top, center, and bottom. Significant differences in width usually indicate changing post-stitch tension.
Wash and finish the blanket according to the care instructions for the yarn actually used. Fiber content determines the appropriate washing, drying, and blocking method.
7 Technical Tips for Better Basket-Weave Crochet
- Mark every eight-stitch repeat. A missed post stitch shifts every block after the error and breaks the basket geometry. Place a locking marker between modules until you can identify the complete repeat visually.
- Measure after 16 pattern rows. Post stitches can pull the working width inward even when the foundation appears wide enough. Compare the width at the foundation, center, and current working edge.
- Keep BPdc loops the same height as FPdc loops. Tight back-post stitches create narrow recessed blocks. Raise the working loop to the same height before completing each double crochet.
- Check every color change at the side edge. Changing yarn one stitch too early creates a visible notch of the new color in the previous stripe. Introduce the new shade during the final yarn-over of the previous stitch.
- Check all four corners before adding another border round. Too many perimeter stitches produce waves, while too few cause the blanket to cup inward. Correct the stitch distribution before continuing.
- Count modules instead of raised ridges. FPdc sections are visually stronger than BPdc sections and can cause a recessed block to be overlooked. Each complete module contains four stitches of one orientation followed by four of the opposite orientation.
- Leave at least 15 cm for every yarn tail. Short ends are difficult to secure in super-bulky crochet. Weave the tail through dense matching stitches and reverse direction before trimming.
Basket-Weave Blanket Care
Check the yarn label before washing. Super-bulky blanket yarn is commonly available in synthetic fibers, but care instructions vary by manufacturer and yarn line.
Because basket-weave crochet produces deep raised sections, allow the blanket to dry completely before folding it for storage. Do not apply a high-temperature finishing method unless the yarn manufacturer specifically permits it.
Inspect woven ends periodically after the first few washes. Thick yarn has fewer stitch paths available for hiding tails, so a loose end should be woven back through the fabric rather than simply trimmed shorter.
Final Notes
A successful basket weave crochet blanket pattern depends more on repeat accuracy than complicated stitch vocabulary. Swatch the selected super-bulky yarn with a 9 mm hook, measure after at least two complete texture cycles, and calculate the number of eight-stitch modules required for your target width.
Keep the beige, ivory, and sage color changes independent of the FPdc/BPdc sequence so the woven structure remains continuous through every stripe. Photograph the finished blanket flat as well as folded so both the complete color arrangement and raised basket texture are visible.
Save the finished project to Pinterest or share your version on Instagram with #SageBasketWeaveBlanket. Which width did you use for the sage bands compared with the larger beige sections?