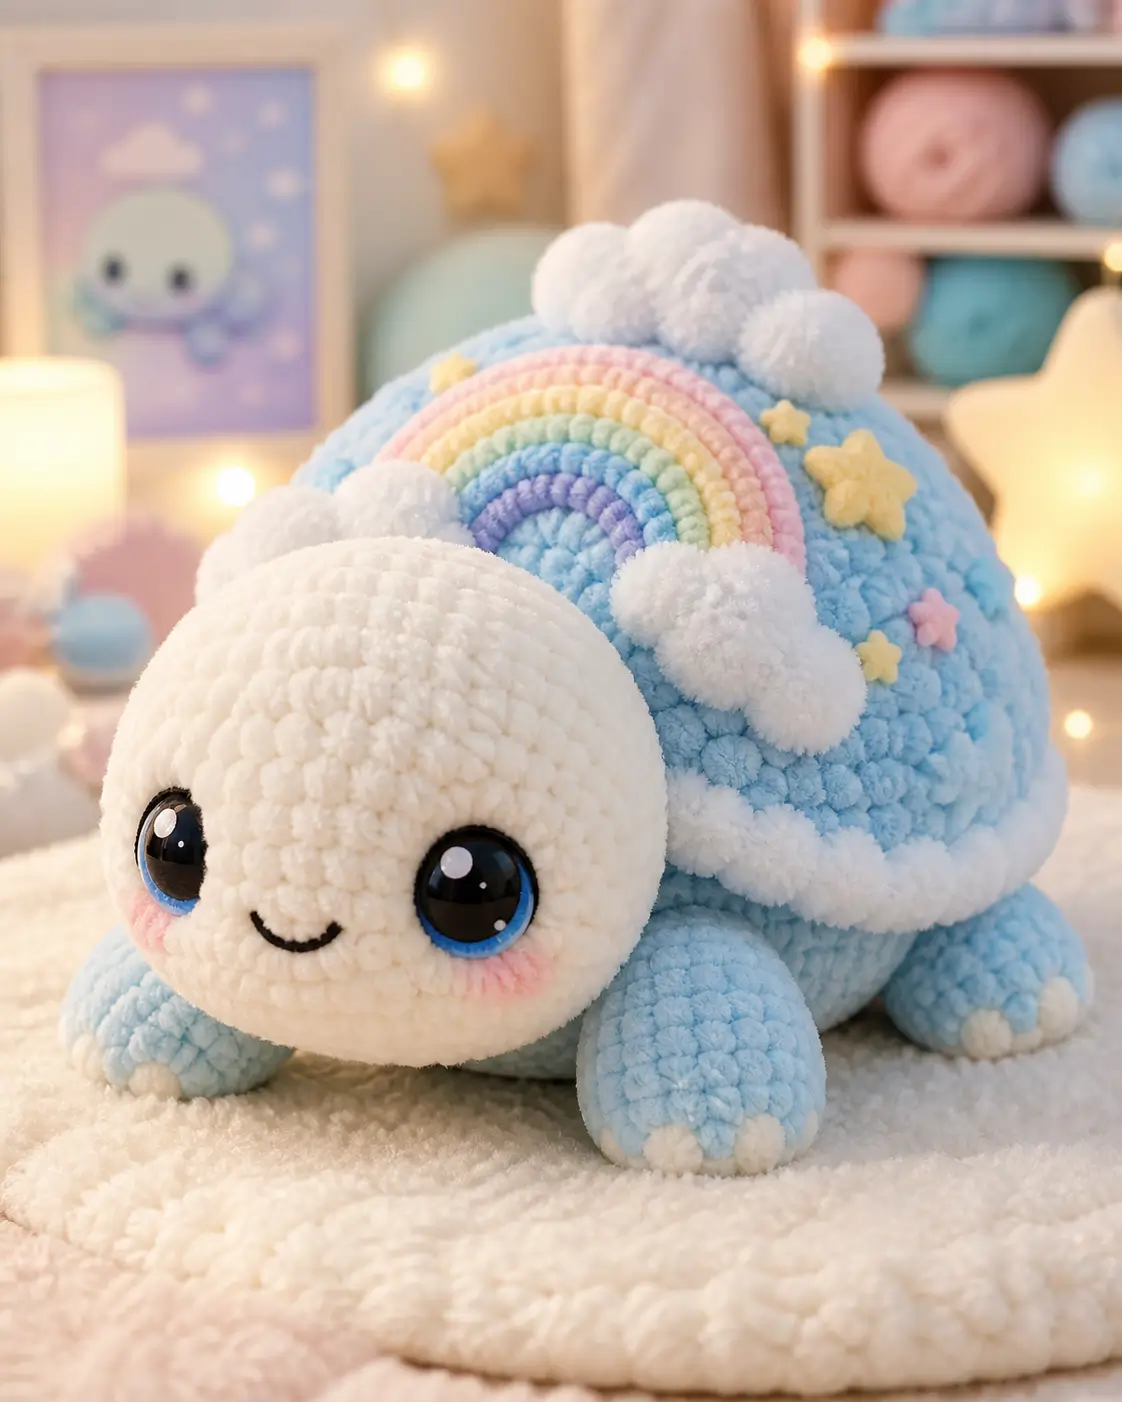
A turtle shell is not a backpack; it is the animal’s spine, so this rainbow shell has to read as part of the body, not decoration. This turtle amigurumi crochet pattern uses super bulky chenille, a 7–8 mm hook, and 20 mm eyes to make a 25 cm intermediate plush. The design works well for nursery shelves because the low body sits without wire.
The Design: What Makes This Sky Turtle Different
This rainbow turtle crochet pattern uses a low oval shell instead of a tall ball. That choice keeps the plush from tipping forward under the weight of the large cream head. The shell is worked as a closed dome, then covered with flat rainbow bands, separate cloud puffs, and small star appliqués. Those add-ons give the shell height without forcing color changes through thick chenille rounds. The head uses a 42-stitch plateau because the face must carry 20 mm eyes, cheek patches, and a stitched smile without crowding. The legs are short and wide, not flippers, so the finished crochet turtle plushie sits like the photo. A common mistake is placing the rainbow too far back. When that happens, the shell reads as a blanket instead of a sky panel.
Project Info at a Glance
| Skill Level | Time | Finished Size | Hook | Best For |
|---|---|---|---|---|
| Intermediate | 3–4 hours | About 25 cm | 7 mm main hook; 8 mm only for very tight hands | Nursery shelf, market plush, photo prop |
Materials and Tools
Yarn
- Sky blue — super bulky chenille — 130 g — Bernat Blanket, Premier Parfait Chunky, or similar.
- Cream white — super bulky chenille — 80 g — for head, rim, clouds, and toe bumps.
- Pastel pink — super bulky or bulky velvet — 8 g — rainbow band and cheek patches.
- Pastel yellow — super bulky or bulky velvet — 8 g — rainbow band and stars.
- Pastel mint — super bulky or bulky velvet — 6 g — rainbow band.
- Pastel blue — super bulky or bulky velvet — 6 g — rainbow band.
- Pastel lavender — super bulky or bulky velvet — 6 g — rainbow band.
- Black embroidery thread — less than 1 g — smile.
Tools
- Hook 7 mm for most pieces.
- Hook 6 mm for cheek patches and stars if your appliqués spread too wide.
- 20 mm safety eyes, blue-backed or black eyes with a blue felt ring.
- Polyester stuffing, tapestry needle, stitch markers, pins, scissors, and black thread.
Abbreviations
MR = magic ring; sc = single crochet; inc = 2 sc in one stitch; dec = invisible decrease; sl st = slip stitch; ch = chain; BLO = back loop only; FO = fasten off. Invisible decrease: insert the hook through the front loops of the next two stitches, yarn over, pull through both front loops, yarn over again, and finish one single crochet.
Pattern — Step by Step
Work in a continuous spiral unless a row section says otherwise. Place a marker in the first stitch of every round. The stitch count appears in brackets at the end of each round.
Head
Yarn: cream white — Source: standard amigurumi math adapted to large chenille.
R1: 6 sc in MR (6)
R2: inc ×6 (12)
R3: (1 sc, inc) ×6 (18)
R4: (2 sc, inc) ×6 (24)
R5: (3 sc, inc) ×6 (30)
R6: (4 sc, inc) ×6 (36)
R7: (5 sc, inc) ×6 (42)
R8–R14: sc around (42)
Place 20 mm safety eyes between R11 and R12, 8 stitches apart. Leave room for the cheek patches beside the eyes.
R15: (5 sc, dec) ×6 (36)
R16: (4 sc, dec) ×6 (30)
R17: (3 sc, dec) ×6 (24)
R18: (2 sc, dec) ×6 (18)
Stuff the head firmly, especially below the eyes and across the forehead.
R19: (1 sc, dec) ×6 (12)
R20: dec ×6 (6)
Fasten off. Leave a 25 cm tail and close the last 6 stitches with a needle.
Body and Shell Dome
Yarn: sky blue — Source: standard amigurumi math adapted to large chenille.
R1: 6 sc in MR (6)
R2: inc ×6 (12)
R3: (1 sc, inc) ×6 (18)
R4: (2 sc, inc) ×6 (24)
R5: (3 sc, inc) ×6 (30)
R6: (4 sc, inc) ×6 (36)
R7: (5 sc, inc) ×6 (42)
R8–R18: sc around (42)
Shape the piece into a low dome as you stuff. Do not pack the bottom into a hard ball.
R19: (5 sc, dec) ×6 (36)
R20: (4 sc, dec) ×6 (30)
R21: (3 sc, dec) ×6 (24)
R22: (2 sc, dec) ×6 (18)
R23: (1 sc, dec) ×6 (12)
R24: dec ×6 (6)
Fasten off. Leave a 30 cm tail and close the opening.
Front Legs
Make 2. Yarn: sky blue — Source: standard amigurumi math.
R1: 6 sc in MR (6)
R2: inc ×6 (12)
R3: (1 sc, inc) ×6 (18)
R4–R6: sc around (18)
R7: (1 sc, dec) ×6 (12)
R8: sc around (12)
Stuff only the front half. Flatten the last round so the leg sits wide against the body.
Fasten off. Leave a 20 cm tail.
Back Legs
Make 2. Yarn: sky blue — Source: standard amigurumi math.
R1: 6 sc in MR (6)
R2: inc ×6 (12)
R3: (1 sc, inc) ×6 (18)
R4–R5: sc around (18)
R6: (1 sc, dec) ×6 (12)
R7: sc around (12)
Use less stuffing than the front legs. Back legs need to support the rear shell without lifting it.
Fasten off. Leave a 20 cm tail.
Tail
Yarn: sky blue — Source: standard amigurumi math.
R1: 6 sc in MR (6)
R2–R5: sc around (6)
Do not stuff. Pinch the tail flat before sewing.
Fasten off. Leave a 15 cm tail.
Cheek Patches
Make 2. Yarn: blush pink — Source: standard flat-circle math.
R1: 6 sc in MR (6)
R2: inc ×6 (12)
Sl st into the first stitch. Fasten off with a 15 cm sewing tail.
White Shell Rim
Yarn: cream white — Source: standard row math.
Ch 43.
Row 1: sc in second ch from hook and across (42)
Row 2: ch 1, turn, sc across (42)
This strip wraps around the lower edge of the shell. Add or remove chains in sets of 2 if your shell circumference changes.
Fasten off. Leave a 35 cm tail for sewing.
Rainbow Shell Arches
Make 5 bands. Yarn: pink, yellow, mint, blue, lavender — Source: standard row math.
Outer pink band: ch 35. Row 1: sc in second ch from hook and across (34)
Second yellow band: ch 31. Row 1: sc in second ch from hook and across (30)
Third mint band: ch 27. Row 1: sc in second ch from hook and across (26)
Fourth blue band: ch 23. Row 1: sc in second ch from hook and across (22)
Inner lavender band: ch 19. Row 1: sc in second ch from hook and across (18)
Do not stuff. Curve each band into an arch while pinning. Place the pink band first, then nest the shorter bands inside it.
Fasten off each band with a 20 cm sewing tail.
Cloud Puffs
Make 7. Yarn: cream white — Source: standard amigurumi math.
R1: 6 sc in MR (6)
R2: inc ×6 (12)
R3: sc around (12)
R4: dec ×6 (6)
Stuff lightly. Make three puffs for the top cloud and two puffs for each lower rainbow cloud.
Fasten off. Leave a 15 cm tail.
Star Appliqués
Make 3 yellow and 1 pink. Yarn: pastel yellow and pastel pink — Source: standard applique math.
R1: 6 sc in MR (6)
R2: (sl st in next st, ch 3, sc in second ch from hook, hdc in next ch, sl st into next base st) ×6 (6 points)
Pull the center ring tight so the star sits flat on the shell.
Fasten off. Leave a 15 cm tail.
Cream Toe Bumps
Make 12. Yarn: cream white — Source: standard small applique math.
R1: 6 sc in MR (6)
Sl st into the first stitch. Fasten off with a 10 cm tail.
Assembly
- Place the body dome on a flat surface with the closing round underneath and the widest blue section facing upward.
- Pin the head to the front of the body across 9–11 body stitches; sew twice around the join so the head does not droop.
- Embroider a small black smile between the eyes, starting 2 rounds below the eye line and keeping the curve under 3 cm wide.
- Sew one cheek patch beside each eye, with the inner edge of each patch 1 stitch away from the smile curve.
- Attach the front legs under the head line, angled outward by about 30 degrees for a crawling pose.
- Attach the back legs near the rear third of the body so the shell stays level when the turtle sits.
- Sew the tail at the back center, directly opposite the head, with the flattened side facing down.
- Wrap the white shell rim around the lower shell edge and sew it in place with small horizontal stitches.
- Pin the rainbow bands to the top shell, sew the pink outer arch first, then add yellow, mint, blue, and lavender inside it.
- Add cloud puffs, star appliqués, and toe bumps last, then weave every yarn tail into the stuffed body.
The finished turtle has a low blue shell, cream face, four rounded legs, a rainbow sky panel, clouds, stars, and visible toe bumps.
7 Technical Tips
- Lost stitch marker failure: Chenille hides the first stitch after R8, especially on the shell. Move the marker every round and add a second marker at the halfway point after the body reaches 42 stitches.
- Under-stuffed forehead failure: The head caves in above 20 mm safety eyes when the upper face has loose fill. Add stuffing in pea-sized pieces until the fabric rebounds when pressed.
- Visible decrease holes: Regular sc2tog leaves gaps in super bulky yarn at R19 and R20 of the head. Use invisible dec and pull the working loop snug before the next stitch.
- Eye placement error: Eyes placed after closing the head cannot be locked with washers. Install them between R11 and R12 while the opening is still wide enough for your fingers.
- Rainbow drift failure: A loose rainbow band shifts to one side when the plush is handled. Pin each band at both ends and the center top before sewing through every third stitch.
- Leg wobble failure: Legs sewn to only one shell stitch twist forward. Catch at least 6 body stitches per leg and pass through the flattened leg edge twice.
- Tail weaving lump: Thick chenille tails create bumps under the belly if all ends are buried in one path. Split the tails into separate paths and trim only after the yarn has traveled at least 6 cm.
Conclusion
This plush works because the shell is built first as structure, then treated as a sky scene. Keep the 42-stitch plateau for the head and body if you want the same broad face and low shell shown in the photo. For the next step, crochet the head and body before cutting any rainbow colors; that confirms your gauge and shell width. Save this turtle amigurumi crochet pattern to Pinterest, then post the finished shell angle on Instagram so the rainbow placement is visible. Use the hashtag #RainbowShellTurtle. Which shell detail should carry the most space on this turtle: the rainbow arch, the top cloud, or the yellow stars?









