Introduction
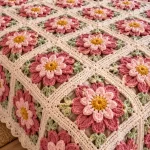
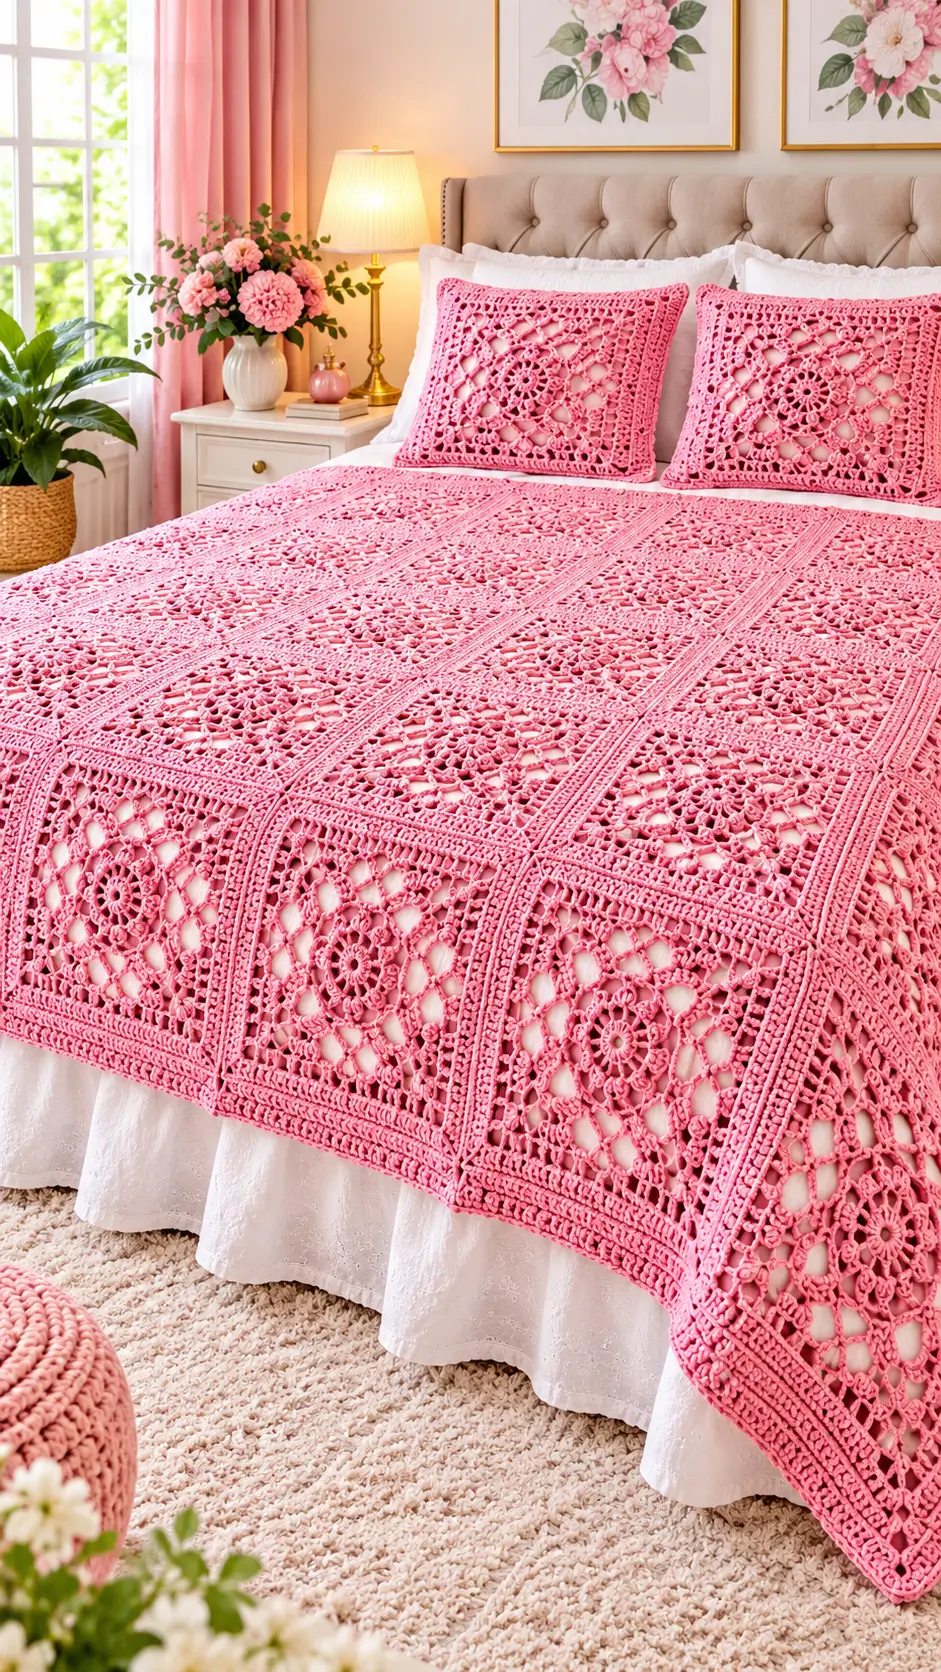
The eight-petal flower medallions and open lattice panels define the structure of this pink floral crochet bedspread pattern. The design combines repeated square motifs, decorative joins, and matching pillow covers to create a coordinated bedroom set. Use DK cotton-blend yarn and a 4.5 mm hook as a starting combination. This intermediate-level, photo-inspired project is modular, allowing you to adjust the finished dimensions to your mattress.
The Design: What Makes This Floral Bedspread Different
The photographed bedspread uses three structural elements: a central floral motif, an openwork background, and narrow joining bands that divide the surface into rectangular sections.
The flower centers establish the decorative rhythm. Surrounding chain spaces create the lace appearance while reducing the amount of yarn needed compared with a solid crochet fabric. Square borders give the individual motifs defined edges, making assembly and measurement more manageable.
The matching pillow covers repeat the floral geometry at a smaller scale. This creates a consistent design without introducing another stitch pattern.
A common mistake when constructing a crochet lace bedspread is joining motifs before blocking them. Even a 5 mm difference between neighboring squares can distort the finished grid.
The floral granny square blanket method described below uses an original simplified motif inspired by the photograph. It is not an exact reconstruction of the photographed lace.
Project Info at a Glance
| Feature | Details |
|---|---|
| Skill Level | Intermediate |
| Construction | Individual joined squares |
| Yarn | DK cotton or cotton blend |
| Hook | 4.5 mm starting size |
| Sample Square Target | 20 × 20 cm after blocking |
| Sample Bedspread | 160 × 220 cm |
| Sample Layout | 8 columns × 11 rows |
| Total Bedspread Motifs | 88 |
| Pillow Covers | Two, sized to inserts |
| Working Method | Joined rounds and modular assembly |
The sample dimensions are design targets, not verified measurements from the photograph. Your blocked motif gauge determines the actual dimensions.
Materials and Tools
Yarn
- Rose pink DK cotton-blend yarn: Approximately 2,000–3,000 g as a provisional purchasing range for the bedspread and two pillow fronts, subject to swatch consumption.
- Matching rose pink yarn: Reserve part of the total for joining and edging.
- Optional white cotton yarn: For contrasting pillow backs or decorative details.
DK yarn paired with a 4.5 mm crochet hook is a useful starting combination for this style of floral square blanket. Actual gauge depends on the yarn, hook, and individual tension.
The photograph does not provide enough information to calculate an exact yarn quantity. Weigh one completed, blocked square, multiply by the number required, and add the measured yarn needed for joins and borders. Allow an additional purchasing margin.
Tools
- 4.5 mm crochet hook
- Tapestry needle
- Locking stitch markers
- Sharp scissors
- Measuring tape
- Blocking mats and rust-resistant pins
- Two pillow inserts
- Optional fabric backing and sewing supplies
Crochet Abbreviations
| Abbreviation | Meaning |
|---|---|
| MR | Magic ring |
| ch | Chain |
| sc | Single crochet |
| hdc | Half double crochet |
| dc | Double crochet |
| tr | Treble crochet |
| sl st | Slip stitch |
| sp | Space |
| st | Stitch |
| rep | Repeat |
| RS | Right side |
| WS | Wrong side |
Instructions use US crochet terminology. A beginning chain is not counted as a stitch unless stated.
Pattern – Step by Step
1. Floral Center Motif (Make 88 for the Sample Bedspread)
Yarn: Rose pink DK.
This original eight-petal motif forms the center of each square. Work in joined rounds.
Round 1: Make a magic ring. Ch 1, work 8 sc into the ring. Join with a sl st to the first sc. (8 sc)
Round 2: Ch 1, sc in the first st, ch 3. Repeat (sc in next st, ch 3) around. Join to the first sc. (8 sc, 8 ch-3 spaces)
Round 3: Sl st into the first ch-3 space. Ch 1, work (sc, hdc, 3 dc, hdc, sc) into that space. Repeat the same petal group in each remaining ch-3 space. Join. (8 petals, 7 sts per petal)
Round 4: Sl st across the first petal to its center dc. Ch 1, sc in that dc, ch 5. Repeat (sc in the center dc of the next petal, ch 5) around. Join. (8 sc, 8 ch-5 spaces)
The resulting flower has eight raised petal groups surrounded by open chain arches.
Do not cut the yarn if continuing immediately into the square background.
2. Converting the Flower into a Square
The next stage creates four corners from the eight surrounding chain arches.
Round 5: Sl st into the first ch-5 space. Ch 3 (counts as the first dc), work (2 dc, ch 2, 3 dc) into that space. Ch 3, sc in the next ch-5 space, ch 3. Repeat this corner-and-side sequence three more times around, using successive pairs of spaces. Join to the top of the beginning ch-3.
The round contains four corner groups, each with 3 dc, ch 2, 3 dc, and four side sc anchors.
Round 6: Sl st across to the first corner ch-2 space. Ch 3, work (2 dc, ch 2, 3 dc) in that corner. Ch 3, sc in the first side ch-3 space, ch 3, sc in the second side ch-3 space, ch 3. Repeat the corner and side sequence around. Join.
Round 7: Work a sc border around the square, placing 3 sc in each corner ch-2 space and working into stitches and chain spaces along the sides. Use one sc per dc, one sc per sc, and three sc into each ch-3 space.
Count the stitches on each side. All four sides must match.
Fasten off, leaving a 15 cm yarn tail.
This produces a small floral square. It will not automatically measure 20 cm.
3. Enlarging the Floral Square
To reach the target size, add repeatable openwork rounds.
Expansion Round A: Join yarn at a corner. Work (3 dc, ch 2, 3 dc) into the corner. Along each side, repeat (ch 2, skip 2 sts, sc in next st) as space permits. Repeat the corner treatment at all four corners. Join.
Expansion Round B: Work (3 dc, ch 2, 3 dc) into each corner. Across each side, work ch-3 arches anchored with sc into successive chain spaces. Join.
Repeat these two expansion rounds, adjusting the final side repeat symmetrically, until the square approaches the intended measurement.
Finish with one sc border round. Place 3 sc in each corner and distribute side stitches evenly.
Gauge checkpoint: Block the completed square and measure it. If it measures 18 cm instead of 20 cm, either add another expansion round or recalculate the number of squares needed.
The expansion instructions are a design framework requiring a trial square. They are not a fully stitch-counted, tested chart for every enlargement round.
4. Joining the Bedspread Squares
For the proposed 160 × 220 cm bedspread, arrange 88 blocked squares in eight columns and eleven rows, assuming each square finishes at exactly 20 cm including its share of the join.
Place adjacent squares right sides together.
Using the same pink yarn, join matching border stitches with a slip-stitch seam or a mattress stitch. Complete the vertical seams first, then the horizontal seams.
Avoid pulling the joining yarn tighter than the individual motifs. Tight seams cause ridges and can reduce the finished width.
Lay the assembled bedspread flat and check the corner alignment before adding the outside border.
5. Decorative Bedspread Border
The photographed design has a relatively narrow structured border, rather than a long fringe.
For a similar finish, work three rounds.
Border Round 1: Sc evenly around all four sides, working 3 sc into each corner.
Border Round 2: Repeat (sc, ch 3, skip 2 sts) around, adjusting the repeat at each corner to keep the border flat.
Border Round 3: Work 3 sc into each ch-3 space, with extra stitches at the corners as required.
Join the last round with a slip stitch. Fasten off and weave the yarn end into the surrounding stitches.
For a wider lace finish, add more mesh rounds before the final sc border.
6. Matching Floral Pillow Covers (Make 2)
The two pillow covers in the photograph use the same pink flower-and-lattice theme.
For each pillow, make enough floral squares to cover the front of the insert. A 40 × 40 cm pillow could use four 20 cm squares in a 2 × 2 arrangement, although the final size must account for joining and seam allowance.
Join the squares into one panel.
Measure the panel after blocking, then cut or crochet a back panel to match. A fabric envelope backing is a practical option because it allows the pillow insert to be removed.
Overlap two backing pieces by approximately 10–12 cm and sew or crochet them to the front panel along the outer edges.
Insert the pillow and inspect the corners. If the insert distorts the lace, use a slightly smaller insert or add a lining behind the openwork.
Assembly – 10 Steps
- Complete one floral square and record its yarn weight and blocked dimensions.
- Adjust the hook or expansion rounds to reach the selected square size.
- Crochet the remaining floral squares using the approved sample as a reference.
- Block all squares to consistent measurements.
- Arrange the squares into the planned bedspread grid.
- Join the vertical edges, checking stitch alignment at every corner.
- Complete the horizontal joins and inspect the intersections.
- Crochet the outer lace border and weave in the yarn ends.
- Make two matching floral pillow fronts and attach their backing panels.
- Block the completed bedspread lightly, following the yarn manufacturer’s care instructions.
The finished set consists of one modular floral bedspread and two coordinated pillow covers.
7 Technical Tips for a Better Result
- Control motif size. A 5 mm variation across eight squares creates a potential 4 cm width difference. Block and measure each square before assembly.
- Mark the corners. Place a locking stitch marker in every ch-2 corner space while developing the square. Misidentified corners produce uneven side lengths.
- Measure yarn consumption. Weigh three completed squares and calculate their average yarn use. Use that value to estimate the remaining material requirement.
- Maintain consistent chain tension. Chain arches pulled too tightly reduce the openwork area. Compare the width of the arches across several motifs.
- Check the joining seam. A seam that is shorter than the motif edge causes puckering. Lay each joined row flat before attaching the next.
- Control border fullness. Excess corner stitches cause rippling, while too few pull the corners inward. Test the border on one assembled corner first.
- Secure yarn tails. Weave each tail at least 8–10 cm through neighboring stitches, changing direction where the stitch structure allows. Loose tails are particularly visible through open lace.
How to Adjust the Bedspread to Your Mattress
Measure the desired finished width and length, including any overhang.
Divide each dimension by the finished width of one blocked motif.
For example, a 20 cm square produces the following nominal dimensions before any extra outside edging:
| Motif Layout | Nominal Size | Approximate Use |
|---|---|---|
| 5 × 7 | 100 × 140 cm | Small throw |
| 7 × 9 | 140 × 180 cm | Large throw |
| 8 × 11 | 160 × 220 cm | Bed cover |
| 10 × 12 | 200 × 240 cm | Larger bedspread |
| 11 × 13 | 220 × 260 cm | Generous bed coverage |
These measurements are planning examples, not standard mattress-size guarantees.
Washing and Blocking
Cotton yarn may change dimensions after washing, particularly when the project includes large openwork sections.
Wash a test square according to the yarn label before committing to the full project. Measure it before and after drying.
For the completed bedspread, support the wet fabric rather than lifting it from one corner. The weight of saturated yarn can stretch the joining seams.
Dry the bedspread flat where practical. Do not stretch the floral motifs beyond their established blocked dimensions.
Conclusion
A pink floral crochet bedspread pattern depends on accurate motif measurements, consistent joining tension, and balanced lace borders. The modular approach allows you to construct a bed covering and matching pillow fronts using the same flower-square design.
Before starting the complete bedspread, make one test square, block it, and record its final dimensions and yarn consumption. These measurements determine the motif count and purchasing requirements.
Save the project to Pinterest as a floral crochet bedroom inspiration idea, or share your finished adaptation on Instagram using #PinkFloralCrochetBedspread.
For your version, would you retain the raised eight-petal flower centers or replace them with flatter lace medallions?