Introduction
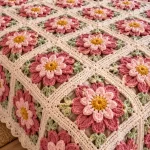
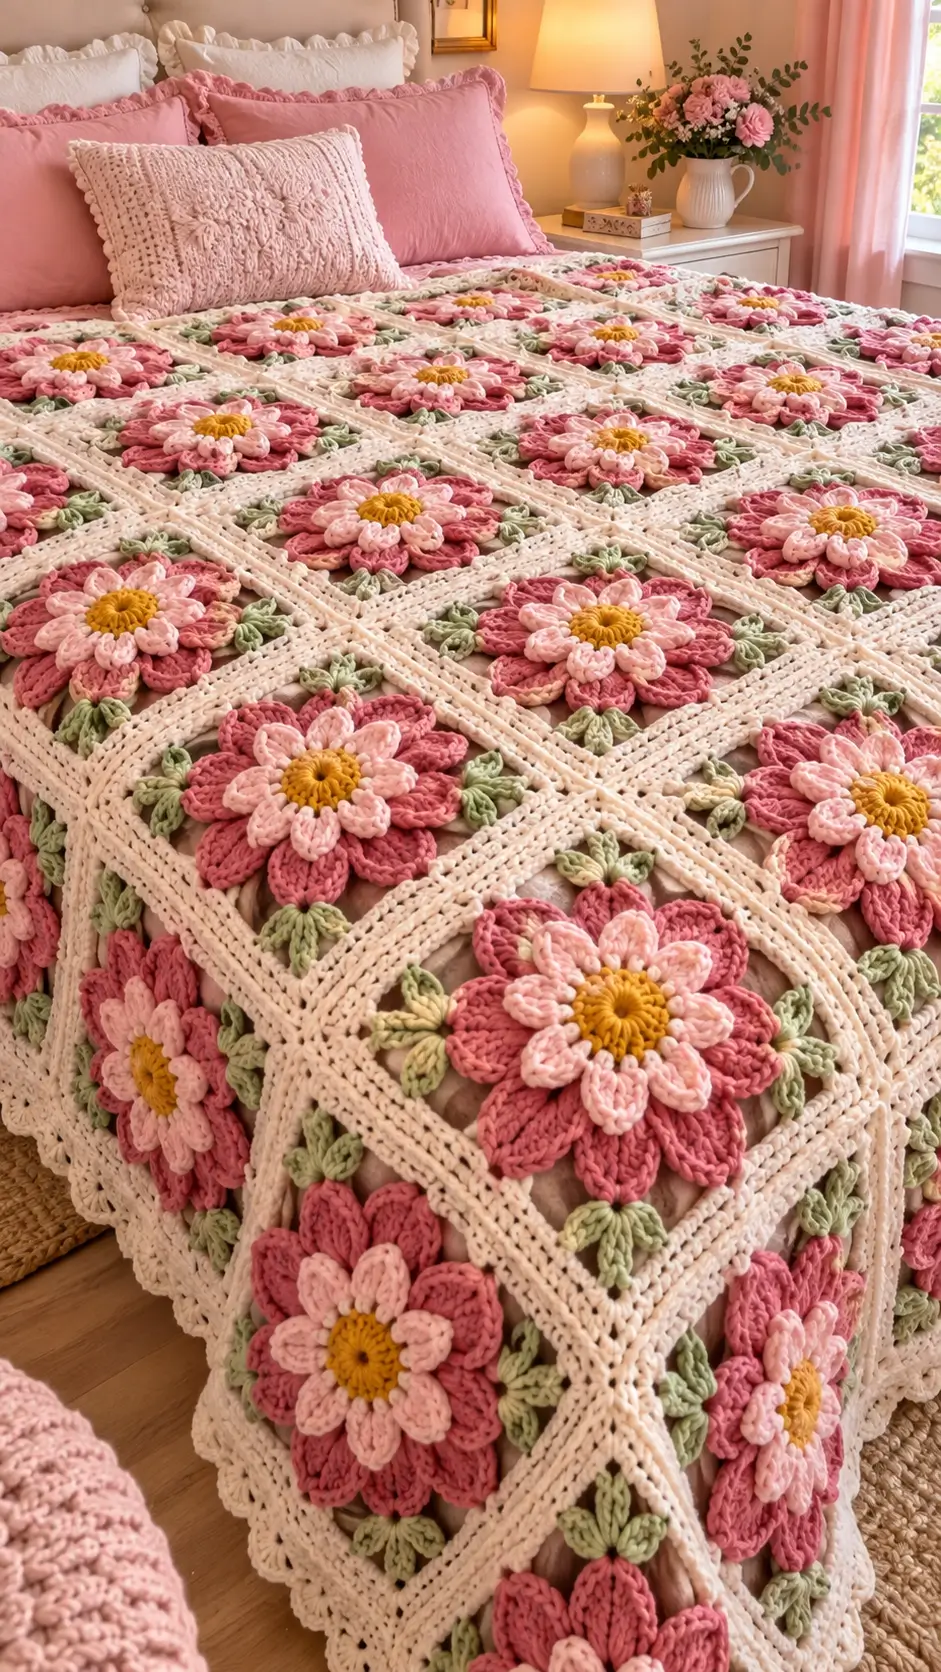
A mustard center surrounded by two pink petal layers needs its own support before four cream corners can be added. This 3D pink daisy granny square crochet bedspread pattern uses raised flowers, sage leaves and an open cream frame to reproduce that layered structure. Work the photo-inspired blocks in worsted-weight yarn with a 5.0 mm hook, targeting approximately 20–22 cm per finished square.
The Design: Layered Flowers on a Structural Square
The bedspread is built from repeated floral blocks rather than flowers joined directly to one another. Each motif starts with a compact mustard center, followed by eight light-pink inner petals and eight larger dusty-rose petals. Small sage leaves fill the visual space around the flower. The cream background then converts the circular floral construction into a stable four-corner square.
That separation is important. The raised petals should provide texture but should not carry the joining tension. The cream frame takes that load instead. A common failure with dimensional flower squares is making the decorative center and structural edge dependent on the same loops; the petals then flatten or the square cups when motifs are joined. This version keeps those functions separate.
Project Info at a Glance
| Skill Level | Construction | Target Square | Hook | Best For |
|---|---|---|---|---|
| Intermediate | Layered 3D flower with separate square frame | 20–22 cm | 5.0 mm | Bedspreads, throws and pillow shams |
Materials and Tools
Yarn
- Mustard yellow — worsted #4 — flower centers
- Light blush pink — worsted #4 — inner petals
- Dusty rose — worsted #4 — large outer petals
- Sage green — worsted #4 — leaves
- Warm cream — worsted #4 — background, joining and border
A 5.0 mm hook is a practical starting point for medium/worsted flower squares. Published daisy-square examples using medium yarn also commonly specify a 5.0 mm hook. Final dimensions vary significantly with the number of framing rounds, so use the blocked master square rather than another pattern’s dimensions as the production standard.
Tools
- 5.0 mm crochet hook
- Yarn needle
- Scissors
- Locking stitch markers
- Tape measure
- Blocking mats
- Rust-resistant pins
- Digital scale for calculating yarn
Abbreviations
- MR — magic ring
- ch — chain
- sl st — slip stitch
- sc — single crochet
- hdc — half double crochet
- dc — double crochet
- tr — treble crochet
- FLO — front loop only
- BLO — back loop only
- sp — space
- st/sts — stitch/stitches
- FO — fasten off
Pattern — 3D Pink Daisy Granny Square
This is an original photo-inspired construction. Make one complete square first, block it and record its finished dimensions before beginning a full bedspread.
Mustard Flower Center
With mustard yarn, make a MR.
R1: Ch 1, work 8 sc into MR. Join with sl st. (8)
R2: Ch 1, work 2 sc in every stitch. Join. (16)
R3: Working in BLO, sc in every stitch. Join. (16)
FO mustard.
The unused front loops from R2 create a subtle raised ring around the center.
Light Pink Petal Foundation
Join light blush pink to any stitch from R3.
Work:
*sc in next 2 sts, ch 5*
eight times.
Join.
You should have 8 ch-5 loops.
Light Pink Inner Petals
Sl st into the first ch-5 loop.
Into that loop work:
(sc, hdc, 3 dc, hdc, sc).
Repeat in every remaining loop.
Join and FO.
The flower now has 8 light-pink petals.
Dusty Rose Outer Petal Foundation
Turn the flower over.
Join dusty rose around the junction between two light-pink petals.
Work:
*ch 7, sl st around the next petal junction*
eight times.
Join.
Keep these loops behind the first petal layer.
Dusty Rose Outer Petals
Sl st into the first ch-7 loop.
Work:
(sc, hdc, 2 dc, 3 tr, 2 dc, hdc, sc)
into the loop.
Repeat around all eight loops.
Join and FO.
You should have 8 large dusty-rose petals positioned behind the light-pink layer.
Petal Definition Round
Rejoin dusty rose at the base of one outer petal.
Work loose sl sts around the outside edge of each dusty-rose petal.
At the tip work:
(sl st, ch 1, sl st).
Continue around all eight petals.
FO.
Do not pull the edging tightly. The outer petals should remain broad rather than curling into narrow tubes.
Sage Leaf Foundation
Turn the flower over.
Join sage yarn behind an outer petal.
Work:
*ch 6, sl st around the next outer-petal junction*
eight times.
Join.
You should have 8 ch-6 loops.
Sage Leaves
Into the first ch-6 loop work:
(sc, hdc, 2 dc, tr, 2 dc, hdc, sc).
Repeat in every remaining loop.
Join and FO.
The motif now contains 8 sage leaves.
Rotate the flower before continuing and pull any leaf forward that has become trapped underneath an outer petal.
Optional Pointed Leaf Tips
For more defined leaves, join sage at the base of one leaf and work sl sts around its edge.
At the center tip work:
(sl st, ch 2, sl st).
Continue down the opposite side.
Repeat for all leaves.
FO.
Cream Structural Foundation
Turn the flower over.
Join cream around a junction between two leaves.
Work:
*ch 6, sc around the next leaf junction*
eight times.
Join.
These eight spaces create a separate structural foundation behind the dimensional flower.
Converting the Flower to a Square
Place four stitch markers in every second cream ch-6 space.
The marked spaces become the corners.
You should have one unmarked space between neighboring corners.
First Cream Square Round
Sl st into the first marked corner space.
In each marked corner space work:
(2 hdc, 2 dc, 2 tr, ch 3, 2 tr, 2 dc, 2 hdc).
In each unmarked side space work:
(2 hdc, 4 dc, 2 hdc).
Repeat around.
Join.
Lay the motif on a flat surface. Four corners should now be clearly visible.
Second Cream Square Round
Ch 3.
Dc in every stitch across the first side.
At each corner ch-3 space work:
(2 dc, ch 2, 2 dc).
Repeat around.
Join.
Openwork Cream Round
Ch 1.
Sc in the first stitch.
Across each side repeat:
ch 2, skip 1 st, sc in next st.
At each corner work:
(sc, ch 3, sc).
Continue around.
Join.
Cream Frame Round
Sl st into the first ch-2 space.
Work 2 hdc in each ch-2 side space.
Work one hdc in each intervening sc.
At every corner ch-3 space work:
(2 hdc, ch 2, 2 hdc).
Join.
Solid Cream Round
Ch 1.
Sc in every stitch around.
At each corner work:
(2 sc, ch 2, 2 sc).
Join.
Second Cream Framing Round
Ch 2.
Hdc in every stitch.
At each corner work:
(2 hdc, ch 2, 2 hdc).
Join.
Final Joining Edge
Ch 1.
Sc in every stitch.
At each corner work:
(sc, ch 2, sc).
Join and FO.
The final round is deliberately simple because it becomes the joining surface between neighboring blocks.
Target Square Size
Block the completed motif to approximately 20–22 cm square.
Published 3D daisy squares demonstrate how strongly dimensions change with construction: medium/worsted examples can finish around 11–13 cm with a 5.0 mm hook, while additional flower, leaf and framing rounds create substantially larger blocks. For this bedspread, 20–22 cm is the intended project target rather than a universal granny-square measurement.
If the square is smaller, continue with matched cream framing rounds until the target is reached.
Master Square Measurements
Record the following measurements after blocking:
- Width — target 20–22 cm
- Height — same as width
- Diagonal A
- Diagonal B
- Flower diameter
- Flower relief
Keep the difference between the two diagonal measurements within approximately 5 mm.
Flower Relief
The flower should rise approximately 1.5–2.5 cm above the cream background.
Do not press the petals flat during blocking.
If the flower projects much higher, reduce the amount of overlap between petal layers.
If it lies completely flat, lift the dusty-rose petals at their bases after the square has dried.
Keeping the Leaves Visible
The sage leaves occupy the transition between the dusty-rose flower and cream background.
Pull each leaf into position before working the cream foundation.
The tips should remain visible after the square is completed.
A leaf trapped completely under an outer petal adds bulk without contributing to the design.
Making the Remaining Squares
Use the blocked master square as a physical template.
Compare every fifth completed block with it.
Keep finished dimensions within approximately 5 mm.
Also compare flower diameter. Consistent square dimensions alone do not guarantee consistent floral proportions.
Bedspread Layout
With a blocked square measuring 21 cm, example motif fields are:
| Grid | Squares | Approximate Size Before Border |
|---|---|---|
| 5 × 6 | 30 | 105 × 126 cm |
| 6 × 8 | 48 | 126 × 168 cm |
| 8 × 10 | 80 | 168 × 210 cm |
| 9 × 11 | 99 | 189 × 231 cm |
| 10 × 12 | 120 | 210 × 252 cm |
Add the outer border depth separately.
Calculating a Bedspread for Your Mattress
Measure the mattress width and required side drop.
For a 160 cm mattress with a 30 cm drop on each side:
160 + 30 + 30 = 220 cm.
With 21 cm squares:
220 ÷ 21 = approximately 10.5.
Eleven columns would produce a field approximately 231 cm wide before the border.
Estimating Yarn
Weigh one completely finished square.
Suppose one blocked motif weighs 80 g.
For 80 squares:
80 g × 80 = 6,400 g.
This covers the example motif field only.
Add cream yarn for joining and the border, then add approximately 10% for swatches, tension differences and future repairs.
Replace the 80 g example with the actual weight of your master square.
Calculating Yarn by Color
For accurate purchasing, weigh each yarn ball before and after one master motif.
An example square might use:
- Mustard — 5 g
- Light pink — 10 g
- Dusty rose — 20 g
- Sage — 10 g
- Cream — 35 g
For 80 motifs, that example would equal:
- Mustard — 400 g
- Light pink — 800 g
- Dusty rose — 1,600 g
- Sage — 800 g
- Cream — 2,800 g
Purchase additional cream for seams and the outer border. These figures demonstrate the calculation method and are not fixed requirements.
Arranging the Motifs
Lay every blocked square on a large flat surface.
Orient the flowers consistently.
Check that the cream framing rounds create continuous straight lines through the entire layout.
Photograph the arrangement before stacking the motifs into labeled rows.
Flat Cream Joining Method
Use cream yarn for the joins.
Place two squares right sides upward.
Insert the hook through corresponding outer loops.
Work relaxed slip stitches from one corner to the next.
Keep the raised flower petals clear of the working yarn.
Testing Seam Tension
After joining approximately 5 cm, place the squares flat.
The joined edge should remain equal to the blocked edge measurement.
If the seam creates a ridge or pulls the corners together, remove it and use looser tension.
Joining Complete Rows
Join the squares horizontally first.
Measure every completed row.
Rows containing the same number of motifs should remain within approximately 1 cm of one another.
Once the row measurements agree, join the rows vertically.
Four-Square Intersections
Keep each four-corner intersection compact.
One joining stitch through the corresponding corner spaces is normally sufficient.
Do not fill the intersection with extra stitches. The flower centers already provide substantial surface texture, so the joining grid should remain flat.
Outer Border — Round 1
Join cream at one corner.
Work sc evenly around the complete bedspread.
At each corner work:
(2 sc, ch 2, 2 sc).
Join.
Border Round 2
Ch 2.
Hdc in every stitch.
At each corner work:
(2 hdc, ch 2, 2 hdc).
Join.
Border Round 3 — Openwork
Ch 1.
Sc in the first stitch.
Repeat:
ch 3, skip 2 sts, sc in next st.
At each corner use a ch-5 space.
Join.
Border Round 4 — Larger Arches
Sl st into the first ch-3 space.
Work:
sc, ch 5, sc in next ch-3 space.
Repeat around.
Use ch 7 at each corner.
Border Round 5 — Cream Scallops
Into each ch-5 space work:
(sc, hdc, 5 dc, hdc, sc).
Into each corner ch-7 space work:
(sc, hdc, 7 dc, hdc, sc).
Repeat around.
FO.
Optional Sage Border Detail
For a stronger botanical finish, add small sage picots between selected cream scallops.
Join sage between two scallops.
Work:
sc, ch 3, sl st into first ch, sc.
Repeat at regular intervals.
Keep this detail sparse so the outer border remains predominantly cream.
Matching Floral Pillow Sham
For a modular pillow front, join four flower squares in a 2 × 2 arrangement.
Work additional cream hdc rounds around the joined panel until it matches the cushion insert.
A 45 cm pillow front should finish close to the insert measurement before assembly.
Single-Flower Pillow Option
Make one enlarged flower rather than four standard blocks.
Increase the outer dusty-rose petal loops proportionally and add additional cream framing rounds behind the flower.
Keep the final panel square and target approximately 45–50 cm, depending on the insert.
Solid Pillow Back
With cream yarn, chain to the width of the finished pillow front.
Row 1: Hdc in third chain from hook and across.
Row 2: Ch 2, turn, hdc across.
Repeat Row 2 until the back matches the front.
FO.
Assembling the Pillow
Place the front and back with wrong sides together.
Sc through both layers around three sides.
Insert the cushion form.
Close the fourth side or add an envelope-style opening for a removable cover.
Alternative Colorway — Burgundy Rose
Replace dusty rose with burgundy.
Keep the inner petals blush pink, the center mustard and the leaves sage.
The stronger outer color increases contrast while retaining the same floral construction.
Alternative Colorway — Peach and Terracotta
Use pale peach for the inner petals and terracotta for the outer layer.
Replace sage with muted olive.
Keep the background warm cream.
Alternative Colorway — Lavender
Use pale lavender inner petals and medium purple outer petals.
Keep mustard for the flower center and sage for the leaves.
The same square construction can be used without changing stitch counts.
Assembly
- Crochet the mustard center and confirm that it contains 16 stitches before beginning the first petal foundation.
- Make eight light-pink inner petals, then add eight larger dusty-rose petals behind them without attaching either layer to the future square edge.
- Add eight sage leaves behind the outer petals and position every leaf so its tip remains visible between adjacent pink petals.
- Create the independent cream foundation behind the leaves, mark every second space as a corner and convert the circular flower into a four-corner square.
- Complete the cream framing rounds and block the master square to approximately 20–22 cm with its two diagonals within 5 mm.
- Make the required number of motifs, comparing every fifth block with the master for square dimensions, flower diameter and petal relief.
- Arrange the blocked motifs in rows, photograph the complete layout and join each horizontal row with relaxed cream slip stitches.
- Join the rows vertically, keeping all raised flowers clear of the seam and every four-square intersection compact.
- Work the cream structural and openwork border rounds around the completed motif field, checking each side for rippling before adding the scallops.
- Weave all tails through dense structural stitches, complete a light final blocking and reshape the pink petals, sage leaves and cream border before drying.
The completed bedspread should form a regular cream grid containing layered pink flowers, mustard centers and visible sage leaves without compressing the dimensional petals into the joining seams.
7 Technical Tips
- Keep the blocked square within 5 mm of the master motif. A repeated 5 mm difference across ten columns changes the final bedspread width by approximately 5 cm.
- Count exactly eight petals in both pink layers. A missing outer petal also changes the spacing of the eight leaf positions behind the flower.
- Keep flower relief near 1.5–2.5 cm. Excessively raised petals make a bedspread harder to use and increase the chance of snagging.
- Mark all four cream corners before the first squaring round. Trying to select corners while crocheting can shift one side and produce unequal diagonals.
- Test each joining seam after approximately 5 cm. A tight seam shortens the blocked edge and creates a ridge between neighboring flowers.
- Keep the two diagonal measurements within approximately 5 mm. A square can have four similar side lengths and still be distorted diagonally.
- Weave structural tails through at least 6–8 cm of dense cream crochet. Do not hide joining ends behind the flower petals, where movement can pull them back into view.
Care and Final Blocking
Follow the care instructions for the selected yarn. Support the bedspread during washing because a large wet motif blanket can become substantially heavier.
Lay the piece flat. Align the cream joining grid first, then check the outside rectangle and border.
Shape the scallops after the main field is square.
Arrange the sage leaves and pink petals last. Do not place heavy objects over the flowers while drying because the layered relief is part of the construction.
Conclusion
The two pink petal layers define this 3D pink daisy granny square crochet bedspread pattern, but the separate cream foundation controls its accuracy as a blanket block. Begin with one 20–22 cm master square, verify both diagonals and weigh the finished motif before starting production. Keep the sage leaves visible, reserve the outer cream rounds for joining and test several connected squares before assembling a complete row. Your next step is to crochet one flower through the leaf round and check its relief on a flat surface. Save the finished bedspread to Pinterest or share it on Instagram with #Pink3DDaisyBedspread. Would you keep the outer petals dusty rose, or make them burgundy for stronger contrast?