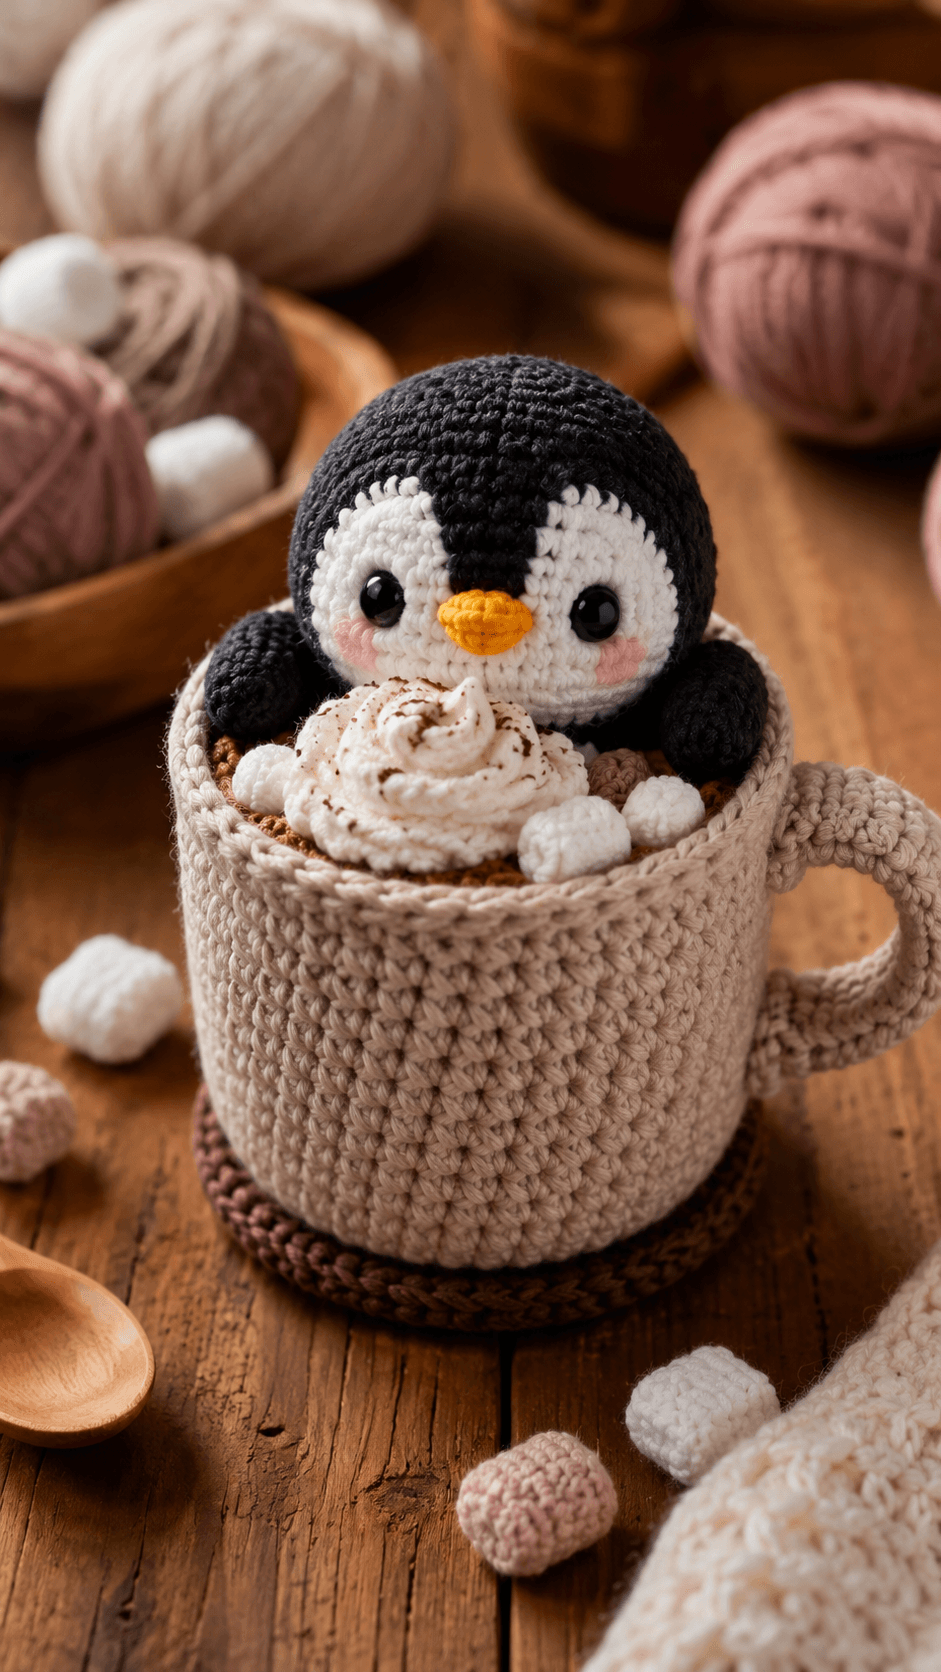
A penguin-in-mug design only works when the penguin head stays oversized enough to read clearly above the rim while the cup remains large enough to frame the whipped topping details. That proportion defines this penguin in mug crochet pattern. The sample shown here uses a black-and-white penguin, a small orange beak, blush cheeks, a textured cream mug, cocoa topping, and a swirl of whipped cream with mini marshmallows. It suits intermediate crocheters who can manage compact amigurumi shaping, clean color changes, and layered assembly on a decorative display piece.
The Design: What Makes This Penguin in Mug Different
This design depends on vertical composition first. The mug is not just a base. It acts as the full lower body support, so the penguin only needs to show the head, wings, and upper chest above the topping. That keeps the project compact and makes the scene readable immediately.
The second design choice is contrast. The black head, white face patch, and bright beak create the penguin expression with very little shaping. In a mug amigurumi, clear facial contrast matters because the rim already hides part of the body.
The third choice is the topping layer. Whipped cream, cocoa surface texture, and marshmallow details turn the mug into a hot drink scene instead of a plain cup. One common mistake with a crochet penguin in a mug is making the topping too flat. That causes the penguin to look dropped into a basket rather than nestled in a drink.
Project Info at a Glance
| Skill Level | Time | Finished Size | Hook | Best For |
|---|---|---|---|---|
| Intermediate | 4–7 hours | Approx. 12–16 cm / 5–6 in tall | 2.5–3.25 mm | Desk decor, winter gifts, shelf displays, café-themed crochet |
Materials and Tools
Yarn
- Black yarn — DK or light worsted — approx. 25–40 g
- White yarn — approx. 20–30 g
- Cream or beige yarn — approx. 40–60 g for mug
- Brown yarn — small amount for cocoa surface
- Orange or mustard yarn — small amount for beak
- Pink yarn — small amount for cheeks, optional
Tools
- Crochet hook 2.5 mm to 3.25 mm
- Tapestry needle
- Stitch markers
- Scissors
- Polyfill stuffing
- Safety eyes 8–10 mm
Abbreviations
- MR = magic ring
- sc = single crochet
- inc = increase
- dec = decrease
- sl st = slip stitch
- ch = chain
- BLO = back loop only
- FLO = front loop only
Invisible decrease gives a cleaner finish than a standard decrease. It matters most on the penguin head and the whipped topping spiral.
Construction Overview
This project is built in sections. The penguin head and upper body are worked first as a compact amigurumi form. The mug is crocheted separately as a firm cup with a handle. A cocoa insert, whipped cream swirl, and small marshmallow details are added on top, then the penguin is seated into the center so the face rises above the rim. The wings are attached at the sides to make the penguin look tucked into the mug.
Penguin Head and Upper Body
The penguin should be round, compact, and slightly oversized compared with the mug opening. That keeps the face visible above the cream swirl.
- Begin with an MR in black and work 6 sc into the ring.
- Increase evenly to a medium head size, usually 30 to 36 stitches.
- Work several even rounds to build the crown.
- Place the safety eyes before the lower decrease rounds.
- Add the white face patch or use color changes across the front.
- Stuff firmly and decrease to close the lower head section.
The lower body can stay very small because most of it will be hidden inside the mug. The visible part is the face, upper chest, and wing placement.
Face Patch
The white face section is what gives the penguin its expression. It should frame the eyes without extending too far up the crown.
- Either switch to white yarn across the face area while shaping the head, or crochet a separate white face patch.
- Keep the patch symmetrical on both sides of the beak area.
- Attach smoothly so there are no puckers around the eyes.
Beak
The beak is small and centered. It should sit low between the eyes, but not so low that it disappears into the mug rim.
- Crochet a tiny orange beak as a short oval, cone, or wedge shape.
- Stuff lightly if needed.
- Sew it between the eyes at the center front.
Cheeks
The sample uses soft blush cheeks, which keep the expression gentle and decorative. They can be embroidered, felted, or crocheted as tiny circles.
- Add one pink cheek on each side below the eyes.
- Keep the size small so the beak remains the central face detail.
Wings
The wings should be short, rounded, and positioned as if the penguin is resting its flippers on the rim or topping layer.
- Make two small black wing pieces as tapered ovals or short tubes.
- Stuff lightly or leave unstuffed for easier shaping.
- Attach them evenly at the side front of the penguin body.
Mug
The mug needs firm walls and a clean cylindrical profile. It should look deep enough to hold the penguin without swallowing the face entirely.
- Begin with an MR in cream or beige and work a flat circular base.
- Increase evenly until the base reaches the desired diameter.
- Work one BLO round to turn the sides upward.
- Continue in even rounds to build the mug wall.
- Finish with a neat rim round that stays level.
A tighter hook helps the mug keep its shape. Soft walls weaken the full cup silhouette immediately.
Handle
The handle should be thick enough to match the mug body and wide enough to read clearly from the side.
- Chain to the desired handle length.
- Work back in sc or hdc for one or two rows.
- Curve and sew both ends securely to the side of the mug.
Cocoa Surface
The brown drink layer closes the mug opening visually and gives the whipped cream something to sit on. It can be a flat insert or a slightly domed circle.
- Crochet a brown circle sized to fit just inside the mug rim.
- Keep it flat and firm.
- Sew or glue it into the mug opening below the whipped cream layer.
Whipped Cream Swirl
The whipped cream is the key scene-setting detail. It should rise above the cocoa and curve around the penguin rather than covering the face.
- Crochet a cream spiral strip or a rounded swirl piece.
- Build it so the center peak sits highest.
- Place it on top of the cocoa insert, leaving room for the penguin head.
- Stitch securely so the swirl stays raised.
Mini Marshmallows
The marshmallows are optional, but they help the mug read as a winter drink instead of a plain cup insert. Tiny white puffs are enough.
- Make several very small white balls or cubes.
- Place them around the whipped cream and near the penguin wings.
- Keep the count low so the top does not look crowded.
Assembly
- Complete the penguin head and upper body first.
- Attach the face patch, beak, cheeks, and wings.
- Crochet the mug body and sew on the handle.
- Insert the cocoa top into the mug.
- Position the penguin inside the center opening.
- Add the whipped cream swirl around the penguin.
- Place the marshmallows around the top.
- Weave in all ends securely and check that the penguin stays centered above the rim.
Color Placement Notes
Keep the penguin crown and wings black, the face and chest white, the beak bright orange, and the mug in a warm cream or taupe shade. That arrangement matches the sample and keeps the winter drink theme soft rather than high contrast. Brown for the cocoa layer helps separate the penguin from the mug interior.
Common Failure Points
- Penguin sinking into the mug: The head is too small or the mug rim is too tall. Increase the head size or shorten the mug wall by one or two rounds.
- Mug walls collapsing: The stitch fabric is too loose for a container shape. Use a smaller hook or firmer cotton yarn.
- Whipped cream looking flat: The swirl was made as a simple disk instead of a raised spiral. Add height at the center.
- Face losing contrast: The white patch is too small around the eyes. Widen the face area slightly before attaching the beak.
- Top looking overcrowded: Too many marshmallows or oversized wings fill the mug opening. Reduce accessory size and keep the penguin face dominant.
Where This Pattern Works Best
This style works well as a winter shelf decoration, desk companion, café-themed gift, holiday craft fair item, or nursery accent. It performs best as display amigurumi rather than a heavily handled toy because the mug, topping, and layered details are part of the appeal. Grouped with mugs, cocoa-themed decor, or other mini animal-in-cup designs, it reads especially clearly.
Conclusion
A penguin in mug crochet pattern succeeds when the face stays high above the rim, the mug stays structured, and the whipped cream layer supports the full hot-drink scene. Focus on clear facial contrast, a stable cup shape, and controlled topping placement around the penguin head. For the closest match to the sample, use a rounded black-and-white penguin, a cream mug, a brown cocoa layer, and a raised whipped cream swirl with a few mini marshmallows. Once assembled, the piece reads immediately as a penguin tucked into a warm drink.









