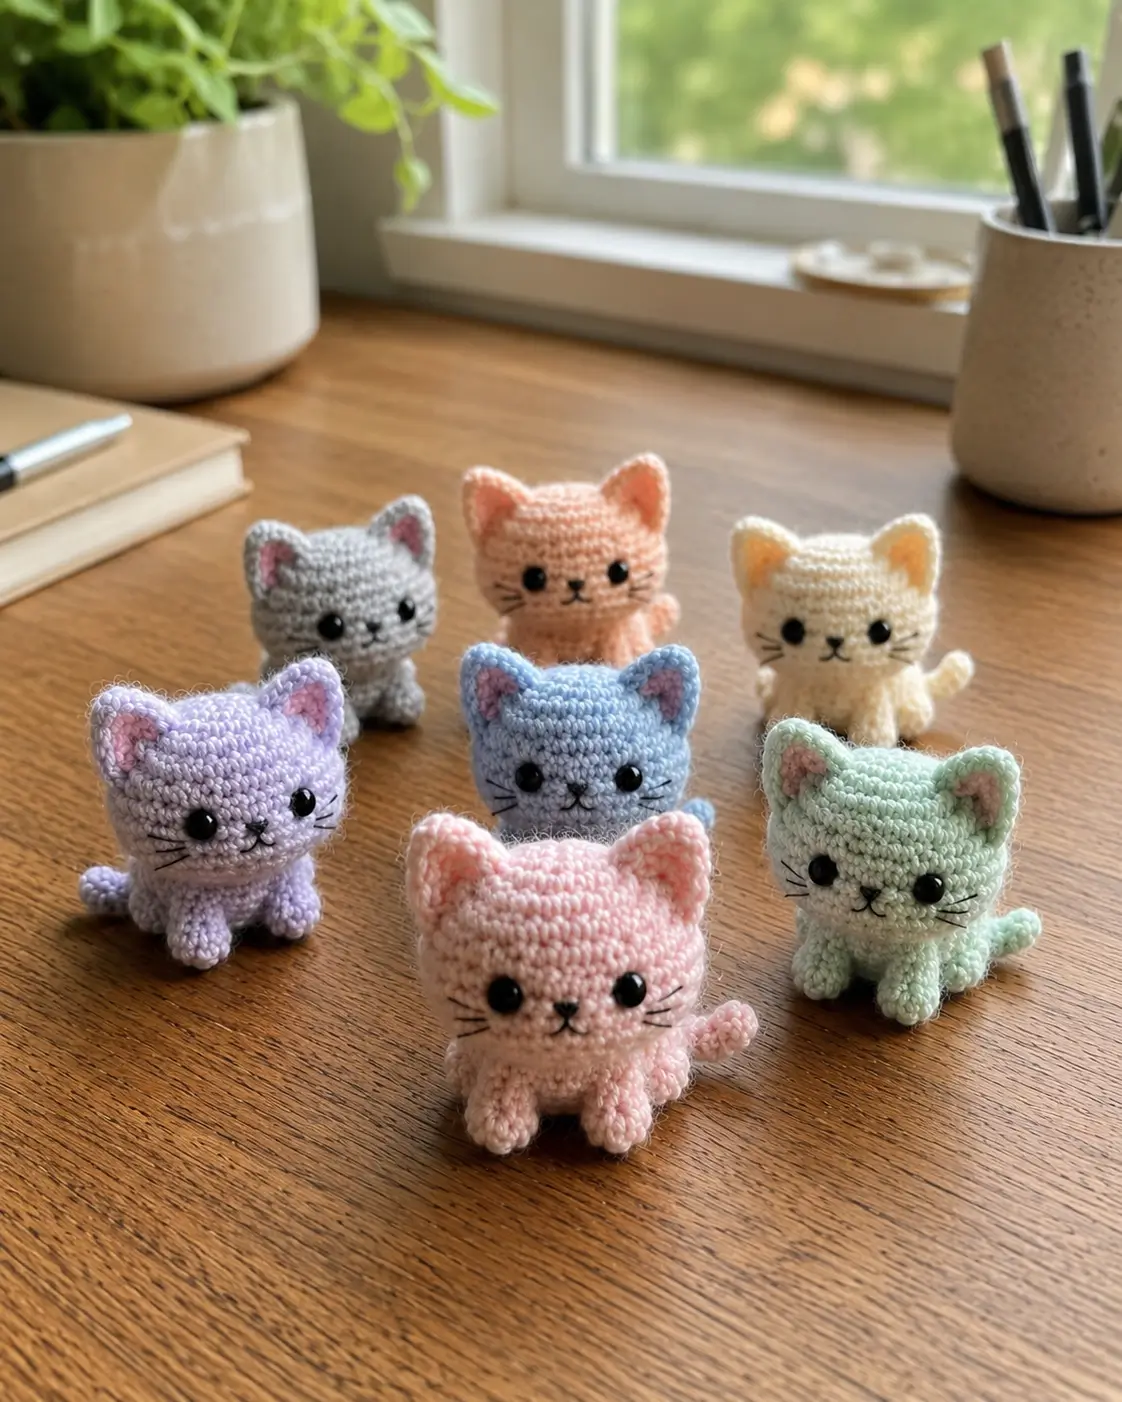
A kitten stops looking like a kitten when the triangular ears drift outward and read as bear nubs. This cat amigurumi crochet pattern builds a pastel, sitting mini cat with DK yarn, a 3.0 mm hook, 10 mm safety eyes, and basic-to-intermediate shaping. You will make a 9–10 cm desk-size toy for market color sets, practice pieces, or a photo prop with clear scale.
The Design: What Makes This Pastel Kitten Different
The head is larger than the body because the photo depends on kitten proportion, not adult cat length. You set the ears high and slightly inward so the silhouette stays feline; flat ears turn the mini cat crochet pattern into a mouse or bear. The body uses a compact sitting oval, then the maker adds separate front and back legs to keep the toy upright on a table. A curled tail is placed low at the rear so it works as a third balance point without pulling the body backward. For this crochet kitten pattern, the common mistake is spacing the eyes too far apart. More than six visible stitches between 10 mm eyes makes the face read older, while tight whisker lines restore the small-kitten scale.
Project Info at a Glance
| Skill Level | Time | Finished Size | Hook | Best For |
|---|---|---|---|---|
| Basic-to-intermediate amigurumi | About 1 hour | 9–10 cm | 3.0 mm | Pastel sets, desk display, keychain-scale gifts |
Time and scale are based on small cat references from Ravelry and DIY Fluffies; hook and yarn weight are cross-checked against DK cat pattern data.
Materials and Tools
Yarn
- Pastel main color — DK or light worsted — up to 40 g — Hobbii 8/8, YarnArt Jeans, Paintbox Cotton DK, or similar.
- Light pink accent — same weight — about 5 g — for inner ears and cheek patches.
- Black embroidery thread — small amount — for nose, mouth, and whiskers.
- Optional second pastel shade — same weight — small scrap — for multi-cat sets.
Tools
- Hook 3.0 mm
- 10 mm safety eyes
- Polyester stuffing
- Tapestry needle
- Stitch markers
- Pins
- Scissors
Safety eyes are not suitable for children under 3; use embroidered eyes for that age group.
Abbreviations
MR = magic ring; sc = single crochet; inc = increase; dec = invisible decrease; sl st = slip stitch; ch = chain; BLO = back loop only; FO = fasten off.
Invisible decrease means working through the front loops of the next two stitches before finishing one single crochet, which reduces bulk on the kitten’s face and body.
Pattern — Step by Step
Continuous spiral unless noted. This pattern uses a 36-stitch medium-mini head and body base to match the rounded pastel kittens in the photo.
Head
Yarn: pastel main color
R1: 6 sc in MR (6)
R2: inc ×6 (12)
R3: (sc, inc) ×6 (18)
R4: (2 sc, inc) ×6 (24)
R5: (3 sc, inc) ×6 (30)
R6: (4 sc, inc) ×6 (36)
R7: sc around (36)
R8: sc around (36)
R9: sc around (36)
R10: sc around (36)
R11: sc around (36)
R12: sc around (36)
Insert 10 mm safety eyes between R8 and R9, with 5–6 visible stitches between the eyes.
R13: (4 sc, dec) ×6 (30)
R14: (3 sc, dec) ×6 (24)
R15: (2 sc, dec) ×6 (18)
R16: (sc, dec) ×6 (12)
Stuff firmly across the lower face, but do not stretch the eye line.
R17: dec ×6 (6)
Fasten off. Leave a 15 cm tail and close the remaining hole.
Body
Yarn: pastel main color
R1: 6 sc in MR (6)
R2: inc ×6 (12)
R3: (sc, inc) ×6 (18)
R4: (2 sc, inc) ×6 (24)
R5: (3 sc, inc) ×6 (30)
R6: (4 sc, inc) ×6 (36)
R7: sc around (36)
R8: sc around (36)
R9: sc around (36)
R10: (4 sc, dec) ×6 (30)
R11: (3 sc, dec) ×6 (24)
R12: sc around (24)
R13: (2 sc, dec) ×6 (18)
Stuff the lower body flat enough to sit without rocking.
R14: (sc, dec) ×6 (12)
R15: dec ×6 (6)
Fasten off. Leave a 20 cm tail for sewing to the head.
Front Legs
Make 2. Yarn: pastel main color
R1: 6 sc in MR (6)
R2: inc ×6 (12)
R3: sc around (12)
R4: sc around (12)
R5: sc around (12)
R6: dec ×6 (6)
R7: sc around (6)
R8: sc around (6)
Stuff only the paw end. The upper half should stay soft for sewing.
Fasten off. Leave a 20 cm tail.
Back Legs
Make 2. Yarn: pastel main color
R1: 6 sc in MR (6)
R2: inc ×6 (12)
R3: (sc, inc) ×6 (18)
R4: sc around (18)
R5: sc around (18)
R6: (sc, dec) ×6 (12)
R7: dec ×6 (6)
Stuff lightly so each hind leg presses flat on the table.
Fasten off. Leave a 25 cm tail.
Outer Ears
Make 2. Yarn: pastel main color
R1: 6 sc in MR (6)
R2: inc ×6 (12)
R3: sc around (12)
R4: sc around (12)
Flatten each ear into a triangle, with the starting ring forming the upper point.
Fasten off. Leave a 25 cm tail.
Inner Ear Patches
Make 2. Yarn: light pink accent
R1: 6 sc in MR (6)
R2: inc ×6 (12)
sl st to first stitch (12)
Do not stuff. Fold each flat circle slightly into a soft triangle before stitching it inside the outer ear.
Fasten off. Leave a 15 cm tail.
Snout and Nose Base
Yarn: pastel main color or slightly lighter pastel
R1: 6 sc in MR (6)
R2: inc ×6 (12)
R3: sc around (12)
Do not overstuff. The snout should sit almost flat between and below the eyes.
Fasten off. Leave a 20 cm tail.
Tail
Yarn: pastel main color
R1: 6 sc in MR (6)
R2: sc around (6)
R3: sc around (6)
R4: sc around (6)
R5: sc around (6)
R6: sc around (6)
R7: sc around (6)
R8: sc around (6)
R9: sc around (6)
R10: sc around (6)
R11: sc around (6)
R12: sc around (6)
Do not stuff heavily. Curve the tail while sewing so it hooks upward like the photo reference.
Fasten off. Leave a 30 cm tail.
Cheek Patches
Make 2. Yarn: light pink accent
R1: 6 sc in MR (6)
R2: inc ×6 (12)
sl st to first stitch (12)
Keep these flat. Place each patch below the outer edge of the eye, not directly under the eye.
Fasten off. Leave a 15 cm tail.
Face Embroidery and Whiskers
Yarn: black embroidery thread
Use one vertical stitch for the nose over the center of the snout. Add a short inverted “Y” mouth under it. Work three whiskers on each side, each 2–3 stitches long. Anchor every whisker through the head, not only through the snout, so the lines stay taut.
Fasten off inside the head and hide the thread.
Photo Accessory Check
No accessory is visible in the reference photo. No hat, scarf, bow, collar, or prop rounds are added to this version.
Assembly
- Pin the head to the body with the head tilted forward by 2–3 mm.
- Sew the body to the head through R14–R16 of the head and the top edge of the body.
- Attach the snout centered between the eyes, with its top edge one round below the eye line.
- Stitch the nose and mouth before adding whiskers so the center point stays fixed.
- Sew cheek patches under the outer lower corners of the eyes.
- Place the ears on R3–R6 of the head, tilted slightly inward.
- Sew front legs to the front body seam, 2 stitches apart.
- Sew back legs lower and wider than the front legs so the kitten can sit.
- Attach the tail at the lower back, then curve it toward one side.
- Weave all tails through stuffed areas and trim only after checking table balance.
The finished kitten is a seated pastel cat with visible ears, legs, cheeks, whiskers, and curled tail.
7 Technical Tips
- Stitch marker drift: A missing marker can move the eye line one stitch per round. Reset the marker at the first stitch of every round, especially on R7–R12 of the head.
- Stuffing firmness: A soft head collapses around 10 mm safety eyes and creates dents. Add pea-sized stuffing pieces under each eye before closing R17.
- Invisible decrease gaps: Standard decreases can leave six small holes around the face close. Work front-loop invisible decreases on R13–R17 to keep stuffing hidden.
- Eye placement timing: Late eye placement can crack the stitch columns when the head is nearly closed. Insert eyes before R13 while the inside of the head is still reachable.
- Velvet tension substitution: Velvet or chenille can enlarge this 9–10 cm cat past 12 cm with the same stitch count. Drop hook size by 0.5 mm from the yarn label if gaps appear.
- Pinning error: Unpinned ears often sit one round lower on one side, which makes the kitten look tilted. Pin both ears across R3–R6 and count from the center top before sewing.
- Tail weaving failure: A tail sewn only to one stitch can twist loose after handling. Sew through at least six body stitches, then weave the tail yarn across the stuffing channel twice.
Conclusion
This pastel kitten works because every cat marker is controlled: high triangle ears, close-set eyes, short whiskers, small paws, and a tail that supports the seated body. Make one test cat in a pale color first, then mark every round where the face parts land before starting a full pastel set. Save the finished piece to Pinterest and post the side view on Instagram so the tail curve and ear angle are visible. Hashtag: #PastelMiniCat. For the next version, test one change only: should the pink kitten’s ears lean closer together, or should they stay wider like the blue cat? This cat amigurumi crochet pattern is built for that comparison.









