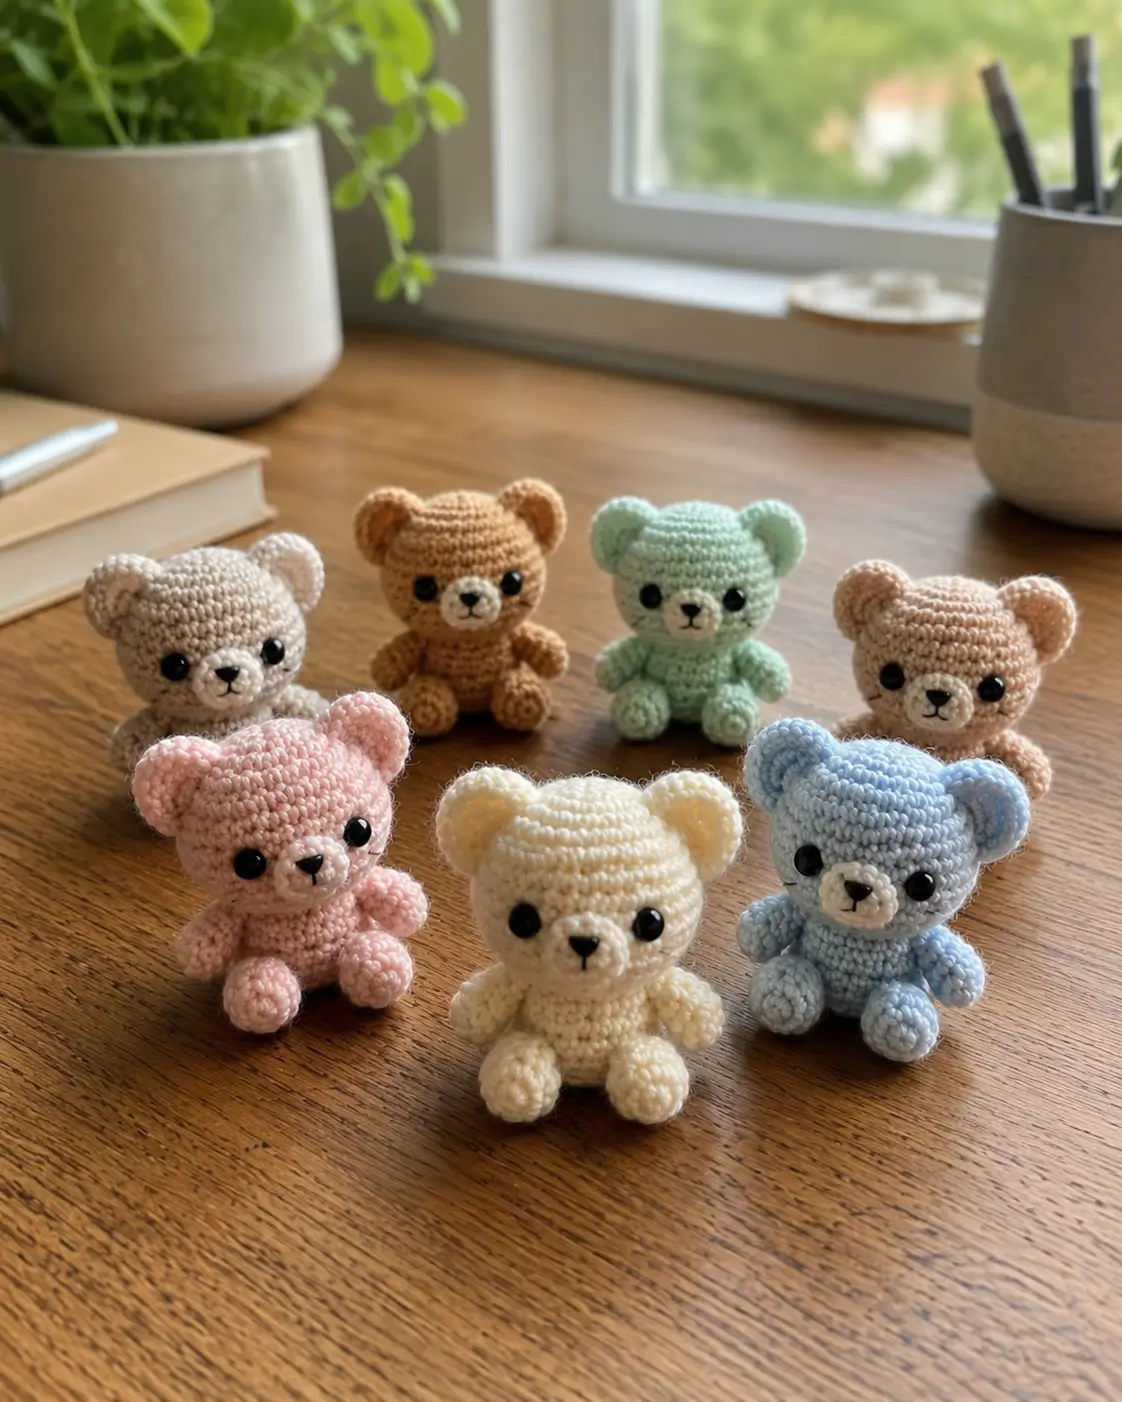
Teddy bears fail fast when the muzzle is too flat for the round ears. This teddy bear amigurumi crochet pattern builds a 9–9.5 cm seated bear from DK cotton, a 2.5 mm hook, 6 mm safety eyes, and firm stuffing. You need standard amigurumi skills: magic ring, increases, invisible decreases, and sewing. Make it for a pastel desk set where each bear keeps the same silhouette.
The Design: What Makes This Teddy Bear Different
This mini teddy bear crochet pattern uses a head larger than the body because the photo bears read as nursery-style figures, not realistic cubs. A 30-stitch head plateau gives enough width for round ears without pushing the eyes outward. The body stops at 24 stitches so the bear sits forward, with back legs acting as a low tripod. The muzzle is made as a raised 12-stitch disk; a flat embroidered nose alone would disappear against the pastel yarn. For a pastel bear amigurumi set, the face must stay identical across colors. The common mistake is sewing ears too high and too far back. That turns the bear into a mouse from the front and hides the circular ear line in side photos.
Project Info at a Glance
| Skill Level | Time | Finished Size | Hook | Best For |
|---|---|---|---|---|
| Intermediate | 1–2 hours after first sample | 9–9.5 cm | 2.5 mm | Pastel sets, desk display, small gifts |
The size, hook, yarn, and eye choices follow verified tiny teddy data using DK cotton, 2.5 mm hook, 6 mm eyes, and low yarn amounts.
Materials and Tools
Yarn
- Cream, pink, blue, mint, tan, or beige — DK cotton or DK/light-worsted blend — 17 g — suggested: Ricorumi DK, Cascade Ultra Pima, Paintbox Cotton DK.
- Ivory or white — DK cotton — 2 g — used for muzzle and optional cheek patches.
- Black — embroidery floss or cotton thread — less than 1 g — used for nose and mouth.
- Optional blush pink — DK cotton — less than 1 g — used only if you want visible cheek circles.
DK cotton gives the clearest stitch definition for the small round ears. Fuzzy baby yarn can work, but it changes the finished height and calls for larger eyes in many tiny bear patterns.
Tools
- Hook 2.5 mm
- 6 mm safety eyes
- Polyester stuffing
- Yarn needle
- Embroidery needle
- Stitch markers
- Pins
- Scissors
- Row counter or paper tally
Abbreviations
- MR = magic ring
- sc = single crochet
- inc = 2 sc in same stitch
- dec = invisible decrease
- sl st = slip stitch
- ch = chain
- BLO = back loop only
- FO = fasten off
Invisible decrease works through front loops only so the closing rounds keep the muzzle-side fabric smooth.
Gauge target: the 30-stitch head should measure about 4.2–4.6 cm wide before stuffing. If it is wider than 5 cm, change to a smaller hook before making the second bear. If it is narrower than 4 cm, the 6 mm eyes may crowd the muzzle. Use the same hook for all pastel colors, then adjust only stuffing pressure.
Pattern — Step by Step
Continuous spiral unless noted. Mark the first stitch of every round.
Head
Yarn: main pastel color.
R1: 6 sc in MR (6)
R2: inc ×6 (12)
R3: (sc, inc) ×6 (18)
R4: (2 sc, inc) ×6 (24)
R5: (3 sc, inc) ×6 (30)
R6: sc around (30)
R7: sc around (30)
R8: sc around (30)
R9: sc around (30)
R10: sc around (30)
R11: sc around (30)
R12: (3 sc, dec) ×6 (24)
R13: (2 sc, dec) ×6 (18)
Install safety eyes between R8 and R9, leaving 6 stitches between eye posts. Start stuffing before R14.
R14: (sc, dec) ×6 (12)
R15: dec ×6 (6)
Fasten off. Leave a 20 cm tail and close the final hole through front loops.
Body
Yarn: main pastel color.
R1: 6 sc in MR (6)
R2: inc ×6 (12)
R3: (sc, inc) ×6 (18)
R4: (2 sc, inc) ×6 (24)
R5: sc around (24)
R6: sc around (24)
R7: sc around (24)
R8: sc around (24)
R9: sc around (24)
R10: (2 sc, dec) ×6 (18)
R11: sc around (18)
Stuff firmly at the base and lightly at the neck edge.
R12: (sc, dec) ×6 (12)
R13: dec ×6 (6)
Fasten off. Leave a 25 cm tail for sewing to the head.
Arms / Front Legs
Yarn: main pastel color. Make 2.
R1: 6 sc in MR (6)
R2: inc ×6 (12)
R3: sc around (12)
R4: sc around (12)
R5: dec ×6 (6)
R6: sc around (6)
R7: sc around (6)
Stuff only the paw section. Leave the top flat so it sits close to the body.
Fasten off. Leave a 15 cm tail on each arm.
Back Legs
Yarn: main pastel color. Make 2.
R1: 6 sc in MR (6)
R2: inc ×6 (12)
R3: sc around (12)
R4: sc around (12)
R5: sc around (12)
R6: dec ×6 (6)
R7: sc around (6)
Stuff each foot firmly. Do not overfill the final round.
Fasten off. Leave an 18 cm tail on each leg.
Ears
Yarn: main pastel color. Make 2.
R1: 6 sc in MR (6)
R2: inc ×6 (12)
R3: sc around (12)
R4: sc around (12)
Do not stuff. Flatten into half-circles.
Fasten off. Leave a 20 cm tail on each ear.
Muzzle / Snout
Yarn: ivory or white.
R1: 6 sc in MR (6)
R2: inc ×6 (12)
R3: sc around (12)
sl st into next stitch (12)
Stuff with a pinch of fiberfill only after pinning. Embroider the nose before final sewing.
Fasten off. Leave a 25 cm tail.
Cheek Patches
Yarn: ivory, white, or blush pink. Make 2.
R1: 6 sc in MR (6)
R2: inc ×6 (12)
sl st into next stitch (12)
Keep these flat. Skip visible blush yarn if matching the photo exactly; use ivory for a subtle under-eye patch.
Fasten off. Leave a 15 cm tail.
Tail
Yarn: main pastel color.
R1: 6 sc in MR (6)
R2: inc ×6 (12)
R3: sc around (12)
R4: dec ×6 (6)
Stuff with one small pinch only.
Fasten off. Leave a 15 cm tail.
Assembly
- Place the head with the closing round at the lower back, not under the muzzle.
- Sew the body to the bottom of the head using the body tail; add stuffing before closing the last 2 cm.
- Pin the muzzle centered between the eyes, with its top edge touching R9.
- Embroider a black triangular nose over R2 of the muzzle, then add one short vertical stitch below it.
- Sew the cheek patches low and slightly outward from the eyes, or omit visible blush for a closer photo match.
- Pin the ears between R4 and R7 of the head, with 8–9 stitches between inner edges.
- Sew arms to the body one round below the head seam, angled forward.
- Attach back legs to the lower front of the body, 4 stitches apart, so the bear sits without tipping.
- Sew the tail to the lower back on the body centerline.
- Weave each yarn tail through at least 3 internal paths, then trim close to the fabric.
The finished bear is a seated mini teddy with a raised muzzle, round ears, short limbs, and stable base.
7 Technical Tips
- Stitch marker drift: If the marker shifts more than 2 stitches across the head plateau, the face center will rotate. Move the marker up every round and count R6, R8, and R10 before installing eyes.
- Stuffing firmness: Under-stuffed heads collapse beside the muzzle and make the eyes point downward. Fill the head to about 85–90% firmness before R14, then add small pieces until the dome holds.
- Invisible decrease holes: Visible holes usually appear on R13–R15 when both loops are pulled through. Work each dec through front loops only and keep the yarn hand tighter for those 3 rounds.
- Eye placement timing: Installing eyes after R14 can stretch the closing rounds and distort the face. Place 6 mm eyes between R8 and R9 with 6 stitches between posts before the opening narrows.
- Velvet tension: If you switch to fuzzy or velvet yarn, loose tension can cause worming around the muzzle seam. Drop 0.5 mm from your normal velvet hook and use longer sewing stitches that catch the base fabric.
- Pinning symmetry: Ears sewn without pins often land one row apart, which makes the bear lean in front photos. Pin both ears first, check from the top, then sew only after the inner edges match.
- Tail weaving: A 5 cm yarn tail can pull free inside a small stuffed body. Leave at least 15 cm, weave through 3 directions, and pull the tail out through the opposite side before trimming.
Conclusion
Before publishing, make one test bear in the lightest yarn color and check the nose contrast under window light. Pale cream, mint, and blue hide embroidery errors, but they also make a weak muzzle look flat. Photograph the side view after pinning; the ears should form two equal circles above the eye line, and the feet should touch the table. Save the finished sample to Pinterest with the height, hook, and yarn weight in the caption, then post the color lineup on Instagram. Use #MiniTeddyBear. Next, crochet one extra muzzle and compare it against the first. For this teddy bear amigurumi crochet pattern, would tan or ivory give the central bear a clearer snout?









