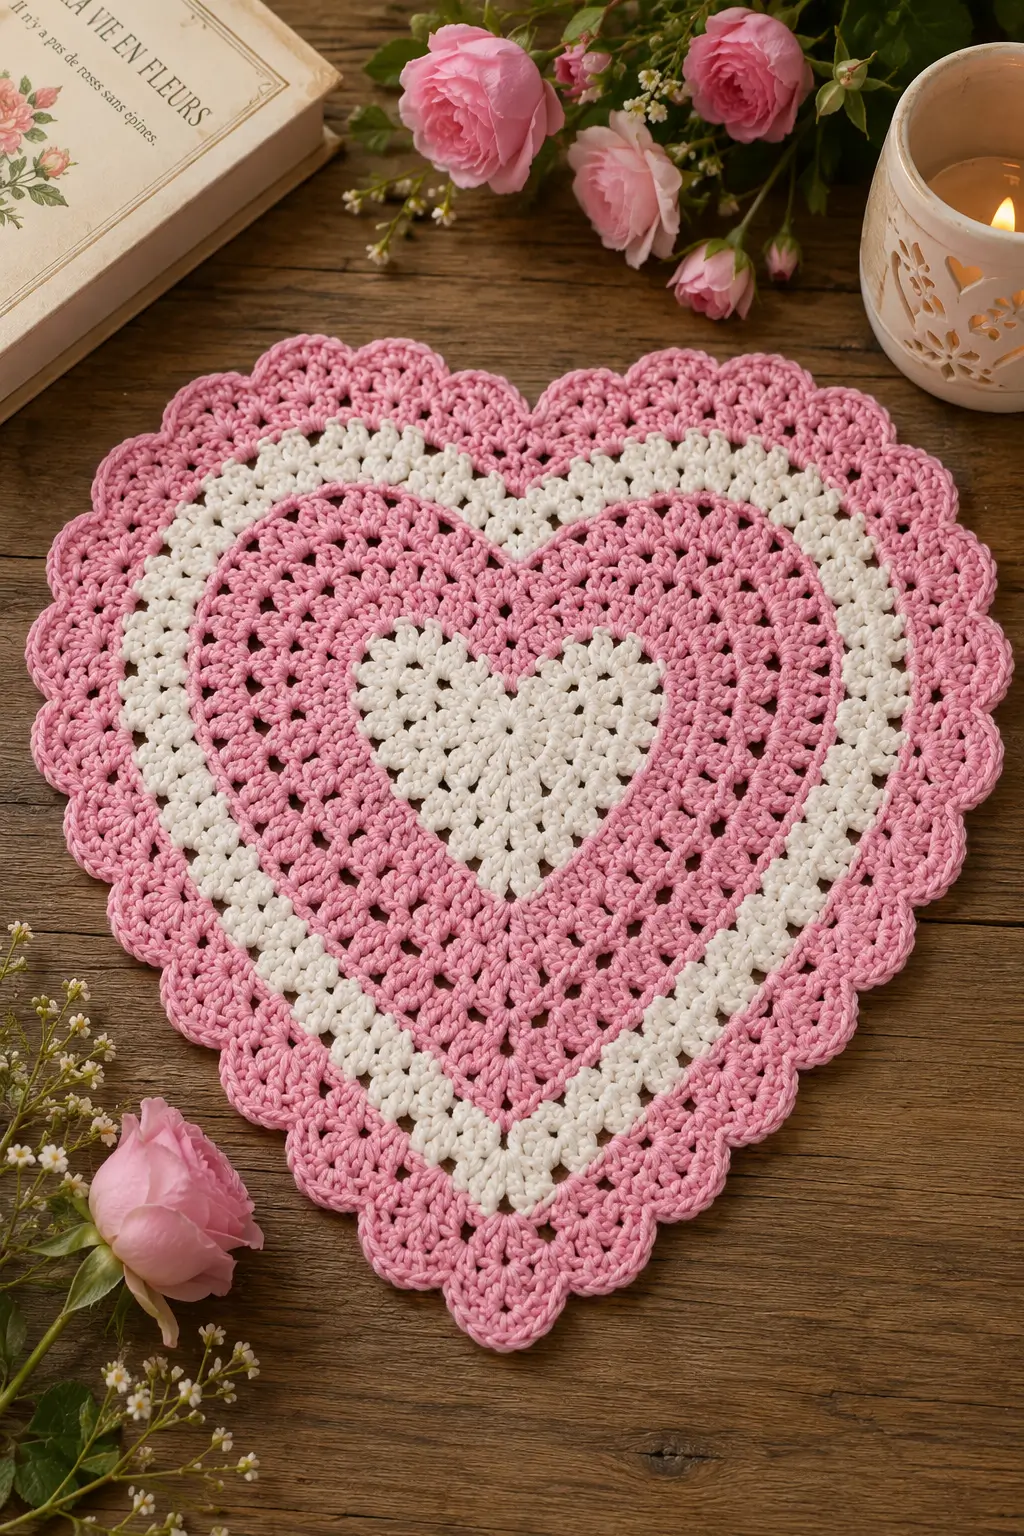
A heart placemat fails when the lobes flatten and the lower point rounds off. This heart crochet placemat pattern fixes both problems with mirrored shell placement, cotton yarn, and a controlled edge round. The finished piece lands near 37 cm, uses a 3.5–4.0 mm hook, and suits an intermediate crocheter. It works as table décor, a tray mat, or seasonal photo styling.
The Design: What Makes This Heart Different
This version is built as a flat decorative mat, not a toy, so structure matters more than stuffing. The first decision is the nested-heart layout: a small cream center, a pink heart ring, then a cream band and pink scalloped border. That sequencing copies the visual rhythm in the photo and also keeps contrast high on a wooden table. The second decision is fiber choice. Cotton holds the lower point sharper than soft acrylic and resists sagging across the upper curves, which is why heart-shaped crochet placemat projects often specify cotton or kitchen-friendly yarns.
A third decision concerns edging. Many patterns stop at a plain perimeter, but a crochet heart doily reads more finished when the border adds outward lift without curling. The common mistake is overloading the top dips with too many shells. Then the center cleft buckles. Here, shell spacing shifts slightly at the lobes and point so the fabric stays flat. That matters in a heart-shaped crochet placemat more than it does in a hanging ornament.
Project Info at a Glance
| Skill Level | Time | Finished Size | Hook | Best For |
|---|---|---|---|---|
| Intermediate | 4–6 hours | approx. 37 x 36 cm | 3.5–4.0 mm | table décor, Valentine styling, tray mat |
Materials and Tools
Yarn
- Soft pink cotton — DK to worsted — about 100 g — Dishie, Muskat, or similar table cotton
- Cream cotton — DK to worsted — about 50 g — matching cotton contrast yarn
Tools
- Hook 3.5 mm to 4.0 mm
- Tapestry needle
- Stitch markers
- Scissors
- Blocking pins and mat
Abbreviations
- MR = magic ring
- ch = chain
- sl st = slip stitch
- sc = single crochet
- hdc = half double crochet
- dc = double crochet
- tr = treble crochet
- inc = increase
- BLO = back loop only
- sp = space
Use the invisible decrease only if you substitute a denser edging round; it reduces bulk at shaping points better than a standard front-facing decrease.
Pattern — Step by Step
This is a joined-round and joined-row flat pattern, adapted from the photographed placemat shape rather than an amigurumi spiral.
Center Heart (Make 1)
Yarn: cream
Ch 4.
R1: Work 3 dc in 4th ch from hook, 3 dc, ch 1, 1 tr, ch 1, 3 dc, ch 2, 3 dc in same ch. Turn work to opposite side of foundation, 3 dc, ch 1, 1 tr, ch 1, 3 dc, ch 2, sl st to join at bottom point.
R2: Ch 3, dc in next 2 sts, (2 dc, ch 1, 2 dc) in next ch-2 sp, dc in next 3 sts, (dc, tr, dc) in next ch-1 sp, dc in next 3 sts, (2 dc, ch 2, 2 dc) in next ch-2 sp, dc in next 3 sts, (dc, tr, dc) in next ch-1 sp, dc in next 3 sts, sl st to join.
R3: Ch 3, dc across to corner, (2 dc, ch 1, 2 dc) in corner sp, dc across side, (dc, tr, dc) in top dip sp, dc across, (2 dc, ch 2, 2 dc) in bottom point sp, dc across, (dc, tr, dc) in top dip sp, dc across, sl st to join.
R4: Repeat shaping logic from R3, adding one dc between each shaping point section.
R5: Sl st around with light tension to clean the outline.
Fasten off. Leave a 12 cm tail.
Pink Heart Band (Make 1)
Yarn: soft pink
Join pink in the lower point.
R1: Ch 3, dc evenly around center heart, placing (2 dc, ch 2, 2 dc) at lower point, (2 dc, ch 1, 2 dc) at each upper lobe curve, and (dc, tr, dc) in each top dip. Sl st to join.
R2: Ch 3, dc in each st around, repeating the same shaping placements at the three outer corners and two top dips.
R3: Ch 4, skip 1, dc in next, ch 1 across each straight section; keep shaping stitches unchanged in the three corner spaces and both top dips.
R4: Ch 3, work 2 dc in each ch-1 sp and 1 dc in each dc; keep shaping stitches in the same five control points.
R5: Sl st in each st around.
Fasten off. Leave a 12 cm tail.
Cream Outer Heart Band (Make 1)
Yarn: cream
Join cream at lower point.
R1: Ch 3, dc around entire piece, placing shaping as established: lower point = (2 dc, ch 2, 2 dc); upper lobe corners = (2 dc, ch 1, 2 dc); top dips = (dc, tr, dc).
R2: Ch 1, sc in each st around; in every ch-1 or ch-2 shaping space work sc, ch 1, sc.
R3: Ch 3, skip 1, 3 dc in next st across gentle curves; on flatter side runs work dc evenly to avoid flare; maintain the same lower point and upper-lobe shaping.
R4: Ch 1, sc around, 2 sc in shell centers where needed to level the edge.
Fasten off. Leave a 12 cm tail.
Pink Scalloped Border (Make 1)
Yarn: soft pink
Join pink in any side section.
R1: Ch 1, sc evenly around entire heart. Place 3 sc in the lower point, 2 sc in each top dip, and 3 sc in each upper lobe outer turn. Join.
R2: Ch 1, skip 1, 5 dc in next st, skip 1, sc in next st around to form scallops.
At the lower point, work one centered shell of 7 dc.
At each top dip, reduce fullness with sc, ch 1, sc instead of a full shell.
R3: Optional refinement round: sl st in each dc of every shell and sc in each valley to tighten the outline.
Fasten off. Leave a 15 cm tail.
Blocking Round (Optional, Make 1)
Yarn: cream or pink
If your cotton is soft and the scallops roll, join yarn in any valley and work a very loose sl st in the back loop only around the full perimeter.
Fasten off. Leave an 8 cm tail.
Assembly
- Weave in the center heart tail on the wrong side.
- Weave in the pink heart band tail, keeping the lower point free of bulk.
- Weave in the cream outer band tail away from the top dip.
- Finish the scallop-border tail by running it through three shell bases.
- Dampen the placemat lightly with water spray.
- Pin the lower point first.
- Pin both upper lobe peaks to equal height.
- Pin the two top dips slightly inward so the cleft stays visible.
- Steam or air-dry flat until the border sets.
- Remove pins and measure from top lobe to point for final sizing.
The completed placemat should lie flat with a distinct center heart and evenly spaced scallops.
7 Technical Tips
- Mark the lower point before each new color round. Miss that location once and the full heart starts drifting left or right by the next band.
- Do not overstuff the shell border with stitches. On a placemat, excess shells create ripples; the failure shows up first along the upper lobes.
- Keep the top dip shallow. Too many stitches there collapse the cleft and turn the silhouette into a rounded oval.
- Block to an exact height target. Aim for roughly 37–38 cm if you are matching the photographed scale; pinning shorter leaves the heart visually squat.
- Use cotton if the piece will sit under dishes or mugs. Acrylic can relax under heat and laundering, while cotton is the more common published choice for placemat builds.
- Pin every third scallop, not just the corners. Skipping intermediate pin points makes one side dry longer and produces uneven shell spread.
- Weave tails through direction changes. A straight tail path across open lace can shadow through the white center, especially under side lighting.
Conclusion
This heart crochet placemat pattern works because the shaping is controlled at five points: the lower tip, two lobe turns, and two top dips. Build the center cleanly, keep the contrast bands even, then block to the final outline instead of forcing the shape during stitching. For the next step, make a second matching mat and test one version in reversed colors. Share the result on Pinterest and Instagram with the project tag #HeartCrochetPlacematPattern. One useful question remains: did your upper cleft stay crisp after the scallop round, or did it need one extra blocking pin on each side?









