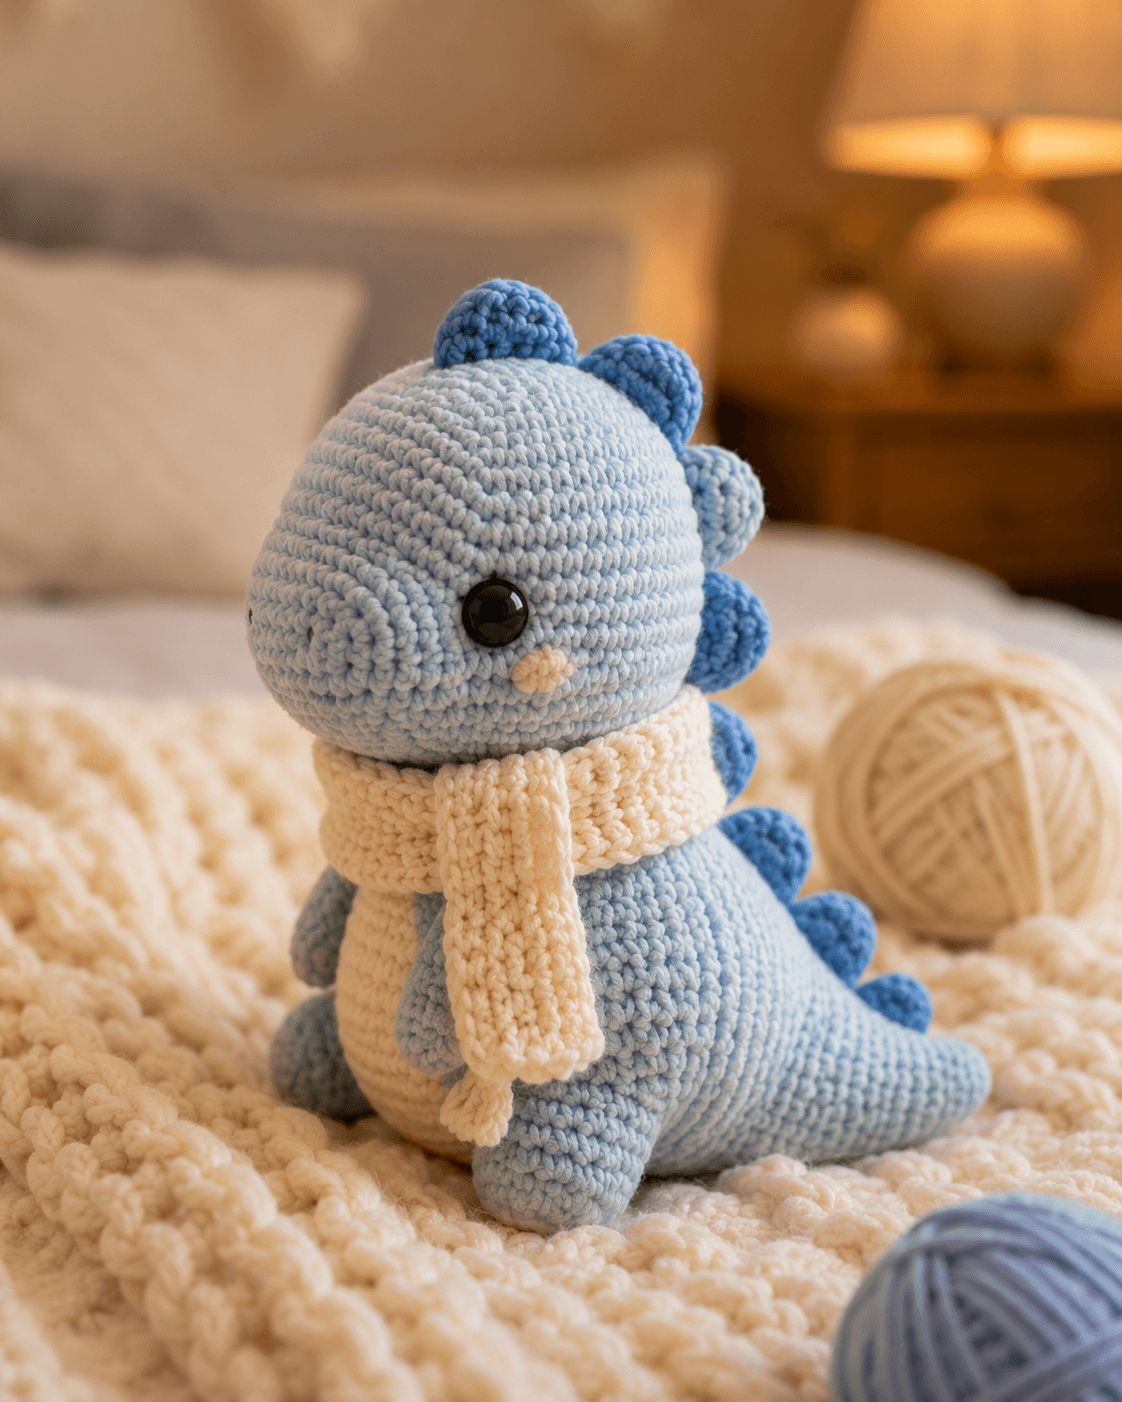
Back spikes change the center of gravity. That is the first drafting problem in this dinosaur amigurumi crochet pattern. You need a broad sitting base, a head large enough for 9 mm eyes, and a tail that stabilizes the profile without flattening the body line. This version uses DK cotton, a 3.25 mm hook, and simple stitched shapes to make a seated toy around 20–21 cm high, useful as a nursery shelf piece or a photo-prop gift.
The Design: What Makes This Dinosaur Different
This dinosaur is not built like a generic upright plush. The head is oversized, but the snout projects forward instead of down, so the eye line stays visible in profile. That matters. A flat face would read as whale or lizard from one angle. The second decision is the tail. It must taper long enough to counterbalance the back-heavy spike line, yet stay soft enough to rest on the blanket rather than hold the body rigid. Third, the spikes are rounded, not sharp. That keeps the silhouette juvenile and matches the baby-dino look common in popular crochet dinosaur pattern searches, while still giving the figure a clear prehistoric outline. A common mistake with baby dinosaur amigurumi is placing the eyes too low on a large head. The result is a drooping face instead of a forward-looking side profile.
Project Info at a Glance
| Skill Level | Time | Finished Size | Hook | Best For |
|---|---|---|---|---|
| Easy–Intermediate | 6–8 hours | 20–21 cm sitting | 3.25 mm | shelf decor, baby gift, winter display |
Size, hook, yarn weight, and eye size are aligned with current dinosaur listings that use DK or similar cotton and finish around 20–21 cm when sitting.
Materials and Tools
Yarn
- Pale blue — DK cotton — 70 g — Paintbox Cotton DK or similar blue cotton reference
- Medium blue — DK cotton — 10–12 g — for spikes and head bumps
- White — DK cotton — 20–25 g — for belly, snout detail, and scarf
- Cream — DK cotton — small amount — optional nose dot or cheek detail
Tools
- Hook 3.25 mm
- 9 mm safety eyes
- Stuffing
- Yarn needle
- Stitch markers
- Sewing pins
Abbreviations
MR = magic ring
sc = single crochet
inc = 2 sc in one stitch
dec = invisible decrease
sl st = slip stitch
ch = chain
BLO = back loop only
Invisible decrease reduces bulk on the face and tail taper, which keeps the surface smoother than a standard front-facing decrease.
Pattern — Step by Step
Continuous spiral unless noted.
Head (Make 1)
Yarn: pale blue — Source: Standard amigurumi math
R1: 6 sc in MR (6)
R2: inc x6 (12)
R3: (sc, inc) x6 (18)
R4: (2 sc, inc) x6 (24)
R5: (3 sc, inc) x6 (30)
R6: (4 sc, inc) x6 (36)
R7–12: sc around (36)
R13: (4 sc, dec) x6 (30)
R14: (3 sc, dec) x6 (24)
Insert safety eyes between R8 and R9, about 8 sts apart. Stuff firmly.
R15: (2 sc, dec) x6 (18)
R16: (sc, dec) x6 (12)
R17: dec x6 (6)
Fasten off. Leave a 20 cm tail.
Body with Tail (Make 1)
Yarn: pale blue — Source: Standard amigurumi math
R1: 6 sc in MR (6)
R2: inc x6 (12)
R3: (sc, inc) x6 (18)
R4: (2 sc, inc) x6 (24)
R5: (3 sc, inc) x6 (30)
R6: (4 sc, inc) x6 (36)
R7–11: sc around (36)
R12: (4 sc, dec) x6 (30)
R13–15: sc around (30)
R16: (3 sc, dec) x6 (24)
R17–19: sc around (24)
R20: (2 sc, dec) x6 (18)
R21–23: sc around (18)
R24: (sc, dec) x6 (12)
R25–27: sc around (12)
R28: dec x6 (6)
Stuff body firmly at base, lighter in the tail.
Fasten off. Leave a 25 cm tail.
Snout (Make 1)
Yarn: pale blue — Source: Standard amigurumi math
R1: 6 sc in MR (6)
R2: inc x6 (12)
R3–4: sc around (12)
R5: (sc, dec) x4 (8)
Light stuffing only.
Fasten off. Leave a 20 cm tail.
Belly Patch (Make 1)
Yarn: white — Source: Standard amigurumi math
Ch 7.
R1: starting in 2nd ch from hook, sc 5, 3 sc in last ch, working on opposite side sc 4, inc in last st (14)
R2: inc, sc 4, inc x3, sc 4, inc x2 (20)
R3: sc around, placing 2 extra sc at each curve end (24)
Fasten off. Leave a 25 cm tail.
Arms / Front Legs (Make 2)
Yarn: pale blue — Source: Standard amigurumi math
R1: 6 sc in MR (6)
R2: (sc, inc) x3 (9)
R3–6: sc around (9)
R7: (sc, dec) x3 (6)
R8–9: sc around (6)
Stuff lower half only.
Fasten off. Leave a 20 cm tail.
Back Legs (Make 2)
Yarn: pale blue — Source: Standard amigurumi math
R1: 6 sc in MR (6)
R2: inc x6 (12)
R3–4: sc around (12)
R5: (2 sc, dec) x3 (9)
R6–7: sc around (9)
Stuff firmly so the toy sits level.
Fasten off. Leave a 20 cm tail.
Head Spikes (Make 2)
Yarn: medium blue — Source: Standard amigurumi math
R1: 6 sc in MR (6)
R2: inc x6 (12)
R3: sc around (12)
Flatten and sc through both sides across 6 sts.
Fasten off. Leave a 15 cm tail.
Back Spikes (Make 4)
Yarn: medium blue — Source: Standard amigurumi math
R1: 6 sc in MR (6)
R2: (sc, inc) x3 (9)
R3: sc around (9)
Flatten and sc through both sides across 4 sts.
Fasten off. Leave a 15 cm tail.
Tail Tip Spike (Make 1)
Yarn: medium blue — Source: Standard amigurumi math
R1: 4 sc in MR (4)
R2: sc around (4)
Flatten.
Fasten off. Leave a 10 cm tail.
Cheek Patches (Make 2)
Yarn: pale blue or cream — Source: Standard amigurumi math
R1: 6 sc in MR (6)
R2: inc x6 (12)
Sl st to close.
Fasten off. Leave a 12 cm tail.
Nose Dot (Make 1)
Yarn: cream — Source: Standard amigurumi math
R1: 4 sc in MR (4)
Sl st to first st.
Fasten off. Leave a 10 cm tail.
Scarf (Make 1)
Yarn: white — Source: Original accessory sizing for photo match
Ch 46.
Row 1: sc in 2nd ch from hook and across (45)
Row 2–6: ch 1, turn, sc across (45)
Fasten off. Leave 18 cm tails.
For one hanging end, join yarn to short side, ch 12, Row 1 sc back across 11, Fasten off.
Repeat once on the opposite short side if a fuller scarf is wanted.
Assembly
- Sew the snout low on the front half of the head, centered below the eyes.
- Attach the cheek patches to each side of the snout area, keeping them slightly behind the eye line.
- Stitch the nose dot to the lower front of the snout.
- Sew the head to the front top of the body so the face tilts slightly upward.
- Attach the belly patch to the front of the body, starting under the chin and ending above the seated base.
- Sew the back legs to the lower sides of the body so both feet touch the surface evenly.
- Attach the arms just below the scarf line, angled inward.
- Sew the two head spikes along the crown and the four back spikes in a single line down the spine.
- Attach the tail tip spike near the upper tail end if you want a fuller silhouette.
- Wrap and tack the scarf around the neck, leaving one end hanging at center front.
The piece is complete when it sits without rolling forward and the tail rests as a light rear support.
7 Technical Tips
- Use one fixed marker for the body start. Losing the round start on the tail section shifts every decrease and leaves the taper bent to one side.
- Stuff the head harder than the tail. A soft head collapses around 9 mm eyes, while an overstuffed tail lifts off the surface and spoils the seated line.
- Work invisible decreases on all visible tapers. Standard decreases leave horizontal bars that show most on pale blue cotton and around the snout.
- Insert the eyes before the last two head decrease rounds. Waiting until 18 stitches or fewer makes backing placement tight and can warp the face.
- Pin the back legs before sewing. A 3–4 mm difference in leg height is enough to make the dinosaur lean toward the snout side.
- Keep spike spacing consistent. Leave roughly 1 round between crown spikes and 2 rounds between body spikes so the back line reads as intentional, not crowded.
- Weave tails back through at least 4 cm of internal stitches. Short buried tails can work loose at the scarf join and at the narrow 12-stitch tail section.
Conclusion
This dinosaur amigurumi crochet pattern works because the structure stays disciplined: medium head volume, 36-stitch body plateau, short limbs, rounded spikes, and a tail that supports the seated pose without turning rigid. Build the body first if you want to test balance early, then pin every sewn piece before committing. The scarf is optional, but it gives the photo version its winter profile. Post the finished toy to Pinterest and Instagram with #BabyDinoScarfPattern so the side silhouette is visible in one frame. For your next revision, would you keep the rounded blue spikes, or switch this dinosaur to plate-style stegosaurus ridges?









