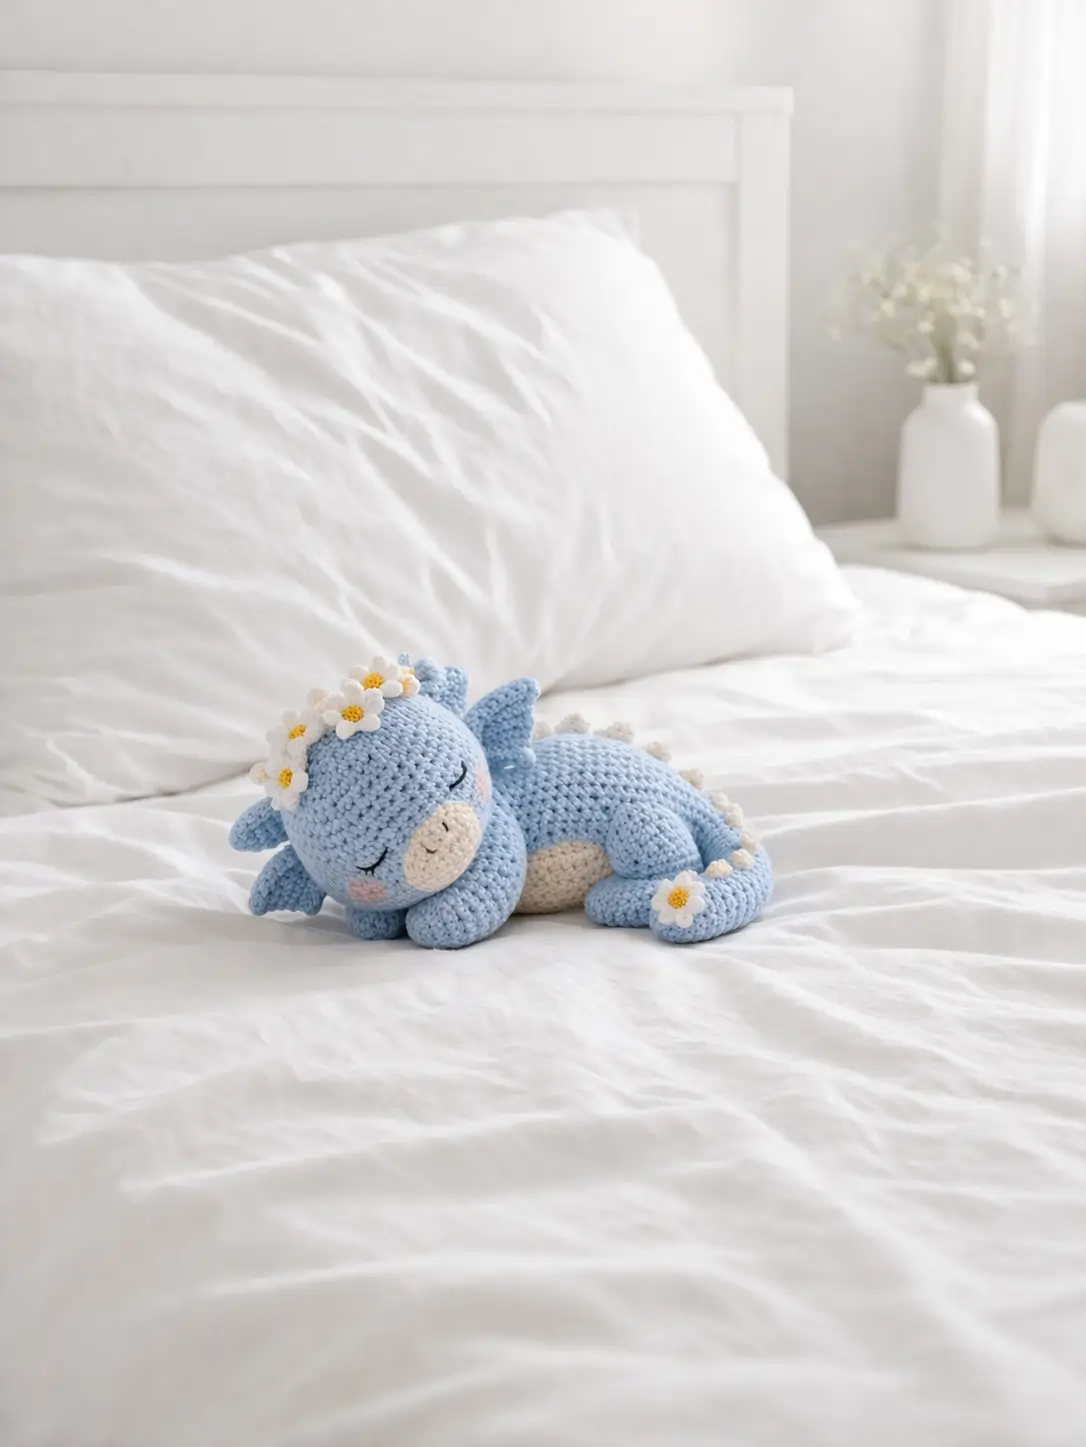
Back spikes decide the silhouette before the snout does. This dragon amigurumi crochet pattern builds a sleeping baby dragon with DK to worsted yarn, a 3.5 mm hook, embroidered eyes, and a compact body that lands near the small 20 cm class seen in comparable dragon patterns. It suits an intermediate maker and works well as nursery shelf decor because the curled pose holds its footprint.
The Design: What Makes This Dragon Different
A sleeping dragon has three structural problems. First, the head reads heavy unless the body sits low and long. That is why this version uses a round medium head, a flatter oval body, and short legs that tuck under instead of standing straight. Second, wings can overpower a resting pose. Here they stay small and folded so the back line still leads from crown to tail. Third, the tail must act like a brace, not a loose appendage. Sewing it forward locks the curve and keeps the dragon from rolling.
A common maker mistake is overstuffing the neck and body equally. Dragons need a firmer head and a softer belly or the sleeping curve disappears. In many baby dragon amigurumi designs, wings or spikes get scaled too large for the body. That shifts the balance and changes the animal from sleepy to stiff. This sleeping dragon crochet pattern avoids that by keeping every back detail short and rounded.
Project Info at a Glance
| Skill Level | Time | Finished Size | Hook | Best For |
|---|---|---|---|---|
| Intermediate | 5–7 hours | about 20 cm long | 3.5 mm | shelf decor, nursery gift, fantasy display |
Finished size, hook, and yarn class align with small dragon references and sleeping-dragon source material.
Materials and Tools
Yarn
- Pastel blue — 8 ply / worsted equivalent — about 60 g — Paintbox Cotton DK or similar
- Cream — 8 ply / worsted equivalent — about 20 g — for snout and belly
- White — 8 ply / worsted equivalent — about 15 g — for daisies and spikes if preferred
- Yellow — 8 ply / worsted equivalent — about 5 g — for flower centers
- Pale pink — small scrap — for cheek patches
- Black embroidery floss or yarn — small scrap — for closed eyes and nostrils
Comparable sleeping and small dragon patterns commonly use a 3.5 mm hook with 8 ply / worsted-equivalent yarn. Small dragon references range from embroidered eyes to 6 mm safety eyes, but the sleeping version here follows the embroidered-eye approach.
Tools
- Hook 3.5 mm
- Polyester stuffing
- Tapestry needle
- Stitch markers
- Pins
- Scissors
Abbreviations
MR = magic ring
sc = single crochet
inc = increase
dec = invisible decrease
sl st = slip stitch
ch = chain
BLO = back loop only
Use the invisible decrease for all shaping rounds where noted; it keeps the outer surface flatter than a standard decrease.
Pattern — Step by Step
Continuous spiral unless noted.
Head (Make 1)
Yarn: pastel blue — Standard amigurumi math sized to a medium 36-stitch plateau, consistent with small dragon references.
R1: 6 sc in MR (6)
R2: inc x6 (12)
R3: (sc, inc) x6 (18)
R4: (2 sc, inc) x6 (24)
R5: (3 sc, inc) x6 (30)
R6: (4 sc, inc) x6 (36)
R7–R12: sc around (36)
R13: (4 sc, dec) x6 (30)
R14: (3 sc, dec) x6 (24)
Start stuffing firmly.
R15: (2 sc, dec) x6 (18)
R16: (sc, dec) x6 (12)
R17: dec x6 (6)
Fasten off. Close. Leave a 20 cm tail.
Snout Patch (Make 1)
Yarn: cream — Standard oval patch to match the photo.
Ch 5.
R1: starting in 2nd ch from hook, 3 sc, 3 sc in last ch, working on opposite side 2 sc, inc (10)
R2: inc, 2 sc, inc x3, 2 sc, inc x2 (16)
R3: sc around (16)
Fasten off. Leave a 20 cm tail.
Body (Make 1)
Yarn: pastel blue — Standard medium body with a 36-stitch plateau for a low resting form.
R1: 6 sc in MR (6)
R2: inc x6 (12)
R3: (sc, inc) x6 (18)
R4: (2 sc, inc) x6 (24)
R5: (3 sc, inc) x6 (30)
R6: (4 sc, inc) x6 (36)
R7–R10: sc around (36)
R11: (4 sc, dec) x6 (30)
R12–R14: sc around (30)
R15: (3 sc, dec) x6 (24)
Stuff the front half more firmly than the rear.
R16–R17: sc around (24)
R18: (2 sc, dec) x6 (18)
R19: sc around (18)
R20: (sc, dec) x6 (12)
Fasten off. Leave a 25 cm tail.
Belly Patch (Make 1)
Yarn: cream — flat oval to break up the side view, as in the photo.
Ch 7.
R1: starting in 2nd ch from hook, 5 sc, 3 sc in last ch, working opposite side 4 sc, inc (14)
R2: inc, 4 sc, inc x3, 4 sc, inc x2 (20)
R3: sc around (20)
Fasten off. Leave a 20 cm tail.
Front Legs (Make 2)
Yarn: pastel blue
R1: 6 sc in MR (6)
R2: inc x6 (12)
R3–R4: sc around (12)
R5: (sc, dec) x4 (8)
R6–R8: sc around (8)
Light stuffing only in the paw.
Fasten off. Leave a 20 cm tail.
Back Legs (Make 2)
Yarn: pastel blue
R1: 6 sc in MR (6)
R2: inc x6 (12)
R3: (sc, inc) x6 (18)
R4–R5: sc around (18)
R6: (sc, dec) x6 (12)
R7–R8: sc around (12)
Stuff the paw half, not the top half.
Fasten off. Leave a 20 cm tail.
Ears (Make 2)
Yarn: pastel blue
R1: 6 sc in MR (6)
R2: (sc, inc) x3 (9)
R3: sc around (9)
R4: (sc, dec) x3 (6)
Flatten.
Fasten off. Leave a 15 cm tail.
Wings (Make 2)
Yarn: pastel blue — row-growth based on small dragon wing references that increase 2, 4, 6, 8, 10 sts across early rows.
R1: ch 2, inc in 2nd ch from hook (2), ch 1, turn
R2: inc x2 (4), ch 1, turn
R3: inc, 2 sc, inc (6), ch 1, turn
R4: inc, 4 sc, inc (8), ch 1, turn
R5: inc, 6 sc, inc (10)
Border: sc evenly around the wing, 2 sc in tip, then sl st at base.
Fasten off. Leave a 18 cm tail.
Dorsal Spikes (Make 6)
Yarn: white
R1: 6 sc in MR (6)
R2: (sc, inc) x3 (9)
R3: sc around (9)
Flatten each spike lightly.
Fasten off. Leave a 12 cm tail.
Tail (Make 1)
Yarn: pastel blue
R1: 6 sc in MR (6)
R2: (sc, inc) x3 (9)
R3–R7: sc around (9)
R8: (2 sc, inc) x3 (12)
R9–R13: sc around (12)
R14: (2 sc, dec) x3 (9)
R15–R18: sc around (9)
Stuff lightly toward the base only so the tail can curl.
Fasten off. Leave a 30 cm tail.
Cheek Patches (Make 2)
Yarn: pale pink
R1: 6 sc in MR (6)
R2: inc x6 (12)
Fasten off. Leave a 12 cm tail.
Daisy Flower for Crown and Tail (Make 6)
Yarn: white and yellow
Center in yellow:
R1: 6 sc in MR (6)
Join with sl st.
Petals in white:
(ch 3, sl st in next st) x6 around.
Fasten off. Leave a 10 cm tail.
Embroidered Eyes and Nostrils
Yarn: black
Embroider one curved sleeping eye on each side of the head. Add 2 short lashes on the outer edge of each curve. Stitch 2 small nostrils on the snout patch after sewing.
Assembly
- Sew the snout patch to the lower front of the head. Add a small pinch of stuffing behind it before closing the last stitches.
- Sew the head to the front top of the body, tilting the chin slightly downward.
- Sew the belly patch to the lower center of the body.
- Pin and sew the front legs under the head-body join so the paws meet near the center front.
- Sew the back legs low on each side of the body, slightly behind the belly patch.
- Sew the ears on top of the head, slightly back from center.
- Sew the wings flat against the upper body so they angle up but do not rise above the head line too much.
- Attach the dorsal spikes from the head crown across the back and onto the start of the tail, spacing them evenly.
- Sew the tail to the rear body, then curve and anchor the tip forward so it wraps toward the front paw.
- Attach cheek patches and daisy flowers: five across the head crown and one at the tail tip. Embroider the eyes and nostrils last.
The piece is complete once the curled tail supports the resting pose without added props.
7 Technical Tips
- Missed round start: A 36-stitch head shifts fast if the marker slips by one stitch. Recount at R6 and R12; both must still read 36.
- Body too cylindrical: That happens when the stuffing is packed evenly from nose to tail. Keep the front body firm and the lower belly softer so the dragon settles instead of standing.
- Visible decrease line: Standard decreases leave notches along R13–R16 of the head. Use invisible dec only on the outer shaping rounds.
- Eye placement too high: Closed eyes stitched above the snout midpoint make the face look startled, not asleep. Place each curve about 2–3 rows above the top edge of the snout patch.
- Wing spread too wide: Oversized wings change the silhouette from resting animal to display dragon. Keep each wing at 10 stitches across before edging.
- Tail won’t curl: Overstuffing the full tail makes it resist the front anchor point. Stuff only the first half and leave the last 6–8 cm soft.
- Flower crown drifts: Daisies sewn only through petal tips twist after handling. Catch the yellow centers and one white petal base on each flower so the crown stays flat.
Conclusion
A curled build changes how a dragon reads on the shelf. The short body, reduced wing span, embroidered eyes, and forward tail anchor keep this version close to the photo while staying workable in standard amigurumi math. This dragon amigurumi crochet pattern is best finished by blocking the wings lightly, checking the flower spacing, and testing the tail anchor before weaving in the last ends. Share the result on Pinterest and Instagram with one overhead shot and one side profile. Use #SleepingBabyDragonPattern. On your version, did you place the spikes closer to the crown or farther down the back?









