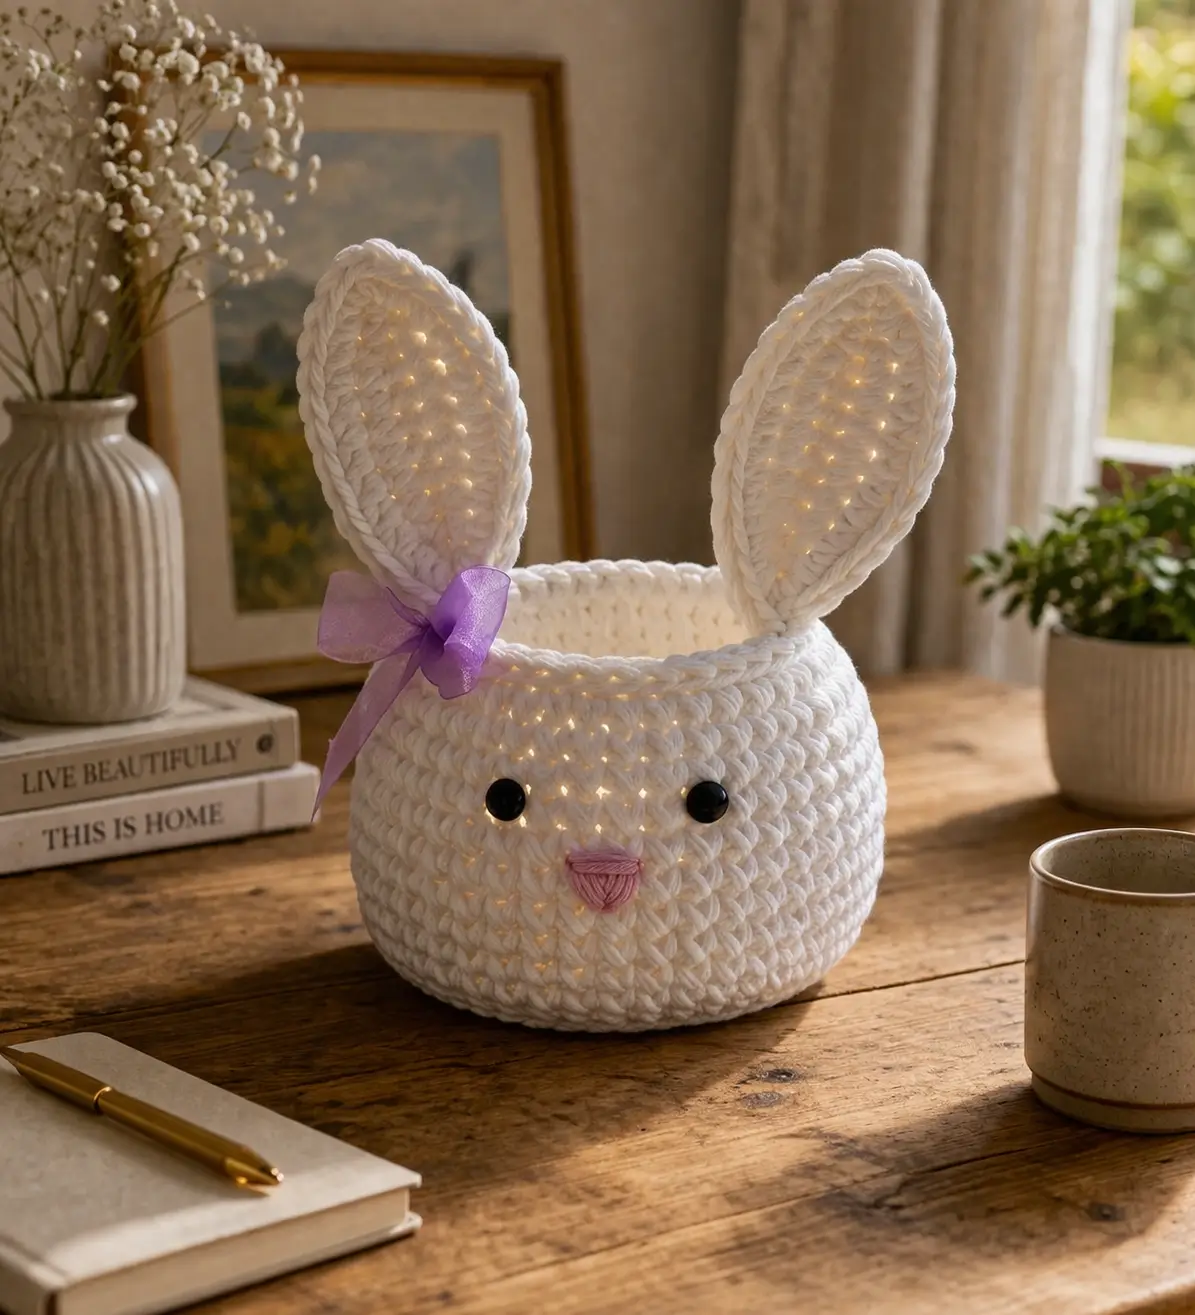
A rabbit basket fails at the ears before it succeeds at the rim. This bunny basket crochet pattern uses chunky cord, an 8 mm hook, and a medium-advanced beginner construction sequence to build a stable container with upright ears and a clean face. Make it for egg hunts, shelf storage, or a photo prop that keeps its shape instead of collapsing after one fill.
The Design: What Makes This Bunny Different
This bunny is not a plush with a hollow belly. It is a basket first, then a character. That structural choice changes every proportion. The base has to widen quickly, because a narrow rabbit cylinder tips forward once the ears add height. The rim also matters more than on a toy, since an open top can flare or cave if the wall tension drifts. In a crochet bunny basket, thick cord solves part of that problem by holding a vertical side wall better than standard DK amigurumi yarn.
The ears are elongated ovals rather than tube ears. That keeps them readable from the front and avoids the heavy rolled look common in rushed rabbit basket crochet pattern tutorials. A common mistake is placing the eyes too high. On basket rabbits, that shortens the visible forehead and makes the rim look like a hat line instead of the top of the head. Mini basket references place eyes around the middle-upper wall rather than near the rim, which keeps the face balanced.
Project Info at a Glance
| Skill Level | Time | Finished Size | Hook | Best For |
|---|---|---|---|---|
| Advanced beginner | 3–5 hours | approx. 15–18 cm body height; about 28–30 cm including ears | 8.0 mm | Easter treats, nursery storage, seasonal display |
The size and hook above follow chunky cotton-cord bunny basket benchmarks, then scale slightly to match the taller ear proportion visible in the reference image.
Materials and Tools
Yarn
- White braided cotton cord — chunky / 5 mm cord — approx. 345 g — Bobbiny-style braided cord or similar
- Soft pink cotton yarn or cord — light accent — approx. 75 g max available; actual nose use is scrap-level — any smooth cotton for nose embroidery
- Lavender ribbon — narrow organza or satin — 1 piece for ear bow
The large, structured basket style in current patterns is commonly worked in 5 mm braided cotton cord with 8–10 mm tools, while smaller versions use worsted yarn and a 4 mm hook. The image aligns more closely with the cord family.
Tools
- Hook 8.0 mm
- 12 mm black safety eyes or equivalent glossy shank buttons
- Stuffing, optional, only for ear bases if extra lift is needed
- Tapestry needle
- Stitch markers
- Scissors
- Fabric glue or sewing needle for bow attachment
Abbreviations
MR / sc / inc / dec / sl st / ch / BLO / hdc
Use invisible decrease whenever the pattern closes a shaped piece; it reduces the ridge that standard decreases leave on visible amigurumi surfaces.
Pattern — Step by Step
Continuous spiral for the basket body. Joined rounds are used only where noted. This draft is written to match the photographed object: deep cylinder, upright ears, simple face, and left-ear bow. The stitch logic follows the 42-stitch basket wall used in multiple bunny basket references, then adapts the proportions to a thicker cord build.
Body / Head Basket Shell (Make 1)
Yarn: white chunky braided cord — based on bunny basket benchmarks and photo proportions
- R1: 6 sc in MR (6)
- R2: inc x6 (12)
- R3: (sc 1, inc) x6 (18)
- R4: (sc 2, inc) x6 (24)
- R5: (sc 3, inc) x6 (30)
- R6: (sc 4, inc) x6 (36)
- R7: (sc 5, inc) x6 (42)
- R8: BLO sc around (42)
- R9: sc around (42)
- R10: sc around (42)
- R11: sc around (42)
- R12: sc around (42)
- R13: sc around (42)
- R14: sc around (42)
- R15: sc around (42)
- R16: sc around (42)
- R17: sc around (42)
- R18: sc around (42)
- R19: sc around (42)
- R20: sc around (42)
- R21: sc around (42)
- R22: sc around (42)
- R23: sl st around loosely for a cleaner rim (42)
Do not stuff. This piece remains open as a basket. The 42-st plateau is the key structural number here; it gives enough diameter for a stable base and a readable face panel.
Fasten off. Leave a 20 cm tail.
Left Ear (Make 1)
Yarn: white chunky braided cord with pink inner panel — ear logic adapted from the chain-15 basket ear benchmark.
With pink accent yarn:
- Ch 15.
- Row 1: starting in 2nd ch from hook, sc 7, hdc 6, 3 hdc in last ch; working back along opposite side of chain, hdc 6, sc 7.
Fasten off pink.
Join white yarn at ear base.
- Rnd 2: sc 14, inc, inc, sc 13 (31)
Steam lightly or finger-shape the top curve. The two increases at the tip widen the cap and help the ear stay tall rather than pointed and narrow.
Fasten off. Leave a 25 cm tail.
Right Ear (Make 1)
Yarn: white chunky braided cord with pink inner panel — same construction as left ear.
Repeat Left Ear.
Fasten off. Leave a 25 cm tail.
Eye Placement
Yarn: none — hardware placement based on larger bunny basket references.
Insert 12 mm eyes between R13 and R14 of the basket wall. Space them 5 stitches apart.
Do this before tightening any embroidery on the nose so the face can be centered from the eye line.
Secure backs firmly.
Nose (Make 1)
Yarn: soft pink cotton — photo-based embroidered triangle nose
- Cut a 60 cm strand.
- Mark the center point two rounds below the eye line.
- Work a small inverted triangle over 3 stitches wide and 2 rounds tall using satin-style embroidery passes.
- Add 1 vertical wrap from center to lower point.
Keep the nose narrower than the eye spacing. A wide nose makes the basket read as bear-like rather than rabbit-like.
Weave ends inside.
Rim Edge (Make 1)
Yarn: white chunky braided cord — standard stabilization finish
- Join yarn at back.
- Rnd 1: reverse sc or tight sl st around upper edge (42)
This extra edge firms the opening and cuts down on rim roll. Use reverse sc only if your tension stays even in cord yarn.
Fasten off. Weave in.
Bow (Make 1)
Yarn/trim: lavender ribbon — photo detail
- Cut 30–35 cm of ribbon.
- Tie a small bow.
- Trim tails on an angle.
Sew or glue at the lower outside edge of the left ear, close to the base but not covering the seam line.
Optional Cheek Patches (Make 2)
Yarn: pale pink cotton — flat circle, standard amigurumi math
- R1: 6 sc in MR (6)
- R2: inc x6 (12)
- Sl st to first st.
These are optional because the photographed sample has no visible cheeks. Use only if the white face needs more contrast in photography.
Fasten off. Leave a 10 cm tail.
Assembly
- Lay the basket shell flat and mark the center front between two stitches.
- Insert the eyes between rounds 13 and 14, spacing them 5 stitches apart.
- Embroider the pink nose centered about 2 rounds below the eyes.
- Fold the lower edge of each ear very slightly inward to create a shallow cup.
- Pin the ears inside the back rim, one on each side of the center back seam line.
- Sew the ears down so each base spans roughly 6 stitches along the inside rim.
- Add a second pass of sewing at the rear half of each ear base; this is what keeps them upright.
- Stitch or glue the lavender bow to the left ear.
- Add optional cheek patches below and slightly outside the eyes only if more contrast is needed.
- Shape the rim by hand and block the ears lightly if the cord has twisted during assembly.
The piece is complete when the rim stays open on its own and both ears remain vertical without hidden wire.
7 Technical Tips
- Mark round 8 immediately. That BLO round is the hinge point where the base turns into the wall; miss it and the basket will bulge instead of standing straight.
- Do not over-tighten round 23. A compressed top round shrinks the opening and pulls the face upward, which distorts the rabbit proportions.
- Set the eye line before ear sewing. If the ears go in first, the basket often gets handled and flattened, which can shift the visual center by 1–2 stitches.
- Use firmer tension on the first three rounds only. A loose center ring leaves a dimpled base, and a basket with a soft center rocks on hard surfaces.
- Anchor each ear across at least 6 stitches. A narrower anchor twists the ear base and causes one ear to lean forward after a few uses.
- Keep the nose within a 3-stitch width. Wider embroidery reads as muzzle shaping, which works on plush rabbits but looks heavy on a minimalist basket face.
- Weave cord tails in two directions. One straight weave can slide out in thick cord; split the tail path and lock it for at least 5 cm total travel.
Conclusion
This bunny basket crochet pattern works because the structure is handled first: fast base expansion, a long 42-stitch wall, a reinforced rim, and broad ears with enough seam width to stay upright. Follow the counts exactly, place the eyes before attaching the ears, and keep the nose small. Then photograph it empty and filled, since storage baskets change character once they hold treats or yarn. Share the finished piece on Pinterest and Instagram with #BunnyBasketPattern. One useful question remains after the first sample: did your left ear hold upright without a second anchor pass, or did it need extra stitching at the back edge?









