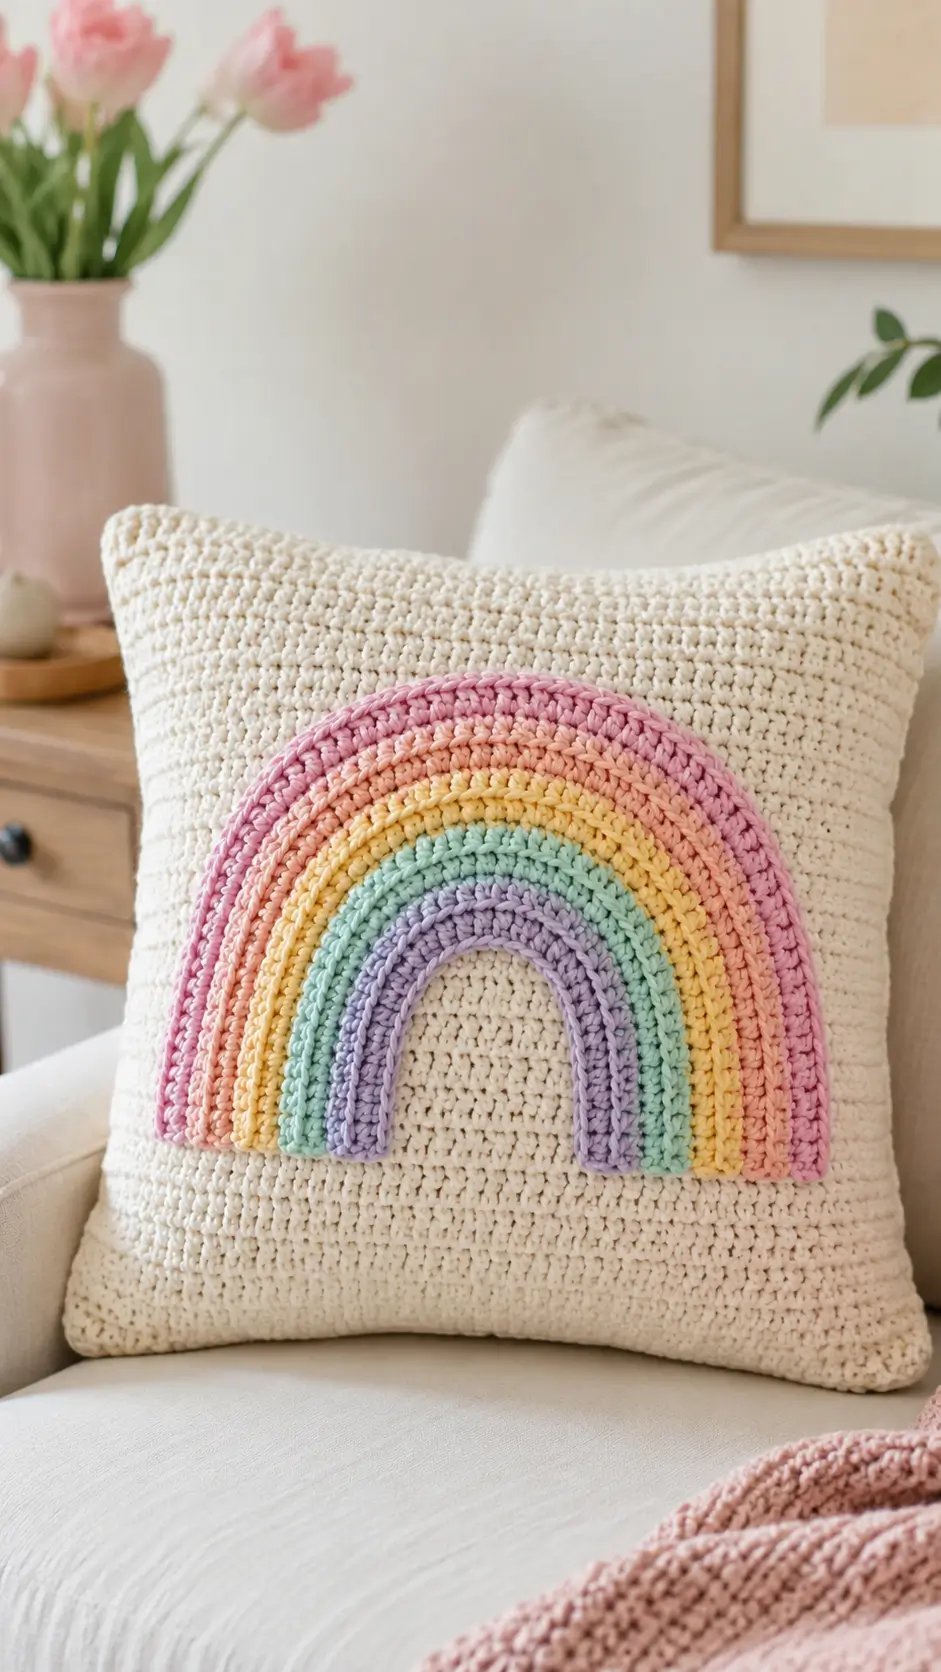
A rainbow cushion fails at the inner curve before it fails anywhere else. This crochet rainbow pillow cover uses a square cream base, six pastel arches, basic single crochet, and a 16-inch cushion format for an advanced beginner project that works as nursery decor, a sofa accent, or a quick sample for applique placement.
The Design: What Makes This Rainbow Pillow Different
This version is built as a square cover with a raised rainbow applique instead of colorwork worked directly into the panel. That decision matters. Separate arches hold cleaner edges, make color changes easier to control, and give the front a layered profile that matches the photographed pillow more closely than tapestry crochet would. The cream background stays visually quiet, so the pastel arcs carry the design.
The second structural choice is the broad lower span of the rainbow. A narrow arch looks neat when flat, then shrinks once stitched down. Here, the outer bands extend lower toward the side seams so the motif reads full-sized after assembly. The third choice is keeping every arch in single crochet. That tighter stitch builds a denser applique, which helps the inner curve stay rounded rather than collapsing inward.
A common mistake with a crochet rainbow cushion cover is forcing each stripe to match the same row count. It sounds tidy. It distorts the curve. Each arch needs its own length and radius, especially in a pastel rainbow pillow pattern with layered bands.
Project Info at a Glance
| Skill Level | Time | Finished Size | Hook | Best For |
|---|---|---|---|---|
| Advanced Beginner | 6–8 hours | Approx. 41 x 41 cm / 16 x 16 in | 4.5 mm | Home decor, nursery styling, gift makes |
Materials and Tools
Yarn
- Cream — DK or light worsted cotton blend — approx. 320–360 g — for front, back, and edging
- Lavender — DK cotton — approx. 20 g
- Mint — DK cotton — approx. 20 g
- Soft Yellow — DK cotton — approx. 20 g
- Peach — DK cotton — approx. 20 g
- Dusty Pink — DK cotton — approx. 22 g
- Rose Pink — DK cotton — approx. 24 g
Tools
- 4.5 mm crochet hook
- 16 x 16 in / 41 x 41 cm cushion insert
- Tapestry needle
- Stitch markers
- Scissors
- Measuring tape
- Optional zipper or buttons
Abbreviations
ch = chain, sc = single crochet, sl st = slip stitch, st = stitch, blo = back loop only, flo = front loop only, inc = 2 sc in the same stitch, dec = single crochet two together, RS = right side, WS = wrong side.
Use invisible decrease only where noted for edging cleanup or if you adapt the cover to a shaped insert; standard decreases leave a more visible notch on compact cotton fabric.
Pattern Notes
The pillow cover is worked in rows for the front and back panels. The rainbow arches are worked separately, then stitched to the front panel before assembly. Ch 1 at the start of a row does not count as a stitch. Measure after light blocking if your cotton tightens during stitching.
Pattern — Step by Step
Front Panel (Make 1)
Yarn: Cream
- Ch 51.
- Row 1: Sc in 2nd ch from hook and in each ch across. (50)
- Rows 2–50: Ch 1, turn, sc across. (50)
The panel should measure close to 16 inches square after light stretching. Add or remove rows if your gauge differs.
Fasten off. Weave in ends.
Back Panel (Make 1)
Yarn: Cream
- Ch 51.
- Row 1: Sc in 2nd ch from hook and in each ch across. (50)
- Rows 2–50: Ch 1, turn, sc across. (50)
Fasten off. Weave in ends.
Inner Arch — Lavender (Make 1)
Yarn: Lavender
- Ch 26.
- Row 1: Sc in 2nd ch from hook and in each ch across. (25)
- Rows 2–16: Ch 1, turn, sc across. (25)
Shape gently into a U before stitching down. Do not force a sharp bend at the base.
Fasten off. Leave a 45 cm tail for sewing.
Second Arch — Mint (Make 1)
Yarn: Mint
- Ch 30.
- Row 1: Sc in 2nd ch from hook and in each ch across. (29)
- Rows 2–18: Ch 1, turn, sc across. (29)
Fasten off. Leave a 45 cm tail.
Third Arch — Soft Yellow (Make 1)
Yarn: Soft Yellow
- Ch 34.
- Row 1: Sc in 2nd ch from hook and in each ch across. (33)
- Rows 2–20: Ch 1, turn, sc across. (33)
Fasten off. Leave a 50 cm tail.
Fourth Arch — Peach (Make 1)
Yarn: Peach
- Ch 38.
- Row 1: Sc in 2nd ch from hook and in each ch across. (37)
- Rows 2–22: Ch 1, turn, sc across. (37)
Fasten off. Leave a 50 cm tail.
Fifth Arch — Dusty Pink (Make 1)
Yarn: Dusty Pink
- Ch 42.
- Row 1: Sc in 2nd ch from hook and in each ch across. (41)
- Rows 2–24: Ch 1, turn, sc across. (41)
Fasten off. Leave a 55 cm tail.
Outer Arch — Rose Pink (Make 1)
Yarn: Rose Pink
- Ch 46.
- Row 1: Sc in 2nd ch from hook and in each ch across. (45)
- Rows 2–26: Ch 1, turn, sc across. (45)
This outer band sets the full span of the applique. Check width on the panel before fastening off permanently.
Fasten off. Leave a 60 cm tail.
Optional Raised Edge for Each Arch
Use this only if you want a thicker outline like the photographed sample.
- Working around one completed arch, join yarn at one lower corner.
- Sc evenly around the outer edge, placing 3 sc in each top corner zone as needed to keep the curve smooth.
- Sl st to first sc.
Fasten off. Repeat for any arch that needs more visual weight.
Layout and Applique Placement
- Lay the front panel flat with the RS facing up.
- Center the lavender arch first. The lower ends should sit about 9 rows up from the bottom edge and about 12 stitches in from each side of the arch span.
- Layer the mint arch around it, leaving roughly 1 row visible between colors.
- Continue with yellow, peach, dusty pink, and rose pink.
- Pin each arch before sewing. Check both side drops. They should match within 1 row.
- Sew each arch down with small whip stitches or mattress-style tacking through the edge loops only.
Assembly
- Place front and back panels together with wrong sides facing inward and right sides facing out.
- Align all four corners and add stitch markers every 10 stitches.
- Join cream yarn in one corner.
- Sc evenly through both panels across the first side, working 50 sc.
- Work 3 sc in the corner.
- Sc 50 along the second side, 3 sc in the corner, sc 50 along the third side, and 3 sc in the next corner.
- Sc along the final side until a 20 cm opening remains.
- Insert the cushion form and smooth the corners fully into place.
- Sc the opening closed, then sl st to the first stitch.
- Fasten off and weave in the remaining tail inside the seam path.
The completed crochet rainbow pillow cover should sit firmly around the insert with a slightly raised motif and a flat back panel.
7 Technical Tips
- Mark the exact midpoint of the front panel before placing the first arch. A rainbow placed even 2 stitches off center becomes obvious once the outer band is attached.
- Do not stretch the inner lavender arch to match the width of the larger stripes. Overstretching pulls the top curve into a point instead of a rounded bridge.
- Use the same hook for all arches unless one color feels noticeably tighter. A single half-size difference can change the outer arch length by more than 1 cm.
- Pin both lower ends of every arch before stitching the curve. If one side drops a row lower, the applique reads twisted from across the room.
- Sew through edge loops only when attaching the arches. Catching full stitch depth creates a ridge line on the cream panel that shows around the motif.
- Keep panel tension consistent after row 35. Pillow covers that flare by 3 or 4 stitches near the top become harder to seam cleanly at the corners.
- Weave each applique tail back through at least 6 cm of stitching path. Short tail finishes work loose faster on high-contact sofa cushions.
Conclusion
This crochet rainbow pillow cover is a controlled applique project, not a complicated one. The square base does the structural work. The six arches handle the visual rhythm. Build the cream panels first, pin the rainbow before sewing, and check the side drop on every band before assembly. That sequence prevents most shaping errors. Once finished, photograph the pillow in natural light, then save one front-facing shot for Pinterest and one styled room shot for Instagram. Use the tag #CrochetRainbowPillowCover. On your version, did the inner lavender arch need one extra row to keep the curve open?









