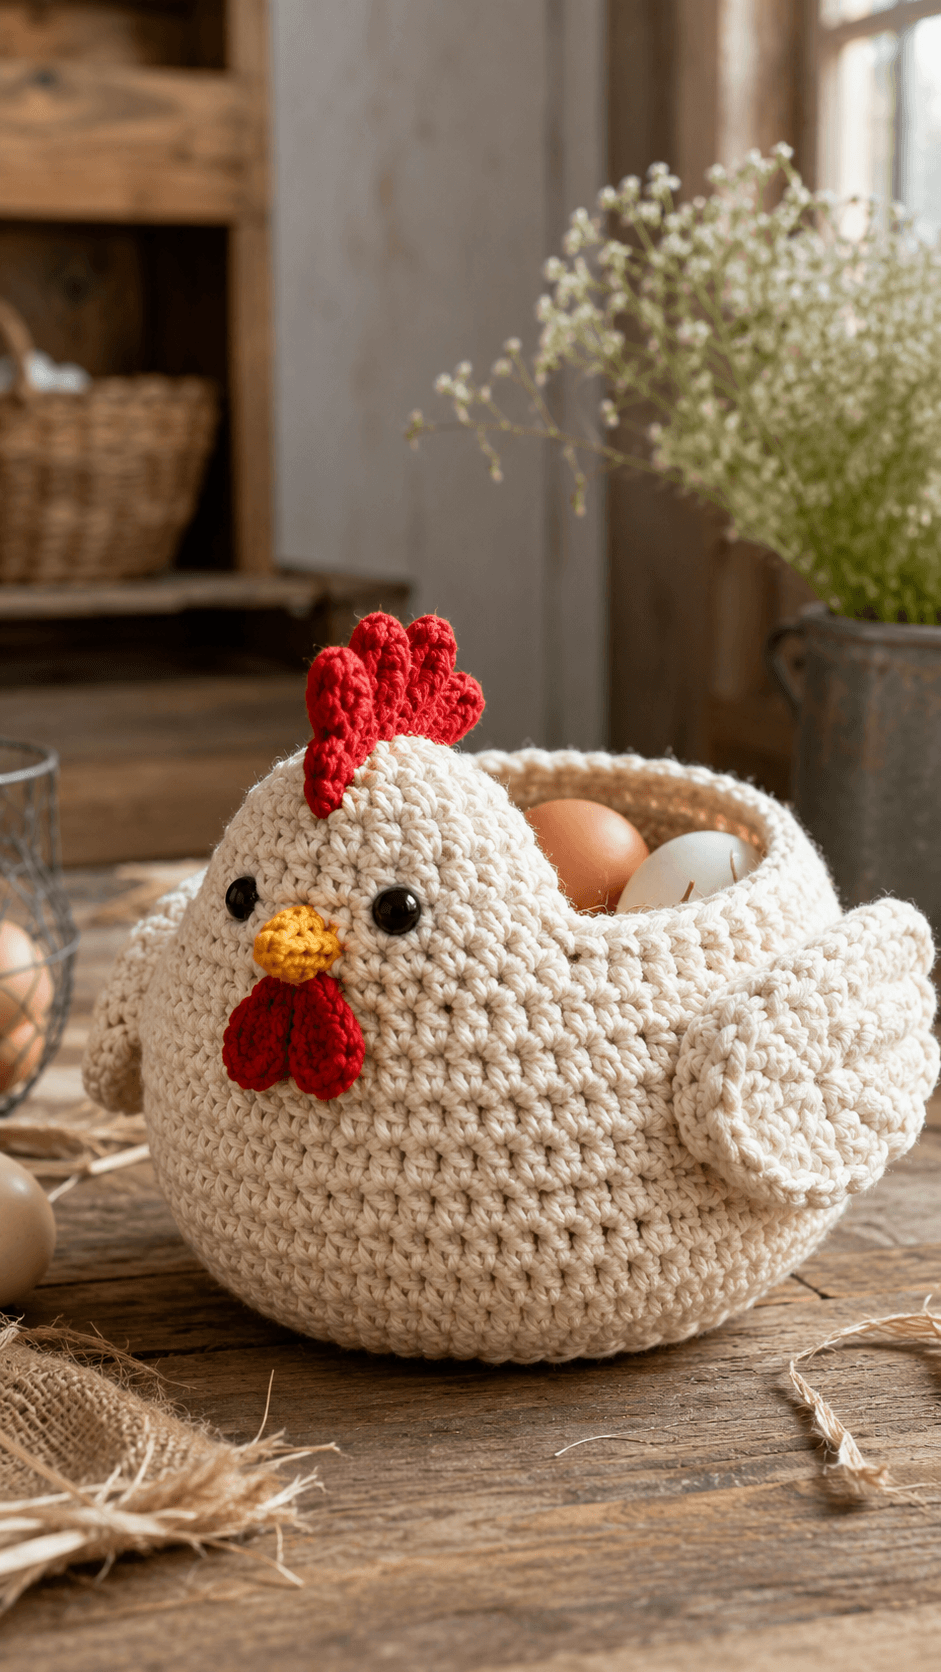
A hen basket fails at the rim before it fails anywhere else. This chicken egg basket crochet pattern is built around that problem first, then the head, wings, and tail are scaled to match a useful egg bowl. Expect a finished piece around 20 cm high, a 4 mm hook, cotton or firm basket yarn, and an intermediate skill level. It works as countertop egg storage rather than shelf-only decor.
The Design: What Makes This Hen Different
This hen is not a round plush with details attached at random. The basket cavity changes the whole structure. First, the body is widened low, then held on a medium stitch plateau before the top opening is shaped so the rim sits high at the back and lower at the front. That keeps the eggs visible and stops the head from blocking access.
Second, the wings are stitched as shallow shells instead of flat circles. That matters because a crochet hen basket looks compressed when the wings lie flush against the body. A little outward curve gives the side profile more volume and hides the join line. In many crochet hen basket designs, the tail also carries visual weight. Here, a layered tail raises the rear silhouette, which balances the open bowl.
A common mistake with any amigurumi chicken basket is overstuffing the front. The maker sees the head area collapse, adds more filling, and the basket mouth narrows. The better fix is firmer lower-body stuffing and lighter filling near the rim.
Project Info at a Glance
| Skill Level | Time | Finished Size | Hook | Best For |
|---|---|---|---|---|
| Intermediate | 6–8 hours | Approx. 20 cm high × 18 cm wide | 4 mm | Egg storage, Easter table display, farmhouse kitchen decor |
Materials and Tools
Yarn
- Cream/White — firm cotton or basket-friendly yarn — about 50 g main color minimum for a smaller version, more for a larger basket — Lily Sugar’n Cream or similar
- Red — accent yarn — small amount for comb and wattle
- Mustard Yellow — accent yarn — small amount for beak
- Blush Pink — accent yarn — very small amount for cheek patches, optional
Tools
- Hook 4 mm
- 10 mm safety eyes
- Polyfill stuffing
- Yarn needle
- Stitch markers
- Pins or clips for assembly
Abbreviations
MR = magic ring, sc = single crochet, inc = increase, dec = decrease, sl st = slip stitch, ch = chain, BLO = back loop only, FLO = front loop only.
Use invisible decrease for the visible shaping rounds because standard decreases leave a ridged seam on cotton basket yarn.
Pattern — Step by Step
Work in a continuous spiral unless noted. Counts are shown in brackets at the end of each round.
Head (Make 1)
Yarn: cream — Standard amigurumi math adapted to the photo proportions
R1: 6 sc in MR (6)
R2: inc x6 (12)
R3: (sc, inc) x6 (18)
R4: (2 sc, inc) x6 (24)
R5: (3 sc, inc) x6 (30)
R6: (4 sc, inc) x6 (36)
R7–R11: sc around (36)
R12: (4 sc, dec) x6 (30)
R13: (3 sc, dec) x6 (24)
Insert safety eyes between R8 and R9, spaced 8 stitches apart. Stuff firmly at the front only.
R14: (2 sc, dec) x6 (18)
R15: (sc, dec) x6 (12)
R16: dec x6 (6)
Fasten off. Leave a 25 cm tail.
Body Basket Base and Sides (Make 1)
Yarn: cream — Custom basket shaping derived for the photo form
R1: 6 sc in MR (6)
R2: inc x6 (12)
R3: (sc, inc) x6 (18)
R4: (2 sc, inc) x6 (24)
R5: (3 sc, inc) x6 (30)
R6: (4 sc, inc) x6 (36)
R7: (5 sc, inc) x6 (42)
R8: (6 sc, inc) x6 (48)
R9: (7 sc, inc) x6 (54)
R10: BLO sc around (54)
R11–R16: sc around (54)
R17: (7 sc, dec) x6 (48)
R18–R20: sc around (48)
Stuff the lower bowl only. Keep the upper half unstuffed so it functions as a basket.
Body Opening Shaping (Continue on Body)
Flatten the top slightly so the front and back are clear. Mark the front center. Work back and forth for the rim.
Row 1: Join yarn at left side of opening, sc 34, ch 1, turn (34)
Row 2: dec, 30 sc, dec, ch 1, turn (32)
Row 3: sc across (32)
Row 4: dec, 28 sc, dec, ch 1, turn (30)
Row 5: sc across (30)
Row 6: dec, 26 sc, dec, ch 1, turn (28)
Row 7: sc across (28)
Now work one round of sc evenly around the entire opening and outer rim to stabilize the edge. Fasten off. Leave a 20 cm tail.
Front Chest Fill Panel (Make 1)
Yarn: cream
This panel fills the front under the head so the hen keeps the rounded breast seen in the photo.
Ch 11.
Row 1: sc in 2nd ch from hook and across (10)
Row 2: ch 1, turn, inc, 8 sc, inc (12)
Row 3: ch 1, turn, sc across (12)
Row 4: ch 1, turn, inc, 10 sc, inc (14)
Row 5: ch 1, turn, sc across (14)
Row 6: ch 1, turn, inc, 12 sc, inc (16)
Fasten off. Leave a 25 cm tail.
Arms / Front Wings (Make 2)
Yarn: cream
R1: 6 sc in MR (6)
R2: inc x6 (12)
R3: (sc, inc) x6 (18)
R4–R5: sc around (18)
R6: (sc, dec) x6 (12)
Flatten lightly.
R7: sc around (12)
Fasten off. Leave a 20 cm tail.
Back Legs (Optional Support Pads, Make 2)
Yarn: cream
These are hidden support nubs placed under the body if the basket tilts backward.
R1: 6 sc in MR (6)
R2: inc x6 (12)
R3: sc around (12)
Fasten off. Leave a 15 cm tail.
Comb (Make 1)
Yarn: red
Ch 11.
Row 1: starting in 2nd ch from hook, sl st, sc, hdc, 3 dc in next ch, hdc, sl st, 3 dc in next ch, hdc, sl st, 3 dc in last ch.
Rotate and work on opposite side of foundation chain: sl st, hdc, 3 dc in next space, sl st, hdc, 3 dc in next space, sl st, hdc, sc, sl st.
Fasten off. Leave a 20 cm tail.
Beak (Make 1)
Yarn: mustard yellow
R1: 4 sc in MR (4)
R2: (sc, inc) x2 (6)
R3: sc around (6)
Flatten. Fasten off. Leave a 15 cm tail.
Wattle (Make 2)
Yarn: red
R1: 6 sc in MR (6)
R2: inc x6 (12)
R3: sc around (12)
R4: (sc, dec) x4 (8)
Fasten off. Leave a 12 cm tail on each piece.
Tail Feathers (Make 3)
Yarn: cream
Each feather:
Ch 8.
Row 1: sc in 2nd ch from hook, 5 sc, 3 sc in last ch. Continue on opposite side: 5 sc, inc in final stitch (16)
Row 2: ch 1, do not turn, sc around evenly (16)
Make three. Stack slightly overlapped before sewing. Fasten off. Leave 18 cm tails.
Cheek Patches (Make 2)
Yarn: blush pink
R1: 6 sc in MR (6)
R2: inc x6 (12)
Fasten off. Leave a 10 cm tail.
Optional Egg Insert Cushion (Make 1)
Yarn: cream
If the basket will hold smaller eggs, add a base cushion.
R1: 6 sc in MR (6)
R2: inc x6 (12)
R3: (sc, inc) x6 (18)
R4: (2 sc, inc) x6 (24)
R5: (3 sc, inc) x6 (30)
R6: sc around (30)
Lightly stuff, flatten, and place loose inside the basket. Fasten off. Leave a 15 cm tail if you want it stitched in place.
Assembly
- Sew the chest fill panel to the front opening area of the body, centered below the future head position.
- Stuff the lower body bowl firmly enough to hold its round shape, but leave the basket cavity empty above the midpoint.
- Sew the head to the front rim so the lower half overlaps the chest panel and the top sits slightly forward.
- Attach the beak centered between the eyes, one round below their lower edge.
- Sew the two wattles directly under the beak with a narrow gap between them.
- Stitch the comb to the top center of the head so the tallest bump sits just behind the forehead curve.
- Add the cheek patches low and slightly outside each eye if you want the soft blush visible in the photo.
- Sew the wings to the side seams, placing the top of each wing about level with the beak base.
- Layer and sew the three tail feathers to the back rim, angling the outer feathers outward.
- Attach the hidden support pads underneath only if the basket tips backward when loaded.
The finished hen should sit level, hold several eggs, and keep a clear opening at the top rear.
7 Technical Tips
- A missed increase in R7 or R8 of the body usually twists the bowl and shifts the opening off center. Count to 54 before the BLO round and fix it there, not after the rim is shaped.
- Mark the front center before shaping the opening. A drift of even 2 stitches makes the head look skewed and reduces usable basket width on one side.
- Stuff the lower body to a firm but not rigid density. If the base compresses more than 1 cm when pressed on the table, add filling before attaching the head.
- Insert the 10 mm eyes before the head closes past 24 stitches. Forcing them in later stretches cotton stitches and leaves a visible stress ring around the post.
- Use invisible decreases on the head and wing shaping rounds. Standard decreases stack a diagonal ridge that shows clearly on pale cotton yarn.
- Pin both wings in place and check them from the front, side, and top before sewing. A height difference of more than one round is visible immediately on a symmetrical hen.
- Weave tails through at least 5–6 internal stitches, then reverse direction once. Short tail weaving loosens first on the comb and tail because those parts are handled the most.
Conclusion
This chicken egg basket crochet pattern works because the basket opening, not the face, sets the geometry. Keep the lower body stable, hold the rim open, and scale the head small enough that the eggs remain accessible. That produces the farmhouse hen shape shown in the photo instead of a closed plush bowl. The next step is simple: make the body first, test the egg capacity with real eggs, then attach the details after the proportions are confirmed. Share the finished basket on Pinterest and Instagram with #ChickenEggBasketPattern. How wide did you keep the back opening so your hen still held eggs without losing its rounded profile?









