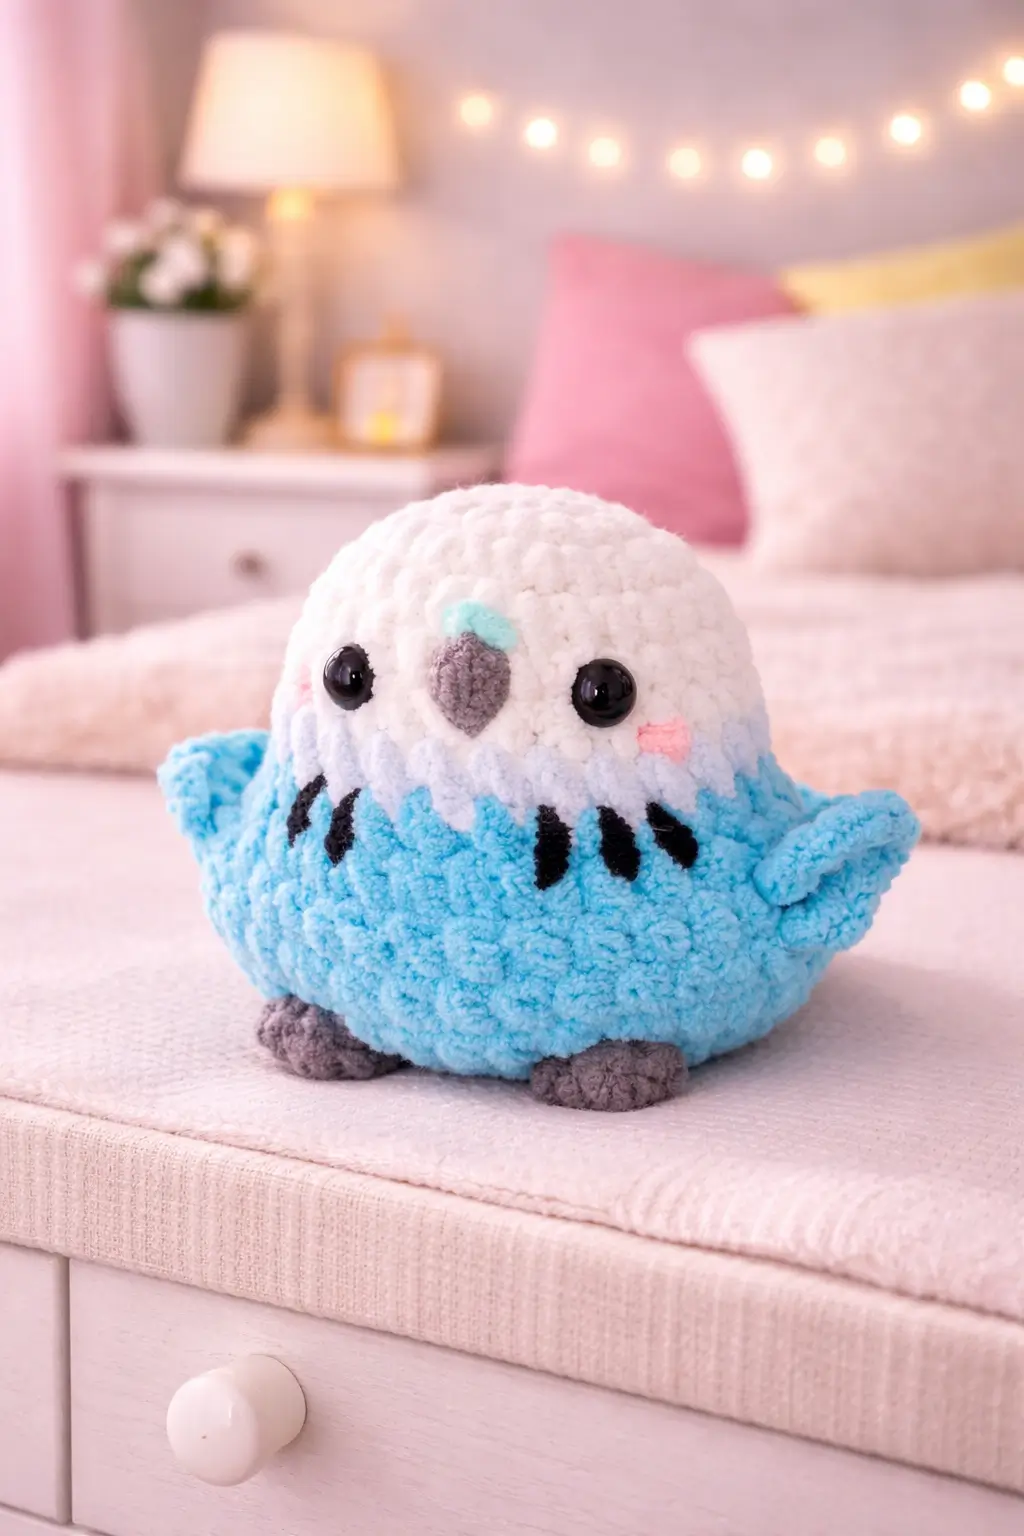
Budgies fail fast when the head and body blur into one lump with no face break at all. This budgie amigurumi crochet pattern gives you materials, verified size, hook, yarn class, and a full plush build for the round chenille bird in the photo. You get head, body, wings, feet, beak patch, blush cheeks, and stripe markings. The practical payoff is simple: it is a small desk plush that uses very little yarn.
The Design: What Makes Budgie Different
This bird works because the proportions are intentionally wrong in a useful way. Real budgies are slim. This plush is not. The body is nearly spherical, the wings are tiny, and the feet stay short so the toy reads as a rounded shelf bird rather than a perched parakeet. That choice matches current market demand. Search results show realistic budgies, mini budgie keychains, and paired birds, but fewer pieces target this chenille, chubby-body format directly.
The second structural decision is the face mapping. You need the white mask, the gray beak area, and the dark neck barring, or the plush stops reading as a budgie and becomes a generic bird. One common mistake with a crochet budgie pattern is placing the eyes too low on the face. That compresses the beak patch and kills the species cue. Another is oversizing the wings. Then the parakeet crochet pattern becomes owl-shaped instead of budgie-shaped.
Project Information at a Glance
| Skill Level | Time | Finished Size | Hook | Best For |
|---|---|---|---|---|
| Advanced beginner | 1.5–2.5 hours | 10 cm / 3.9 in tall, 10 cm / 3.9 in wide | 2.5 mm | Desk decor, gifts, stash-friendly bird plush |
Materials and Tools
Yarn
- Sky blue — 8-ply / DK-light-worsted range — 18g — Schachenmayr Catania or similar cotton blend
- White — 8-ply / DK-light-worsted range — 10g — Schachenmayr Catania or similar
- Gray — 8-ply / DK-light-worsted range — 2g — for beak patch and feet
- Black — 8-ply / DK-light-worsted range — 1g — for barring marks
- Pale pink — 8-ply / DK-light-worsted range — 1g — for cheek blush
- Mint — 8-ply / DK-light-worsted range — 1g — for the small forehead accent
The published budgie yarn snippet specifies cotton yarn at 160 m per 50 g with a 2.5 mm hook, which sits in the DK-light-worsted zone. The gram figures above are calculated from the photographed plush scale, not from a public pattern excerpt.
Tools
- 2.5 mm crochet hook
- 10–12 mm safety eyes
- Fiberfill stuffing
- Yarn needle
- Stitch markers
- Sharp embroidery scissors
Crochet Abbreviations
MR / sc / inc / dec / sl st / ch / BLO / hdc
Use invisible decrease only on the closing rounds; standard decreases leave a seam line that shows clearly on a round bird face.
Step-by-Step Budgie Crochet Pattern
Work in continuous spiral rounds unless noted.
Head (Make 1)
Yarn: white
Source: Standard amigurumi math
R1: 6 sc in MR (6)
R2: inc x6 (12)
R3: (sc, inc) x6 (18)
R4: (2 sc, inc) x6 (24)
R5: (3 sc, inc) x6 (30)
R6: sc around (30)
R7: sc around (30)
Insert 10–12 mm safety eyes between R6 and R7, about 8 stitches apart.
R8: (3 sc, dec) x6 (24)
R9: (2 sc, dec) x6 (18)
Stuff firmly through the forehead and cheeks. A soft face makes the beak patch sink.
R10: (sc, dec) x6 (12)
R11: dec x6 (6)
Fasten off. Leave 25 cm tail.
Body (Make 1)
Yarn: sky blue
Source: Standard amigurumi math
R1: 6 sc in MR (6)
R2: inc x6 (12)
R3: (sc, inc) x6 (18)
R4: (2 sc, inc) x6 (24)
R5: (3 sc, inc) x6 (30)
R6: sc around (30)
R7: (3 sc, dec) x6 (24)
R8: (2 sc, dec) x6 (18)
R9: sc around (18)
Stuff lightly. The body should look full, not hard-packed.
Fasten off. Leave 28 cm tail.
Wings (Make 2)
Yarn: sky blue
Source: Standard amigurumi math
R1: ch 8
Row 1: starting in 2nd ch from hook, sc across (7)
Row 2: ch 1, turn, dec, sc 3, dec (5)
Row 3: ch 1, turn, dec, sc, dec (3)
Fasten off. Leave 14 cm tail.
Feet (Make 2)
Yarn: gray
Source: Standard amigurumi math
R1: 6 sc in MR (6)
R2: sc around (6)
R3: sc around (6)
Stuff very lightly or leave unstuffed. They only need enough shape to sit under the body.
Fasten off. Leave 12 cm tail.
Beak Patch (Make 1)
Yarn: gray
Source: Standard amigurumi math
R1: 6 sc in MR (6)
R2: sc around (6)
Flatten slightly into a small oval.
Fasten off. Leave 10 cm tail.
Forehead Accent Patch (Make 1)
Yarn: mint
Source: Standard amigurumi math
R1: 4 sc in MR (4)
Flatten lightly.
Fasten off. Leave 8 cm tail.
Cheek Patches (Make 2)
Yarn: pale pink
Source: Standard amigurumi math
R1: 6 sc in MR (6)
Fasten off. Leave 8 cm tail.
Neck / Cheek Markings (Make 6 embroidered bars)
Yarn: black
Source: Standard amigurumi math
Add 3 short satin-stitched bars on each side of the upper chest.
Keep each bar about 5–7 mm long. Longer marks start reading as feathers instead of barring.
Assembly Instructions
- Sew the head to the body with the face slightly forward, not perfectly centered over the body sphere.
- Attach the gray beak patch between the eyes, low enough to leave a full forehead above it.
- Sew the mint forehead accent directly above the beak patch.
- Add the pale pink cheek patches slightly below and outside the eyes.
- Embroider the six black neck bars, three per side, just under the white-to-blue face break.
- Attach the two wings low on the body sides so they stay small and tucked.
- Sew the two feet to the underside front edge so the bird sits upright without leaning back.
- Check the plush from the front and correct any tilt before tightening the final seams.
- Weave every tail at least 4 cm into the stuffing path.
- Trim only after the body remains stable on a flat surface.
The budgie is complete.
7 Technical Tips for Cleaner Amigurumi
- Use a stitch marker on every increase round. Missing one increase before the 30-stitch plateau makes the body oval, and that distortion is obvious on a round bird.
- Stuff the head firmer than the body. If both are equally packed, the beak patch sinks and the face loses its budgie-specific mapping.
- Insert the eyes before the final decreases. Forcing them into a narrowing head can push one eye off-axis by several millimeters.
- Keep tension slightly tighter on chenille-style substitutions. Velvet yarn spreads more under stuffing, so loose tension can expose filler through the face.
- Pin both wings before sewing either one. A wing even 5 mm higher than the other is easy to spot on a symmetrical chubby bird.
- Use invisible decrease on the face rounds only. Standard decreases create a shallow notch that catches light directly below the eye.
- Weave tails deeper than usual. Short tails loosen fastest at the wing seam and underbody foot joins because those points take the most handling.
Conclusion
This budgie amigurumi crochet pattern works because the body stays simple while the face carries the species detail. Use the verified 10 cm size band, 2.5 mm hook, and cotton 160 m per 50 g baseline as the starting point, then adjust eye position and barring placement before changing the core stitch counts. Photograph the finished bird from a straight-on angle so the mask, beak patch, and neck marks all stay readable. Share it on Pinterest and Instagram with #ChubbyBudgieAmigurumi. One direct question remains: will your next budgie stay classic blue, or switch to a yellow-and-gray pet-shop colorway with the same body math?









