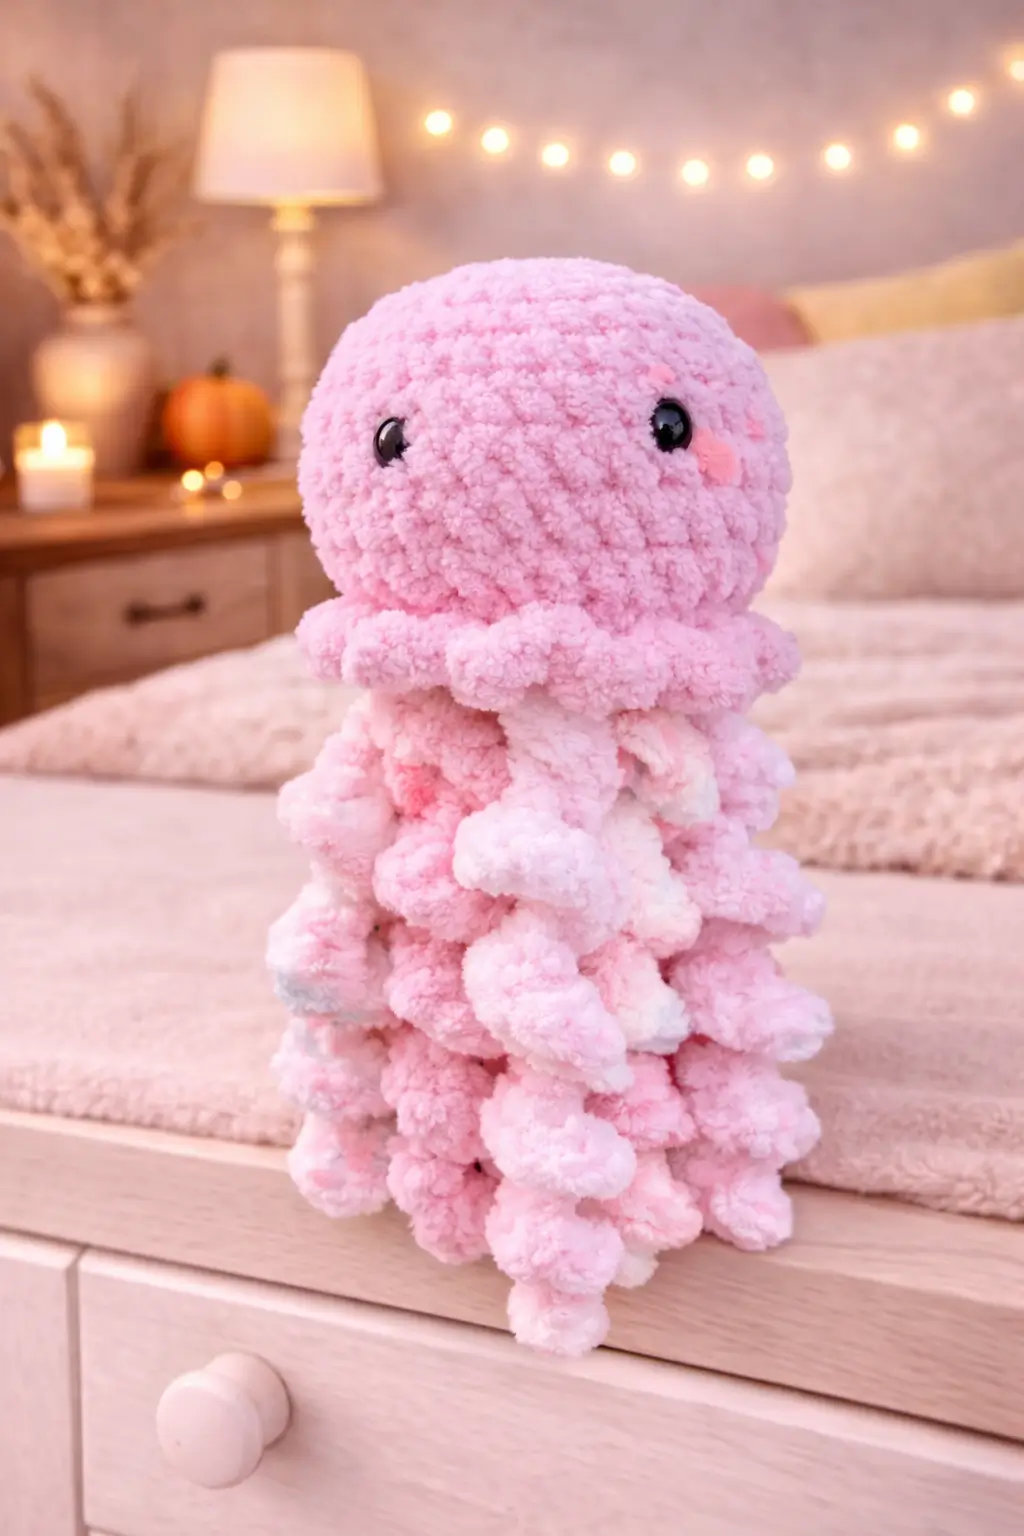
A jellyfish with ten plush corkscrew tentacles looks wrong the second the skirt edge sits flat. This jellyfish amigurumi crochet pattern gives you materials, verified size, hook, skill level, and a full plush build with bell, lower body, ruffle, tentacles, oral arms, and decorative strands. You get a display toy that is fast to photograph and easy to recolor for markets.
The Design: What Makes Jellyfish Different
This build is not driven by the dome alone. The cap matters, but the lower silhouette carries the species read. Current jellyfish references keep returning to the same structural split: rounded bell above, expressive tentacles below. That is exactly what the photo shows. The first decision is cap width. It must be broad enough to overhang the lower join, because a narrow bell makes the plush read like an octopus head. Then the ruffle line has to break cleanly around the edge. No compromise there. A second decision is tentacle density. This crochet jellyfish pattern needs thick spiral strands, not a few thin chains, because the photographed plush uses volume as its main texture. One common mistake in a plush jellyfish crochet build is overstuffing the bell. Then the tentacles hang from a hard sphere and lose the soft drifting effect.
Project Information at a Glance
| Skill Level | Time | Finished Size | Hook | Best For |
|---|---|---|---|---|
| Advanced beginner | 2–4 hours | 22.8 cm / 9 in long, 12.7 cm / 5 in wide | 5 mm | Gifts, nursery decor, ocean-themed displays |
Materials and Tools
Yarn
- Light pink — Super bulky / blanket yarn — 220g — Bernat Baby Blanket
- White — Super bulky / blanket yarn — 80g — Bernat Baby Blanket
- Pastel variegated pink-white-blue — Super bulky / blanket yarn — optional substitution within the 300g total — Bernat Baby Blanket
The 300 g total comes from a current giant jellyfish reference using one skein of Bernat Baby Blanket. The photographed toy is smaller than the giant version but still visually sits in the same plush-yarn family.
Tools
- 5 mm crochet hook
- 14 mm safety eyes
- Fiberfill stuffing
- Yarn needle
- Stitch markers
- Sharp scissors
- Optional bead strand materials
Crochet Abbreviations
MR / sc / inc / dec / sl st / ch / BLO / hdc
Use invisible decrease only on the shaping rounds; standard decreases leave dents that stay visible across a smooth plush bell.
Step-by-Step Jellyfish Crochet Pattern
Work in continuous spiral rounds unless noted.
Bell Cap (Make 1)
Yarn: light pink
Source: https://lalylala.com/en-al/pages/freebie-jellyfish
R1: 6 sc in MR (6)
R2: inc x6 (12)
R3: (sc, inc) x6 (18)
R4: (2 sc, inc) x6 (24)
R5: (3 sc, inc) x6 (30)
R6: (4 sc, inc) x6 (36)
R7: (5 sc, inc) x6 (42)
R8: sc around (42)
R9: sc around (42)
R10: sc around (42)
R11: sc around (42)
Insert 14 mm safety eyes between R8 and R9, about 10 stitches apart.
R12: (dec, 5 sc) x6 (36)
R13: sl st around (36)
Stuff firmly but do not overpack the lower edge.
Fasten off. Leave 28 cm tail.
Lower Body Disc (Make 1)
Yarn: light pink
Source: Standard amigurumi math
R1: 6 sc in MR (6)
R2: inc x6 (12)
R3: (sc, inc) x6 (18)
R4: (2 sc, inc) x6 (24)
R5: (3 sc, inc) x6 (30)
R6: (4 sc, inc) x6 (36)
Fasten off. Leave 24 cm tail.
Skirt Ruffle (Make 1)
Yarn: light pink
Source: Standard amigurumi math
R1: ch 37
R2: starting in 2nd ch from hook, 2 sc in each chain across (72)
R3: ch 1, turn, sc around (72)
This row creates the frilled edge visible under the bell.
Fasten off. Leave 22 cm tail.
Spiral Tentacles (Make 8)
Yarn: light pink, white, or pastel variegated
Source: adapted from current jellyfish tentacle references; counts from Standard amigurumi math
R1: ch 32
R2: starting in 2nd ch from hook, inc x15, then repeat (sc 1, inc) to end
This produces a tight spiral close to the photographed corkscrew shape.
Fasten off. Leave 18 cm tail.
Plush Oral Arms (Make 4)
Yarn: light pink and white
Source: Standard amigurumi math
R1: ch 20
R2: starting in 2nd ch from hook, 2 hdc in each chain across (38)
R3: ch 1, turn, sc around (38)
Keep these softer and thicker than the spiral tentacles.
Fasten off. Leave 18 cm tail.
Side Tentacles (Make 2)
Yarn: pastel variegated
Source: Standard amigurumi math
R1: ch 26
R2: starting in 2nd ch from hook, 3 sc in each chain across (75)
Fasten off. Leave 16 cm tail.
These two fuller tentacles help widen the lower silhouette.
Decorative Beaded Threads (Make 3)
Yarn: optional fine thread
Source: https://lalylala.com/en-al/pages/freebie-jellyfish
Thread 1: ch 1 with bead, ch 1 without bead repeated 15 times, then ch 12
Thread 2: ch 1 with bead, ch 2 without bead repeated 10 times, then ch 8
Thread 3: ch 1 with bead, ch 2 without bead repeated 10 times, then ch 8
Fasten off. Leave 10 cm tail.
Cheek Patches (Make 2)
Yarn: blush pink
Source: Standard amigurumi math
R1: 6 sc in MR (6)
Fasten off. Leave 8 cm tail.
Assembly Instructions
- Sew the lower body disc to the open underside of the bell cap, leaving space to anchor the tentacles before the last section closes.
- Attach the skirt ruffle around the bell edge so it sits outside the lower join line.
- Sew the eight spiral tentacles evenly around the underside.
- Add the four plush oral arms closer to center so they hang thicker than the outer spirals.
- Attach the two side tentacles to the left and right rear quadrants to widen the silhouette.
- Add the three decorative beaded threads only after the main tentacle layout is fixed.
- Sew the two cheek patches slightly below and outside the eyes.
- Check the jellyfish from front view and side view before tightening any tail.
- Weave every yarn tail at least 4 cm into the stuffing path.
- Trim only after the jellyfish hangs evenly and the skirt edge remains circular.
The jellyfish is complete.
7 Technical Tips for Cleaner Amigurumi
- Use a stitch marker on every increase round. Missing one increase before the 42-stitch plateau makes the bell oval, and the ruffle line will show it immediately.
- Keep the bell firm, not rigid. If the cap is overstuffed, the skirt edge lifts and the jellyfish starts reading mushroom-shaped.
- Insert the 14 mm eyes before the final lower shaping is fully handled. Forcing them through dense plush later can shift one eye by several millimeters.
- Work the spiral tentacles with even tension. Loose tension creates flat waves instead of corkscrews, which changes the entire lower profile.
- Pin all tentacles before sewing the first one. A single tentacle placed 1 cm lower than the others becomes obvious from the front.
- Use invisible decrease on the bell rounds only. Standard decreases leave dents that catch light near the face line.
- Bury tails at least 4 cm deep. Short tails loosen fastest where the tentacles are handled and twisted during display.
Conclusion
This jellyfish amigurumi crochet pattern works because the bell stays controlled while the lower half carries the motion. Use the verified 22.8 cm by 12.7 cm size band, 5 mm hook, 14 mm safety eyes, and super bulky yarn baseline as the starting point, then adjust tentacle density before changing the cap math. Photograph the finished plush from a straight-on angle so the eye spacing, skirt edge, and corkscrew tentacles all stay visible. Share it on Pinterest and Instagram with #PlushJellyfishAmigurumi. One direct question remains: will your next jellyfish keep the solid pink bell, or switch to a pastel marbled cap with matching beaded threads?









