Introduction
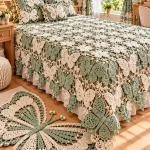
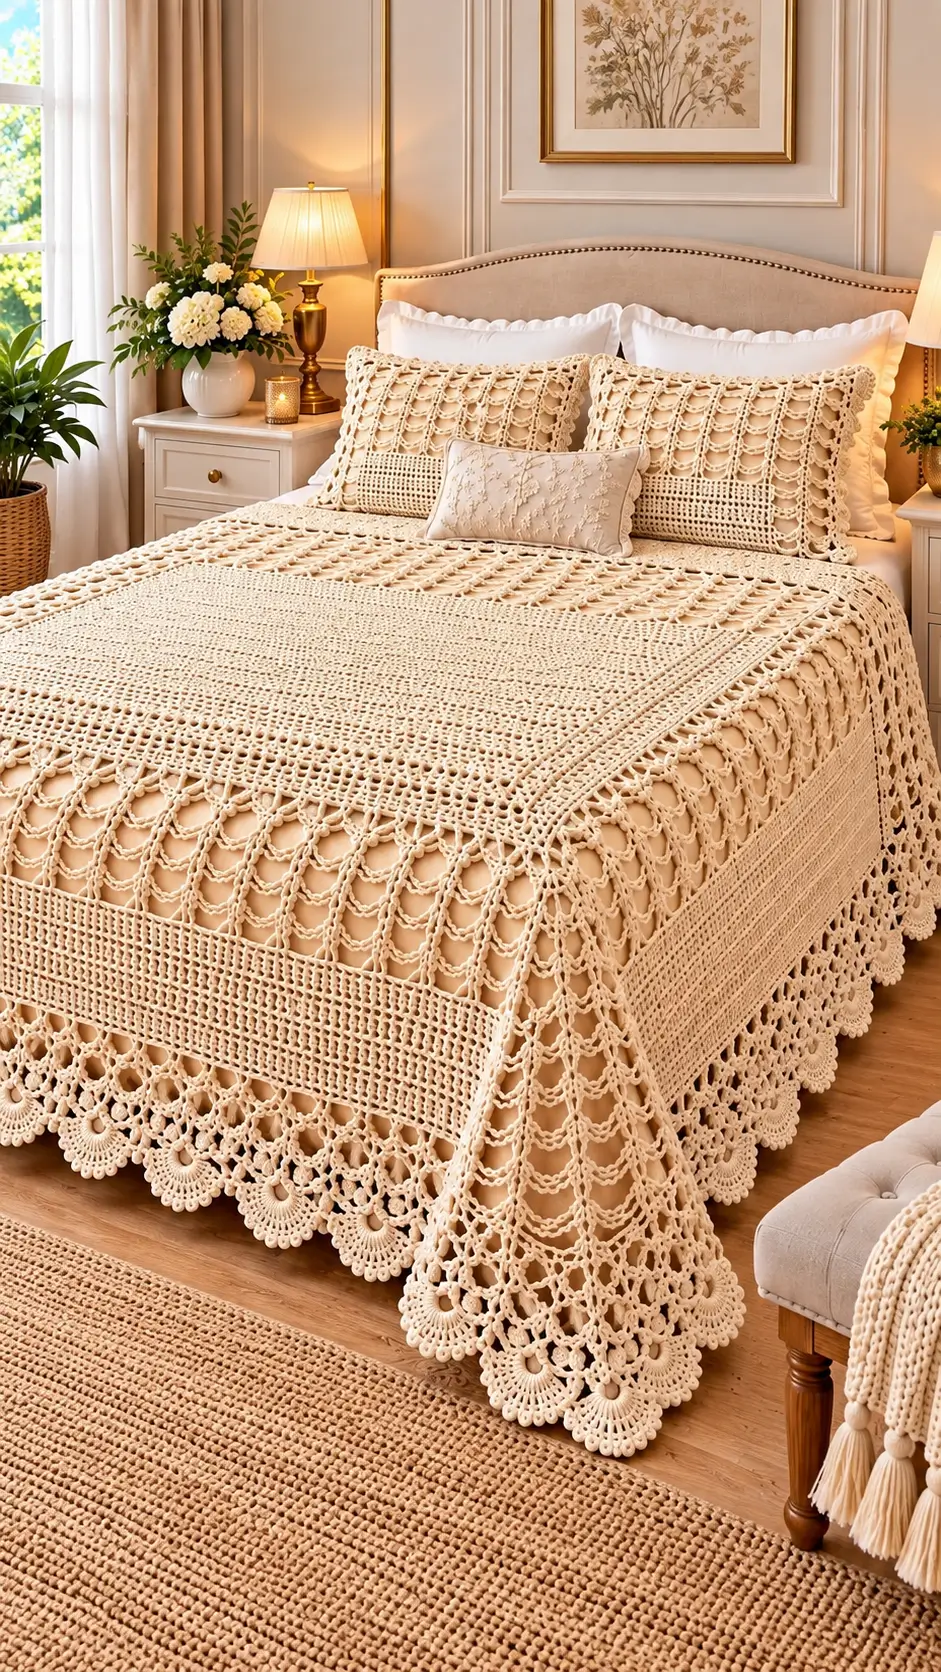
The photographed bedspread places a dense rectangular field inside a broad open lattice, then finishes its three exposed sides with repeating scallops. This ivory lace crochet bedspread pattern recreates that construction logic without claiming the image reveals every stitch. Use DK cotton, a 3.5 mm hook, and measured filet gauge to make a roughly 230 × 250 cm queen-size cover. The project is advanced because border shaping, consistent mesh tension, and large-panel measurement matter more than complicated individual stitches.
The Design: What Makes This Bedspread Different
Three zones distinguish this bed cover. First, open filet mesh forms a light base; double-crochet posts define each square, so you can identify a skipped post before the error extends across several feet. Second, solid double-crochet bands interrupt the mesh to create a firmer central field. The photo suggests a tighter center, but its exact stitch chart is unavailable; this pattern uses alternating filled and open rows instead. Third, a separate succession of chain arches grows outward from the perimeter and terminates in fan-shaped scallops. Four deliberate corner increases on each arch round reduce the risk of a tight, cupping border. Matching crochet pillow sham fronts repeat the filet grammar at smaller scale. A common failure in vintage-style crochet bedding is treating an unblocked filet swatch as a finished-size measurement. Wash and block the sample before calculating any foundation chain.
Project Info at a Glance
| Skill level | Time | Designed size | Hook | Best for |
|---|---|---|---|---|
| Advanced; requires filet, blocking, and border shaping | Multiweek project; maker-dependent | Approx. 230 × 250 cm bedspread, plus two 60 × 60 cm sham fronts, at target gauge | 3.5 mm | Queen bed with a layered, openwork cover |
Sizing status: These are calculated design targets, not measurements taken from the photograph or a tested physical sample. The published Motif Bedspread by Sara Huntington supplies an independent comparison: 132 × 198 cm, DK cotton, and a 3.5 mm hook. It is not this pattern.
Materials and Tools
Yarn
- Ivory or ecru DK cotton — provisional purchase budget 3,000–3,800 g for the large cover and sham fronts, then refine from a washed swatch. Suggested reference yarn: Phildar Phil Coton 4, used in a published DK bedspread, or a comparable smooth cotton with yardage printed on the label.
- Matching ivory DK cotton — included in the budget above for the edging; reserve enough of the same dye lot before beginning the final border.
- Contrast yarn — 0 g, because the photographed crochet uses a near-monochrome palette. Add contrast only after making a separate color sample.
- Optional sewing fabric — two envelope-style pillow backs, each cut for a finished cover of approximately 60 × 60 cm, plus matching sewing thread. This is fabric, not additional crochet yarn.
The budget is a planning estimate, not source-verified consumption for this new construction. For a better figure, weigh a washed 20 × 20 cm filet sample and a separate solid sample, then multiply their grams per square centimeter by each area’s planned dimensions. Weigh an edging sample per 10 cm as well. Add 10–15% for sampling, seams, and tension variation; compare total metres with the yarn label before ordering.
Tools
- 3.5 mm crochet hook or the size that meets the blocked mesh gauge.
- Locking stitch markers, at least twelve, including four distinct corner markers.
- Measuring tape and a ruler long enough to check a 20 cm swatch.
- Tapestry needle, scissors, rustproof blocking pins, blocking mats or a clean blocking surface.
- Kitchen scale reading in grams, for the yarn calculation.
- Pillow inserts sized to the sewn sham backs, and a sewing needle or machine if fabric backs are used.
No stuffing, safety eyes, or amigurumi-specific materials belong in this flat textile project.
Abbreviations and Counting Rules
ch = chain; sc = single crochet; dc = double crochet; sl st = slip stitch; sk = skip; sp = space; rep = repeat; RS/WS = right/wrong side; FO = fasten off. An open filet cell is a three-stitch-wide unit formed by ch 2 over two skipped stitches and a dc post; a filled cell replaces the two chains with two dc. The adjacent cells share their dc post. An invisible decrease is unnecessary because neither panel uses single-crochet decreases.
Target blocked gauge: seven open filet cells across and eight rows vertically per 10 cm. This is an instructional target to check, not an externally tested gauge. At that target, 161 cells occupy 230 cm and 200 rows occupy 250 cm. Count cells rather than treating a chain-space as one ordinary stitch.
Pattern — Step by Step
Use US crochet terms. Work back and forth in rows, not in a continuous spiral. The written design is an original photo-inspired interpretation; it is not the maker’s original chart. The fundamental open/filled filet method is independently documented by Crochet.com and Kelbourne Woolens.
A. Open Filet Foundation and Main Bedspread Panel (Make 1)
Yarn: ivory DK cotton. Stitch basis: standard filet crochet mathematics.
Foundation: Ch 488. That is three chains for each of 161 cells, plus five starting chains.
Row 1: Dc in the eighth ch from the hook. Ch 2, sk 2 ch, dc in next ch; rep across. 161 open cells; 162 dc posts. Turn.
Open-row instruction, after an open row: Ch 5 (counts as first dc and ch 2), dc in next dc post; ch 2, dc in next dc post across. 161 open cells; 162 posts. Turn.
Filled-row instruction, after an open row: Ch 3 (counts as first dc), turn; 2 dc in next ch-2 sp, dc in next dc post across. 484 dc because 3 × 161 + 1 = 484.
Solid-row instruction, after a filled row: Ch 3, turn; dc in each of the remaining 483 stitches. 484 dc.
Return-to-open instruction, after a filled row: Ch 5, turn; sk 2 dc, dc in next dc across. 161 open cells, 162 dc posts.
Work these instructions in this exact order:
- Rows 1–20: Open mesh. Row 1 is the foundation row; Rows 2–20 use the open-row instruction. 161 cells per row.
- Rows 21–26: Fill on Row 21, then work five solid rows. 484 dc per row.
- Rows 27–72: Return to open on Row 27, then continue open. 161 cells per row.
- Rows 73–76: Fill on Row 73, then three solid rows. 484 dc per row.
- Rows 77–124: Work six eight-row repeats consisting of five filled rows followed by three open rows. For the first repeat, Rows 77–81 are solid and Rows 82–84 are open; thereafter switch by the conversion instructions above. 484 dc in each filled row; 161 cells in each open row.
- Rows 125–128: Four filled rows, beginning with the filled-row instruction. 484 dc per row.
- Rows 129–173: Open mesh, converting on Row 129. 161 cells per row.
- Rows 174–179: Six filled rows, converting on Row 174. 484 dc per row.
- Rows 180–200: Open mesh, converting on Row 180. 161 cells per row. FO, leaving a 20 cm tail to weave through the nearest solid band.
There are 200 total rows: 20 + 6 + 46 + 4 + 48 + 4 + 45 + 6 + 21. Place a removable marker every 20 rows. Check the width after Row 20; an 8% gauge difference changes a calculated 230 cm width by more than 18 cm.
B. Expanding Lace Border (Make 1, Around All Four Sides)
Yarn: ivory DK cotton. This is an original repeat based on standard chain-arch construction and five-dc fans.
Preparation round: With RS facing, join at a corner. Work 484 sc across the top, 203 sc down the first long side, 484 sc across the bottom, and 203 sc up the second long side. Add 3 sc in each of four corners, keeping those corner groups distinct from the edge totals. 1,386 sc overall: 484 + 203 + 484 + 203 + 12. To reach 203 side stitches over 200 row ends, distribute three extra sc near the quarter points. Join with sl st.
Arch Round 1: Sc in next base sc, ch 5, sk next five base sc around; join. 231 ch-5 arches, because 1,386 ÷ 6 = 231. Place four markers in arches nearest the corners.
Arch Rounds 2–13: Work sc in next ch-5 arch, ch 5 around. At each of the four corner markers, work (sc, ch 5) twice in that marked arch instead of once, then move its marker to the corresponding new corner arch. Each round gains four arches. Counts at round ends are 235, 239, 243, 247, 251, 255, 259, 263, 267, 271, 275, 279. Join each round with sl st; do not turn.
Scallop Round 14: In every ch-5 arch work (sc, 5 dc, sc). Replace the 5 dc with 7 dc in each of the four marked corner arches if the corners need the additional ease. The standard count is 279 fans; the optional corner adjustment adds eight dc overall. Join, FO, and weave in the end.
The lace drop is an estimate until blocked. If a shallower edge is needed, stop after Arch Round 6 and place the scallops into that round’s 251 arches; the corner-increase arithmetic remains unchanged.
C. Matching Filet Pillow-Sham Fronts (Make 2)
Yarn: ivory DK cotton. Each front targets 60 × 60 cm at the listed gauge.
Foundation: Ch 131, calculated as 3 × 42 + 5.
Row 1: Dc in eighth ch from hook; ch 2, sk 2, dc in next ch across. 42 open cells; 43 dc posts.
Rows 2–8: Open mesh as for the bedspread. 42 cells each row.
Rows 9–12: Convert to filled filet on Row 9; continue solid. 127 dc each row (3 × 42 + 1).
Rows 13–36: Convert back to open on Row 13; continue open. 42 cells each row.
Rows 37–40: Four filled rows. 127 dc each row.
Rows 41–48: Eight open rows. 42 cells each row. FO with a 20 cm tail.
Optional sham scallop: Work 127 sc on each horizontal edge, 50 sc on each vertical edge, and 3 sc at each corner for a base of 366 sc. Repeat sc, sk 2, 5 dc in next st, sk 2 around: 61 five-dc fans. Work an extra two dc into the shell nearest each corner only if blocking shows that the corner draws inward.
Sew each crocheted front to an envelope-style woven backing, leaving an opening at the back for the insert. Pin all four corners and side midpoints first. A textile backing keeps the open filet from stretching around the pillow insert.
D. Narrow Lumbar-Pillow Overlay (Make 1, Optional)
Yarn: ivory DK cotton. This references the narrow cushion set in front of the two larger crocheted shams.
Foundation: Ch 80 for 25 open cells.
Row 1: Dc in eighth chain; repeat ch 2, sk 2, dc in next ch across. 25 cells; 26 posts.
Rows 2–4: Open mesh. 25 cells per row.
Rows 5–10: Filled filet. 76 dc per row (3 × 25 + 1).
Rows 11–14: Open mesh. 25 cells per row. FO, leaving a 25 cm sewing tail.
At target gauge, the overlay measures about 36 × 17.5 cm before trim. Sew it onto a removable fabric lumbar cover, keeping the crochet’s edges flat. The photographed embroidered floral cushion appears to be a separate textile piece; its embroidery cannot be reconstructed as a crochet pattern from this image.
E. Size Adjustments for Other Beds
Use the blocked gauge rather than a nominal mattress label. Desired width in centimeters × 0.7 gives the approximate number of filet cells; round to a whole number and use 3 × cells + 5 foundation chains. Desired length in centimeters × 0.8 gives the approximate number of rows. A 130 × 200 cm topper uses 91 cells, 278 starting chains, 274 dc in any fully filled row, and 160 rows. The border’s corner shaping and stitch counts must be recalculated for any resized panel; do not copy the 1,386-stitch base blindly.
Assembly and Finishing
- Check the main panel’s corners against a rectangular template; all four corners should reach the intended blocked outline without diagonal pulling.
- Wash a spare gauge swatch according to the yarn label, then use its blocked measurements to judge whether the main panel needs gentle reshaping.
- Lay out the bedspread with the denser band arrangement centered on the bed, then place markers at the top, foot, and side midpoints.
- Pin the filet field before blocking; align its vertical posts rather than stretching only the chain arches.
- Shape the border from each corner toward the midpoint so the added corner arches distribute around the turn.
- Block the cover flat on a clean surface, letting it dry completely before lifting it from the pins.
- Block both sham fronts to matching measurements and compare their horizontal bands side by side.
- Attach the fabric backs with the openings facing inward or overlapping at the back; keep stitch tension even at the corners.
- Attach the optional lumbar overlay to its textile cover without piercing or flattening the chain spaces.
- Weave in each yarn tail through several neighboring stitches, changing direction once and trimming only after the fabric has dried.
The completed set has one openwork bed cover, two filet sham fronts, and an optional narrow overlay.
Seven Technical Tips
- Lost dc post: A 161-cell row must have 162 vertical dc posts. Check the post count at every 20-row marker; one skipped post shifts the filet grid across the next band.
- Weak or twisted foundation: The 488-chain foundation can rotate before Row 1 is finished. Lay it flat in sections of approximately 50 chains and recheck orientation before inserting each dc.
- Inconsistent mesh height: A difference of one row per 10 cm creates roughly 25 cm of length error over 200 rows. Measure row gauge after washing, not while the fabric is still dry and tensioned.
- Solid-band puckering: Every filled queen-size row contains 484 dc, not 483. Missing one post at the right edge creates a diagonal seam when the next open section resumes.
- Corner cupping: Four extra chain arches are inserted on every expanding border round. If the corners still draw inward, check whether the marker remained at the geometric corner rather than drifting along the side.
- Fan-edge ruffling: Each ordinary final arch carries one sc, five dc, and one sc. Working seven dc into every arch rather than only the four corner arches causes excess gathers along straight edges.
- Visible woven-in tails: The solid bands offer at least 5 cm of denser fabric for hiding ends. Thread a tail back through several dc posts, reverse once, and avoid leaving it in an open ch-5 arch.
Conclusion
A filet bedspread succeeds on repeat accuracy, not complicated stitches. Record the blocked gauge, the cell count, and the grams consumed by the first 20 rows before committing to the full width. That record makes it possible to adjust the band sequence without changing the underlying mathematics. Next, complete a 20 × 20 cm sample that includes one solid stripe and part of the chain-arch border. Pin the sample over contrasting fabric to inspect its openings before buying yarn. Save the finished ivory lace crochet bedspread pattern on Pinterest and share a measured detail photograph on Instagram using #IvoryLaceBedspread. Would you keep the central bands solid, or replace them with additional open filet rows?
Sources and Verification Notes
- Ravelry: Motif Bedspread, Sara Huntington — independent 132 × 198 cm DK cotton project, 3.5 mm hook and 32 × 50 g main plus 3 × 50 g contrast; not the photographed bedspread.
- Craft Yarn Council: Yarn Weight System — hook size ranges by yarn category.
- Crochet.com: Filet Crochet — open and filled cell methods.
- Kelbourne Woolens: Filet Crochet — mesh structure and cotton thread context.
- Yarnspirations: Shell Stitch Variations — five-dc shells.
- Free Vintage Crochet: Lovelace Bedspread — documented vintage bedspread and border approach.