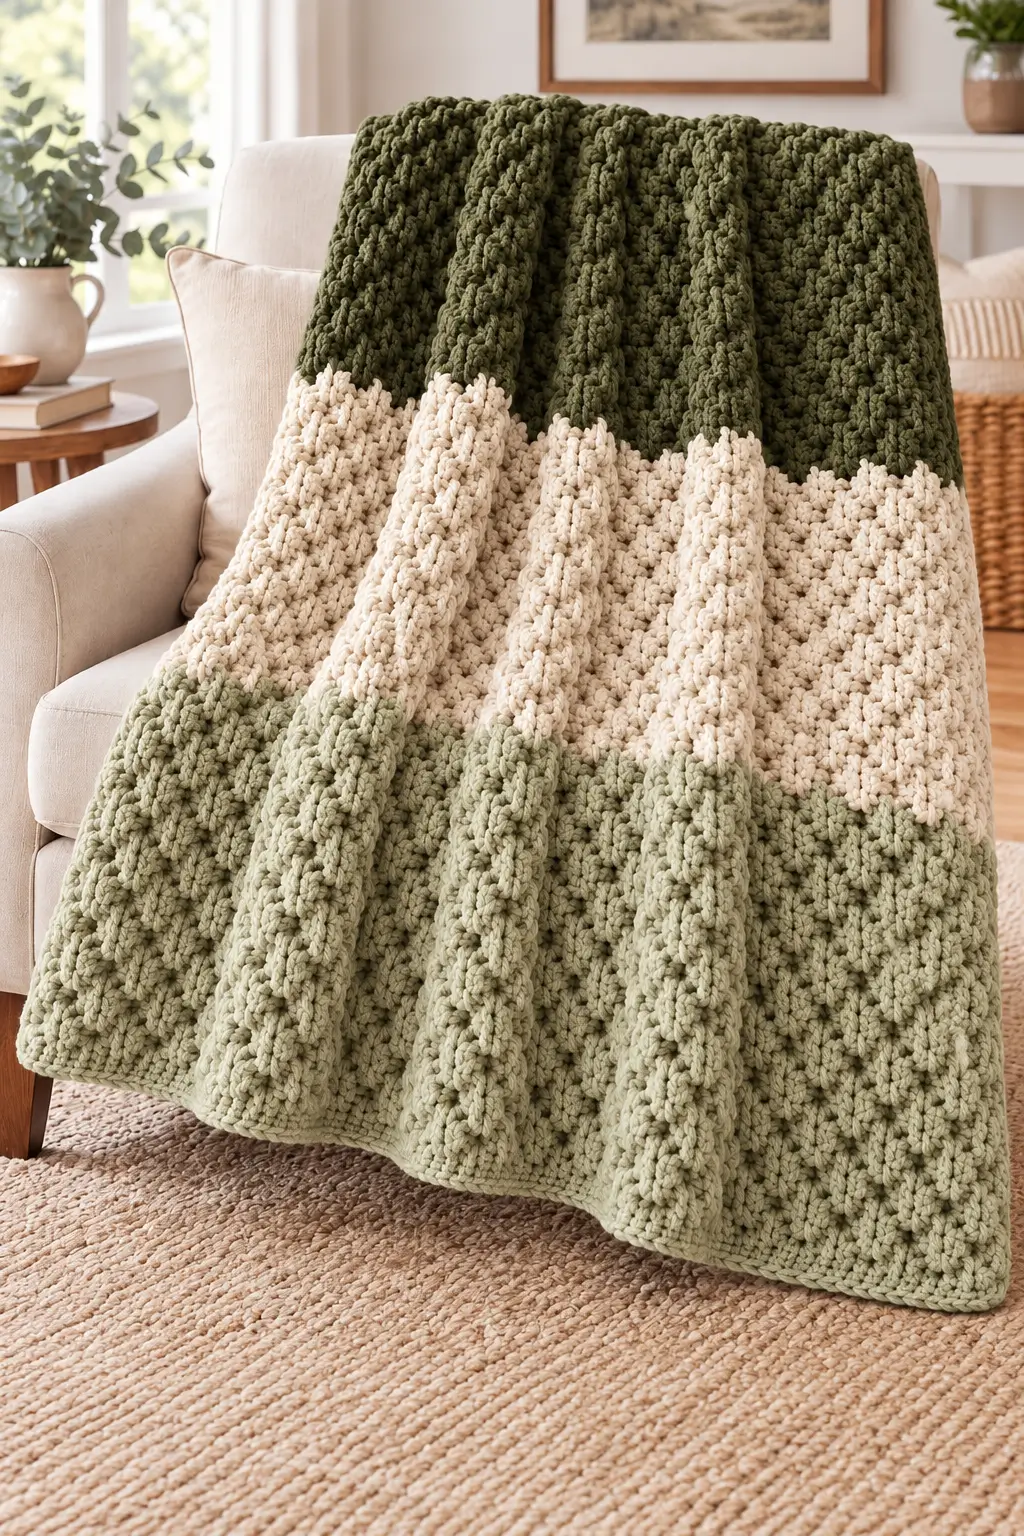
Three broad bands of olive green, ivory, and sage define this chunky crochet blanket pattern, while raised stitches add depth across the surface. Designed as a 120 × 150 cm throw, this image-inspired project uses super bulky yarn and an 8 mm starting hook. The intermediate-level construction works in flat rows with repeating post stitches, making it suitable for a sofa blanket without separate panels or complicated assembly.
The Design: What Makes This Blanket Different
The blanket uses three substantial color blocks rather than narrow repeating stripes. Dark olive occupies the upper section, ivory separates the two greens, and light sage finishes the lower section. This distribution creates contrast without interrupting the overall surface pattern.
Raised front-post double crochet stitches form the primary texture. Unlike ordinary double crochet, post stitches wrap around the stitch below, producing vertical ridges. Their spacing must remain consistent to prevent the textured crochet throw from developing uneven columns.
The third decision is continuous rectangular construction. A single foundation establishes the width, and the blanket grows vertically through repeated rows.
For this three color crochet blanket, the most common construction problem is changing colors before completing the current row. Make every transition at the row edge to maintain a clean horizontal boundary.
Project Info at a Glance
| Detail | Specification |
|---|---|
| Skill Level | Intermediate |
| Estimated Time | 15–25 hours |
| Target Size | 120 × 150 cm (47 × 59 inches) |
| Hook Size | 8 mm, adjust for gauge |
| Yarn Weight | Super Bulky #6 |
| Construction | One-piece rectangle |
| Main Texture | Double crochet and front-post double crochet |
| Best For | Sofa throw or bed accent |
Finished dimensions, working time, and yarn quantities are estimates for this image-inspired design. The pattern has not been tested on a completed sample.
Materials and Tools
Yarn
Choose the same yarn brand and weight for all three sections to maintain consistent thickness and drape.
- Light Sage Green: Super bulky #6 yarn, approximately 900 g. Suggested yarn: Bernat Blanket or comparable chenille yarn.
- Warm Ivory: Super bulky #6 yarn, approximately 600–900 g. Use the same yarn collection.
- Dark Olive Green: Super bulky #6 yarn, approximately 600 g. Choose a matching yarn texture.
The combined starting budget is approximately 2,100–2,400 g, equivalent to seven or eight 300 g skeins. Actual consumption depends on gauge, tension, and finished measurements.
Tools
- 8 mm crochet hook, or size needed to obtain gauge
- Large-eye tapestry needle for weaving in ends
- Scissors
- Locking stitch markers
- Measuring tape
- Row counter
- Digital kitchen scale (optional)
Crochet Abbreviations
| Abbreviation | Meaning |
|---|---|
| ch | Chain |
| sc | Single crochet |
| dc | Double crochet |
| fpdc | Front-post double crochet |
| sl st | Slip stitch |
| st | Stitch |
| RS | Right side |
| WS | Wrong side |
| rep | Repeat |
All instructions use US crochet terminology. The blanket is worked flat in turned rows rather than continuous rounds.
Gauge and Blanket Sizing
Before starting the full blanket, make a 20 × 20 cm gauge swatch using the selected yarn and hook. Work enough rows to establish the textured stitch repeat, allow the fabric to relax, and measure the central 10 cm.
The planning gauge for this design is approximately 8 stitches and 6 rows per 10 cm in the textured pattern. This is a target gauge rather than a measurement from a tested sample.
At 8 stitches per 10 cm, 96 working stitches produce a nominal width of approximately 120 cm before finishing.
If your gauge differs, adjust the foundation chain and recalculate the number of rows needed for the finished length. Keep the stitch repeat consistent when changing the width.
Chunky Crochet Blanket Pattern – Step by Step
This blanket is constructed as one rectangular piece with three color sections. Work in turned rows and maintain consistent tension throughout the project.
Section 1: Light Sage Green
Yarn: Light sage green
Foundation: Chain 98.
Row 1: Dc in the fourth chain from the hook and in each remaining chain. Turn. (96 stitches, counting the beginning chain-3 as one dc.)
Row 2: Ch 3 (counts as first dc). Dc in the next 2 stitches. Repeat [fpdc around the next stitch, dc in the next 2 stitches] until three stitches remain; fpdc around the next stitch, dc in the next stitch, dc in the top of the turning chain. Turn. (96 stitches.)
Row 3: Ch 3 (counts as first dc). Dc in each remaining stitch, working the final dc into the top of the turning chain. Turn. (96 stitches.)
Rows 4–35: Repeat Rows 2–3 sixteen times. Maintain 96 stitches in every row.
Rows 36–37: Repeat Rows 2–3 once more. (96 stitches per row.)
At the planning gauge, this section measures approximately 62 cm in length. Measure the actual fabric before changing colors.
Section 2: Warm Ivory
Yarn: Warm ivory.
At the final yarn-over of the last stitch in Row 37, introduce the ivory yarn. Complete the stitch with the new color.
Rows 38–65: Continue alternating the textured and plain rows, starting with the textured row. Maintain 96 stitches in each row.
The ivory section contains 28 rows, producing a planning length of approximately 47 cm.
Keep the color transition at the edge of the blanket. Leave sufficient yarn tails for weaving in during finishing.
Section 3: Dark Olive Green
Yarn: Dark olive green.
Change to dark olive at the end of Row 65 using the same color-change method.
Rows 66–90: Continue alternating textured and plain rows while maintaining the established stitch placement. Work 96 stitches in each row.
The final olive section contains 25 rows, giving a planning length of approximately 42 cm.
After Row 90, fasten off and leave a 20 cm yarn tail.
Important: The complete 90-row blanket measures approximately 150 cm only if your row gauge averages 6 rows per 10 cm. Add or remove rows within the color sections as needed to achieve your target measurements.
How to Finish the Crochet Blanket
Step 1: Check the Shape
Lay the blanket on a flat surface without stretching it. Measure the width at the top, center, and bottom, then measure the length along both sides.
If one side is noticeably shorter, check the edge stitches and tension before adding the border.
Step 2: Add a Simple Crochet Border
Join sage yarn at one corner of the blanket.
Work one single crochet into each stitch across the horizontal edges. Along the vertical sides, distribute single crochet stitches evenly so the border lies flat.
Work three single crochet stitches into each corner. Join with a slip stitch to the first single crochet.
Add a second round of single crochet if additional edge stability is needed.
Step 3: Secure the Yarn Ends
Fasten off and weave yarn tails through several neighboring stitches using a tapestry needle. Change direction at least once to help secure each tail.
Chenille yarn can shed when cut, so avoid trimming tails too close to the fabric.
Step 4: Final Measurements
Place the finished blanket flat and measure again. Compare the result with the target dimensions of 120 × 150 cm.
Allow the blanket to relax naturally before storing or displaying it. Follow the yarn manufacturer’s care instructions when washing.
7 Technical Tips for a Better Chunky Crochet Blanket
- Use stitch markers: Place markers at both ends of each row to prevent losing edge stitches. A missing stitch can gradually reduce the width and distort the rectangular shape.
- Control color transitions: Introduce the new yarn on the final yarn-over of the previous row. Changing colors in the middle of a row produces an uneven horizontal boundary.
- Check post-stitch placement: Insert the hook around the stitch post rather than through its top loops. Incorrect placement interrupts the raised texture and changes the appearance of the columns.
- Monitor tension: Measure the blanket width every ten rows. A difference greater than 3 cm from the starting width may indicate inconsistent tension or a stitch-count error.
- Handle chenille yarn carefully: Avoid pulling cut yarn tails sharply because the fibers may slip from the central core. Secure the tails through multiple stitches before trimming.
- Space border stitches evenly: Too many single crochet stitches along the vertical edges create ruffling. Too few stitches pull the fabric inward and produce a tight border.
- Check finished measurements: Lay the blanket flat without stretching before measuring. Record dimensions at several points to identify uneven edges or changes in width.
How to Customize Your Three-Color Crochet Blanket
The three-section design can be adapted to different furniture sizes and color palettes. Before changing the dimensions, complete a gauge swatch and calculate the required stitch and row counts.
Make a Larger Blanket
For a wider throw, increase the foundation chain while maintaining the established stitch repeat. Work additional rows in each color section to preserve the approximate proportions.
A larger blanket requires more yarn. Calculate additional material from the weight of your gauge swatch rather than relying only on the original estimate.
Change the Color Arrangement
The original visual arrangement places light sage at the bottom, warm ivory in the middle, and dark olive at the top.
Reverse the two green sections for a different distribution of visual weight, or substitute other shades with similar contrast.
For example, charcoal, oatmeal, and pale gray can create a neutral version while retaining the same three-band construction.
Adjust the Texture
For a flatter surface, replace some textured rows with plain double crochet rows. This reduces the frequency of raised columns and changes yarn consumption.
For stronger texture, maintain the front-post stitch repeat consistently throughout the blanket. Avoid introducing additional stitch patterns without making a new gauge swatch.
Conclusion
The three-color construction combines a repeated raised stitch with a controlled palette of sage, ivory, and olive. Because the blanket is worked as one rectangle, the main technical requirements are consistent stitch counts, accurate row measurements, and clean transitions between colors. Before making the full throw, complete a gauge swatch and record its dimensions and yarn consumption.
Save this chunky crochet blanket pattern to Pinterest for future reference, or share the finished project on Instagram using #ThreeColorChunkyThrow. Photograph the blanket flat so the color proportions and raised stitch columns remain visible.
Would you keep the dark olive section at the top, or reverse the green sections for your room?