Introduction
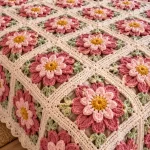
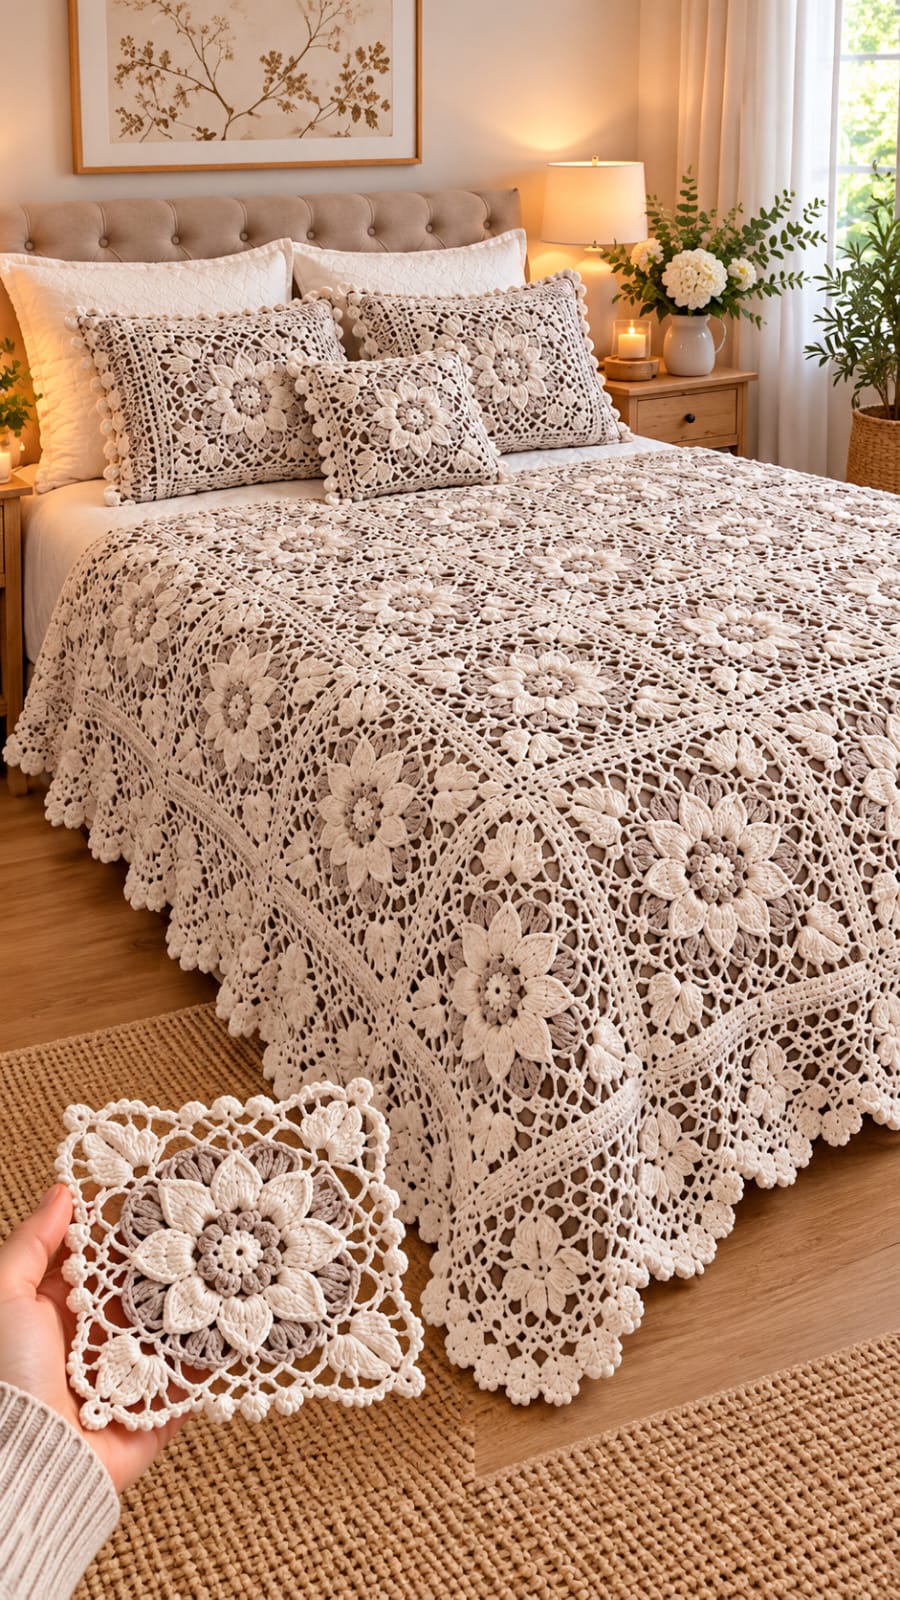
Every raised flower on this bedspread sits inside a square of open crochet lace, creating a repeating floral surface without a solid fabric background. This 3D flower crochet bedspread pattern combines layered petals, openwork granny squares, flat joining seams, and a scalloped border. Designed for intermediate crocheters, the project uses cream cotton-blend yarn and a 3.5 mm hook. The finished dimensions can be adjusted by changing the number of squares.
The Design: What Makes This Floral Bedspread Different
The defining feature of this crochet lace bedspread is the combination of dimensional flowers and an open square framework. Each motif contains a raised floral center, surrounded by eight petals and a delicate network of chain spaces. The surrounding lace forms a square that can be joined to neighboring motifs without interrupting the floral arrangement.
The cream and light beige color combination emphasizes texture rather than strong color contrast. Raised petals create depth, while the openwork sections keep the finished bedspread flexible.
A wide scalloped border completes the design. Matching crochet pillow covers repeat the same flower motif at a smaller scale, creating a coordinated bedroom set.
The main construction challenge is maintaining consistent square dimensions. Uneven motifs can distort the joining lines and cause the finished bedspread to pull diagonally.
Project Information
| Detail | Specification |
|---|---|
| Skill Level | Intermediate |
| Technique | Crochet lace and 3D floral motifs |
| Hook Size | 3.5 mm |
| Yarn | DK cotton or cotton-blend yarn |
| Colors | Ivory and light beige |
| Motif Size | Approximately 15 × 15 cm after blocking |
| Bedspread Size | Approximately 180 × 240 cm before outer edging |
| Construction | Individual squares joined into a rectangular panel |
| Estimated Time | Large multiweek project |
Measurements are design targets for this adaptation. Actual size depends on yarn, tension, blocking, and the number of motifs.
Materials and Tools
Yarn
- Ivory DK cotton-blend yarn: approximately 2,000–2,500 g for the main bedspread.
- Light beige DK cotton-blend yarn: approximately 200–300 g for contrasting flower centers.
- Additional ivory yarn: approximately 300–500 g for two matching pillow covers, depending on their dimensions.
These quantities are planning estimates rather than tested consumption figures. Make and weigh one complete blocked motif before purchasing the full amount.
Tools
- 3.5 mm crochet hook
- Tapestry needle
- Scissors
- Stitch markers
- Measuring tape
- Blocking mats and rustproof pins
Crochet Abbreviations
- MR: Magic ring
- ch: Chain
- sc: Single crochet
- hdc: Half double crochet
- dc: Double crochet
- tr: Treble crochet
- sl st: Slip stitch
- sp: Space
- st: Stitch
- rep: Repeat
- RS: Right side
- WS: Wrong side
All instructions use US crochet terminology.
3D Flower Crochet Square Pattern
The bedspread is assembled from individual floral squares. Each square has a raised flower, an open lace background, and four corners for joining.
Step 1: Crochet the Flower Center
Yarn: light beige.
Round 1: Make a magic ring. Work 8 sc into the ring. Join with a sl st to the first sc. (8 sc)
Round 2: Ch 3, work 1 dc in the same stitch, then 2 dc in each remaining stitch. Join to the top of the beginning ch-3. (16 dc)
Round 3: Ch 1, sc in the first stitch, ch 3, skip the next stitch. Repeat around and join with a sl st. (8 ch-3 spaces)
Fasten off the beige yarn and weave the end into the back of the center.
Step 2: Make the Raised Flower Petals
Yarn: ivory.
Join the ivory yarn in any ch-3 space from Round 3.
Round 4: In each ch-3 space, work (sc, hdc, 3 dc, hdc, sc). Repeat around. (8 petals)
Each petal forms a rounded raised section around the beige center.
Fasten off, leaving a tail long enough to secure the flower if needed.
Technical note: The petals should remain slightly raised above the center. Avoid pulling the final stitches tightly against the underlying chain spaces.
Step 3: Create the Lace Foundation
Yarn: ivory.
Join the yarn behind the flower at the base of any petal.
Round 5: Ch 5, sc into the base between the next two petals. Repeat around to create 8 ch-5 loops. Join with a sl st. (8 loops)
Round 6: Work (sc, ch 5, sc) into each ch-5 loop. Repeat around. (8 ch-5 spaces)
Round 7: Work 5 dc into each alternate ch-5 space and (sc, ch 5, sc) into the spaces between them. Repeat around.
This produces a circular openwork foundation behind the raised flower.
Step 4: Convert the Flower into a Square
The circular motif must now be shaped into four corners.
Round 8: Join yarn in a suitable outer chain space. Ch 3, work 2 dc in the same space, ch 3, then work 3 dc in the same space to form the first corner.
Continue across the side with chain spaces and double-crochet groups, placing the remaining three corners at evenly spaced positions around the motif.
Each corner should contain:
(3 dc, ch 3, 3 dc)
Join with a sl st.
Round 9: Ch 3 and work dc groups along each side, separated by ch-2 spaces. At each corner, work (3 dc, ch 3, 3 dc).
Round 10: Repeat the square expansion, maintaining four corner ch-3 spaces and evenly spaced lace openings along each side.
Round 11: Work sc stitches around the outer edge, placing 3 sc in each corner space.
Fasten off and weave in the ends.
Important: Rounds 8–11 describe the square-shaping method rather than a fully counted, tested chart. The exact side repeats must be adjusted to the available foundation spaces. Make and block a sample square before producing the bedspread.
Blocking the Crochet Squares
Blocking is an important stage because the open lace framework needs consistent dimensions for assembly.
- Lightly dampen the completed crochet square.
- Place it on a blocking mat.
- Pin the four corners to the intended dimensions.
- Adjust the lace openings so they are evenly distributed.
- Keep the raised flower free from excessive flattening.
- Allow the square to dry completely before removing the pins.
For this design, begin with a target measurement of approximately 15 × 15 cm per square.
Measure the blocked sample before calculating the number of motifs required for the bedspread.
How Many Crochet Squares Do You Need?
The number of squares depends on the bedspread dimensions and the blocked motif size.
For example, a bedspread measuring approximately 180 × 240 cm can be assembled from 15 cm squares.
| Measurement | Calculation |
|---|---|
| Width | 12 squares × 15 cm = 180 cm |
| Length | 16 squares × 15 cm = 240 cm |
| Total | 192 crochet squares |
This calculation excludes any additional width or length created by the outer border.
For a smaller blanket, reduce the number of squares. For a larger bedspread with a deeper overhang, increase the number of rows or columns.
Joining the Crochet Flower Squares
Arrange all completed motifs on a flat surface before joining.
Keep the flowers facing upward and position the square corners in straight lines.
Flat Slip-Stitch Joining Method
- Place two squares next to each other with their right sides facing upward.
- Insert the hook through corresponding outer loops along the adjoining edges.
- Join the ivory yarn at one corner.
- Work slip stitches through the matching edge loops.
- Continue until the opposite corner is reached.
- Fasten off or continue joining the next square.
Join the squares into horizontal rows first. Then connect the completed rows to form the full rectangular bedspread.
Keep the joining stitches relaxed. Tight seams can shorten the edges and distort the lace openings.
Crochet Lace Border Pattern
The border gives the bedspread its finished outline and adds the scalloped detail visible around the photographed design.
Border Round 1: Foundation
Join ivory yarn at one corner of the assembled bedspread.
Work sc evenly around the entire perimeter.
Place 3 sc in each corner to maintain the rectangular shape.
Join with a sl st.
Border Round 2: Double Crochet
Ch 3 and work dc in each stitch around.
At each corner, work (2 dc, ch 3, 2 dc).
Join with a sl st.
Border Round 3: Open Lace
Ch 5, skip 2 stitches, sc in the next stitch.
Repeat around the perimeter.
At the corners, use a ch-7 space to provide additional room for turning.
Border Round 4: Lace Expansion
In each ch-5 space, work (sc, ch 3, sc).
At each corner ch-7 space, work (sc, ch 3, 3 dc, ch 3, sc).
Border Round 5: Scalloped Edge
Work 5 dc in one ch-3 space, then sl st into the next available space.
Repeat around the border, distributing the shells evenly.
Adjust the final repeat at each corner if necessary to keep the edge flat.
Fasten off and weave in all remaining ends.
Matching Crochet Flower Pillow Covers
The photograph includes matching decorative pillows featuring the same raised floral motifs and open lace background.
Use the completed flower squares to create coordinating pillow fronts.
Pillow Front
For a square cushion, arrange nine motifs in a 3 × 3 layout.
If each motif measures 15 cm, the joined panel will measure approximately 45 × 45 cm before any additional edging.
Join the motifs using the same flat joining method as the bedspread.
Pillow Back
For a practical pillow cover, use two overlapping rectangular crochet panels or a coordinating fabric backing.
The envelope opening should overlap sufficiently to keep the pillow insert inside without a zipper.
Attach the back to the completed floral front by sewing or crocheting around the outer perimeter.
Decorative Pillow Border
Work one round of sc around the finished pillow.
Add a small shell border if desired.
Keep the pillow edging shallower than the bedspread border so the flower motifs remain the main decorative element.
Assembly and Finishing
- Complete one floral square and confirm its blocked dimensions.
- Make the remaining squares using the same yarn, hook, and tension.
- Block the motifs to matching measurements.
- Arrange the squares into the selected bedspread layout.
- Join individual squares into horizontal rows.
- Connect the rows using relaxed, evenly spaced joining stitches.
- Work the foundation border around the complete bedspread.
- Add the openwork lace rounds and scalloped finishing edge.
- Weave in all remaining yarn ends through matching stitches.
- Block the completed bedspread and allow it to dry fully before placing it on the bed.
The finished project consists of a rectangular floral lace bedspread with raised flower motifs and a decorative scalloped perimeter.
7 Technical Tips for Crochet Lace Bedspreads
- Measure the first blocked square. A 5 mm difference per motif can accumulate into a substantial size difference across twelve or more squares.
- Maintain consistent flower tension. Uneven petal height makes some flowers appear larger even when the surrounding squares have identical dimensions.
- Use stitch markers at all four corners. Misplaced corner groups can turn a square into a diamond-shaped motif.
- Keep the lace chains relaxed. Tight chain spaces restrict blocking and pull the openwork background inward.
- Check joining tension after every row. A seam that is tighter than the motif edges causes visible puckering across the bedspread.
- Avoid flattening the raised flowers during blocking. Pin the surrounding square framework rather than stretching the petals themselves.
- Check border corners after each round. Corners that curl upward need additional expansion, while ruffled corners indicate excessive stitches.
How to Care for a Crochet Lace Bedspread
A large crochet lace bedspread requires careful handling because the openwork sections can stretch under their own weight.
Before washing, check the care instructions for the selected yarn.
If the fiber allows handwashing, use cool water and a mild detergent. Support the entire bedspread when lifting it from the water.
Avoid twisting or wringing the fabric. Instead, gently press out excess water and lay the bedspread flat on clean towels.
Reshape the corners and scalloped edging while the fabric is damp.
Allow the bedspread to dry completely before folding or placing it back on the bed.
For storage, fold the fabric loosely rather than hanging it for long periods. Hanging can stretch the joined motifs and distort the overall shape.
Conclusion
This 3D flower crochet bedspread pattern combines raised floral motifs, open lace squares, flat joining seams, and a scalloped outer border. The most important construction requirement is consistent motif sizing: complete and block one sample before calculating yarn quantities or making the full set of squares. Matching pillow covers can be assembled from the same motif for a coordinated bedroom design.
Save this crochet bedspread idea to Pinterest or share your finished project on Instagram using #3DFlowerCrochetBedspread. Record your blocked square dimensions and final motif count for future projects. Would you keep the raised flowers entirely ivory, or use light beige centers to emphasize the layered petals?