Introduction
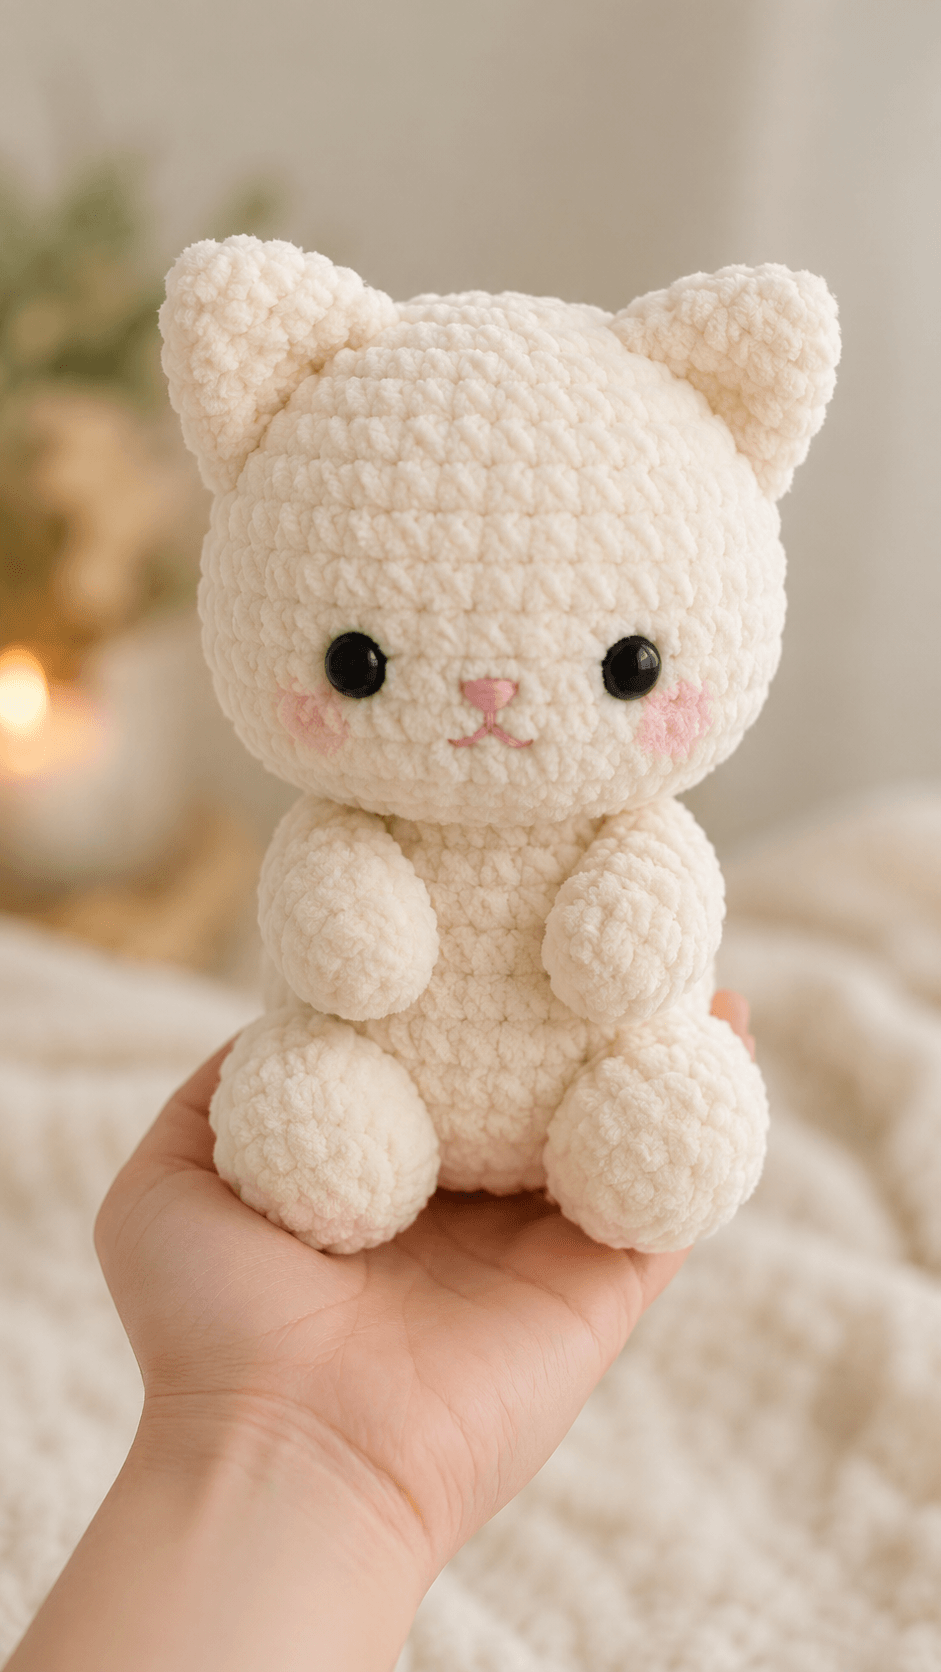
A white kitten’s triangular ears must remain visible above a head nearly twice the width of its torso. This white cat amigurumi crochet pattern uses super-bulky chenille, a 5 mm hook and 15 mm safety eyes to produce a sitting kitten measuring about 20 cm. The project suits an intermediate beginner who can count spiral rounds. Its broad feet and compact body create a stable plush that remains upright for display or photography.
The Design: What Makes This Sitting Kitten Different
The head reaches a 36-stitch plateau, giving the kitten the wide forehead and short facial area visible in the reference photo. Its body also reaches 36 stitches, but fewer straight rounds keep the torso narrower once stuffed. Large back feet are attached low and slightly forward; this placement supports the head without adding pellets or internal weights. The ears use shallow cones rather than flat triangles, so their bases follow the curve of the head. A common error in a chenille cat crochet pattern is placing the eyes too high. That adjustment lengthens the muzzle and removes the juvenile proportion. Here, the eyes sit below the horizontal center of the head. The resulting plush kitten amigurumi retains a compact face, visible cheeks and enough space for a small embroidered nose.
Project Info at a Glance
| Skill Level | Time | Finished Size | Hook | Best For |
|---|---|---|---|---|
| Intermediate beginner | 4–6 hours | About 20 cm sitting | 5 mm | Display, gifts and plush photography |
Published chenille cat patterns use hooks near 4–5 mm, with finished measurements varying according to yarn thickness and stitch tension. This version uses the larger 36-stitch head required for the photographed proportions.
Materials and Tools
Yarn
- Ivory or warm white — super-bulky polyester chenille — 100–120 g — Bernat Blanket, Hobbii Honey Bunny or a comparable plush yarn.
- Pale pink — DK cotton or six-strand embroidery floss — under 10 g — used for the nose, mouth and cheek patches.
Tools
- 5 mm crochet hook
- 15 mm black safety eyes
- Polyester stuffing, approximately 60–80 g
- Yarn needle with a large eye
- Locking stitch marker
- Sharp scissors
- Straight pins for assembly
- Pink embroidery needle and thread
Safety eyes are not suitable for a toy intended for a child under three years old. Replace them with firmly embroidered eyes when required.
Abbreviations
- MR — magic ring
- sc — single crochet
- inc — two single crochets in one stitch
- dec — invisible decrease over two stitches
- sl st — slip stitch
- ch — chain
- BLO — back loop only
For an invisible decrease, insert the hook through the front loops of the next two stitches, yarn over, pull through both front loops, then complete one single crochet.
Pattern — Step by Step
Work in a continuous spiral unless a section states otherwise. Place the marker in the first stitch of every round and move it after each completed round.
Head
Yarn: ivory super-bulky chenille. Shape based on standard six-stitch amigurumi expansion.
R1: 6 sc in MR (6)
R2: inc ×6 (12)
R3: (sc, inc) ×6 (18)
R4: (2 sc, inc) ×6 (24)
R5: (3 sc, inc) ×6 (30)
R6: (4 sc, inc) ×6 (36)
R7–R13: sc around (36)
R14: (4 sc, dec) ×6 (30)
Insert 15 mm safety eyes between R10 and R11, leaving seven visible stitches between the posts. Count the spacing across the front surface rather than around the full round.
R15: (3 sc, dec) ×6 (24)
R16: (2 sc, dec) ×6 (18)
Stuff the upper head firmly. Add smaller pieces around the eye washers so the front remains even.
R17: (sc, dec) ×6 (12)
R18: dec ×6 (6)
Fasten off. Pull the yarn through the front loops of the final six stitches and close the opening. Leave a 25 cm tail only when additional head shaping is planned.
Body
Yarn: ivory super-bulky chenille.
R1: 6 sc in MR (6)
R2: inc ×6 (12)
R3: (sc, inc) ×6 (18)
R4: (2 sc, inc) ×6 (24)
R5: (3 sc, inc) ×6 (30)
R6: (4 sc, inc) ×6 (36)
R7–R9: sc around (36)
R10: (4 sc, dec) ×6 (30)
R11–R12: sc around (30)
R13: (3 sc, dec) ×6 (24)
R14: sc around (24)
R15: (2 sc, dec) ×6 (18)
R16: sc around (18)
R17: (sc, dec) ×6 (12)
Stuff the base firmly and the neck area slightly less firmly. The softer neck edge gives the head a broad contact surface during sewing.
Fasten off. Leave a 35 cm tail for attaching the body to the head.
Front Paws — Make Two
Yarn: ivory super-bulky chenille.
R1: 6 sc in MR (6)
R2: inc ×6 (12)
R3: (sc, inc) ×6 (18)
R4–R5: sc around (18)
R6: (sc, dec) ×6 (12)
R7–R9: sc around (12)
Stuff the lower two-thirds. Leave the final round unstuffed so the top can flatten against the body.
R10: Fold the opening flat and crochet 6 sc through both layers (6).
Fasten off. Leave a 25 cm sewing tail.
Back Legs — Make Two
Yarn: ivory super-bulky chenille.
R1: 6 sc in MR (6)
R2: inc ×6 (12)
R3: (sc, inc) ×6 (18)
R4: (2 sc, inc) ×6 (24)
R5–R7: sc around (24)
R8: (2 sc, dec) ×6 (18)
R9: sc around (18)
R10: (sc, dec) ×6 (12)
Stuff firmly, concentrating extra filling in the front half to form a rounded paw.
R11: dec ×6 (6)
Fasten off. Close the six remaining stitches and leave a 30 cm tail for sewing.
Ears — Make Two
Yarn: ivory super-bulky chenille.
R1: 6 sc in MR (6)
R2: (sc, inc) ×3 (9)
R3: (2 sc, inc) ×3 (12)
R4: (3 sc, inc) ×3 (15)
R5: sc around (15)
Do not stuff. Flatten each ear so the opening forms a shallow curve rather than a straight edge.
Fasten off. Leave a 25 cm tail.
Tail
Yarn: ivory super-bulky chenille.
R1: 6 sc in MR (6)
R2: inc ×6 (12)
R3–R10: sc around (12)
R11: Fold flat and crochet 6 sc through both layers (6)
Add only a narrow strip of stuffing through the lower half. An overfilled tail becomes rigid and pushes the body away from the sitting surface.
Fasten off. Leave a 25 cm tail.
Cheek Patches — Make Two
Yarn: pale pink DK cotton or separated embroidery floss.
R1: 6 sc in MR (6)
R2: inc ×6 (12)
Join with a sl st. Fasten off and leave a 15 cm sewing tail. For a lighter blush effect, embroider six to eight short horizontal stitches instead of attaching the circles.
Nose and Mouth
Thread a needle with pale pink embroidery floss.
Make a horizontal stitch centered one round below the eyes and pass the thread through its midpoint to form a small inverted triangle. Bring the thread down by one stitch, then work one diagonal stitch to the left and one to the right. Each mouth line should span about 8 mm. Knot the thread inside the head or bury the ends through several dense stitches.
Assembly
- Pin the body beneath the head with the neck centered between R15 and R17 of the head.
- Sew the body to the head with small mattress stitches, adding a final pinch of stuffing before closing the seam.
- Check that the eyes remain level when the kitten rests on a flat surface.
- Attach the cheek patches one round below and slightly outside the eyes.
- Embroider the pink nose at the midpoint between the eyes, then add the short divided mouth.
- Pin the front paws to the upper body with their lower tips directed inward.
- Sew the back legs to the lower sides of the body, keeping their lowest edges level with the body base.
- Attach the ears between R3 and R7 of the head, with about seven stitches between their inner corners.
- Sew the tail to the lower rear body and curve it toward one side.
- Bury every yarn tail through at least 4 cm of stuffed fabric, trim it and massage the surface until the cut end retracts.
The completed kitten should sit without support, with both back paws touching the surface and the head centered above the body.
7 Technical Tips
- Marker drift: A missed first stitch shifts the eye line and ear placement by one stitch per round. Use a locking marker and recount every increase or decrease round before continuing.
- Loose stuffing at the neck: A hollow section beneath the head causes forward tilt. Pack the body to about 80% firmness, then add small pieces around the neck seam during assembly.
- Visible decrease gaps: Standard decreases expose stuffing through chenille fabric. Work each decrease through the front loops only and keep the loop height below 5 mm.
- Late eye insertion: Eye washers cannot be fitted after the head closes. Install both eyes after R14 at the latest, then compare their height from the bottom edge before locking the washers.
- Uneven chenille tension: Pulling firmly can strip fibers from the yarn core. Keep each working loop near the 5 mm hook shaft and tighten only after the stitch is completed.
- Unbalanced limb placement: Sewing one leg 10 mm higher than the other makes the kitten lean. Pin all four limbs and test the seated position before making permanent stitches.
- Escaping yarn tails: Short chenille ends can slide out of the fabric. Weave each tail through three separate stitch directions over a minimum internal distance of 4 cm.
Conclusion
Block out the facial layout before locking the eye washers, because the seven-stitch spacing controls the kitten’s entire expression. After assembly, compare the ear angles, front-paw height and contact points beneath both back feet. Correct any tilt before burying the final tails. Save the white cat amigurumi crochet pattern with the finished measurements and yarn label so a second kitten can be matched to the first. Add a vertical project photo to Pinterest and post the front and side views on Instagram with #CloudPawKitten. Which ear position suits this kitten better: both ears upright, or one ear angled slightly outward?









