Introduction
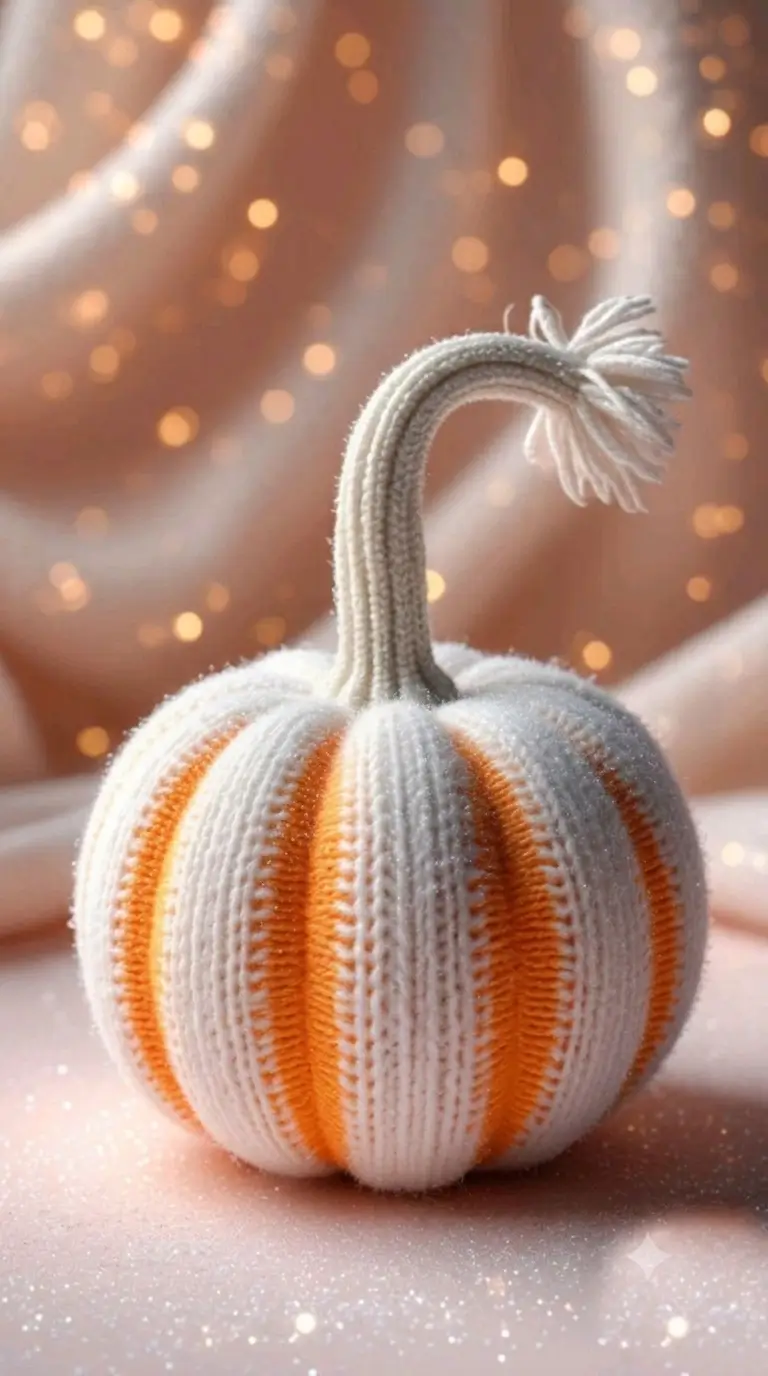
A pumpkin reads correctly only when its ribs converge at both poles; this striped version makes that geometry impossible to hide. This white and orange striped crochet pumpkin pattern uses worsted-weight yarn, a 3.75 mm hook, embroidered orange channels, firm stuffing, and a separate curved stem. The finished piece is about 10–12 cm wide and roughly 16–18 cm high including the stem. It suits an intermediate maker and works well as compact autumn table decor.
The Design: What Makes This Pumpkin Different
The body is built as one closed sphere first, then compressed so six broad lobes develop around the circumference. That order keeps the stuffing balanced and gives the ribbed crochet pumpkin a stable base instead of forcing the grooves during the crochet rounds. Narrow orange channels are added only after the white body is complete, which makes their spacing easier to control and keeps white as the dominant color. The long stem uses a separate narrow tube and flat base disc so its curved profile does not pull the crown out of shape. A common mistake in a two color crochet pumpkin is making the orange areas as wide as the white sections. On this design, the accent color belongs inside the grooves. That proportion is what separates the striped pumpkin crochet pattern from a simple alternating-color ball.
Project Info at a Glance
| Skill Level | Time | Finished Size | Hook | Best For |
|---|---|---|---|---|
| Intermediate | About 3–5 hours | 10–12 cm wide; about 16–18 cm high with stem | 3.75 mm | Fall table decor, shelf displays, small centerpieces |
Materials and Tools
Yarn
- Soft white or ivory — worsted / #4 yarn — approximately 50 g — Paintbox Simply Aran or a comparable smooth yarn.
- Pumpkin orange — matching worsted / #4 yarn — approximately 10 g — use a clean orange rather than a dark rust if you want the narrow grooves to remain visible.
- Pale gray-beige or warm cream — worsted / #4 yarn — approximately 5 g — reserved for the stem, base disc and fringe tip.
Tools
- 3.75 mm crochet hook
- Polyester stuffing — approximately 25–35 g
- Long tapestry or doll needle — preferably 10–15 cm
- Standard yarn needle
- Locking stitch marker
- Six removable stitch markers or pins
- Scissors
- Safety eyes — none for the photographed design
Use the same yarn weight for all three colors. Changing to a thinner orange yarn makes the channels look embroidered rather than crocheted into the body, while a heavier accent yarn can spread across the white lobes.
Abbreviations
- MR — magic ring
- sc — single crochet
- inc — work 2 single crochet stitches in one stitch
- dec — invisible single crochet decrease
- sl st — slip stitch
- ch — chain
- BLO — back loop only
- st / sts — stitch / stitches
An invisible decrease is made through the front loops of the next two stitches before completing one single crochet through both loops.
Pattern — Step by Step
Work the pumpkin body in a continuous spiral. Place a marker in the first stitch of every round and move it upward after each completed round. The body construction below is original six-stitch amigurumi math rather than copied stitch instructions from another published pumpkin pattern.
Pumpkin Body
Yarn: soft white or ivory — Source: standard six-stitch amigurumi math.
R1: 6 sc in MR (6)
R2: inc ×6 (12)
R3: (sc, inc) ×6 (18)
R4: (2 sc, inc) ×6 (24)
R5: (3 sc, inc) ×6 (30)
R6: (4 sc, inc) ×6 (36)
R7: (5 sc, inc) ×6 (42)
R8: sc around (42)
R9: sc around (42)
R10: sc around (42)
R11: sc around (42)
R12: sc around (42)
R13: sc around (42)
R14: sc around (42)
R15: sc around (42)
R16: (5 sc, dec) ×6 (36)
R17: (4 sc, dec) ×6 (30)
R18: (3 sc, dec) ×6 (24)
R19: (2 sc, dec) ×6 (18)
R20: (sc, dec) ×6 (12)
R21: dec ×6 (6)
Begin stuffing after R16. Add fiberfill in small layers rather than inserting one dense lump. Keep the center firm, but leave approximately 1 cm around the top and bottom slightly more compressible because those areas will be pulled inward during sculpting.
Fasten off. Leave a 30 cm tail, thread it through the front loops of the remaining six stitches, pull the opening closed and bury the tail through the body.
Central Compression
Yarn: white — Source: original shaping method based on standard pumpkin sculpting.
Cut approximately 80 cm of white yarn and thread the long needle. Enter through the exact bottom center and push the needle through the stuffing until it exits through the top center.
Insert the needle back through the crown and return to the bottom center. Pull gradually until the top and bottom move inward by roughly 8–12 mm. The sides should spread slightly, changing the sphere into a low pumpkin profile.
Repeat the pass once more if the first strand does not hold the shape. Knot the ends at the bottom, then bury them inside the body.
Mark the Six Rib Positions
Source: original layout.
Set the pumpkin on a flat surface and look at it directly from above. Place six removable markers around the widest part of the body. At the 42-stitch plateau, the approximate spacing is seven stitches from one groove position to the next.
Check opposite markers in pairs. Marker 1 should face marker 4, marker 2 should face marker 5, and marker 3 should face marker 6. Correct the spacing before adding orange yarn because small placement errors become more visible once the channels are tightened.
Orange Rib Channels
Yarn: pumpkin orange — Make 6 — Source: original surface-embroidery construction.
Cut approximately 55–60 cm of orange yarn for the first channel. Thread the yarn needle and anchor the tail near the bottom center.
Work a line of surface chain stitches from the bottom toward the crown









