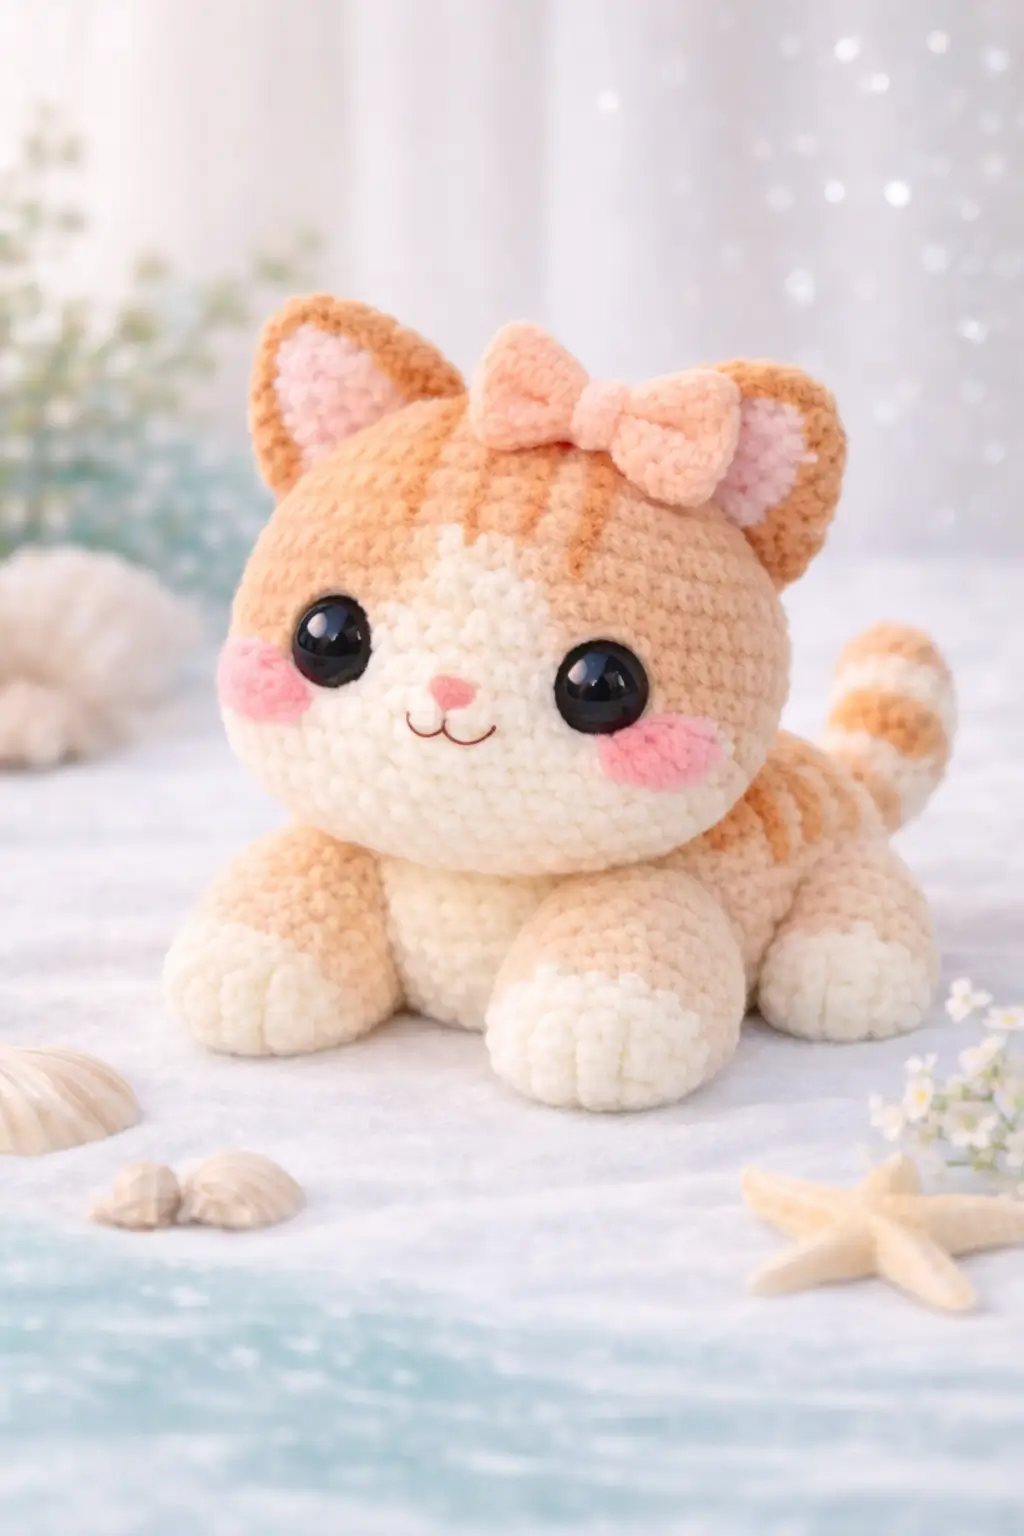
Tabby cats need stripe changes that stay centered on a curved tail. This cat amigurumi crochet pattern solves that problem with a loaf-shaped body, a broad cream muzzle, and a separate bow placed between the ears. Work it in super bulky chenille with a 5 mm hook and large safety eyes for a finished plush around 18 cm long. The shape fits shelf display, nursery decor, and market tables especially well.
The Design: What Makes This Tabby Different
A tabby plush fails fast when the body sits too high. The photo shows a cat that reads more like a loaf than a seated toy, so the pattern uses a low oval torso and four short grounded legs rather than a long neck and upright silhouette. The second structural decision is the face split: cream covers the muzzle and lower face to widen the expression zone around the eyes. That gives the cheeks room to sit low without crowding the nose embroidery. Third, the tail has mild taper and stripe breaks instead of a plain tube, which keeps the tabby cat amigurumi readable from the side. A common error with a crochet kitten plush like this is undersizing the ears; when ears are too small, the bow takes over the whole head and the proportions collapse.
Project Info at a Glance
| Skill Level | Time | Finished Size | Hook | Best For |
|---|---|---|---|---|
| Familiar beginner / intermediate | 4–6 hours | about 18 cm long | 5 mm | chenille plush display, gift stock, market inventory |
Verified reference cats in this yarn category commonly use super bulky weight 6 yarn, a 5 mm hook, and safety eyes ranging from 9 mm on small cats to 18 mm on larger chenille builds.
Materials and Tools
Yarn
- Light apricot / pale orange — super bulky weight 6 chenille — about 70 g — Hobbii Honey Bunny or Baby Snuggle Solid
- Cream — super bulky weight 6 chenille — about 45 g — Hobbii Honey Bunny or Baby Snuggle Solid
- Soft pink — super bulky weight 6 chenille or lighter scrap yarn — about 10 g — for inner ears, cheeks, and bow
- White — super bulky weight 6 chenille — about 8 g — for tail tip stripes if desired
- Brown or dark embroidery thread — small amount — for nose and mouth
The chenille references used here are 100 g skeins. This photo-based adaptation uses less than one full skein of the main color and partial amounts of the contrast colors.
Tools
- Hook 5 mm
- Safety eyes 16–18 mm
- Polyester stuffing
- Tapestry needle
- Stitch markers
- Scissors
Abbreviations
MR / sc / inc / dec / sl st / ch / BLO / FO
Use invisible decrease instead of a standard two-stitch close when shaping the head and body; the front loops stay flatter and the muzzle line stays cleaner in chenille yarn.
Pattern — Step by Step
Continuous spiral unless noted.
Head (Make 1)
Yarn: cream, then apricot — Source: Standard amigurumi math adapted to the photo using a medium 36-st plateau.
R1: 6 sc in MR (6)
R2: inc x6 (12)
R3: (sc, inc) x6 (18)
R4: (sc 2, inc) x6 (24)
R5: (sc 3, inc) x6 (30)
R6: (sc 4, inc) x6 (36)
R7-R11: sc around (36)
Change to apricot at the top half as desired. Place eyes between R8 and R9, 8 stitches apart. Start stuffing.
R12: (sc 4, dec) x6 (30)
R13: (sc 3, dec) x6 (24)
R14: (sc 2, dec) x6 (18)
R15: (sc, dec) x6 (12)
R16: dec x6 (6)
Fasten off. Leave 20 cm tail.
Body (Make 1)
Yarn: cream, then apricot — Source: Standard amigurumi math adapted to the loaf-style photo.
R1: 6 sc in MR (6)
R2: inc x6 (12)
R3: (sc, inc) x6 (18)
R4: (sc 2, inc) x6 (24)
R5: (sc 3, inc) x6 (30)
R6: (sc 4, inc) x6 (36)
R7-R10: sc around (36)
Change upper body stitches to apricot, leaving cream on the belly line.
R11: (sc 4, dec) x6 (30)
R12-R13: sc around (30)
R14: (sc 3, dec) x6 (24)
R15: (sc 2, dec) x6 (18)
Stuff the front half firmly and the back half lightly so the body rests low instead of doming upward.
R16: (sc, dec) x6 (12)
R17: dec x6 (6)
Fasten off. Leave 20 cm tail.
Front Legs (Make 2)
Yarn: cream to apricot — Source: Standard amigurumi math.
R1: 6 sc in MR (6)
R2: inc x6 (12)
R3: (sc, inc) x6 (18)
R4-R5: sc around (18)
R6: (sc 4, dec) x3 (15)
R7-R9: sc around (15)
Change to apricot after the paw.
R10: (sc 3, dec) x3 (12)
R11-R12: sc around (12)
Stuff paw only. Fasten off. Leave 18 cm tail.
Back Legs (Make 2)
Yarn: cream to apricot — Source: Standard amigurumi math.
R1: 6 sc in MR (6)
R2: inc x6 (12)
R3: (sc, inc) x6 (18)
R4-R6: sc around (18)
R7: (sc 4, dec) x3 (15)
R8-R10: sc around (15)
Change to apricot after the paw section.
R11: (sc 3, dec) x3 (12)
R12: sc around (12)
Stuff the bottom half only. Fasten off. Leave 18 cm tail.
Ears (Make 2)
Yarn: apricot with pink inner panel — Source: ear shaping based on small cat ear references and standard math.
R1: 6 sc in MR (6)
R2: (sc, inc) x3 (9)
R3: (sc 2, inc) x3 (12)
R4: sc around (12)
Surface stitch or embroider a pink inner triangle after assembly.
Fasten off. Leave 15 cm tail.
Tail (Make 1)
Yarn: apricot, cream, apricot, cream — Source: Standard amigurumi math with tubular tail sizing informed by chenille cat references.
R1: 6 sc in MR (6)
R2: (sc, inc) x3 (9)
R3: (sc 2, inc) x3 (12)
R4-R6: sc around (12)
Change to cream for one stripe.
R7-R8: sc around (12)
Change to apricot for second stripe.
R9-R10: sc around (12)
Change to cream for tail tip.
R11-R12: sc around (12)
R13: (sc 2, dec) x3 (9)
R14: sc around (9)
Lightly stuff base only. Fasten off. Leave 18 cm tail.
Muzzle Panel (Make 1)
Yarn: cream — Source: Standard oval shaping to match the broad face panel in the photo.
Ch 7.
R1: starting in 2nd ch from hook, sc 5, 3 sc in last ch, sc 4 on opposite side, inc in last st (14)
R2: inc, sc 4, inc x3, sc 4, inc x2 (20)
R3: sc around (20)
Fasten off. Leave 20 cm tail.
Cheek Patches (Make 2)
Yarn: pink — Source: Standard flat circle math.
R1: 6 sc in MR (6)
R2: inc x6 (12)
Fasten off. Leave 10 cm tail.
Bow (Make 1)
Yarn: pink — Source: Standard accessory shaping based on the visible top bow.
Ch 9.
Row 1: starting in 2nd ch from hook, sc 8 (8)
Row 2-R5: ch 1, turn, sc 8 (8)
Fasten off first rectangle.
Make a second identical rectangle. Stack them. Wrap a short strand tightly around the center 6–8 times to form the knot. Leave tails for sewing.
Nose Embroidery
Yarn: pink and brown embroidery thread — Source: Standard finishing.
Satin stitch a small pink triangle at the center of the muzzle. Add a shallow brown smile under it with two mirrored curves.
Assembly
- Sew the head to the front third of the body, angling it slightly downward so the loaf profile stays low.
- Attach the muzzle panel to the lower face, centered below the eyes.
- Sew the cheek patches under the outer corners of the eyes, one round lower than the nose point.
- Add the embroidered nose and mouth after the cheek circles are fixed, so the spacing stays centered.
- Sew the front legs to the underside front of the body, close enough to touch under the chin.
- Sew the back legs to the rear underside, slightly wider apart than the front pair.
- Fold and sew the ears to the head between R4 and R8 from the crown, tilted slightly outward.
- Attach the tail to the back seam line and angle it upward before curving it outward.
- Sew the bow between the ears, offset just a little to the right to match the photo styling.
- Brush the plush lightly by hand, check symmetry from the front, and trim any visible embroidery tails.
The piece is complete when the head reads round from the front and the body still rests low against the surface.
7 Technical Tips
- Mark the first stitch of every round. Chenille hides the join line, and the failure mode is a stripe break that drifts off-center on the tail by R8 or earlier.
- Do not overstuff the body. The target is a low loaf profile; once the belly starts arching upward, the cat stops reading as a resting tabby and starts reading as a seated plush.
- Use invisible decreases on the face side only. Standard decreases on chenille create ridges, and those ridges show most on R12-R15 of the head.
- Install the eyes before the final two decrease rounds. On this scale, eye placement works best between R8 and R9 with 8 stitches between them; waiting longer compresses the face and crowds the muzzle panel.
- Stuff paws more firmly than leg shafts. A soft shaft with a denser paw keeps the feet rounded while the limbs still flatten naturally against the table.
- Pin the ears and bow before sewing. The common failure mode is bow dominance: if the ears sit too low or too narrow, the bow becomes the main silhouette from the front.
- Weave tails through at least 4 directional passes. Chenille sheds under friction, so a single straight weave can loosen after handling, especially at the tail base and bow center.
Conclusion
This tabby version keeps the details that matter: wide muzzle contrast, short grounded legs, striped tail sections, and a bow that does not overwhelm the ears. The next step is simple. Swatch one small tail stripe in your chosen chenille first, then confirm that the color change stays clean before you begin the full build. When you publish the finished toy, post one front view and one side view on Pinterest and Instagram so the loaf silhouette reads clearly. Use #TabbyBowCat and tag the project as a cat amigurumi crochet pattern. One question remains useful for revisions: did you place the bow centered, or slightly off to one ear like the photo?









