Introduction
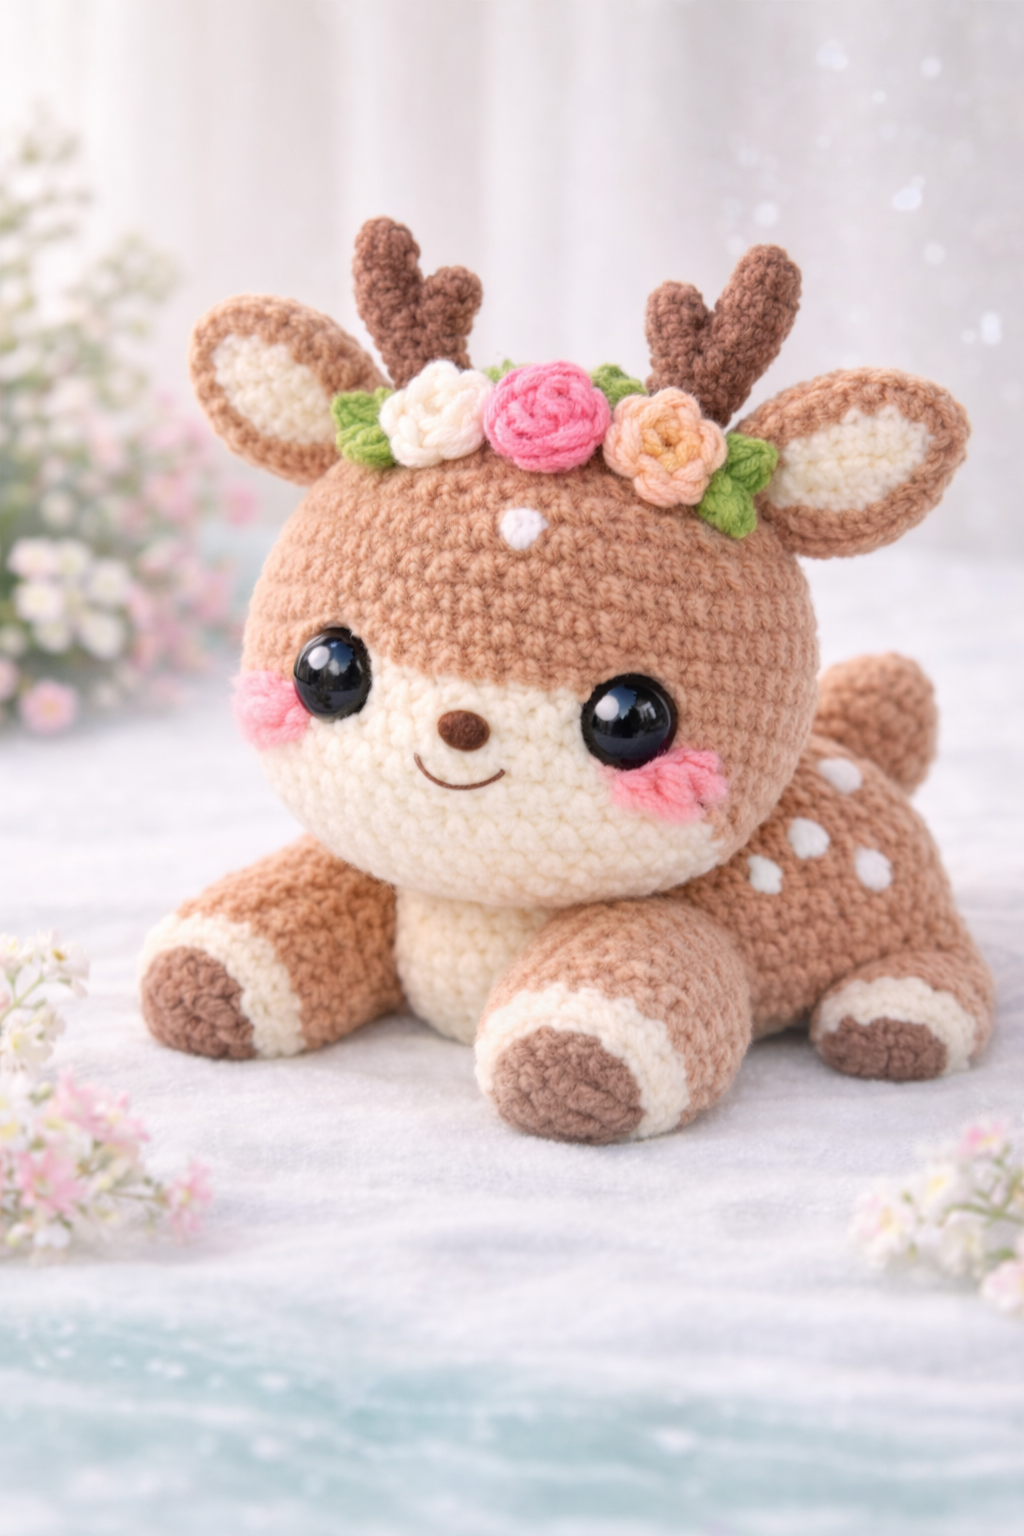
Fawn spots sit high on the back, not the face, and that changes the whole proportion plan for this deer amigurumi crochet pattern. This version uses sport yarn, a 2.5 mm hook, about 20 cm finished height, and intermediate shaping with separate antlers, ears, limbs, and floral crown details. It works well as nursery decor because the body stays low and stable on a shelf.
The Design: What Makes This Deer Different
This deer is built around a wide head and a short, grounded body. That ratio matters. A real fawn has long legs, but the photographed plush compresses them into rounded cylinders so the toy reads as seated instead of standing. The cream muzzle also has to wrap low enough to carry the nose and smile without flattening the cheeks. Miss that transition and the face turns bear-like.
Antlers are kept short on purpose. Longer branches would pull visual weight upward and fight the flower crown. The ears are broad ovals rather than narrow points, which keeps the silhouette in line with a cute deer crochet plush instead of a realistic buck. A common mistake in a fawn amigurumi pattern is placing the eyes too high; the forehead then loses room for the crown and the muzzle looks undersized. Pattern geometry fixes that before assembly begins.
Project Info at a Glance
| Skill Level | Time | Finished Size | Hook | Best For |
|---|---|---|---|---|
| Intermediate | 8–10 hours | 20 cm | 2.5 mm | Shelf decor, nursery styling, photo props |
Finished size and hook based on current deer pattern market references using sport yarn.
Materials and Tools
Yarn
- Light caramel brown — sport — 80–100 g estimated for this photo-based version — YarnArt Jeans or similar baseline
- Cream — sport — 20–25 g — for muzzle, belly, hoof bands
- Dark brown — sport — 10 g — for antlers, hooves, nose
- White — sport — 5 g — for spots and forehead dot
- Pink — sport — 5 g — for cheeks and flower
- Peach — sport — 5 g — for flower
- Leaf green — sport — 5 g — for leaves
- White or ivory — sport — 5 g — for flower
Tools
- Hook 2.5 mm
- Safety eyes 12 mm for this pictured proportion; 8–12 mm is common in deer patterns
- Polyester stuffing
- Tapestry needle
- Stitch markers
- Brown embroidery floss for smile
Abbreviations
MR / sc / inc / dec / sl st / ch / BLO / FO
Use invisible decrease on visible shaping rounds so the muzzle, head, and body close without hard ridges.
Pattern — Step by Step
Continuous spiral unless noted. This is an original photo-based adaptation using standard amigurumi math, not a transcription of any listed source.
Head (Make 1)
Yarn: light caramel brown with cream muzzle insert — Source: Standard amigurumi math
R1: 6 sc in MR (6)
R2: inc x6 (12)
R3: (sc, inc) x6 (18)
R4: (2 sc, inc) x6 (24)
R5: (3 sc, inc) x6 (30)
R6: (4 sc, inc) x6 (36)
R7-R12: sc around (36)
R13: (4 sc, dec) x6 (30)
R14: (3 sc, dec) x6 (24)
R15: (2 sc, dec) x6 (18)
R16: (sc, dec) x6 (12)
R17: dec x6 (6)
Insert stuffing at round 14. Place safety eyes between R8 and R9, about 8 stitches apart. Do not close the face area with overstuffing; the muzzle will be added separately.
Fasten off. Leave 20 cm tail.
Muzzle (Make 1)
Yarn: cream — Source: Standard amigurumi math
R1: 6 sc in MR (6)
R2: inc x6 (12)
R3: (sc, inc) x6 (18)
R4: (2 sc, inc) x6 (24)
R5: sc around (24)
R6: (2 sc, dec) x6 (18)
Lightly stuff before sewing. Embroider brown nose centered near the upper third. Add smile after attachment.
Fasten off. Leave 18 cm tail.
Body (Make 1)
Yarn: cream to caramel brown — Source: Standard amigurumi math
R1: 6 sc in MR (6)
R2: inc x6 (12)
R3: (sc, inc) x6 (18)
R4: (2 sc, inc) x6 (24)
R5: (3 sc, inc) x6 (30)
R6-R9: sc around (30)
R10: change to caramel brown, sc around (30)
R11-R13: sc around (30)
R14: (3 sc, dec) x6 (24)
R15: (2 sc, dec) x6 (18)
R16: (sc, dec) x6 (12)
R17: dec x6 (6)
Stuff firmly, especially the lower half.
Fasten off. Leave 20 cm tail.
Front Legs (Make 2)
Yarn: dark brown, cream, caramel brown — Source: Standard amigurumi math
R1: 6 sc in MR (6)
R2: (sc, inc) x3 (9)
R3: BLO sc around (9)
R4: sc around (9)
R5: change to cream, sc around (9)
R6: change to caramel brown, sc around (9)
R7-R10: sc around (9)
R11: flatten and sc through both sides 4 sts (4)
Stuff only the hoof and lower leg. Keep top soft for easier sewing.
Fasten off. Leave 18 cm tail.
Back Legs (Make 2)
Yarn: dark brown, cream, caramel brown — Source: Standard amigurumi math
R1: 6 sc in MR (6)
R2: inc x6 (12)
R3: BLO sc around (12)
R4: sc around (12)
R5: change to cream, sc around (12)
R6: change to caramel brown, sc around (12)
R7-R9: sc around (12)
R10: (4 sc, dec) x2 (10)
R11: sc around (10)
R12: flatten and sc through both sides 5 sts (5)
Stuff the front half more than the back half so the leg sits under the body like a tucked haunch.
Fasten off. Leave 18 cm tail.
Ears Outer (Make 2)
Yarn: caramel brown — Source: Standard amigurumi math
R1: 6 sc in MR (6)
R2: inc x6 (12)
R3: (sc, inc) x6 (18)
R4: sc around (18)
R5: (sc, dec) x6 (12)
R6: flatten and sc through both sides 6 sts (6)
Fasten off. Leave 15 cm tail.
Ears Inner (Make 2)
Yarn: cream — Source: Standard amigurumi math
R1: 6 sc in MR (6)
R2: inc x6 (12)
R3: (sc, inc) x6 (18)
R4: sc around (18)
R5: (sc, dec) x6 (12)
Sew each inner ear onto one outer ear. Pinch base before attaching to head.
Fasten off. Leave 12 cm tail.
Antlers (Make 2)
Yarn: dark brown — Source: Standard amigurumi math
Main stem
R1: 6 sc in MR (6)
R2-R5: sc around (6)
Branch
R6: ch 4, starting in 2nd ch from hook sc 3 back down chain, sc in next 3 sts of stem, ch 3, starting in 2nd ch from hook sc 2 back down chain, sc in remaining 3 sts of stem (6)
R7: sc around stem to tidy shape (6)
Do not stuff. Bend lightly before sewing.
Fasten off. Leave 18 cm tail.
Tail (Make 1)
Yarn: caramel brown — Source: Standard amigurumi math
R1: 4 sc in MR (4)
R2: inc x4 (8)
R3-R4: sc around (8)
R5: (2 sc, dec) x2 (6)
Lightly stuff or leave flat, depending on preferred tail shape.
Fasten off. Leave 12 cm tail.
Cheek Patches (Make 2)
Yarn: pink — Source: Standard amigurumi math
R1: 6 sc in MR (6)
R2: inc x6 (12)
Fasten off. Leave 10 cm tail.
Back Spots (Make 4)
Yarn: white — Source: Standard amigurumi math
R1: 6 sc in MR (6)
Pull into small ovals while sewing. Fasten off. Leave 8 cm tail.
Forehead Dot (Make 1)
Yarn: white — Source: Standard amigurumi math
R1: 6 sc in MR (6)
Fasten off. Leave 8 cm tail.
Flower 1: Center Rose (Make 1)
Yarn: pink — Source: Standard amigurumi math
Ch 16
Row 1: starting in 2nd ch from hook, [sc, hdc, 2 dc] in next 5 stitches, sl st in final stitch.
Roll strip into spiral rose and stitch base.
Fasten off. Leave 15 cm tail.
Flower 2: Ivory Bud (Make 1)
Yarn: ivory — Source: Standard amigurumi math
Ch 10
Row 1: starting in 2nd ch from hook, [sc, hdc, 2 dc] in next 3 stitches, sl st in final stitch.
Roll and stitch base.
Fasten off. Leave 12 cm tail.
Flower 3: Peach Flower (Make 1)
Yarn: peach — Source: Standard amigurumi math
Ch 12
Row 1: starting in 2nd ch from hook, *(sc, hdc, 2 dc)* repeat 4 times, sl st in final stitch.
Roll and stitch base.
Fasten off. Leave 12 cm tail.
Leaves (Make 4)
Yarn: green — Source: Standard amigurumi math
Ch 6
Work along chain: sl st, sc, hdc, sc, sl st.
Fasten off. Leave 10 cm tail.
Assembly
- Sew the muzzle centered on the lower half of the head, spanning roughly rounds 8 to 14.
- Insert the safety eyes through the head before final muzzle tightening if that placement is still open.
- Embroider the nose on the muzzle and add a shallow curved smile directly below it.
- Attach the head to the body with the body’s narrow end centered under the muzzle.
- Sew the front legs to the lower front body, angled slightly outward so the deer sits low.
- Attach the back legs to each side of the rear body, with the broad hoof ends facing forward.
- Sew the ears to the upper sides of the head and pinch the bases so they tilt outward.
- Attach the antlers between the ears, slightly behind the flower line.
- Sew on the tail, back spots, forehead dot, and cheek patches.
- Build the floral crown by stitching leaves first, then the three flowers across the forehead between the antlers.
The completed deer should rest on four contact points with the head balanced slightly forward.
7 Technical Tips
- Mark the first stitch of every round. On a 30-stitch body plateau, one missed marker shifts the leg line and the seated pose twists off center.
- Stuff the head in two stages. Fill at round 14 and again before closing; overpacking all at once creates a square crown and pushes the eyes outward.
- Use invisible decrease on exposed shaping rounds. Standard dec leaves a dotted seam that shows clearly across the forehead and muzzle edge.
- Install eyes before the final third of head closure. Waiting past round 15 on a 36-stitch head makes washer placement harder and distorts spacing.
- Keep cheek patches flat. Extra stuffing under the pink circles turns them into bumps instead of blush areas.
- Pin antlers and flowers before sewing. Antlers that sit too wide compete with the ears, while flowers placed too low crowd the eyes.
- Weave tails back through color changes. On cream-to-brown hoof joins, a short tail can work loose and show at the ankle after handling.
Conclusion
This deer amigurumi crochet pattern works because the shaping stays compact: medium head, short body, low legs, small antlers, and a crown that sits above rather than inside the eye line. Follow the body order first, then handle the face before attaching the crown pieces. After finishing, photograph the deer from the front and three-quarter angle for Pinterest, then post a close crop of the flower crown on Instagram. Use #FloralCrownDeer when you share it. For this specific deer shape, would you keep the antlers short like a young fawn, or extend them one round taller for a more defined silhouette?









