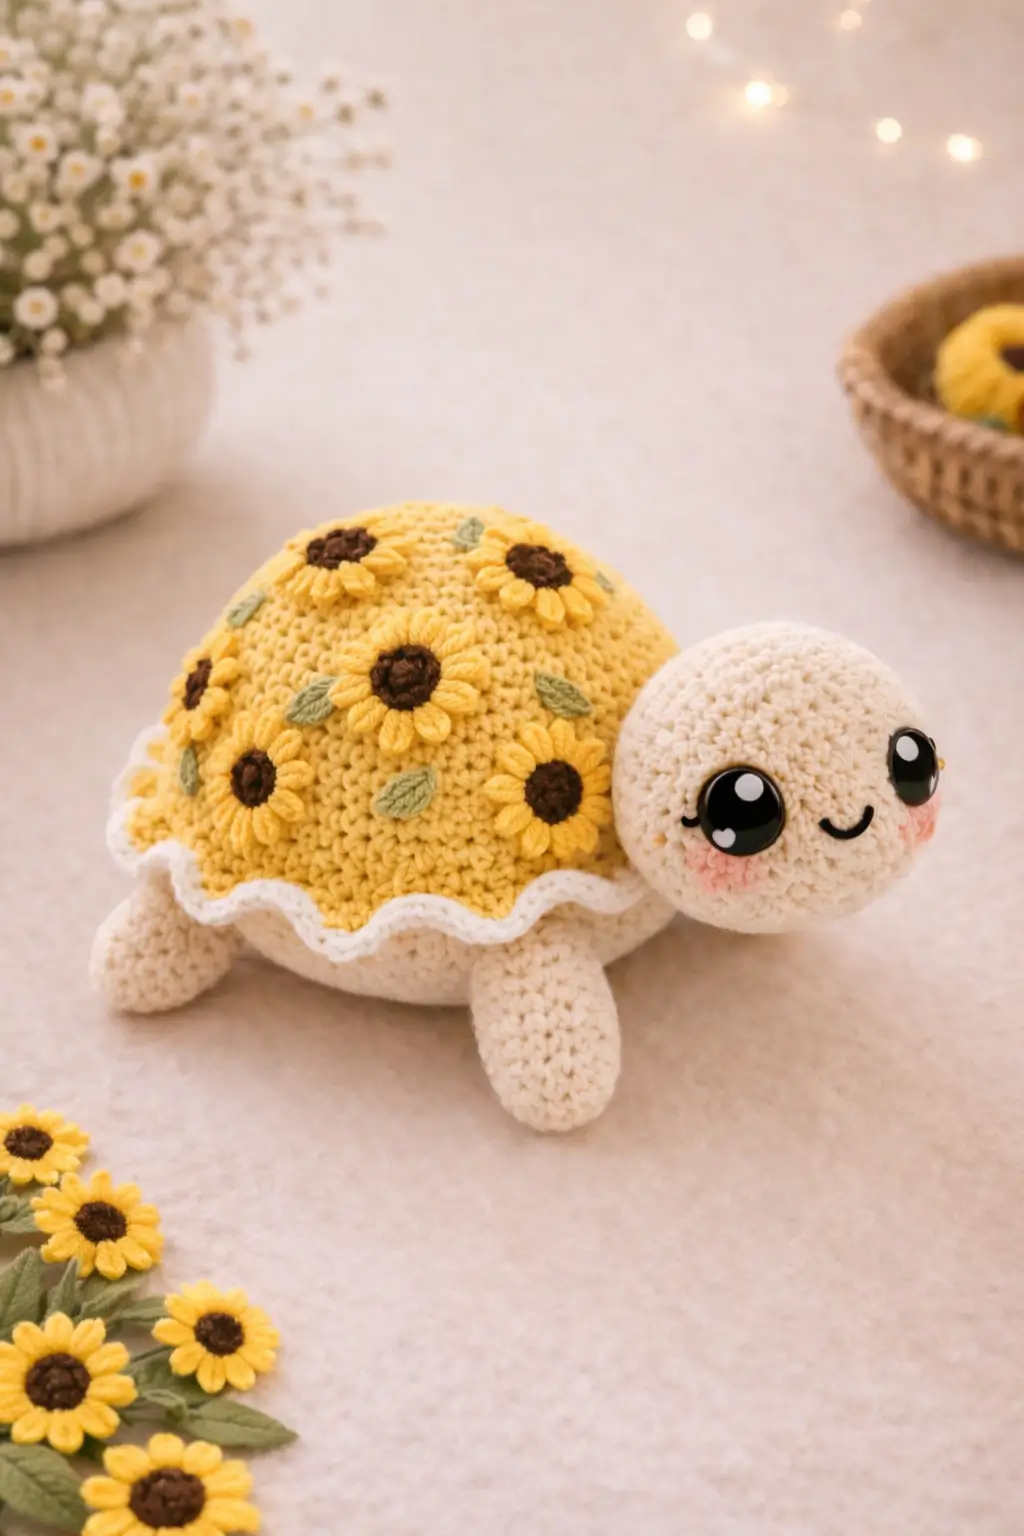
A turtle shell can carry a field of petals without losing its dome. That is the real job in this sunflower turtle amigurumi crochet pattern: balance a rounded body, layered flowers, and a face large enough for oversized safety eyes. Use worsted cotton, a 3.25 mm hook, and intermediate amigurumi skills to make a desk-sized plush that works well as spring shelf decor or a nursery prop.
The Design: What Makes This Turtle Different
The photographed turtle is not built like a flat sea turtle. Its shell rises high, almost like a stuffed cap, which shifts the pattern toward a firm top dome and a flatter cream base. A second structural choice is the white scalloped rim. That edge breaks the color transition and hides the seam line, so the join reads as decorative instead of corrective. Then there are the sunflowers themselves. They sit on top of the shell rather than being colorwork inside it, which keeps the stitch fabric stable and keeps petal tips crisp.
You will notice that the head is proportionally large for a turtle amigurumi pattern. That choice puts the eyes farther forward and creates the kawaii expression visible in the photo. A common mistake with a flower turtle crochet design is attaching motifs before the shell is fully shaped. Petals can twist, and the dome starts to pucker.
Project Info at a Glance
| Skill Level | Time | Finished Size | Hook | Best For |
|---|---|---|---|---|
| Intermediate | 5–7 hours | about 14 cm long in worsted cotton | 3.25 mm | Shelf plush, nursery decor, gift make |
Materials and Tools
Yarn
- Butter yellow — worsted — about 35 g — Paintbox Cotton Aran or similar
- Cream — worsted — about 45 g — Ricorumi Aran or similar
- White — worsted — about 10 g — same fiber family
- Dark brown — worsted — about 8 g — same fiber family
- Sage green — worsted — about 8 g — same fiber family
- Blush pink — worsted — scraps — same fiber family
Tools
- Hook 3.25 mm
- 16 mm safety eyes
- Polyester stuffing
- Tapestry needle
- Stitch markers
- Black embroidery floss for smile
Abbreviations
MR / sc / inc / dec / sl st / ch / BLO / FLO / dc / hdc
Use invisible decrease for all decrease rounds so the cream head and shell stay smooth under direct light.
Pattern — Step by Step
Continuous spiral unless noted.
Head (Make 1)
Yarn: cream — Standard amigurumi math, scaled to the photo
R1: 6 sc in MR (6)
R2: inc x6 (12)
R3: (sc, inc) x6 (18)
R4: (2 sc, inc) x6 (24)
R5: (3 sc, inc) x6 (30)
R6: (4 sc, inc) x6 (36)
R7–R11: sc around (36)
Insert 16 mm eyes between R8 and R9, spaced 10 sts apart. Embroider lashes and smile before final stuffing.
R12: (4 sc, dec) x6 (30)
R13: (3 sc, dec) x6 (24)
R14: (2 sc, dec) x6 (18)
Stuff firmly at the cheeks and lightly at the crown.
R15: (sc, dec) x6 (12)
R16: dec x6 (6)
Fasten off. Leave a 25 cm tail.
Body Base (Make 1)
Yarn: cream — Standard amigurumi math
R1: 6 sc in MR (6)
R2: inc x6 (12)
R3: (sc, inc) x6 (18)
R4: (2 sc, inc) x6 (24)
R5: (3 sc, inc) x6 (30)
R6: (4 sc, inc) x6 (36)
R7: sc in BLO around (36)
R8–R9: sc around (36)
Fasten off. Leave a 35 cm tail for joining.
Shell Top (Make 1)
Yarn: butter yellow — Standard amigurumi math
R1: 6 sc in MR (6)
R2: inc x6 (12)
R3: (sc, inc) x6 (18)
R4: (2 sc, inc) x6 (24)
R5: (3 sc, inc) x6 (30)
R6: (4 sc, inc) x6 (36)
R7–R10: sc around (36)
Fasten off. Leave a 35 cm tail.
Shell Frill (Make 1 edging round)
Yarn: white — worked into FLO of Body Base R7
Join yarn in any front loop of R7.
Edging: (sl st in next st, hdc in next st, 2 dc in next st, hdc in next st) repeat 9 times around.
You will have 9 scallops around the rim.
Fasten off. Weave in ends.
Front Legs (Make 2)
Yarn: cream — Standard amigurumi math
R1: 6 sc in MR (6)
R2: inc x6 (12)
R3: (sc, inc) x6 (18)
R4–R5: sc around (18)
R6: (sc, dec) x6 (12)
R7: sc around (12)
Flatten slightly. Fasten off. Leave a 20 cm tail.
Back Legs (Make 2)
Yarn: cream — Standard amigurumi math
R1: 6 sc in MR (6)
R2: inc x6 (12)
R3: (sc, inc) x6 (18)
R4: sc around (18)
R5: (sc, dec) x6 (12)
Flatten lightly. Fasten off. Leave a 20 cm tail.
Sunflower Centers (Make 6)
Yarn: dark brown — Standard amigurumi math
R1: 6 sc in MR (6)
R2: inc x6 (12)
Fasten off. Join yellow for petals.
Sunflower Petals (Work on each center)
Yarn: butter yellow — derived from visible petal count in the photo
Petal round: (sl st in next st, ch 3, 2 dc in same st, ch 2, sl st in same st) repeat 12 times around.
Fasten off. Leave a 15 cm tail for sewing.
Leaves (Make 6)
Yarn: sage green — visual match from the photo
Ch 6.
Working back along chain: sl st in second ch from hook, sc, hdc, sc, sl st.
Work 1 sl st into the same base and rotate to the other side of the chain: sc, hdc, sc, sl st.
Fasten off. Leave a 10 cm tail.
Cheek Patches (Make 2)
Yarn: blush pink — optional flat circles to mimic the photo
R1: 6 sc in MR (6)
R2: inc x6 (12)
Fasten off. Leave a 12 cm tail.
Assembly
- Sew the front legs to the body base at the front third, spacing them 8 stitches apart.
- Sew the back legs to the body base at the rear third, spacing them 8 stitches apart.
- Pin the head to the front of the body base so the chin sits just below the rim line.
- Sew the head in place with small whip stitches, adding a final pinch of stuffing at the neck before closing.
- Stuff the shell top until it holds a rounded dome without hard corners.
- Place the shell top over the body base and stitch around the edge, matching 36 stitches to 36 stitches.
- Sew the sunflower centers with petals across the yellow dome, starting with one center flower and then balancing the remaining five around it.
- Sew one leaf beside each flower, aiming all tips in slightly different directions so the shell does not look gridded.
- Attach the cheek patches under the eyes, then lightly brush or embroider over them for a softer blush effect.
- Weave in every tail inside the body, shape the shell by hand, and check that the turtle sits level on all four legs.
The finished turtle should rest with a forward head tilt and a stable shell dome.
7 Technical Tips
- Use a stitch marker at the start of every round. Losing one increase point on a 36-stitch head will throw the eye line off center by the time you reach R8.
- Keep shell stuffing lighter than head stuffing. Overfilled domes push the scalloped rim upward and flatten the flower appliqués.
- Work invisible decreases only on visible cream sections. Standard decreases leave a bar line that shows clearly on pale yarn near the cheeks and neck.
- Install eyes before the head closes past 24 stitches. Trying to force 16 mm posts into a nearly closed head can stretch the fabric around the sockets.
- Pin all six flowers before sewing even one down. A shell this small looks crowded fast, and uneven spacing is the most obvious finishing error.
- Match front-leg angle before stitching permanently. If one leg points forward and the other points down, the turtle will rock instead of sitting flat.
- Weave tails through at least 4 cm of internal stitches. Flower motifs sit on the shell surface, so short secured tails can work loose with handling.
Conclusion
This version of the sunflower turtle amigurumi crochet pattern is built to match the uploaded toy rather than the bulkier chenille turtles filling current search results. The larger cream head, separate scalloped rim, and sewn floral motifs are the key points. Next, crochet the head and one sunflower first, then compare them against your intended display space before making the full set of pieces. Share the finished turtle on Pinterest and Instagram with one top-down shell photo and one side profile so the flower layout reads clearly. #SunflowerTurtlePattern What petal count looks best on a turtle shell this round: 6, 8, or 12?









