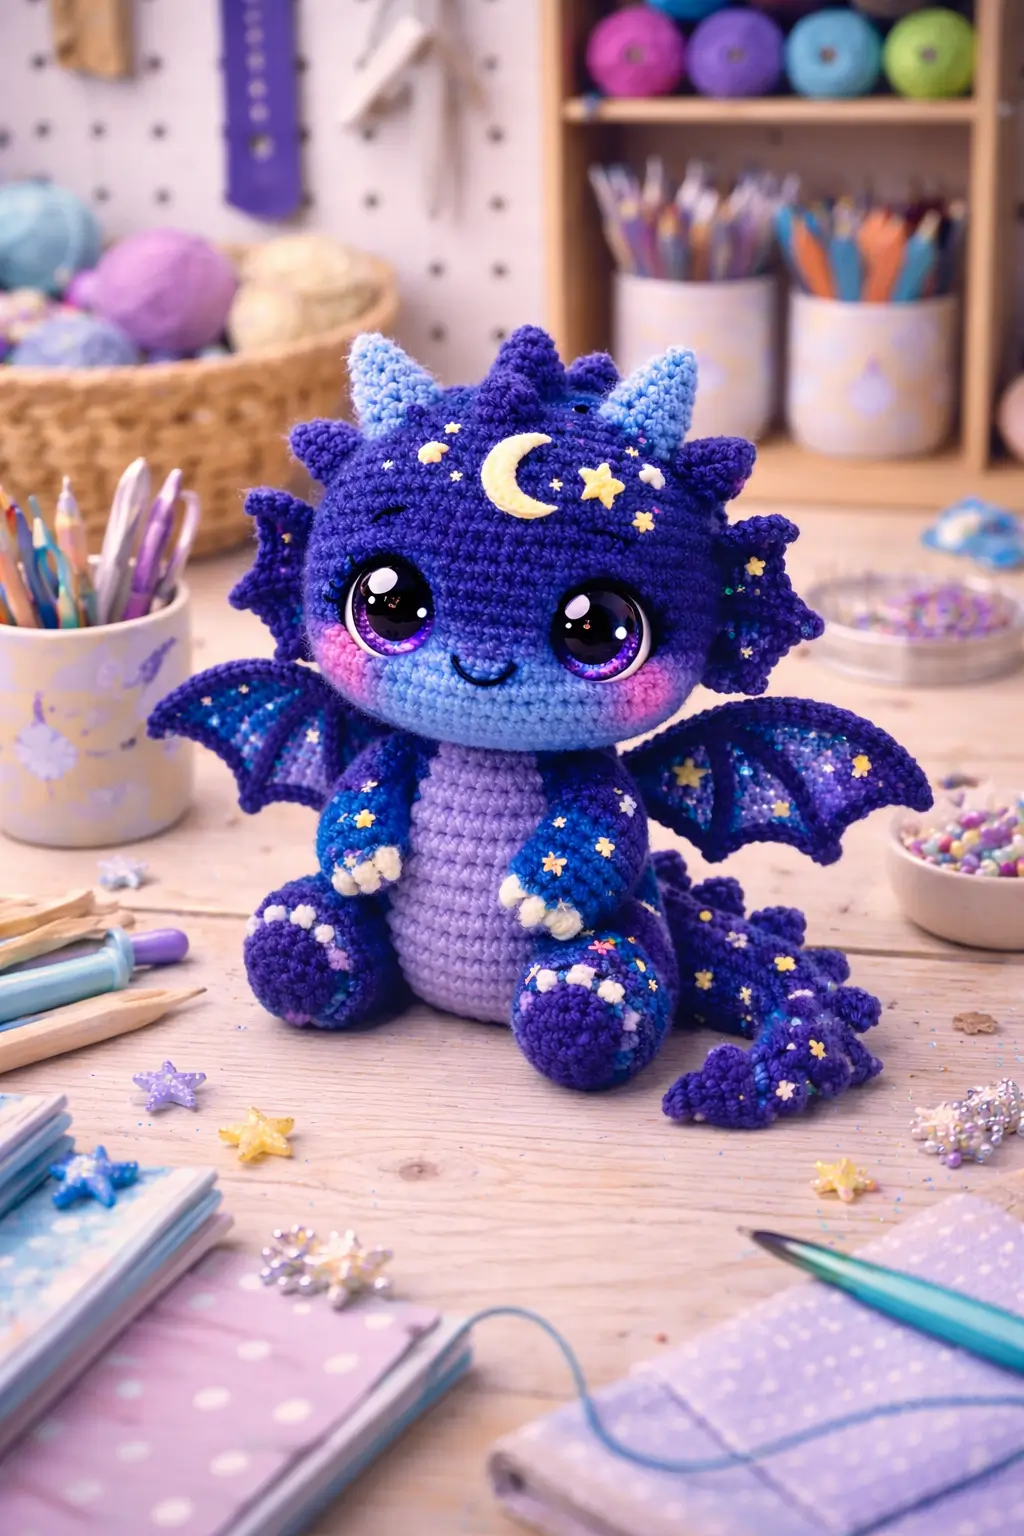
A dragon with a crescent moon stitched into its forehead cannot use a narrow face. This dragon amigurumi crochet pattern is built for a wide head, compact seated body, bat wings, and layered color patches, with benchmark sizing around 16 cm seated in standard yarns. It suits an intermediate maker who wants a display plush that reads clearly from the front.
The Design: What Makes Galaxy Dragon Different
You need the head to dominate the silhouette. That is the first structural choice, because the photo shows a plush that reads as face-first rather than torso-first. The second decision is the low-set muzzle panel. It pulls the eye line downward and leaves room for the moon applique and top spikes without crowding the forehead. Third comes the seated base: short legs, a round front belly, and a tail that braces the toy from behind. The result is more stable on a shelf.
Many dragon patterns chase length. This one does not. A galaxy dragon amigurumi works better when the front view carries the design, because the celestial details sit on the face, wings, and shoulders. A common mistake with a sitting dragon amigurumi is placing the wings too low, which makes the neck look buried and the head look detached from the body.
Project Info at a Glance
| Skill Level | Time | Finished Size | Hook | Best For |
|---|---|---|---|---|
| Intermediate | 8–10 hours | 16 cm seated benchmark | 4 mm benchmark | Display plush, gift, fantasy decor |
Materials and Tools
Yarn
- Deep indigo main yarn — worsted or DK benchmark — about 50 g — Paintbox, Stylecraft, or similar
- Sky blue contrast — about 25 g — for muzzle, ear lining, and wing shading
- Lavender contrast — about 10–25 g — for belly panel and neck area
- Small scraps in pale yellow, white, and pink for stars, moon, claws, and cheeks
Tools
- Hook 4 mm benchmark for worsted builds
- Safety eyes 10 mm benchmark for a seated dragon; larger stylized eyes can be substituted for a plush look
- Stuffing
- Yarn needle
- Stitch markers
- Pins
- Black embroidery thread for the mouth
Abbreviations
MR = magic ring, sc = single crochet, inc = increase, dec = invisible decrease, sl st = slip stitch, ch = chain, BLO = back loop only, FLO = front loop only, hdc = half double crochet.
Invisible decrease is used on visible shaping rounds because it reduces the step line that standard decreases leave on plush faces and limbs.
Pattern — Step by Step
Continuous spiral unless noted. This is an original image-inspired pattern draft using standard amigurumi math.
Head (Make 1)
Yarn: deep indigo
R1: 6 sc in MR (6)
R2: inc x6 (12)
R3: (sc, inc) x6 (18)
R4: (2 sc, inc) x6 (24)
R5: (3 sc, inc) x6 (30)
R6: (4 sc, inc) x6 (36)
R7: (5 sc, inc) x6 (42)
R8–R13: sc around (42)
R14: (5 sc, dec) x6 (36)
R15: sc around (36)
R16: (4 sc, dec) x6 (30)
R17: sc around (30)
R18: (3 sc, dec) x6 (24)
Insert eyes between R13 and R14 with 10 stitches visible between them. For the photo look, use larger custom eyes instead of the 10 mm benchmark.
R19: sc around (24)
R20: (2 sc, dec) x6 (18)
Stuff firmly, with extra fill across the forehead so the moon applique sits flat.
R21: (sc, dec) x6 (12)
R22: dec x6 (6)
Fasten off. Leave a 20 cm tail.
Muzzle / Face Panel (Make 1)
Yarn: sky blue
Ch 7.
R1: starting in 2nd ch from hook, 5 sc, 3 sc in last ch, working on opposite side 4 sc, inc (14)
R2: inc, 4 sc, 3 inc, 4 sc, 2 inc (20)
R3: sc around (20)
R4: (4 sc, inc) x4 (24)
Fasten off. Leave a 25 cm tail.
Body (Make 1)
Yarn: lavender
R1: 6 sc in MR (6)
R2: inc x6 (12)
R3: (sc, inc) x6 (18)
R4: (2 sc, inc) x6 (24)
R5: (3 sc, inc) x6 (30)
R6–R11: sc around (30)
R12: (3 sc, dec) x6 (24)
R13: sc around (24)
R14: (2 sc, dec) x6 (18)
R15: sc around (18)
R16: (sc, dec) x6 (12)
Stuff firmly at the base and only lightly at the neck edge.
R17: dec x6 (6)
Fasten off. Leave a 25 cm tail.
Arms / Front Legs (Make 2)
Yarn: deep indigo
R1: 6 sc in MR (6)
R2: (sc, inc) x3 (9)
R3–R5: sc around (9)
R6: (sc, dec) x3 (6)
Add a pinch of stuffing only in the paw.
Fasten off. Leave a 20 cm tail.
Back Legs (Make 2)
Yarn: deep indigo
R1: 6 sc in MR (6)
R2: inc x6 (12)
R3–R5: sc around (12)
R6: dec x6 (6)
Fasten off. Leave a 20 cm tail.
Ears (Make 2)
Yarn: deep indigo outer, sky blue inner
Outer ear:
Ch 3.
Row 1: sc in 2nd ch, hdc in next (2)
Inner ear:
Ch 3.
Row 1: sl st in 2nd ch, sc in next (2)
Fasten off both pieces and sew inner ear to outer ear.
Wings (Make 2)
Yarn: deep indigo with sky blue lower stripe
Ch 16.
Row 1: sc in 2nd ch from hook and across (15)
Row 2: ch 1, turn, dec, 11 sc, dec (13)
Row 3: ch 1, turn, 13 sc (13)
Row 4: change to sky blue for last 5 stitches, ch 1, turn, dec, 9 sc, dec (11)
Row 5: ch 1, turn, dec, 7 sc, dec (9)
Row 6: ch 1, turn, dec, 5 sc, dec (7)
Edging: work 1 round of sc evenly around, making 3 chain-picot points along the lower edge to form membrane scallops.
Fasten off. Leave a 25 cm tail.
Tail (Make 1)
Yarn: deep indigo
R1: 6 sc in MR (6)
R2: (sc, inc) x3 (9)
R3: sc around (9)
R4: (2 sc, inc) x3 (12)
R5: sc around (12)
R6: (3 sc, inc) x3 (15)
R7–R10: sc around (15)
R11: (3 sc, dec) x3 (12)
R12: sc around (12)
Lightly stuff only the base half.
Fasten off. Leave a 30 cm tail.
Head Spikes / Crown Ridge (Make 1 Strip)
Yarn: deep indigo
Ch 15.
Working from 2nd ch from hook:
(sl st, sc, hdc, sc, sl st) in next 5 ch for first spike,
repeat this spike sequence twice more across remaining chain.
Fasten off. Leave a 20 cm tail.
Back Spikes (Make 3 Small)
Yarn: deep indigo
For each spike:
Ch 4.
Working from 2nd ch from hook: sl st, sc, hdc.
Fasten off.
Cheek Patches (Make 2)
Yarn: pink
R1: 6 sc in MR (6)
R2: inc x6 (12)
Fasten off. Leave a short tail.
Claws (Make 8 Small Pieces)
Yarn: white
Ch 2, 1 sl st in 2nd ch from hook.
Fasten off.
Moon Applique (Make 1)
Yarn: pale yellow
Ch 10.
Row 1: 8 sc starting in 2nd ch from hook, ch 1, turn (8)
Row 2: dec, 4 sc, dec (6)
Row 3: dec, 2 sc, dec (4)
Edging: work sl st around outer curve. Embroider an inner crescent line to suggest the moon cut-out.
Fasten off. Leave a 20 cm tail.
Star Appliques (Make 5–9)
Yarn: pale yellow or white
For each star, make a tiny French-knot cluster or sew a 3-stitch crossed star directly onto the surface.
Assembly
- Sew the muzzle panel to the lower front of the head, centered from roughly R11 to R18.
- Embroider the smile at the top edge of the muzzle panel.
- Attach the cheek patches just below and slightly outside the eyes.
- Sew the head to the body with the neck opening centered over the body top.
- Attach the back legs low on the body front so the dragon sits instead of leans.
- Sew the arms at the upper side seams, one to two rounds below the head join.
- Fix the ears near the upper side head line and sew the crown ridge between them.
- Attach the wings high on the back, with the top edge starting just behind the neck.
- Sew the tail to the rear base and add the three small back spikes along the tail and lower back.
- Stitch the moon applique to the forehead, add the small stars across the head, wings, and thighs, then sew the white claws to paws and feet.
The finished plush should sit upright with the tail acting as a rear brace.
7 Technical Tips
- Mark the center front before sewing the muzzle. On this dragon, even a 2-stitch drift makes the moon, smile, and eyes stop lining up.
- Keep the head stuffing firmer than the body. A soft head collapses under oversized eyes and wrinkles across the forehead applique.
- Use invisible decreases on all visible shaping rounds. Standard decreases leave a stepped seam that shows badly on indigo yarn.
- Install eyes before the last two decrease rounds of the head. Waiting too long forces the washers through dense stuffing and can distort the face panel zone.
- Do not overstuff the neck edge. Too much fill at the head-body join tips the dragon backward instead of letting it sit.
- Pin the wings at the same round on both sides before sewing. A difference of one round changes the shoulder line and makes one wing angle upward.
- Weave tails through at least 4 cm of interior stitches. Short buried tails work loose faster on plush yarn because the pile reduces friction.
Conclusion
This build works because the proportions stay disciplined: large head, short seated body, high wings, and a tail that supports the pose. The celestial details do the rest. Readers looking for a dragon amigurumi crochet pattern usually want the face, wing layout, and sizing clarified before they commit to the yarn. Start with the head and muzzle first, check your eye spacing before closing, then move to the seated body. Share the finished dragon on Pinterest and Instagram with #GalaxyDragonPattern. One question remains useful here: did you place the moon higher between the ears, or lower to frame the eyes?









