Introduction
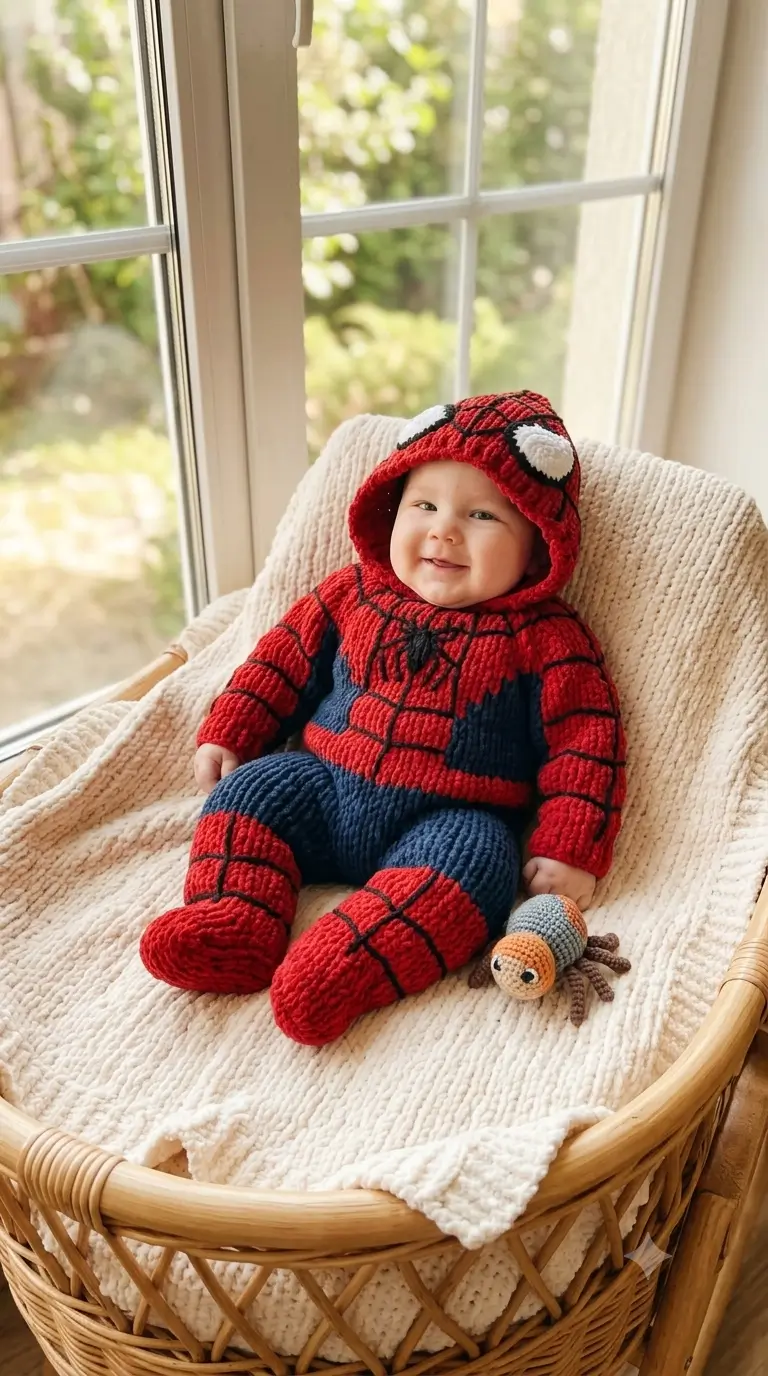
A spider puts eight legs around a body only a few centimeters wide, so attachment spacing matters more than elaborate shaping. This spider amigurumi crochet pattern recreates the photo with sport-weight yarn, a 1.75 mm hook and an approximately 8 cm body length. The project suits an advanced beginner familiar with spiral rounds. Its small yarn requirement also makes it a practical use for partial skeins.
The Design: What Makes This Small Spider Different
The face is built separately from the abdomen so the tan-and-gray color break stays sharp rather than drifting around a joined body. That choice also makes it easier to position the oversized white eye patches before final assembly. Second, the abdomen uses a 30-stitch small-amigurumi plateau instead of the much larger counts found in several published spiders, keeping the proportions close to the compact toy visible in the photo. The eight narrow brown legs are divided into four pairs and sewn across a measured band instead of emerging from a single crowded round.
A common error with a small spider crochet pattern is placing all eight legs too close to the head. The body then tips backward. This crochet spider toy distributes the middle pairs around the widest section of the abdomen, moving support toward the center of mass.
Project Info at a Glance
| Skill Level | Time | Finished Size | Hook | Best For |
|---|---|---|---|---|
| Advanced beginner | 3–4 hours | Approx. 8 cm body length | 1.75 mm | Scrap yarn, small display toy, photo-matched amigurumi |
The 8 cm benchmark and 1.75 mm hook are based on a published sport-weight spider pattern using YarnArt Jeans.
Materials and Tools
Yarn
A published small-spider design uses sport-weight cotton/acrylic yarn, while another compact spider pattern documents a 30 g total project quantity. The individual quantities below are working allowances based on that total and the visible color proportions in the reference image.
- Cool gray — sport weight — 10–12 g — YarnArt Jeans or similar cotton/acrylic yarn
- Tan/caramel — sport weight — 5–6 g — YarnArt Jeans or similar yarn
- Medium brown — sport weight — 8–10 g — for eight legs
- White — sport weight — 2 g — eye patches
- Black — sport weight or embroidery yarn — less than 1 g — eye centers if safety eyes are not used
Tools
- 1.75 mm crochet hook
- 6 mm black safety eyes ×2, or black embroidery yarn
- Polyester toy stuffing
- Yarn needle
- Stitch markers
- Sewing pins
- Scissors
Safety note: If the finished object is intended for a baby or very young child, omit safety eyes and embroider the black centers securely instead. Detachable components are not suitable for unsupervised infant use.
Abbreviations
- MR — magic ring
- sc — single crochet
- inc — 2 sc in one stitch
- dec — invisible single-crochet decrease
- sl st — slip stitch
- ch — chain
- BLO — back loop only
- st/sts — stitch/stitches
For an invisible decrease, insert the hook under the front loops of the next two stitches, yarn over and complete one single crochet through both loops.
Spider Amigurumi Pattern — Step by Step
Work in a continuous spiral unless a section states otherwise. Mark the first stitch of every round.
Head
Yarn: tan/caramel — independently drafted with standard six-stitch amigurumi expansion.
R1: 6 sc in MR (6)
R2: inc ×6 (12)
R3: (sc, inc) ×6 (18)
R4: (2 sc, inc) ×6 (24)
R5: (3 sc, inc) ×6 (30)
R6–R9: sc around (30)
R10: (3 sc, dec) ×6 (24)
R11: (2 sc, dec) ×6 (18)
Place the eye patches across R6–R8 before firm stuffing. Keep roughly 4 stitches between their nearest inner edges.
R12: (sc, dec) ×6 (12)
R13: dec ×6 (6)
Stuff the head so it stays round without stretching the stitches. Fasten off and leave a 20 cm tail for attachment.
The five increase stages stop at 30 stitches, matching the required plateau for a small character.
Body / Abdomen
Yarn: cool gray — independently drafted with standard amigurumi math.
R1: 6 sc in MR (6)
R2: inc ×6 (12)
R3: (sc, inc) ×6 (18)
R4: (2 sc, inc) ×6 (24)
R5: (3 sc, inc) ×6 (30)
R6–R11: sc around (30)
R12: (3 sc, dec) ×6 (24)
R13: sc around (24)
R14: (2 sc, dec) ×6 (18)
R15: sc around (18)
R16: (sc, dec) ×6 (12)
Stuff more firmly at the front third than at the closing end. The oval shape comes from the extra plateau rounds rather than a wider stitch count.
R17: dec ×6 (6)
Fasten off. Weave the remaining tail through the front loops of R17 and close the opening.
Front Legs — Make 2
Yarn: medium brown.
R1: 6 sc in MR (6)
R2–R8: sc around (6)
R9: (sc, dec) ×2 (4)
R10–R11: sc around (4)
Do not stuff. Flatten the top opening. Fasten off and leave a 15 cm tail for sewing.
Front-Middle Legs — Make 2
Yarn: medium brown.
R1: 6 sc in MR (6)
R2–R9: sc around (6)
R10: (sc, dec) ×2 (4)
R11–R12: sc around (4)
Do not stuff. These are one round longer than the front pair so the legs can reach the work surface without pulling the abdomen forward. Fasten off and leave a 15 cm tail.
Back-Middle Legs — Make 2
Yarn: medium brown.
R1: 6 sc in MR (6)
R2–R9: sc around (6)
R10: (sc, dec) ×2 (4)
R11–R12: sc around (4)
Leave unstuffed and flatten the attachment end. Fasten off and leave a 15 cm tail.
Back Legs — Make 2
Yarn: medium brown.
R1: 6 sc in MR (6)
R2–R8: sc around (6)
R9: (sc, dec) ×2 (4)
R10–R11: sc around (4)
Do not stuff. The rear pair returns to the shorter length used for the front pair, preventing a tail-heavy stance. Fasten off and leave a 15 cm tail.
White Eye Patches — Make 2
Yarn: white — flat-circle construction.
R1: 6 sc in MR (6)
R2: inc ×6 (12)
R3: (sc, inc) ×6 (18)
Sl st to the next stitch. Fasten off and leave a 12 cm tail.
Flatten each circle. The patch diameter should measure roughly 20–23 mm with the suggested sport yarn. If it exceeds 25 mm, remove R3 and use the 12-stitch circle.
Black Eye Centers — Make 2
For a child-safe textile version, embroider a dense black circle about 6 mm wide at the center of each white patch.
For a display version, insert one 6 mm safety eye through the center of each white circle before the patch is sewn to the head.
Pedipalps / Small Front Mouthparts — Make 2
Yarn: medium brown — special feature.
R1: 6 sc in MR (6)
R2–R4: sc around (6)
R5: (sc, dec) ×2 (4)
Do not stuff. Fasten off and leave a 10 cm tail.
These short pieces sit below and slightly outside the eye patches. Keep them small because oversized mouthparts change the silhouette of the compact two-eyed spider.
Assembly
- Pin the tan head to the narrow front end of the gray abdomen and check the join from the side. Sew through one complete ring of stitches on each piece.
- Position the two white eye patches across the middle-front of the head. Keep the inner edges about 4 stitches apart and match their height before sewing.
- Add the 6 mm black centers or complete the embroidered centers if that was not done earlier. Tie embroidery ends inside the head area or bury them deeply in the stuffing.
- Pin the front legs on opposite sides of the abdomen near R5–R6. Angle them approximately 25–35 degrees forward rather than straight sideways.
- Add the front-middle pair around R7. Their attachment points should sit one to two stitches behind the front-leg seams.
- Place the back-middle pair around R9. Compare both sides from above before making permanent stitches.
- Attach the rear pair around R10–R11, angling them approximately 25–35 degrees backward. All four pairs should form an even progression along each side.
- Sew one small pedipalp below each eye patch near the lower sides of the tan head. Keep both pieces clear of the head-to-body seam.
- Set the spider on a flat surface and check all eight contact points. Re-stitch any leg whose base rotates the body more than a few millimeters off center.
- Bury every yarn tail through at least 3 cm of dense stuffing, pull it out at a distant point and trim flush so the end retracts inside.
The finished spider has one tan head, one gray abdomen, two white eye patches and four symmetrical pairs of brown legs.
7 Technical Tips
- Stitch-marker drift: Moving the marker one stitch late on repeated rounds rotates every later leg-placement reference. Put the marker into the first stitch immediately after completing it, not after the second stitch.
- Understuffed abdomen: A body that compresses by more than about 8 mm under light finger pressure will sag between the middle legs. Add stuffing in small pieces before closing R17.
- Visible decrease gaps: Ordinary decreases can leave paired holes along R12–R17 of the abdomen. Work every decrease through the two front loops so the closing surface stays closer to the surrounding stitch density.
- Late eye placement: Safety eyes cannot be fitted correctly after the head is closed. Test the white patches around R6–R8, fit the black centers, then complete stuffing and the final decreases.
- Loose tension: Stitches wider than roughly 3 mm with a 1.75 mm hook may expose stuffing around the head. Change hook size before increasing stuffing pressure; extra stuffing does not correct open fabric.
- Unpinned legs: A displacement of only two stitches at the base can leave the spider resting on six legs instead of eight. Pin all four pairs before sewing the first permanent seam.
- Short woven tails: A 1 cm buried tail can migrate back through a small amigurumi seam. Draw sewing ends through at least 3 cm of stuffed fabric before trimming them.
Conclusion
Block the spider amigurumi crochet pattern only by hand-shaping; wet blocking is unnecessary for a stuffed 8 cm toy. Your next useful check is the leg base spacing: place the finished spider on a flat board and confirm that all four pairs contact the surface before burying the final tails. Save a top-down photograph to Pinterest so the eight-leg layout is visible, and post a side view on Instagram with #SmallSpiderAmigurumi for scale comparison. When making a second version, change only one variable at a time—hook, yarn weight or leg length—so the result remains measurable. Which color would you change first: the gray abdomen, tan head or brown legs?









