Introduction
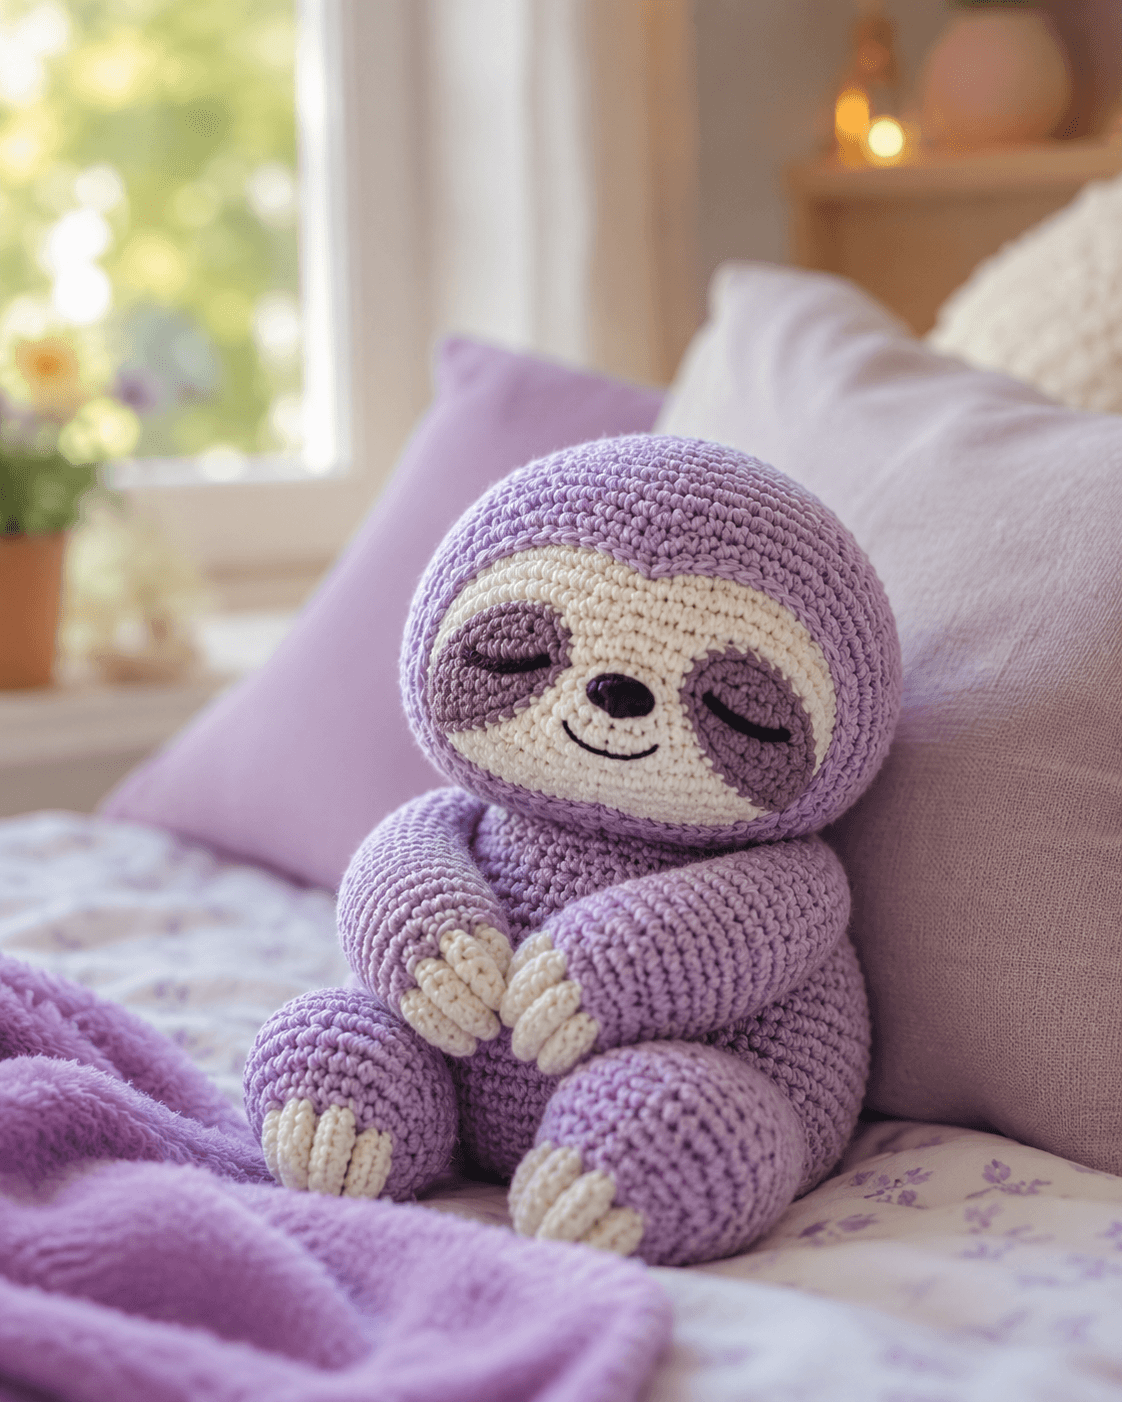
A sloth face fails fast when the eye patches sit too high. This sloth amigurumi crochet pattern fixes that with a wide cream face, low mauve patches, embroidered lashes, and a compact seated body. Expect a medium project worked in cotton-style yarn with a 3.5 mm hook and a finished size near 18 cm based on common seated sloth references. It suits shelf decor, nursery styling, or gift stock.
The Design: What Makes This Sloth Different
This version is built around posture first. The head is oversized, because the photographed toy reads as a sleepy plush rather than a branch-hanging animal. The arms sit forward and inward so the torso looks protected instead of spread wide. That choice also stabilizes the seated silhouette.
Face layout matters more here than limb shaping. A sleeping sloth crochet pattern depends on wide mask contrast, long low eye patches, and a short muzzle zone. Shift those patches upward and the toy stops looking drowsy. Move them too far apart and the face flattens.
The third decision is claw handling. Instead of separate finger pieces, this sloth crochet plush uses cream claw bumps at the edge of hands and feet. Fewer seams. Cleaner scale. Top tutorials often prioritize eyes and branch poses; this build prioritizes a seated sloth amigurumi meant to read clearly from the front.
Project Info at a Glance
| Skill Level | Time | Finished Size | Hook | Best For |
|---|---|---|---|---|
| Intermediate | 6–8 hours | ~18 cm seated | 3.5 mm | Decor, nursery gift, market prep |
Materials and Tools
Yarn
- Lavender — worsted or DK cotton blend — about 50–60 g — Ricorumi Cotton DK or similar for a firmer finish
- Cream — same weight — about 20 g — matching cotton or cotton blend
- Dusty mauve — same weight — about 10–15 g — for eye patches
- Black — small amount — for nose and embroidery
Tools
- Hook 3.5 mm
- Safety eyes 12 mm benchmark — not used in the sample face, but common for sloth sizing
- Polyester stuffing
- Tapestry needle
- Stitch markers
- Embroidery needle
Abbreviations
MR / sc / inc / dec / sl st / ch / BLO
Invisible decrease reduces bulk on visible shaping lines by pulling through front loops first, which keeps the closing rounds tighter than a standard dec in most amigurumi builds.
Pattern — Step by Step
Continuous spiral unless noted.
Head
Yarn: cream, then lavender
R1: 6 sc in MR (6)
R2: inc x6 (12)
R3: (1 sc, inc) x6 (18)
R4: (2 sc, inc) x6 (24)
R5: (3 sc, inc) x6 (30)
R6: (4 sc, inc) x6 (36)
R7: (5 sc, inc) x6 (42)
R8: (6 sc, inc) x6 (48)
R9-R14: sc around (48)
R15: (6 sc, dec) x6 (42)
R16: (5 sc, dec) x6 (36)
R17: (4 sc, dec) x6 (30)
Stuff firmly. Keep front face broad, not pointed.
R18: (3 sc, dec) x6 (24)
R19: (2 sc, dec) x6 (18)
R20: (1 sc, dec) x6 (12)
R21: dec x6 (6)
Fasten off. Leave 20 cm tail.
Body
Yarn: lavender
R1: 6 sc in MR (6)
R2: inc x6 (12)
R3: (1 sc, inc) x6 (18)
R4: (2 sc, inc) x6 (24)
R5: (3 sc, inc) x6 (30)
R6-R11: sc around (30)
R12: (3 sc, dec) x6 (24)
R13-R14: sc around (24)
R15: (2 sc, dec) x6 (18)
Stuff lower half firmly so the doll can sit.
Fasten off. Leave 25 cm tail.
Arms / Front Legs (Make 2)
Yarn: cream, then lavender
R1: 6 sc in MR (6)
R2: inc x6 (12)
R3: BLO sc around (12)
This ridge separates claw tips from sleeve color.
Change to lavender
R4-R10: sc around (12)
R11: flatten and sc through both sides 6 sts (6 closed edge)
Fasten off. Leave 18 cm tail.
Back Legs (Make 2)
Yarn: cream, then lavender
R1: 6 sc in MR (6)
R2: inc x6 (12)
R3: (1 sc, inc) x6 (18)
R4-R5: sc around (18)
Change to lavender
R6: (1 sc, dec) x6 (12)
R7-R10: sc around (12)
R11: flatten and sc through both sides 6 sts (6 closed edge)
Stuff toe end only. Keep top half soft for sewing angle.
Fasten off. Leave 20 cm tail.
Eye Patches / Cheek Patches (Make 2)
Yarn: dusty mauve
Ch 7
R1: starting in 2nd ch from hook, 5 sc, 3 sc in last ch, working along other side 4 sc, inc in last ch (14)
R2: inc, 4 sc, 3 inc, 4 sc, 2 inc (20)
Fasten off. Leave 20 cm tail.
Muzzle Panel
Yarn: cream
Ch 6
R1: 4 sc, 3 sc in last ch, 3 sc on other side, inc in last ch (12)
R2: inc, 3 sc, 3 inc, 3 sc, 2 inc (18)
R3: sc around (18)
Fasten off. Leave 18 cm tail.
Claw Tips for Hands (Make 6)
Yarn: cream
R1: 4 sc in MR (4)
R2: sc around (4)
Fasten off. Leave 8 cm tail.
Claw Tips for Feet (Make 6)
Yarn: cream
R1: 5 sc in MR (5)
R2: sc around (5)
Fasten off. Leave 8 cm tail.
Nose
Yarn: black or use a small plastic nose if preferred.
R1: 6 sc in MR (6)
R2: sc around (6)
Flatten lightly into an oval before sewing.
Fasten off. Leave 12 cm tail.
Embroidered Sleep Lids
Yarn: black embroidery floss.
Embroider each closed eye as a shallow downward curve centered across the eye patch. Add 2 short lash stitches at the outer side of each lid.
Assembly
- Sew the head to the body, tilting the chin slightly forward.
- Pin the eye patches low on the face, not at the horizontal midpoint.
- Sew the muzzle panel between and below the patches.
- Attach the nose at the center top of the muzzle.
- Embroider the closed eyes after the patches are fixed in place.
- Sew three small cream claws to each hand edge.
- Sew three larger cream claws to each foot edge.
- Attach the arms high on the body and angle them inward so the hands meet at center front.
- Attach the legs low and wide so the plush sits back on its body base.
- Add the stitched smile under the nose and weave in every tail inside the body.
The completed sloth should sit upright with the head visually larger than the body.
7 Technical Tips
- Use one marker for round start and a second marker for front center. Sloth faces drift sideways fast when the patches are placed without a front-center reference.
- Stuff the head firmer than the body. A soft head collapses over the embroidered lids and makes the face wrinkle.
- Stop eye-patch placement before the side curve begins. If the patches wrap too far around the head, the sloth reads more like a mask than a face.
- Keep each arm sewn at the same row depth. Even a 1-round mismatch shows immediately because the hands are positioned together at the center front.
- Do not overstuff the legs. Bulky feet push the plush backward and cancel the seated silhouette.
- Work invisible decreases on exposed shaping rounds. Standard decreases create small bars that show more clearly in solid cotton yarn.
- Weave claw tails back through the paw twice before trimming. Single-pass tails loosen under handling because each claw is a tiny cylinder with very little anchor area.
Conclusion
This sloth amigurumi crochet pattern works because the proportions stay controlled: broad head, compact body, low eye patches, and inward-facing arms. The verified sloth references point to medium builds around the 3.5 mm range, but this photographed version shifts the finish toward a sleeping front-view plush rather than a hanging toy. Post the finished piece on Pinterest and Instagram with #SleepingSlothPattern so the face placement can be compared across versions. The next step is simple: pin every facial part before sewing. One question matters with this character more than most—did your sloth look sleepier after lowering the patches by one round?









