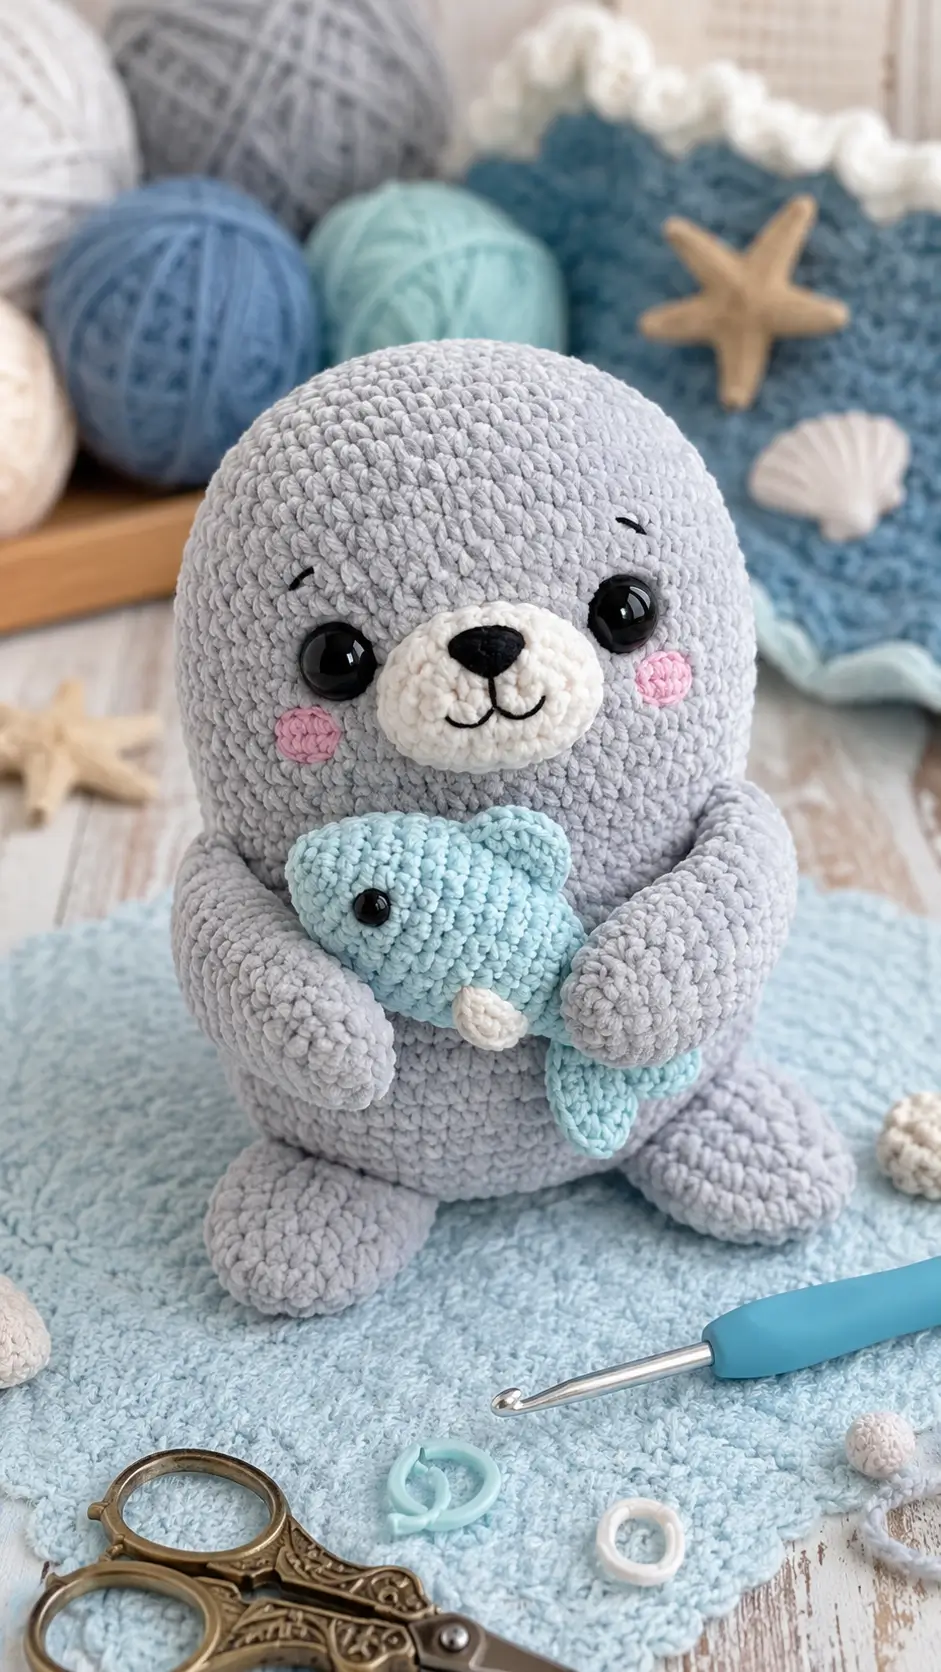
A seal has no neck break, so the first shaping problem is keeping the head and body as one continuous mass. This seal amigurumi crochet pattern uses super bulky plush yarn, a 5.5 mm hook, and 16 mm eyes to build a shelf-size toy with a separate fish accessory. It suits confident beginners and works well for nursery decor or market tables.
The Design: What Makes This Seal Different
The photographed seal works because the silhouette stays blunt instead of dropping into a long tail. You need a head that holds a 42-stitch crown long enough to read as domed, then a body that stays broad and flat at the base so the figure can sit without a stand. That choice keeps the species cue intact. The second decision is flipper placement. The front pair sit low and angle inward so the fish looks held rather than pinned to the belly. A third decision is the separate white muzzle. On a plush seal crochet pattern, that added layer creates a short snout without turning the face into a long oval. Many baby seal amigurumi attempts lose the seal profile by placing the eyes too high or narrowing the muzzle too much. The result starts reading as a bear.
Project Info at a Glance
| Skill Level | Time | Finished Size | Hook | Best For |
|---|---|---|---|---|
| Easy–Intermediate | A few hours | 20–27 cm benchmark range | 5.5 mm | Low-sew plush display |
Materials and Tools
For a photographed plush like this, the seal amigurumi crochet pattern sits closer to current super bulky chenille benchmarks than to small DK or 4-ply seals, so the supply list below follows that scale.
Yarn
- Light gray — super bulky chenille/velvet — 80–100 g — LindeHobby Velvet Lux gray or Premier Parfait Chunky Fog
- White — super bulky chenille/velvet — 15–20 g — same yarn line in cream
- Pale aqua — super bulky chenille/velvet — 20–25 g — same yarn line in a light blue
- Pink — scrap yarn — less than 5 g — any soft plush or cotton blend scrap
- Black — scrap yarn — less than 5 g — for nose, mouth, and brows
Tools
- Hook 5.5 mm
- 16 mm safety eyes for the seal
- 8 mm safety eyes for the fish
- Polyester stuffing
- Tapestry needle
- Stitch markers
- Pins
- Small scissors
Abbreviations
- MR = magic ring
- sc = single crochet
- inc = increase
- dec = invisible decrease
- sl st = slip stitch
- ch = chain
- BLO = back loop only
- FLO = front loop only
Work the invisible decrease through the front loops only, because plush yarn shows a ridge when a standard sc2tog is used.
Pattern — Step by Step
Continuous spiral unless noted.
Head (Make 1)
Yarn: light gray
- R1: 6 sc in MR (6)
- R2: inc x6 (12)
- R3: (sc, inc) x6 (18)
- R4: (2 sc, inc) x6 (24)
- R5: (3 sc, inc) x6 (30)
- R6: (4 sc, inc) x6 (36)
- R7: (5 sc, inc) x6 (42)
- R8: sc around (42)
- R9: sc around (42)
- R10: sc around (42)
- R11: sc around (42)
- R12: sc around (42)
- R13: sc around (42)
- R14: (5 sc, dec) x6 (36)
- R15: sc around (36)
- R16: (4 sc, dec) x6 (30)
- R17: sc around (30)
- R18: (3 sc, dec) x6 (24)
- R19: sc around (24)
- R20: (2 sc, dec) x6 (18)
- R21: (sc, dec) x6 (12)
- R22: dec x6 (6)
Insert the 16 mm eyes between R11 and R12, 9 sts apart. Start stuffing firmly from R19 onward.
Fasten off. Leave 30 cm tail.
Body (Make 1)
Yarn: light gray
- R1: 6 sc in MR (6)
- R2: inc x6 (12)
- R3: (sc, inc) x6 (18)
- R4: (2 sc, inc) x6 (24)
- R5: (3 sc, inc) x6 (30)
- R6: (4 sc, inc) x6 (36)
- R7: (5 sc, inc) x6 (42)
- R8: sc around (42)
- R9: sc around (42)
- R10: sc around (42)
- R11: sc around (42)
- R12: sc around (42)
- R13: sc around (42)
- R14: sc around (42)
- R15: (5 sc, dec) x6 (36)
- R16: sc around (36)
- R17: (4 sc, dec) x6 (30)
- R18: sc around (30)
- R19: sc around (30)
- R20: (3 sc, dec) x6 (24)
- R21: sc around (24)
- R22: (2 sc, dec) x6 (18)
- R23: sc around (18)
- R24: (sc, dec) x6 (12)
- R25: dec x6 (6)
Stuff the base firmly and press it flat with your palm so the seal can sit upright.
Fasten off. Leave 30 cm tail.
Front Flippers (Make 2)
Yarn: light gray
- R1: 6 sc in MR (6)
- R2: inc x6 (12)
- R3: (sc, inc) x6 (18)
- R4: sc around (18)
- R5: sc around (18)
- R6: sc around (18)
- R7: (sc, dec) x6 (12)
- R8: sc around (12)
- R9: sc around (12)
- R10: sc around (12)
- R11: sc through both layers across opening (6)
Stuff only the lower half. Flatten the opening.
Fasten off. Leave 25 cm tail.
Back Flippers (Make 2)
Yarn: light gray
- R1: 6 sc in MR (6)
- R2: inc x6 (12)
- R3: (sc, inc) x6 (18)
- R4: (2 sc, inc) x6 (24)
- R5: sc around (24)
- R6: sc around (24)
- R7: (2 sc, dec) x6 (18)
- R8: sc around (18)
- R9: sc around (18)
- R10: sc through both layers across opening (9)
Lightly stuff the front half only, then flatten.
Fasten off. Leave 20 cm tail.
Muzzle (Make 1)
Yarn: white
- R1: 6 sc in MR (6)
- R2: inc x6 (12)
- R3: (sc, inc) x6 (18)
- R4: sc around (18)
- R5: (2 sc, inc) x6 (24)
- R6: sc around (24)
Lightly stuff only when the piece is 75% sewn to the face. Embroider the nose before or after attaching.
Fasten off. Leave 30 cm tail.
Cheek Patches (Make 2)
Yarn: pink
- R1: 6 sc in MR (6)
- R2: inc x6 (12)
- R3: sc around (12)
Keep flat. Do not stuff.
Fasten off. Leave 15 cm tail.
Fish Body (Make 1)
Yarn: pale aqua
- R1: 6 sc in MR (6)
- R2: inc x6 (12)
- R3: (sc, inc) x6 (18)
- R4: (2 sc, inc) x6 (24)
- R5: (3 sc, inc) x6 (30)
- R6: sc around (30)
- R7: sc around (30)
- R8: (3 sc, dec) x6 (24)
- R9: sc around (24)
- R10: (2 sc, dec) x6 (18)
- R11: sc around (18)
- R12: (sc, dec) x6 (12)
- R13: sc around (12)
Insert one 8 mm eye on each side between R5 and R6, about 7 sts apart. Stuff the front half lightly. Flatten the opening for the tail attachment.
Fasten off. Leave 20 cm tail.
Fish Tail Lobes (Make 2)
Yarn: pale aqua
- R1: 6 sc in MR (6)
- R2: inc x6 (12)
- R3: sc around (12)
Do not stuff. Flatten slightly with your fingers before sewing.
Fasten off. Leave 12 cm tail.
Fish Lower Fin / Mouth Tab (Make 1)
Yarn: white
- R1: 6 sc in MR (6)
- R2: sc around (6)
Leave flat. This piece sits under the fish head as a small fin or mouth tab.
Fasten off. Leave 10 cm tail.
Assembly
- Sew the head to the body with the decrease lines centered vertically.
- Pin the muzzle below the eye line, sew it on, and add a pinch of stuffing before closing the last quarter.
- Embroider a small black triangle nose, a short vertical mouth split, and two curved sleepy brows.
- Sew one pink cheek patch below each outer eye corner.
- Attach the back flippers low on the body so both touch the surface and act as feet.
- Sew the front flippers at mid-body height, angled inward toward the center front.
- Stitch the two fish tail lobes side by side onto the flattened back of the fish body.
- Sew the white lower fin or mouth tab under the fish head.
- Position the fish across the seal’s belly and tack each flipper over it with 2–3 anchor stitches.
- Weave all tails back through multiple stitch columns, adjust stuffing, and level the base.
The piece is complete when the seal sits without tipping and the fish stays trapped between both flippers.
7 Technical Tips
- Mark the first stitch of every round. Plush yarn hides the stitch top, and a one-stitch drift by R8 will twist the face off center.
- Stuff the head until finger pressure leaves no more than a shallow dent. A soft crown collapses around 16 mm eyes and makes the muzzle sink.
- Work every decrease invisibly through the front loops only. A regular sc2tog leaves a hard seam line that shows across chenille fabric.
- Place the seal eyes before the head drops below 24 stitches. Installing them one round higher changes the face from seal to bear.
- Size down to a 5.0 mm hook if stuffing flashes between stitches. This happens often with loose tension on velvet yarn, especially around the crown increases.
- Pin both front flippers before sewing and check the inner edge spacing. If one flipper sits even 5 mm lower, the fish will tilt and the hugging pose will fail.
- Weave each tail through at least three stitch columns, then reverse direction once. Plush yarn grips poorly on a single pass because the pile hides loose anchoring.
Conclusion
This seal amigurumi crochet pattern produces a blunt-faced seal with a clear muzzle, low front flippers, and a fish that explains the inward arm angle. After sewing the final seam, take one front photo and one side photo, then compare muzzle width, eye line, and fish height before you repeat the pattern. That small record speeds up later versions and makes market batching more consistent. Post the finished toy to Pinterest and Instagram with the fish close-up and the full front view. Use #BabySealAmigurumi and note the yarn brand, hook size, and eye size. Would you keep the fish narrow, or widen it so the flippers overlap more at the center?









