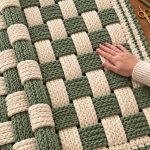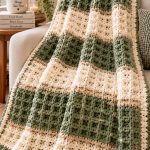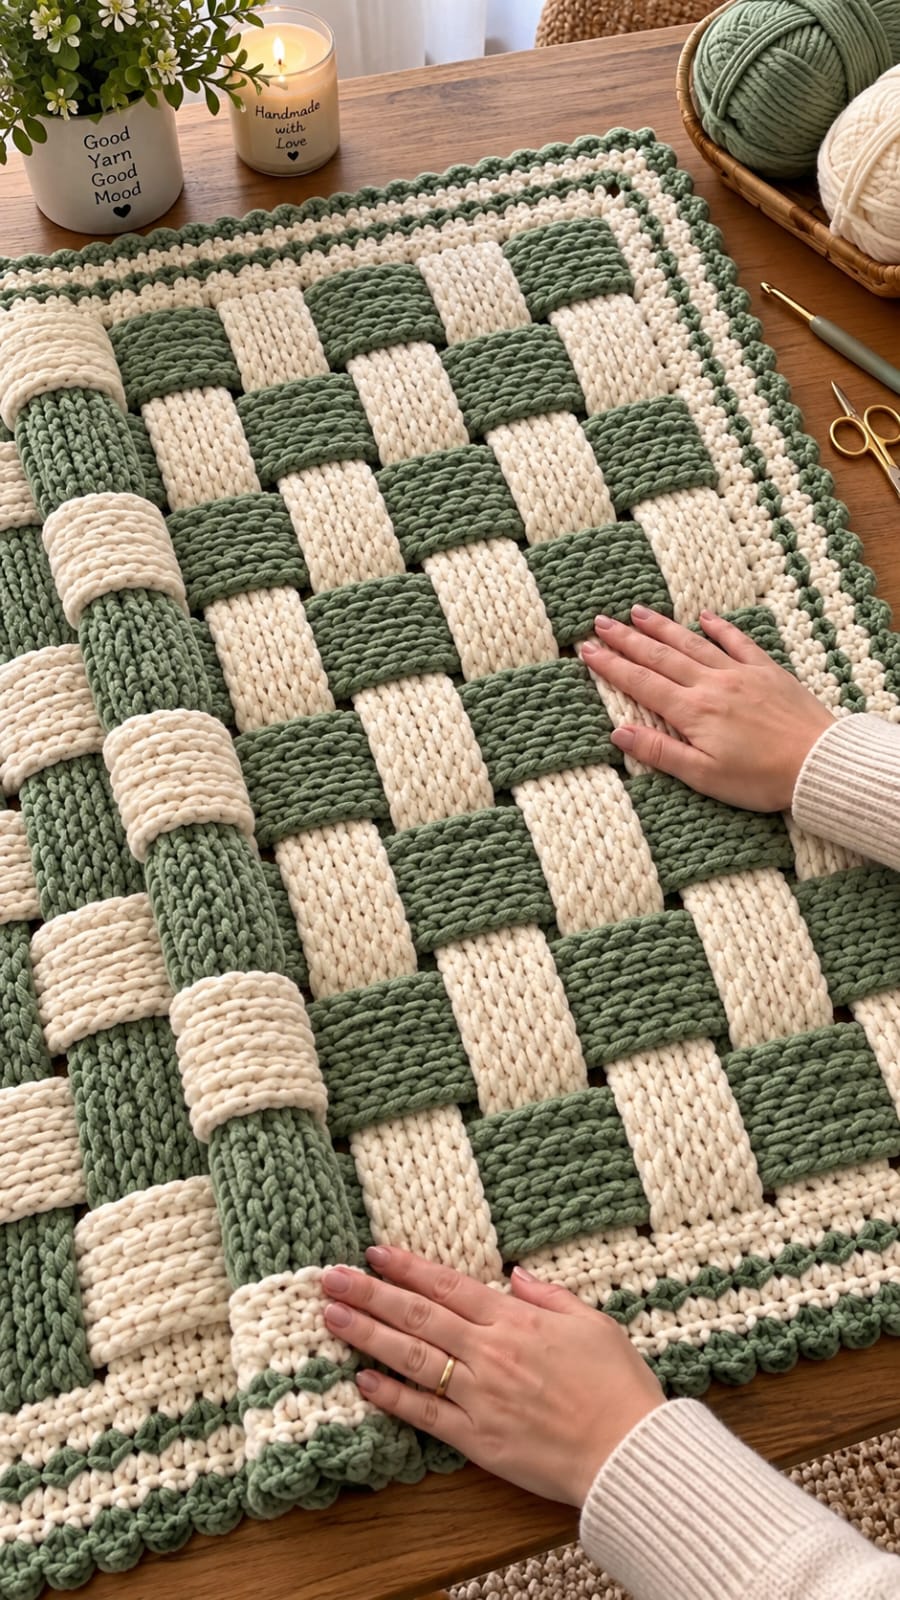
A woven blanket fails immediately when two neighboring strips cross in the same direction, because the basket structure depends on strict over-under alternation. This basket weave crochet blanket pattern recreates the photographed sage-and-cream design with broad interlaced strips, thick raised crossings, a cream frame and a sage scalloped border. Using super-bulky yarn, target a finished throw approximately 110 × 145 cm for a substantial sofa blanket.
The Design: What Makes This Woven Blanket Different
This blanket is constructed from separate crocheted strips rather than simulated basketweave stitches. Long cream strips form one axis of the grid while shorter sage bands pass alternately above and below them. A second variation reverses those colors, producing the large checkerboard effect visible across the photographed surface.
Strip width is the critical measurement. Every component needs to finish close to 9–10 cm wide so the intersections remain square and the outer rectangle stays balanced. The crossings are only lightly secured, which preserves their raised appearance.
The border performs a structural job as well as a decorative one. Several cream rounds lock the loose strip ends together, a narrow sage detail adds contrast, and a rounded sage edging finishes this chunky woven crochet blanket without flattening the center.
Project Info at a Glance
| Skill Level | Time | Finished Size | Hook | Yarn Weight |
|---|---|---|---|---|
| Intermediate | 18–24 hours | Approx. 110 × 145 cm | 9–10 mm | Super Bulky #6 |
The finished dimensions are photo-inspired targets rather than measurements taken directly from the pictured blanket. Yarn construction, strip gauge and border width can change the final size substantially.
Materials and Tools
Yarn
- Sage green — Super Bulky #6 — approximately 900–1100 g
- Warm cream — Super Bulky #6 — approximately 1000–1200 g
- Sage green — reserve approximately 150 g of the total amount for the border
- Warm cream — reserve approximately 200 g of the total amount for joining and border rounds
Plan for approximately 2–2.4 kg of yarn for the complete throw. Make one test strip before purchasing the final quantity because dense super-bulky yarn can vary considerably in weight per meter.
Tools
- 9–10 mm crochet hook
- Large tapestry needle
- 20–30 locking stitch markers
- Sharp scissors
- Tape measure
- Blocking mats
- Rust-resistant pins
Abbreviations
- ch — chain
- sc — single crochet
- hdc — half double crochet
- sl st — slip stitch
- BLO — back loop only
- RS — right side
- WS — wrong side
- st/sts — stitch/stitches
An invisible decrease is not required for this construction because every central component is a flat rectangle with a constant stitch count.
Gauge and Strip Measurements
Target approximately 8 stitches per 10 cm in half double crochet using a 9–10 mm hook.
Each woven strip should measure approximately 9–10 cm wide. Consistent width matters more than matching an exact row gauge.
Make a sample approximately 30 cm long. Lay it flat without stretching and measure the width in three places. A difference greater than approximately 5 mm indicates inconsistent tension.
The strip needs enough flexibility to curve over neighboring pieces without folding sharply at each crossing.
Blanket Construction
The central panel is made as a true woven grid. First crochet the long vertical strips. Next make shorter horizontal strips. Arrange the vertical pieces parallel, then weave every horizontal piece over and under them.
The sequence reverses on every horizontal row. If Row 1 begins over the first vertical strip, Row 2 begins under it.
After the panel is square, selected intersections are sewn discreetly. The border is then crocheted around the complete woven rectangle.
Long Vertical Strips — Make 10
Make approximately five cream strips and five sage strips. Alternate their colors across the blanket.
Vertical Strip Pattern
Target finished length before border: approximately 135–138 cm.
Foundation: Ch 9.
Row 1: Hdc in second chain from hook and in every chain across. (8)
Row 2: Ch 1, turn. Hdc BLO across. (8)
Rows 3 onward: Repeat Row 2 until the strip measures approximately 135–138 cm.
Fasten off with a 30 cm tail.
Repeat until ten long strips have been completed.
Why Back-Loop Crochet Works Here
Working through the back loop creates narrow ridges across the strip. Those ridges reinforce the chunky appearance without adding complicated stitch combinations.
The slight elasticity of back-loop half double crochet also helps each strip bend over a crossing.
A very dense single crochet strip can become too rigid, while loose double crochet may stretch noticeably after assembly. Half double crochet provides a useful middle ground for this photo-inspired construction.
Alternative Dense Strip
If your super-bulky yarn produces loose half double crochet fabric, use single crochet instead.
Foundation: Ch 11.
Row 1: Sc in second chain from hook and across. (10)
Row 2: Ch 1, turn. Sc BLO across. (10)
Repeat Row 2 until the required length is reached.
Do not combine the hdc and sc strip versions unless both samples finish at the same width and similar thickness.
Preparing the Vertical Grid
Place all ten long strips parallel on a large table or clean floor.
Alternate cream and sage:
Cream — Sage — Cream — Sage — Cream — Sage — Cream — Sage — Cream — Sage.
Align their upper ends. Leave no more than approximately 5 mm between neighboring strips.
Use locking stitch markers to connect the strips temporarily at the top and bottom.
Measure the total width. Before adding the border, target approximately 95–100 cm.
Horizontal Strips — Make 14
The horizontal strips cross the complete width of the vertical foundation.
Make seven sage and seven cream pieces.
Target finished length: approximately 98–102 cm.
Foundation: Ch 9.
Row 1: Hdc in second chain from hook and across. (8)
Row 2: Ch 1, turn. Hdc BLO across. (8)
Rows 3 onward: Repeat Row 2 until the piece measures approximately 98–102 cm.
Fasten off with a 30 cm tail.
Make fourteen pieces, alternating sage and cream.
First Woven Row
Place a sage horizontal strip at the lower edge of the vertical arrangement.
Pass it over Vertical Strip 1, under Strip 2, over Strip 3, under Strip 4 and continue alternating to the opposite side.
Center the horizontal strip so approximately equal amounts extend beyond both outer vertical strips.
Do not pull it tightly. The strip should cross the vertical pieces without narrowing them.
Second Woven Row
Use a cream horizontal strip.
Reverse the sequence:
Under Vertical Strip 1, over Strip 2, under Strip 3, over Strip 4.
Continue to the opposite edge.
Push the second horizontal strip gently against the first without compressing its width.
Continue the Basket Weave
Repeat the two weaving sequences across the full blanket.
Odd-numbered horizontal strips begin over the first vertical strip.
Even-numbered horizontal strips begin under the first vertical strip.
Alternate sage and cream as the strips are added.
After every three rows, inspect the complete width. A single incorrect crossing interrupts the checkerboard structure and should be corrected immediately.
Creating the Raised Intersections
The crossings in the reference blanket are thick and clearly layered. Avoid pressing the upper strip tightly against the lower one.
At every intersection, center the upper strip over the lower strip and allow its natural thickness to create the raised section.
Do not sew around all four sides of the crossing.
Most intersections need only one hidden anchoring stitch, and some can remain completely free if the border provides enough stability.
Squaring the Woven Panel
Spread the completed panel on a flat surface.
Measure across the top, middle and bottom. The three measurements should remain within approximately 2 cm of one another.
Next measure both long sides.
Shift the unsecured horizontal strips until the sides match as closely as possible.
Check the diagonals. Large differences between diagonal measurements indicate that the grid has become skewed.
Securing the Perimeter
Thread a tapestry needle with yarn matching the outer strip.
Sew every perimeter intersection using two or three small stitches on the wrong side.
Keep the joining tension relaxed. Pulling these stitches too firmly narrows the strip ends and produces a wavy border foundation.
Repeat around all four sides.
Securing Interior Crossings
Anchor approximately every second interior intersection.
Lift the upper strip slightly and pass the needle through a few hidden loops on its underside. Catch one or two loops from the lower strip and return through the upper piece.
Knot discreetly on the wrong side.
The objective is to stop major movement while preserving the visible separation between the two layers.
Cream Foundation Border
Use warm cream yarn.
Join yarn at one corner.
Round 1: Ch 1. Sc evenly around the entire woven panel.
Capture every strip end securely while working along the edges.
At each corner work (sc, ch 2, sc).
Join with sl st to the first sc.
Lay the blanket flat before continuing. This first border round determines whether the strip ends remain aligned.
Second Cream Border Round
Round 2: Ch 1. Sc in every stitch around.
At each ch-2 corner space work (sc, ch 2, sc).
Join with sl st.
If the border begins to ruffle, remove excess stitches from the first round rather than trying to correct the wave later.
Third Cream Border Round
Round 3: Ch 1. Hdc in every stitch around.
At each corner work (hdc, ch 2, hdc).
Join with sl st.
This round increases the visual separation between the woven grid and the decorative sage edging.
Sage Contrast Round
Change to sage green.
Round 4: Ch 1. Sc in every stitch around.
Work 3 sc into each corner space.
Join with sl st.
Keep this round slightly relaxed. A tight contrast row can pull the cream border inward.
Cream Accent Round
Change back to cream.
Round 5: Ch 1. Sc in every stitch around.
Work 3 sc into each corner stitch.
Join with sl st.
This narrow pale line separates the sage contrast row from the final decorative edging.
Sage Scalloped Border
Change to sage.
Round 6: *Sl st in next stitch, skip 1 stitch, 5 hdc in next stitch, skip 1 stitch.* Repeat around.
Adjust the final repeat slightly where necessary so each corner receives a full shell.
At the corners, work 7 hdc into the corner stitch rather than 5 hdc.
Join with sl st and fasten off with a 30 cm tail.
The finished edge should form compact rounded scallops similar to the sage outer border visible in the photograph.
Optional Braided-Look Border Detail
A narrow raised sage line can be added between the cream border rounds.
With the right side facing, join sage yarn to the surface of Round 2.
Work loose surface slip stitches around the complete blanket.
Keep each stitch large enough to lie on the surface rather than pulling the underlying border inward.
Fasten off and hide both tails on the wrong side.
Color Placement
The strongest checkerboard effect comes from alternating colors on both axes.
When a sage horizontal strip passes over a cream vertical strip, the visible rectangle becomes sage. At the next crossing, the cream vertical strip appears on top instead.
This repeated reversal produces the oversized woven checker pattern without crocheting individual squares.
Lay all strips in their planned order before weaving. Rearranging colors after the panel is partially assembled requires removing several completed crossings.
Keeping Every Strip the Same Width
Measure each strip after approximately 20 cm of crochet.
Target 9–10 cm across without stretching.
If one piece is more than 5 mm narrower than the established standard, correct the tension or hook size before continuing.
A difference that appears minor on one strip becomes obvious when ten strips are arranged side by side.
Preventing Strip Twist
Back-loop crochet has a clear front and back orientation. Check the strip before passing it beneath each crossing.
Keep the same surface facing upward along its entire length.
A half-turn trapped inside the grid produces a ridge that cannot be corrected once surrounding intersections and border rounds have been secured.
Assembly
- Crochet ten long vertical strips to approximately 135–138 cm, making five sage and five cream.
- Arrange the vertical strips parallel in alternating colors and connect their ends temporarily with locking stitch markers.
- Crochet fourteen horizontal strips approximately 98–102 cm long, making seven sage and seven cream.
- Weave the first horizontal strip over and under alternating vertical strips, then reverse the sequence for the next row.
- Continue weaving until all horizontal strips are installed and the central checkerboard panel is complete.
- Square the panel by comparing its top, center, bottom, side and diagonal measurements.
- Sew every perimeter intersection and approximately every second interior crossing using hidden stitches.
- Work three structural cream border rounds around the complete woven panel.
- Add the sage contrast row, cream accent row and final sage scalloped edging.
- Weave all yarn tails securely, reshape the crossings and lay the completed blanket flat for final measurement.
The finished blanket should form a stable rectangular throw with alternating sage-and-cream crossings and visibly raised woven layers.
7 Technical Tips for a Basket Weave Crochet Blanket
- Unequal strip width: Measure every piece after the first 20 cm. A difference greater than 5 mm accumulates across the grid and produces visibly unequal woven rectangles.
- Incorrect over-under sequence: Check each horizontal strip immediately after weaving it. Two consecutive crossings in the same direction break the basket pattern and require the strip to be removed.
- Twisted strips: Keep one designated side facing upward before passing a strip beneath the next crossing. A single 180-degree twist creates a permanent raised fold.
- Flat intersections: Use only one or two hidden stitches at most interior crossings. Sewing the complete perimeter of each 9–10 cm intersection removes the dimensional woven effect.
- Wavy border: Lay the blanket flat after the first cream round. Rippling greater than approximately 1–2 cm indicates too many side stitches and should be corrected before Round 2.
- Narrow strip ends: Keep perimeter sewing relaxed. Pulling a joining strand tightly can compress a 10 cm strip end to 8–9 cm and distort the outer frame.
- Skewed rectangle: Compare both diagonal measurements before attaching the border. A difference greater than approximately 3 cm means the unsecured crossings should be shifted before the panel is locked in place.
Making the Blanket Wider
Add vertical strips before beginning the horizontal pieces.
Each additional strip increases the unfinished width by approximately 9–10 cm.
If two vertical strips are added, increase every horizontal strip by approximately 18–20 cm.
Maintain the alternating sage-and-cream sequence so the checkerboard remains balanced.
Do not attempt to gain substantial width with extra border rounds. An oversized border changes the proportions of the woven center.
Making the Blanket Longer
Lengthen all vertical strips before assembly.
For a finished blanket close to 175 cm long, make the vertical pieces approximately 165 cm before adding the border.
Additional horizontal strips will then be required to fill the extra space.
Continue alternating the over-under sequence from the previous row. Never restart the weaving sequence simply because another color repeat begins.
Making a Smaller Lap Blanket
Use eight vertical strips instead of ten and approximately ten or eleven horizontal strips.
Target a central panel approximately 75–80 cm wide and 95–100 cm long.
Add the same multi-round border afterward.
A smaller version can also be made with bulky #5 yarn and a 7–8 mm hook, provided all strips are recalculated from a gauge sample.
Creating a Two-Color Checkerboard
Keep the vertical pieces alternating cream and sage. Do the same with the horizontal pieces.
Because each strip alternately disappears beneath and rises above its neighbors, the visible color blocks shift automatically across the blanket.
Do not sew separate squares over the intersections. The photograph’s depth comes from complete strips physically crossing one another.
Working With Super-Bulky Yarn
Support the blanket on a table during weaving and border construction. Allowing the entire panel to hang from one edge can stretch the outer strips.
Use a smooth hook that passes easily through the back loops without splitting the yarn.
Join new yarn near strip ends whenever possible. A bulky join placed directly at a crossing creates an unnecessary lump.
When multiple balls are required, compare dye lots before beginning. Large cream sections make small shade changes particularly visible.
Yarn Alternatives
Smooth super-bulky acrylic creates strong stitch definition and practical washability. A wool blend produces a firmer woven surface but can make the completed blanket substantially heavier.
Chenille can reproduce the thick appearance, although its surface may hide the back-loop ridges.
If using chenille, make a sample crossing from two short strips. Pull the pieces against one another several times to check whether the yarn sheds or stretches excessively.
Blocking the Finished Blanket
This construction needs shaping more than aggressive stretching.
Lay the blanket flat and align the cream frame first. Adjust the woven center only after all four outer edges form a rectangle.
Move individual strips sideways where necessary to equalize the intersections.
Follow the care instructions for the selected yarn when choosing a blocking method. Avoid excessive heat on synthetic super-bulky fibers.
Allow the blanket to dry completely in a flat position.
Washing and Care
The overlapping strips create areas with two layers of dense crochet, so the blanket can retain considerable water after washing.
Follow the yarn manufacturer’s washing instructions and use a gentle cycle when machine washing is permitted.
Support the complete blanket when removing it from water. Lifting one wet corner can stretch the long strips.
Reshape the woven intersections while damp and dry the blanket flat whenever practical.
Finishing the Woven Grid
Run your hands across the right side and inspect every crossing. The visible upper strips should remain centered over the pieces beneath them.
Check that no strip has folded along one edge.
Turn the blanket over and inspect all joining stitches. No long sewing strands should cross open areas on the reverse side.
Weave each yarn tail through at least 6–8 cm of matching crochet, reverse direction once and trim only after the tail is secure.
Final Border Check
Place the blanket on a flat surface after completing the scalloped edge.
All four corners should sit without lifting.
If the sage shells curl upward, lightly reshape them by hand. If the complete border ruffles, the problem is usually excess stitches in an earlier structural round rather than the decorative shell itself.
Measure the finished width and length only after the border has relaxed.
Conclusion
Make one cream strip and one sage strip first, then compare their widths before producing the remaining pieces. Once both measure approximately 9–10 cm, complete the vertical foundation and test a single horizontal strip through the full alternating sequence. Square the woven panel before sewing any interior crossings, because alignment is difficult to correct after the cream frame is attached. This basket weave crochet blanket pattern can then be resized by adding complete strips rather than changing the woven structure. Save the finished project to Pinterest or share it on Instagram with #SageBasketWeaveBlanket. For this specific blanket, would you keep the sage scalloped edge or finish the entire border in cream?