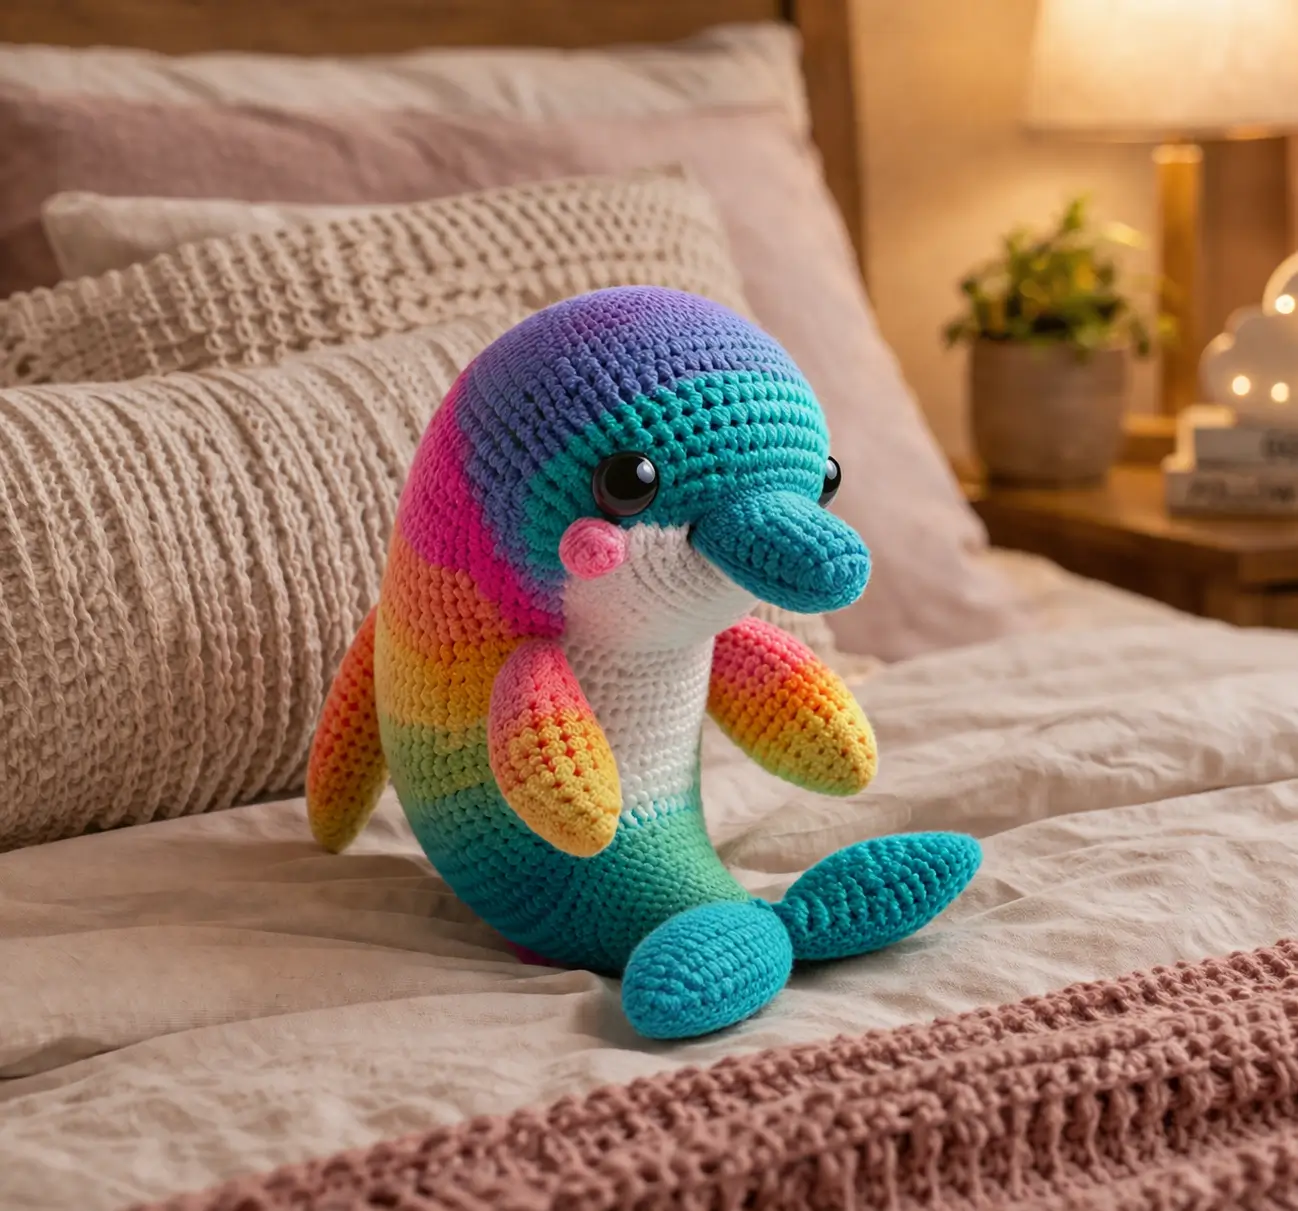
A dolphin reads wrong the moment the rostrum is too short. This dolphin amigurumi crochet pattern fixes that with a separate snout, plush chenille yarn, a 5.0 mm hook, and a finished size near 20 cm. The build suits an advanced beginner or lower-intermediate maker. It also works well for ocean-theme decor because the curved body can sit upright without extra support.
The Design: What Makes Rainbow Dolphin Different
This version depends on three structural choices. First, the snout is made as a distinct oval tube instead of being implied by head decreases. That preserves the long dolphin profile. Second, the body keeps a medium 36-stitch plateau, then shifts its mass low and forward so the toy can rest in a seated curve rather than tipping backward. Third, the white belly is handled as a visual field, not a separate insert, because plush yarn already adds bulk.
The common mistake is shortening the face and oversizing the fins. That turns a dolphin into a generic whale. In rainbow dolphin amigurumi work, color placement matters as much as shaping. A plush dolphin amigurumi still needs a clean jawline, narrow cheek transition, and a tail set wider than the head.
Project Info at a Glance
| Skill Level | Time | Finished Size | Hook | Best For |
|---|---|---|---|---|
| Advanced beginner / lower intermediate | 4–6 hours | 20 cm | 5.0 mm | Plush decor, nursery shelf, ocean-themed gift |
Materials and Tools
Yarn
- Rainbow plush chenille — bulky/super bulky — about 100 g main body allowance — Himalaya Dolphin Baby Colors or similar plush gradient yarn
- White plush chenille — bulky/super bulky — small contrast amount — matching chenille in white
- Turquoise plush chenille — bulky/super bulky — scrap to small amount — for snout and tail emphasis
- Pink plush chenille or cotton — scrap amount — for cheek patches
Tools
- Hook 5.0 mm
- 13 mm safety eyes
- Polyester stuffing
- Tapestry needle
- Stitch markers
- Scissors
- Pins for placement
Abbreviations
MR = magic ring
sc = single crochet
inc = increase
dec = invisible decrease
sl st = slip stitch
ch = chain
BLO = back loop only
FLO = front loop only
Invisible decrease reduces bulk at the shaping line by working through the front loops of the next two stitches before completing one single crochet.
Pattern — Step by Step
Continuous spiral unless noted.
Head (Make 1)
Yarn: rainbow plush chenille — Source: Standard amigurumi math informed by medium plush sizing used in current dolphin patterns.
R1: 6 sc in MR (6)
R2: inc x6 (12)
R3: (sc, inc) x6 (18)
R4: (2 sc, inc) x6 (24)
R5: (3 sc, inc) x6 (30)
R6: (4 sc, inc) x6 (36)
R7-R12: sc around (36)
R13: (4 sc, dec) x6 (30)
R14: (3 sc, dec) x6 (24)
Stuff firmly at the crown only. Keep the lower face slightly softer so the snout can seat cleanly.
Fasten off. Leave a 25 cm tail.
Snout / Rostrum (Make 1)
Yarn: turquoise plush chenille — Source: Standard amigurumi math; separate snout chosen because dolphin anatomy requires a projected rostrum.
R1: 6 sc in MR (6)
R2: inc x6 (12)
R3: sc around (12)
R4: (sc, inc) x6 (18)
R5-R7: sc around (18)
R8: (sc, dec) x6 (12)
R9: sc around (12)
Light stuffing only. The tip should stay rounded, not rigid.
Fasten off. Leave a 20 cm tail.
Body (Make 1)
Yarn: start turquoise, transition to rainbow, keep belly white from R10 onward if working color blocks — Source: Standard amigurumi math with medium plateau 36 sts.
R1: 6 sc in MR (6)
R2: inc x6 (12)
R3: (sc, inc) x6 (18)
R4: (2 sc, inc) x6 (24)
R5: (3 sc, inc) x6 (30)
R6: (4 sc, inc) x6 (36)
R7-R14: sc around (36)
R15: (4 sc, dec) x6 (30)
R16-R18: sc around (30)
R19: (3 sc, dec) x6 (24)
R20-R21: sc around (24)
R22: (2 sc, dec) x6 (18)
Stuff the lower half firmly. Keep the upper neck area slightly compressible for sewing.
Fasten off. Leave a 25 cm tail.
Pectoral Fins (Make 2)
Yarn: rainbow plush chenille — Source: Standard amigurumi math.
R1: 6 sc in MR (6)
R2: (sc, inc) x3 (9)
R3: sc around (9)
R4: (2 sc, inc) x3 (12)
R5-R7: sc around (12)
R8: (2 sc, dec) x3 (9)
Flatten.
R9: 4 sc through both layers (4)
Do not overstuff. A flat fin sits closer to the body and reads more like a flipper.
Fasten off. Leave a 20 cm tail.
Tail Flukes (Make 2)
Yarn: turquoise plush chenille — Source: Standard amigurumi math; shaped as mirrored teardrops for cleaner join.
R1: 6 sc in MR (6)
R2: inc x6 (12)
R3-R4: sc around (12)
R5: (4 sc, dec) x2 (10)
R6: sc around (10)
Flatten.
R7: 5 sc through both layers (5)
Fasten off. Leave a 15 cm tail on the first fluke and 30 cm on the second.
Tail Base (Make 1)
Yarn: turquoise plush chenille — Source: Standard amigurumi math.
R1: 6 sc in MR (6)
R2: (sc, inc) x3 (9)
R3-R4: sc around (9)
Fasten off. Leave a 20 cm tail.
Dorsal Fin (Make 1)
Yarn: rainbow plush chenille — Source: Standard amigurumi math.
R1: 4 sc in MR (4)
R2: (sc, inc) x2 (6)
R3: sc around (6)
R4: (2 sc, inc) x2 (8)
R5: sc around (8)
Flatten.
R6: 4 sc through both layers (4)
Fasten off. Leave an 18 cm tail.
Cheek Patches (Make 2)
Yarn: pink plush or cotton — Source: Standard flat circle math.
R1: 6 sc in MR (6)
R2: inc x6 (12)
sl st to close.
Fasten off. Leave a 12 cm tail.
Belly Panel (Optional visual aid, Make 1 if you prefer an appliqué instead of color changes)
Yarn: white plush chenille — Source: Standard oval construction.
Ch 5.
R1: starting in 2nd ch from hook, 3 sc, 3 sc in last ch, working on opposite side 2 sc, inc (10)
R2: inc, 2 sc, inc x3, 2 sc, inc x2 (16)
R3: sc around (16)
Fasten off. Leave a 20 cm tail.
Assembly
- Sew the snout to the center front of the head, spanning roughly the lower half of the face.
- Insert the 13 mm safety eyes between head rounds 10 and 11, with about 8 visible stitches between them, checking that the snout sits just below the eye line.
- Stitch the cheek patches just below and slightly outside each eye.
- Close and shape the head, then seam it to the top of the body.
- Pin the pectoral fins to the body sides around the upper third of the torso, angled slightly backward, then sew.
- Sew the dorsal fin along the back centerline of the body.
- Join the two tail flukes at their inner flat edges.
- Sew the joined flukes to the tail base, then attach the completed tail to the lower back of the body.
- Add the belly panel only if you did not work the white section directly into the body.
- Massage the stuffing to form a gentle forward curve and weave in every tail end inside the body.
The finished toy should sit with the tail and lower belly acting as the contact points.
7 Technical Tips
- Mark the start of every round. Losing one round on the body plateau shifts the tail seam and the dolphin starts leaning sideways instead of forward.
- Keep crown stuffing firmer than muzzle stuffing. If the snout is packed as hard as the head, the seam bulges and the eye line looks compressed.
- Use invisible decreases on all visible shaping rounds. Standard decreases leave stacked ridges that show clearly on plush yarn once the gradient changes direction.
- Install eyes before the head is fully closed. On this build, placing them after final stuffing makes the washers distort the face and can shorten the apparent rostrum.
- Watch chenille tension on color transitions. Tight rainbow joins create dents, while loose joins create gaps that flash stuffing through the stitches.
- Pin both fins before sewing either one. A 5 mm placement difference is visible on dolphins because the body is smooth and the fins act like alignment markers.
- Weave tail ends through at least three direction changes. A straight buried end often works loose in velvet yarn, especially at the fluke join where the piece flexes during handling.
Conclusion
This rainbow build turns a common sea-animal project into a shape-driven study. The key is not the color sequence. It is the proportion between head, rostrum, and tail. Work the snout first, keep the body at a controlled 36-stitch plateau, and check fin symmetry before sewing. That produces a cleaner dolphin amigurumi crochet pattern result than most quick plush versions. The next step is simple: make one in solid blue, then compare the silhouette against the rainbow sample. Post the pair to Pinterest and Instagram with #RainbowDolphinPattern. One question remains useful here: did you place the rostrum long enough to read as dolphin from profile view?









