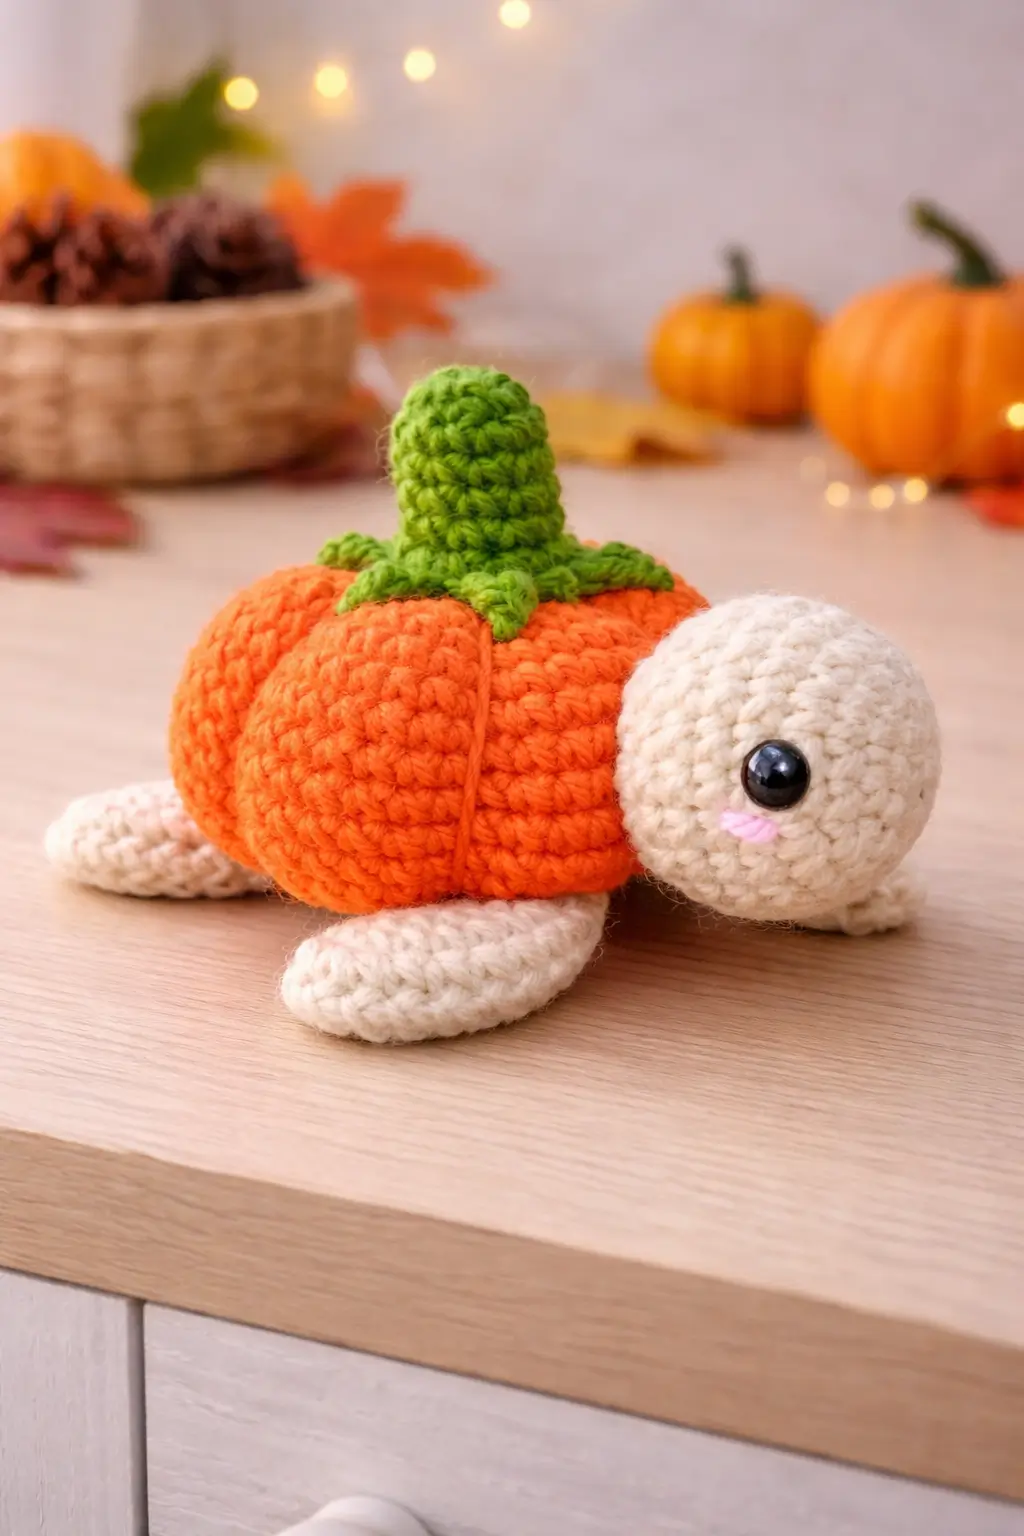
A pumpkin turtle only works when the shell reads as a pumpkin first and a turtle second. This pumpkin turtle crochet pattern gives you the head, body, flippers, tail, pumpkin shell, stem, and leaf collar in one compact plush build. You also get the current size band, hook baseline, and a clean round-by-round structure adapted to the photo. The practical reason to make it is obvious. One turtle base can support multiple seasonal shell themes without changing the core anatomy. 0
The Design: What Makes This Turtle Different
This is not a standard sea turtle with an orange dome on its back. The pumpkin shell is the defining mass, so the body has to stay quiet. Current pumpkin turtle patterns consistently frame the idea as a plush turtle with a pumpkin shell, often in beginner-friendly or no-sew formats, which matches the straightforward construction logic visible here. The shell needs segment definition, a centered stem, and enough width to overhang the body slightly without burying the head. 1
The second structural decision is proportion. The photo shows a modest cream head, short tail, low flippers, and a shell that sits wide rather than tall. Good choice. A common mistake with a pumpkin turtle amigurumi is over-rounding the shell so it becomes a ball with a stem. Then the turtle disappears. Another failure mode is making the stem too long. That shifts the silhouette upward and breaks the squat autumn-plush shape. This version works because the head stays smooth, the shell gets vertical segment lines, and the leaf collar sits flat at the base of the stem instead of flaring like a flower. 2
Project Information at a Glance
| Skill Level | Time | Finished Size | Hook | Best For |
|---|---|---|---|---|
| Advanced beginner | 1.5–2.5 hours | 18 cm / 7 in | 4.5 mm | Fall decor, gifts, Halloween market plush |
Materials and Tools
Yarn
- Cream plush yarn — size 5 bulky to size 6 super bulky — about 35g — for head, flippers, tail, and underside
- Orange plush yarn — size 5 bulky to size 6 super bulky — about 35g — for pumpkin shell
- Green plush yarn — size 5 bulky to size 6 super bulky — about 10g — for stem and leaf collar
- Pink yarn — scrap amount — for cheek detail
- Black embroidery floss — scrap amount — optional for a tiny smile
Tools
- 4.5 mm crochet hook
- 12–14 mm safety eyes
- Fiberfill stuffing
- Yarn needle
- Stitch markers
- Pins
- Small scissors
Crochet Abbreviations
MR / sc / inc / dec / sl st / ch / BLO / FLO / hdc / dc
Use invisible decrease only on the closing rounds. Plush yarn spreads under a standard decrease, and those little openings are easy to spot on a cream turtle face.
Step-by-Step Pumpkin Turtle Crochet Pattern
Work in continuous spiral rounds unless noted.
Head (Make 1)
Yarn: cream
Source: Standard amigurumi math
R1: 6 sc in MR (6)
R2: inc x6 (12)
R3: (sc, inc) x6 (18)
R4: (2 sc, inc) x6 (24)
R5: sc around (24)
R6: sc around (24)
R7: sc around (24)
Insert 12–14 mm safety eyes between R5 and R6, about 7 stitches apart.
R8: (2 sc, dec) x6 (18)
R9: (sc, dec) x6 (12)
Stuff firmly through the snout and cheeks first.
R10: dec x6 (6)
Fasten off. Leave a 25 cm tail.
Body Base (Make 1)
Yarn: cream
Source: Standard amigurumi math
R1: 6 sc in MR (6)
R2: inc x6 (12)
R3: (sc, inc) x6 (18)
R4: (2 sc, inc) x6 (24)
R5: (3 sc, inc) x6 (30)
R6: sc around (30)
R7: sc around (30)
R8: (3 sc, dec) x6 (24)
Stuff lightly. The pumpkin shell will provide the upper bulk.
Fasten off. Leave a 30 cm tail.
Front Flippers (Make 2)
Yarn: cream
Source: Standard amigurumi math
R1: 6 sc in MR (6)
R2: inc x6 (12)
R3: sc around (12)
R4: sc around (12)
R5: sc around (12)
R6: (4 sc, dec) x2 (10)
Stuff lightly in the front half only.
Fasten off. Leave a 20 cm tail.
Back Flippers (Make 2)
Yarn: cream
Source: Standard amigurumi math
R1: 6 sc in MR (6)
R2: inc x6 (12)
R3: sc around (12)
R4: sc around (12)
R5: (4 sc, dec) x2 (10)
Fasten off. Leave a 20 cm tail.
Tail (Make 1)
Yarn: cream
Source: Standard amigurumi math
R1: 4 sc in MR (4)
R2: (sc, inc) x2 (6)
R3: sc around (6)
R4: sc around (6)
Fasten off. Leave a 12 cm tail.
Pumpkin Shell (Make 1)
Yarn: orange
Source: Standard amigurumi math
R1: 6 sc in MR (6)
R2: inc x6 (12)
R3: (sc, inc) x6 (18)
R4: (2 sc, inc) x6 (24)
R5: (3 sc, inc) x6 (30)
R6: (4 sc, inc) x6 (36)
R7: sc around (36)
R8: sc around (36)
R9: sc around (36)
R10: (4 sc, dec) x6 (30)
Stuff very lightly or leave almost flat if you want a softer shell line.
Fasten off. Leave a 35 cm tail.
Shell Segment Sculpting
Yarn: orange
Source: Standard amigurumi math
Using a long strand of orange yarn, wrap from top center to underside and back again to create 6 pumpkin sections.
Pull just enough to define the segments without pinching the shell into wedges.
This is the detail that turns the shell into a pumpkin instead of a plain dome.
Leaf Collar (Make 1)
Yarn: green
Source: Standard amigurumi math
R1: 6 sc in MR (6)
R2: inc x6 (12)
Then work leaves around the edge:
(ch 5, sl st in 2nd ch from hook, sc in next ch, hdc in next ch, sl st in next ch, sl st in next base stitch) repeat 6 times.
Fasten off. Leave a 15 cm tail.
Stem (Make 1)
Yarn: green
Source: Standard amigurumi math
R1: 6 sc in MR (6)
R2: sc around (6)
R3: sc around (6)
R4: sc around (6)
R5: (sc, inc) x3 (9)
R6: sc around (9)
Stuff lightly. The stem should stand upright but not look rigid.
Fasten off. Leave a 20 cm tail.
Cheek Detail (Optional)
Yarn: pink
Source: Standard amigurumi math
Add one or two short blush stitches under each eye.
Keep the blush under 6 mm long so the face stays clean.
Smile Detail (Optional)
Yarn: black embroidery floss
Source: Standard amigurumi math
Embroider a tiny curved smile centered below the eyes.
Keep the smile narrow. A wide curve makes the head look stretched.
Assembly Instructions
- Sew the head to the front of the body base, keeping the lower face slightly forward of center.
- Attach the front flippers low and angled outward so the turtle sits in a soft crawling pose.
- Sew the back flippers slightly farther apart than the front pair to stabilize the rear.
- Attach the tail at the rear center just below the shell line.
- Shape and sculpt the pumpkin shell before attaching the stem.
- Sew the leaf collar to the shell top center, then attach the stem through the middle of that collar.
- Pin the completed shell to the upper body so the front edge sits just behind the head join.
- Sew the shell to the body, keeping the segment lines centered and vertical from front view.
- Add the optional pink cheek detail and tiny smile only after the shell angle is final.
- Check the turtle from both side angles, then weave all tails at least 4 cm into the stuffing path.
The pumpkin turtle is complete.
7 Technical Tips for Cleaner Amigurumi
- Mark the 36-stitch shell plateau immediately. Missing one increase before R6 leaves the pumpkin dome uneven, and the segment sculpting stops lining up.
- Stuff the head firmer than the body. If both are equally packed, the pumpkin shell takes over the silhouette and the turtle looks buried.
- Do not over-pull the shell segments. Tight sculpting creates deep grooves and makes the shell look like six slices instead of a plush pumpkin.
- Keep the stem short. Adding even 1 cm too much height shifts the plush upward and weakens the squat autumn look.
- Pin all four flippers before sewing. A single flipper placed 5 mm too low is obvious from the side profile.
- Sew the leaf collar flat. If the leaves angle upward too much, the shell top starts reading like a flower instead of a pumpkin crown.
- Add the shell after full segment shaping. Sculpting it once attached to the body is harder, and the tension can distort the turtle base.
Conclusion
This pumpkin turtle crochet pattern works because the turtle stays simple while the shell carries the autumn identity. Use the current plush-pattern baseline of about 18 cm finished size, a 4.5 mm hook, and bulky-to-super-bulky yarn as your reference, then adjust shell sculpting tension rather than the base stitch math if the first sample looks off. Post the finished plush on Pinterest and Instagram with #PumpkinTurtleAmigurumi so the pumpkin segments and side profile show clearly in one frame. One final question: are you keeping the classic orange shell, or turning the next turtle into a cream pumpkin version for a softer fall palette?









