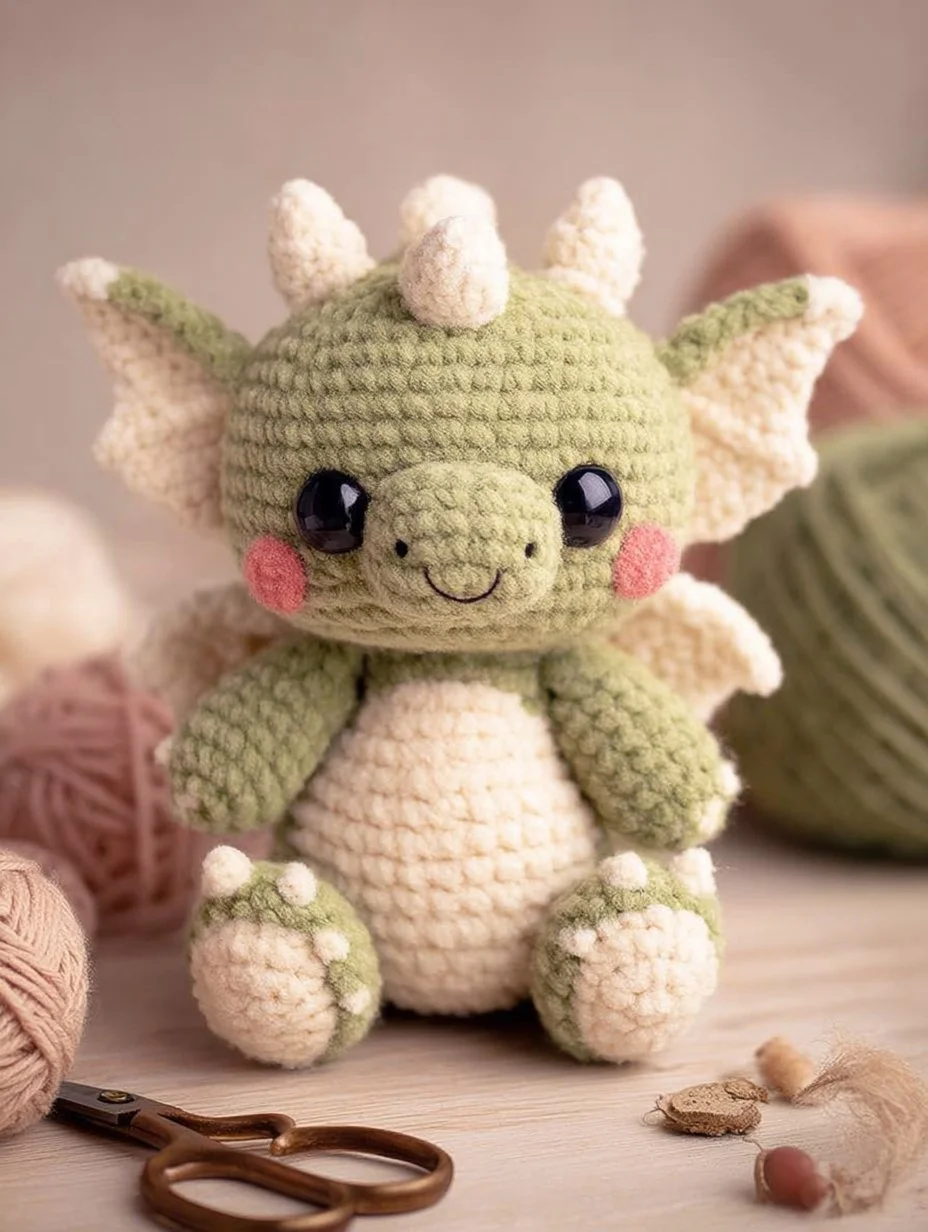
Pumpkin Bear Amigurumi Pattern
A Pumpkin Bear pattern features a uniquely rounded and plump body that resembles a cheerful pumpkin, making it an ideal seasonal addition to any plush collection. This amigurumi pattern allows you to create a delightful plush bear that stands approximately 25 cm tall using super bulky yarn, perfect for quick crafting. With a skill level set for intermediate crocheters, this project is designed to refine your crochet abilities while creating a charming toy or a useful decorative item in the fall months.
The Design: What Makes Pumpkin Bear Different
The Pumpkin Bear’s character is immediately evident in its striking rounded shape, which mimics the curves of a thriving pumpkin while retaining the friendly aspects of a plush bear. The body, made from super bulky yarn, is not only soft and cuddly but also provides a structure that helps maintain its shape. The head is deliberately larger in proportion to the body, enhancing its cartoonish charm, which draws attention and invites interaction.
When looking at the limbs, you’ll notice that the short arms and stubby legs are purposefully designed. This choice enhances the bear’s playful silhouette while providing the necessary stability to ensure it can sit upright even after the whimsical pumpkin stem is added to the top of its head. A well-balanced design is crucial for this character, as its bottom is wider, which helps counterbalance the added weight of the stem, ensuring that the Pumpkin Bear maintains its upright posture.
One common mistake that crocheters might encounter is overstuffing their amigurumi. Overstuffing can lead to the distortion of the desired shape, making it difficult to achieve that lovely rounded silhouette that the Pumpkin Bear aims for. To avoid this issue, it’s important to maintain consistent tension in your stitches and fill each section with just enough stuffing to keep it plush while staying true to its intended outline.
The use of super bulky yarn not only speeds up the amigurumi-making process but also enhances the visibility of individual stitches, allowing for ease in managing the crocheting of this pattern. The soft texture of the yarn contributes significantly to the inviting appearance of the Pumpkin Bear, making it an excellent handmade amigurumi toy suitable for both children and adults. The combination of cozy curves and seasonal colors sets the tone for an autumn-themed decor piece or a thoughtful gift during the fall months.
Project Info at a Glance
| Skill Level | Time | Finished Size | Hook | Yarn | |————-|——|—————|——|——| | Intermediate | 5–6 hours | 25 cm | 4.5 mm | Super Bulky |
Materials and Tools
Having the right materials is crucial for achieving the intended look and feel of your Pumpkin Bear. By using super bulky yarn, you create an inviting plush with a soft texture that enhances the project’s appeal.
Yarn
- Main color super bulky yarn — 150 g for the head, body, and limbs
- Accent color super bulky yarn — 80 g for special features like the pumpkin stem
- Detail color yarn — 30 g for facial features and additional embellishments
This combination of yarn fosters a harmonious color scheme that acts as the foundation for your Pumpkin Bear. Choosing various shades of orange, brown, and green will provide an authentic autumn feel while allowing you to express personal flair through different color substitutions.
Tools
- 4.5 mm crochet hook
- 18 mm safety eyes
- Polyester fiberfill
- Yarn needle
- Locking stitch marker
- Pins
- Scissors
- Embroidery thread
Using pins and stitch markers is essential for this project as they help to accurately position limbs and special features before the sewing process. This practice ensures that the bear is well proportioned. If the safety eyes haven’t already been secured prior to closing the head, this timing ensures they are evenly aligned, adding to the overall charm of your Pumpkin Bear.
Abbreviations
MR = magic ring
sc = single crochet
inc = increase
dec = invisible decrease
sl st = slip stitch
ch = chain
BLO = back loop only
FO = fasten off
The invisible decrease technique involves working through the front loops of the next two stitches to complete a single crochet, creating a smooth appearance.
Pattern Notes
This pattern is designed to be worked in a continuous spiral unless specified otherwise. It is beneficial to use a stitch marker for keeping track of the beginning of each round. As you stuff each piece, fill them firmly without overstretching the stitches; this will help maintain the correct shape.
When adding safety eyes, it’s recommended to do so before the head is fully closed, as it allows for easier adjustments and ensures they are symmetrically positioned. For all limbs and special features, pin them in place first to visualize their positions accurately before sewing them in permanently.
Plush yarn can significantly affect the visibility of your stitches, necessitating extra attention to maintain even tension, particularly in smaller areas. It’s worth noting that the final size of your Pumpkin Bear may vary based on your individual tension, which is why it’s advisable to create a small swatch beforehand to ensure a proper fit.
A well-balanced character is vital for achieving visual appeal. The Pumpkin Bear’s wide base supports the added weight of the stem, allowing it to sit upright and stable, adding to its charm as a decorative piece.
Pattern — Step by Step
Head Make 1
R1: 6 sc in MR (6)
R2: inc ×6 (12)
R3: [sc, inc] ×6 (18)
R4: [2 sc, inc] ×6 (24)
R5: [3 sc, inc] ×6 (30)
R6: [4 sc, inc] ×6 (36)
R7: [5 sc, inc] ×6 (42)
R8-12: sc around (42)
R13: [5 sc, dec] ×6 (36)
R14: [4 sc, dec] ×6 (30)
R15: [3 sc, dec] ×6 (24)
R16: [2 sc, dec] ×6 (18)
R17: [1 sc, dec] ×6 (12)
R18: dec ×6 (6)
FO, leaving a long tail for sewing.
Carefully place the safety eyes between rounds 10 and 11 with an 8-10 stitch gap for proper alignment. The head should be stuffed firmly but not excessively to achieve its desired round shape.
Body Make 1
R1: 6 sc in MR (6)
R2: inc ×6 (12)
R3: [sc, inc] ×6 (18)
R4: [2 sc, inc] ×6 (24)
R5: [3 sc, inc] ×6 (30)
R6: [4 sc, inc] ×6 (36)
R7: [5 sc, inc] ×6 (42)
R8-10: sc around (42)
R11: [5 sc, dec] ×6 (36)
R12: [4 sc, dec] ×6 (30)
R13: [3 sc, dec] ×6 (24)
R14: [2 sc, dec] ×6 (18)
R15: [1 sc, dec] ×6 (12)
R16: dec ×6 (6)
FO, leaving a long tail for sewing.
The body needs to be stuffed firmly to shape it into a comfortable sitting position. Make sure to attach the head securely at the neck to enhance the overall stability of the bear.
Front Legs Make 2
R1: 6 sc in MR (6)
R2: inc ×6 (12)
R3-5: sc around (12)
R6: [1 sc, dec] ×4 (8)
R7: sc around (8)
FO, leaving a long tail for sewing.
Position the front legs slightly outward to improve the bear’s balance when it sits, enhancing its overall appearance.
Back Legs Make 2
R1: 6 sc in MR (6)
R2: inc ×6 (12)
R3-5: sc around (12)
R6: [1 sc, dec] ×4 (8)
R7: sc around (8)
FO, leaving a long tail for sewing.
Attach the back legs towards the lower part of the body to uphold overall balance and stability of the bear.
Pumpkin Stem Make 1
R1: 6 sc in MR (6)
R2-3: sc around (6)
R4: inc ×6 (12)
R5: sc around (12)
R6: dec ×6 (6)
FO, leaving a long tail for sewing.
When sewing the pumpkin stem onto the head, ensure it aligns correctly to create the lovely illusion of the bear sprouting from a pumpkin.
Cheek Patches Make 2
R1: 6 sc in MR (6)
R2: inc ×6 (12)
sl st to close.
FO, leaving a tail for sewing.
Position the cheek patches on either side of the bear’s face to impart a sweet, flushed appearance, enhancing its overall character.
Tail Make 1
R1: 6 sc in MR (6)
R2: inc ×6 (12)
R3-4: sc around (12)
FO, leaving a long tail for sewing.
Though the tail is modest in size, it contributes to the bear’s balance and is positioned at the rear to complement the overall design and stability.
Face Embroidery
Adding facial features is crucial for bringing your Pumpkin Bear to life. Begin by accurately spacing the safety eyes, placing them approximately 8-10 stitches apart to maintain balance in the bear’s features. For the nose, you can create a small “V” shape with black embroidery thread, positioning it just below the center line of the eyes. The mouth should consist of a gentle curve beneath the nose to enhance the bear’s playful demeanor.
After embroidering the mouth, attach the cheek patches post-embroidery. Placing them on the sides of the face will add a touch of color against the Pumpkin Bear’s plush body. Make sure to secure all thread ends within the plush yarn. This step will prevent any unsightly protrusions that could distract from the overall aesthetic of your finished piece.
Assembly
- Start by attaching the head to the body using the long tail from the head, stitching it securely at the neck center. Proper alignment of the head is essential for achieving a visually appealing outcome.
- Next, sew the pumpkin stem onto the top of the head, which adds unique character and charm to the design. Confirm that this piece sits comfortably and enhances the overall visual aspect of the bear.
- Position the front legs on either side of the body, ensuring they face forward. It’s vital to secure their placement well to maintain enhanced balance and stability.
- Afterward, attach the back legs to the lower part of the body, confirming they are evenly positioned. Effective weight distribution is key to maintaining the bear’s balance when it is sitting.
- Add smaller features such as the cheek patches, ensuring they fit snugly with the eye base for an adorable expression. This detail enhances the character of your Pumpkin Bear and ties the features together.
- If the safety eyes were not affixed earlier, do it now while double-checking their level alignment. This extensive placement detail is crucial for creating a pleasing facial expression.
- Embroider the nose and mouth as previously described, adjusting as necessary to achieve a gentle smile that resonates with the bear’s playful nature.
- Next, sew the cheek patches onto the face, being meticulous with their placement to ensure uniformity. These patches are pivotal in establishing the bear’s character.
- After all features have been secured, check the bear’s balance from front, side, and back angles. Make necessary adjustments to maintain even weight distribution.
- Finally, weave in all any remaining yarn ends and gently shape the plush character to finalize its look. Confirm all pieces are securely attached, eliminating any loose ends.
Your Pumpkin Bear is now complete, ready to be cherished in its new home!
7 Technical Tips
- Stitch Marker Drift: Keep your stitch marker close to the beginning of rounds as you work through the pattern. If it isn’t regularly repositioned, you risk losing track of your stitch count, which could distort the round shapes of the head and body, particularly as you approach the larger counts.
- Stuffing Firmness: Balancing the stuffing of your bear to achieve both firmness and a soft quality is essential. Overstuffing can distort the appearance of both the head and limbs, impacting the overall cuteness, while insufficient stuffing may leave the bear appearing too flat and unstable.
- Invisible Decrease Gaps: When performing invisible decreases, ensure that you keep the yarn taut to prevent gaps from forming between stitches. Issues like this detract from the plush quality of the bear’s head and limbs, where smoothness is key.
- Eye Placement Timing: Place the safety eyes while the head is still open to reduce misalignment concerns as you complete your work. This practice minimizes the risk of positioning errors that may become problematic once the head is fully closed and stuffed.
- Plush Yarn Tension: Pay special attention to your tension while working with plush yarn, as this material can obscure stitches. Loose stitches create gaps, while overly tight stitches could cause puckering, particularly in rounded areas that are integral to the bear’s overall form.
- Pinning Before Sewing: Always take time to pin all limbs and feature parts before finalizing seams. This step allows for visual guidance, enabling you to make necessary adjustments easily and achieve the correct symmetry and proportions.
- Tail Weaving: Ensure that any final yarn ends are securely woven within the plush body, as loose ends can disrupt the cohesive appearance of the bear, drawing attention away from its charming design.
Related Patterns
- Cinnamon Roll Turtle — This pattern combines a whimsical turtle shape with a pastry design, utilizing similar techniques for shaping rounds. It provides a delightful challenge for those eager to continue developing their amigurumi skills.
- Strawberry Dragon — This fascinating pattern marries vibrant colors with playful round shapes, perfect for infusing fantasy into your amigurumi repertoire. The design principles echo those found in the Pumpkin Bear, appealing to crochet enthusiasts.
- Galaxy Cat — Capturing the enchanting quality of plush toys, this pattern introduces unique textures and colors for an exciting challenge. It employs similar plush aesthetics to charm both its creator and admirers.
- Cupcake Bunny — Featuring layered textures and character embellishments, the Cupcake Bunny pattern necessitates a design approach akin to that of the Pumpkin Bear. This pattern focuses on balance and offers another whimsical addition to your crochet collection.
Conclusion
Creating a Pumpkin Bear is a fulfilling experience that allows you to enhance your amigurumi skills while bringing a delightful character to life. This amigurumi pattern showcases the charming elements of plush toy design, making it an engaging project for any crochet enthusiast. To your next step, consider saving this pattern on Pinterest for future reference and sharing your completed plush on Instagram with the hashtag #PumpkinBear. How will you personalize your Pumpkin Bear with your chosen colors?









