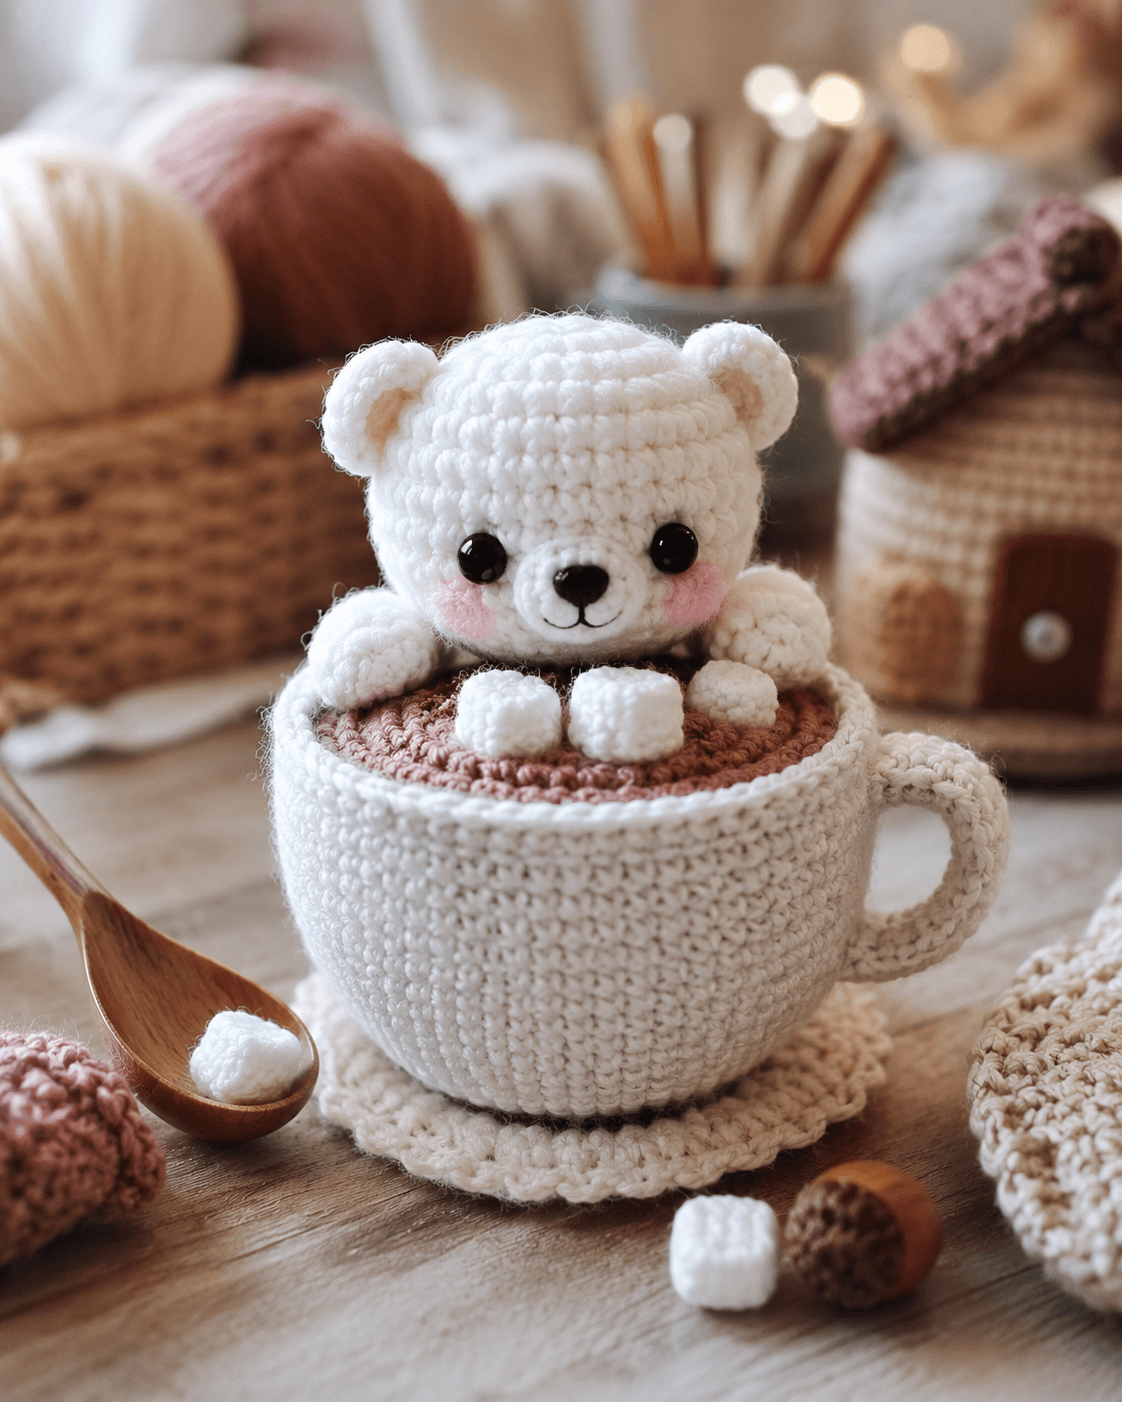
A bear in cocoa changes the body plan before the head is even closed. This polar bear amigurumi crochet pattern is built around a compact white bear, a firm hot cocoa surface, a deep mug with handle, and separate mini marshmallows. Use DK to light-worsted yarn with a 3.0 mm hook for a display piece about 16 to 18 cm tall, which fits published small polar bear sizing ranges. It suits an intermediate maker because structure matters more than stitch variety.
The Design: What Makes This Polar Bear Different
This version is not a standard seated bear placed in front of an accessory cup. The bear is designed to sit inside the mug, so the body stays narrow while the head remains oversized. That choice matters because the image reads as a drink scene first and an animal second. A second structural choice is the cocoa lid effect. The brown top has to support the paws and frame the lower face without caving inward. The third choice is the handle scale. Too small and the mug looks flat. Too large and the bear disappears. One common mistake in a polar bear crochet pattern adapted for a mug is keeping a full belly shape. Then the bear rides too high above the rim and stops looking settled into the cup. This build trims the torso and lets the paws do the front-view work. Comparable polar bear patterns show small-to-medium finished sizes, which supports a compact mug display like this one. :contentReference[oaicite:19]{index=19}
Project Info at a Glance
| Skill Level | Time | Finished Size | Hook | Best For |
|---|---|---|---|---|
| Intermediate | 7–9 hours | About 16–18 cm tall | 3.0 mm | Winter display, desk decor, handmade gift |
Materials and Tools
Yarn
- White — DK or light worsted — about 45 g — for head, muzzle, ears, arms, paws, marshmallows
- Cream — same weight — about 30 g — for mug and handle
- Warm brown — same weight — about 20 g — for cocoa surface
- Blush pink — scrap amount — for cheek patches
- Black — scrap amount — for nose and mouth detail
Tools
- Hook 3.0 mm
- 8–10 mm safety eyes
- Polyester stuffing
- Tapestry needle
- Stitch markers
- Straight pins
- Scissors
Abbreviations
MR = magic ring, sc = single crochet, inc = increase, dec = decrease, sl st = slip stitch, ch = chain, BLO = back loop only, FO = fasten off. Use invisible decrease on visible shaping rounds so the head narrows cleanly around the cheek and muzzle area.
Pattern — Step by Step
Continuous spiral unless noted.
Head (Make 1)
Yarn: white — Standard amigurumi math adapted to photo proportions
R1: 6 sc in MR (6)
R2: inc x6 (12)
R3: [sc, inc] x6 (18)
R4: [2 sc, inc] x6 (24)
R5: [3 sc, inc] x6 (30)
R6: [4 sc, inc] x6 (36)
R7–12: sc around (36)
R13: [4 sc, dec] x6 (30)
R14: sc around (30)
R15: [3 sc, dec] x6 (24)
R16: sc around (24)
Insert eyes between R9 and R10, about 7 stitches apart. Stuff firmly before closing.
R17: [2 sc, dec] x6 (18)
R18: [sc, dec] x6 (12)
R19: dec x6 (6)
FO. Leave a 25 cm tail.
Muzzle (Make 1)
Yarn: white — Short rounded snout
R1: 6 sc in MR (6)
R2: inc x6 (12)
R3: sc around (12)
R4: [sc, dec] x4 (8)
Stuff lightly. Embroider the nose before sewing if preferred.
FO. Leave a 20 cm tail.
Ears (Make 2)
Yarn: white
R1: 6 sc in MR (6)
R2: inc x6 (12)
R3: sc around (12)
R4: [sc, dec] x4 (8)
Leave unstuffed or stuff very lightly. Flatten before sewing.
FO. Leave 15 cm tails.
Body (Make 1)
Yarn: white — Reduced body to fit mug opening
R1: 6 sc in MR (6)
R2: inc x6 (12)
R3: [sc, inc] x6 (18)
R4: [2 sc, inc] x6 (24)
R5–8: sc around (24)
R9: [2 sc, dec] x6 (18)
R10: sc around (18)
Stuff firmly, especially at the base. Keep the top edge flat enough to anchor into the cocoa top.
FO. Leave a 25 cm tail.
Arms (Make 2)
Yarn: white
R1: 6 sc in MR (6)
R2: [sc, inc] x3 (9)
R3–5: sc around (9)
R6: [sc, dec] x3 (6)
R7: sc around (6)
Stuff only the lower half. Flatten top edge slightly.
FO. Leave 18 cm tails.
Front Paws (Make 2)
Yarn: white — Small rounded paws on cocoa surface
R1: 6 sc in MR (6)
R2: inc x6 (12)
R3: sc around (12)
R4: [sc, dec] x4 (8)
Stuff lightly. These should stay soft and rounded.
FO. Leave 15 cm tails.
Mini Paw / Side Marshmallow Detail (Make 1)
Yarn: white — Small rounded piece visible near the rim
R1: 6 sc in MR (6)
R2: sc around (6)
Use as a small paw or cocoa-top accent to match the photo layout.
FO. Leave 10 cm tail.
Mug (Make 1)
Yarn: cream — Deep cup shape
R1: 6 sc in MR (6)
R2: inc x6 (12)
R3: [sc, inc] x6 (18)
R4: [2 sc, inc] x6 (24)
R5: [3 sc, inc] x6 (30)
R6: [4 sc, inc] x6 (36)
R7: BLO sc around (36)
R8–16: sc around (36)
R17: [5 sc, inc] x6 (42)
R18–19: sc around (42)
If you want a firmer display piece, fit the crochet over a light insert cup. For a soft version, stuff the base lightly only.
FO. Leave a 35 cm tail.
Handle (Make 1)
Yarn: cream
Ch 18.
Row 1: starting in 2nd ch from hook, sc 17
Row 2: ch 1, turn, sc 17
Curve into a handle shape before attaching.
FO. Leave 18 cm tails on both ends.
Cocoa Top (Make 1)
Yarn: warm brown — Flat support circle
R1: 6 sc in MR (6)
R2: inc x6 (12)
R3: [sc, inc] x6 (18)
R4: [2 sc, inc] x6 (24)
R5: [3 sc, inc] x6 (30)
R6: [4 sc, inc] x6 (36)
Keep tension firm. This piece acts as the top platform for the bear and marshmallows.
FO. Leave a 30 cm tail.
Marshmallows (Make 5)
Yarn: white — Mini cocoa toppings and extras
R1: 6 sc in MR (6)
R2: sc around (6)
R3: sc around (6)
Stuff very lightly or not at all. Shape into small cubes by hand after sewing closed.
FO. Leave 10 cm tails.
Cheek Patches (Make 2)
Yarn: blush pink — Flat circles
R1: 6 sc in MR (6)
R2: inc x6 (12)
FO. Leave 12 cm tails.
Coaster (Make 1)
Yarn: cream — Flat scalloped base under the mug
R1: 6 sc in MR (6)
R2: inc x6 (12)
R3: [sc, inc] x6 (18)
R4: [2 sc, inc] x6 (24)
R5: [3 sc, inc] x6 (30)
R6: [4 sc, inc] x6 (36)
R7: [sl st in next st, 2 hdc in next st] x18
Flatten well after finishing so the mug sits level.
FO. Weave in ends.
Assembly
- Sew the muzzle centered low on the face, then embroider the black nose and mouth.
- Attach the cheek patches below the eyes and outside the muzzle edges.
- Sew the ears high on the head with a slight outward tilt.
- Sew the head to the body with the face angled slightly downward.
- Attach the arms to the upper body so they can rest over the mug rim line.
- Sew the mug handle to one side of the cup, keeping both join points level.
- Place the cocoa top into the mug opening and tack it around the inside edge.
- Fix the bear body through the cocoa top so the head rises clearly above the rim.
- Sew the front paws onto the cocoa surface and add the extra small white detail near the rim.
- Attach the marshmallows on the cocoa top and place extras beside the mug if styling for photos, then set the finished mug on the coaster.
The finished polar bear should sit low in the mug, with the forepaws resting forward and the cocoa surface staying flat.
7 Technical Tips
- Test the body inside the mug before sewing the cocoa top in place. If the body is more than about 1 cm too tall, the bear will ride above the rim and lose the tucked-in effect.
- Keep the cocoa top firm. Loose tension on a 36-stitch disc makes the paws sink into the center instead of reading as if they rest on a drink surface.
- Place the safety eyes before the last two head decrease rounds. On a compact bear face, late insertion makes the washers harder to seat and can distort the cheek spacing.
- Do not overstuff the muzzle. Too much fill turns the snout into a ball and pushes the nose too far toward the eyes.
- Pin the handle before sewing both ends. Even a small angle change is obvious because the mug body is plain and vertical.
- Sew the arms after the bear is fixed into the mug. That keeps the paw height aligned with the rim instead of leaving them floating above it.
- Use very small stitches for the marshmallows. On pieces only 6 stitches around, large stitches flatten the cube shape immediately.
Conclusion
This polar bear amigurumi crochet pattern works because the mug is treated as structure, not background. The bear stays compact, the cocoa top does the support work, and the small marshmallows finish the scene without crowding the face. Build the head first, test the body depth against the mug second, and lock the cocoa platform only after the paw position looks correct. That sequence keeps the proportions controlled. Share the finished piece on Pinterest and Instagram with #PolarBearHotCocoaAmigurumi. One practical question remains: did your bear sit low enough in the mug to make the forepaws look like they are resting on the cocoa instead of floating above it?









