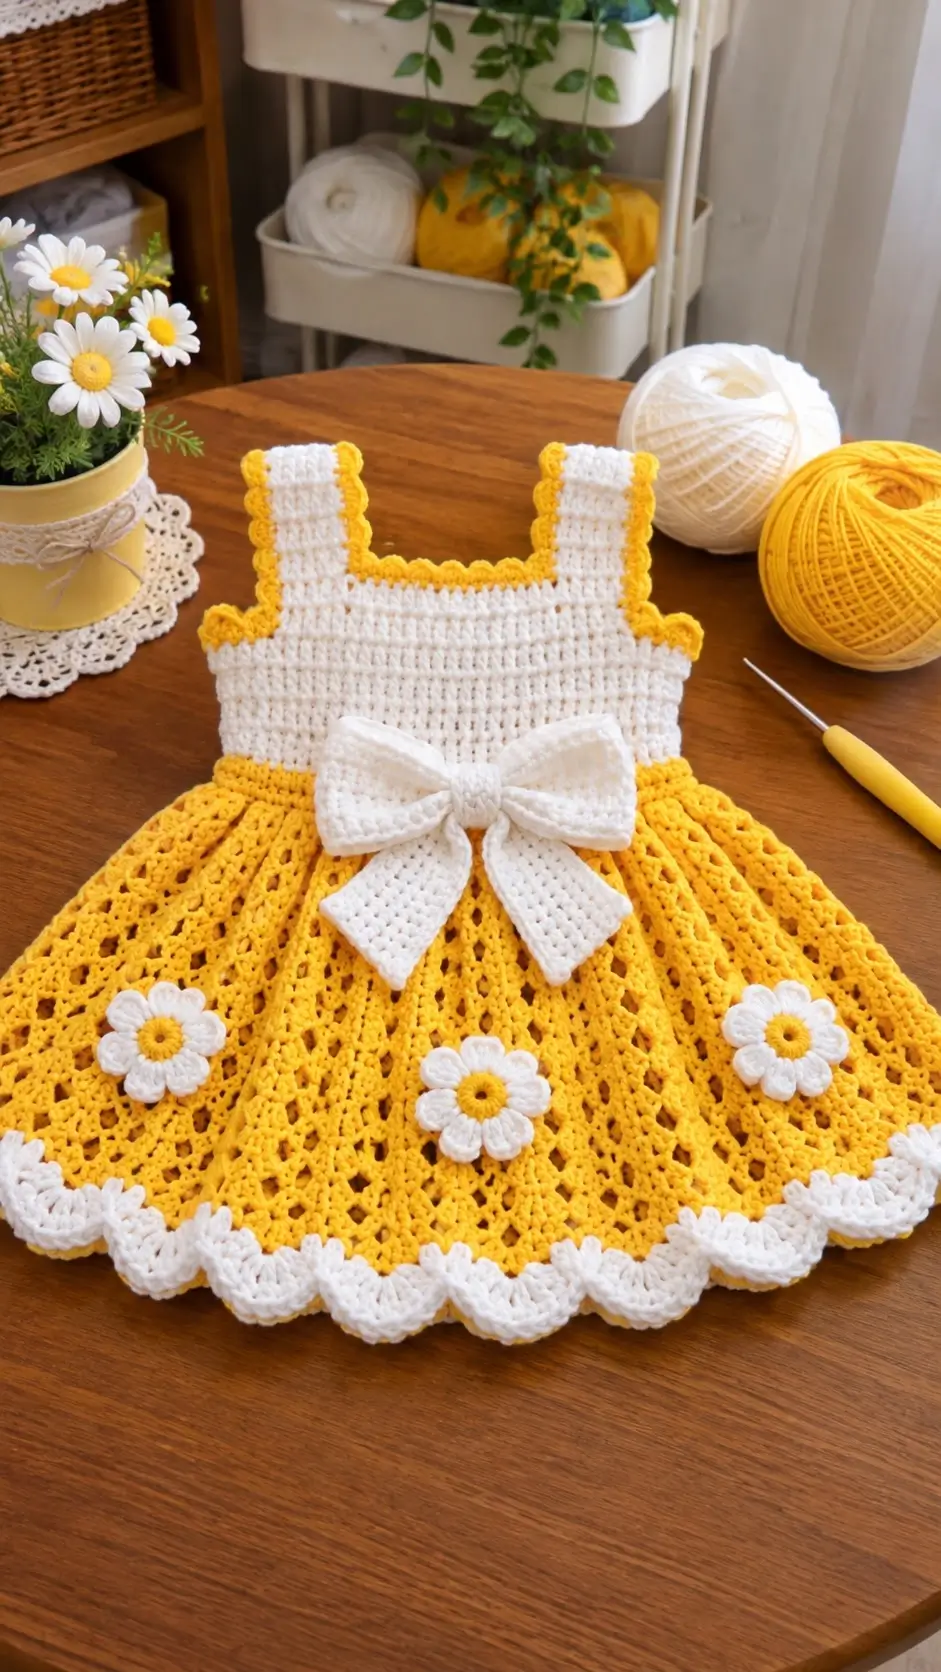
The alternating white lace bands are what control the shape of this pink and white baby crochet dress set. The dress is worked from the neckline downward with a round yoke, a flared striped skirt, scalloped hem, and separate pink bow. A matching striped hat and pair of booties complete the set. The instructions below use a 3–6 month size as a working reference, with measurements included so the fit can be adjusted.
The Design: What Makes This Baby Crochet Set Different
The dress uses three separate structural ideas. First, the round yoke distributes increases across several rows so the neckline stays smooth rather than developing four obvious raglan corners. Second, the skirt alternates denser pink sections with decorative white openwork bands. Those white rows break up the strong pink color while adding controlled flare. Finally, the hat and booties repeat the same two colors without copying every stitch from the dress, which keeps the three-piece set visually coordinated.
The main fitting mistake with a circular-yoke baby dress is making the armhole split too late. A yoke can look correct while lying flat yet become restrictive once the front and back are joined. Check chest width and armhole depth before starting the skirt.
Project Information at a Glance
| Skill Level | Reference Size | Construction | Hook | Pieces |
|---|---|---|---|---|
| Intermediate | 3–6 months | Top-down dress | 3.5–4.0 mm | Dress, hat, 2 booties |
Finished Measurement Targets
| Measurement | 3–6 Month Reference |
|---|---|
| Dress chest circumference | Approx. 48–51 cm |
| Dress length | Approx. 38–42 cm |
| Armhole depth | Approx. 10–11 cm |
| Skirt length from underarm | Approx. 25–29 cm |
| Hat circumference | Approx. 40–43 cm |
| Bootie sole length | Approx. 10–11 cm |
These are project targets. Baby sizing varies, so compare the crochet piece with the intended wearer’s actual measurements before completing the yoke or footwear.
Materials and Tools
Yarn
- Rose Pink — DK/light #3 baby yarn — approximately 250–320 g for the complete reference-size set
- White — DK/light #3 baby yarn — approximately 80–120 g
Choose a smooth, washable baby yarn with enough stitch definition to keep the white openwork rows visible.
Tools
- 3.5–4.0 mm crochet hook
- Yarn needle
- Scissors
- Stitch markers
- Measuring tape
- Blocking mat
Abbreviations
- MR — magic ring
- ch — chain
- sc — single crochet
- hdc — half double crochet
- dc — double crochet
- inc — increase
- sl st — slip stitch
- st/sts — stitch/stitches
- sp — space
- sk — skip
- RS — right side
Gauge and Fit Check
Make a 12 × 12 cm swatch in the main pink stitch before beginning the dress.
A practical starting gauge is approximately:
18–20 dc = 10 cm
The exact stitch count matters less than matching the required finished measurements. If your fabric is wider than the target, change to a smaller hook. If it is too narrow or stiff, test a larger hook.
Dress Construction
The dress begins at the neckline. Work the yoke first, separate the sleeve openings, then continue the body and flared skirt downward.
Neckline Foundation
With pink yarn, make a foundation chain that measures approximately 28–30 cm without stretching.
For many DK yarns with a 3.5–4.0 mm hook, approximately 64–72 chains will provide a useful starting range.
Join carefully with a sl st if making a closed neckline, making sure the chain is not twisted.
For easier dressing, the neckline may instead be worked back and forth for the first few rows and closed later with a small button opening at the back.
Round Yoke
Yoke Round 1
Ch 2.
Work 1 hdc in each foundation stitch around.
Join with sl st.
Yoke Round 2
Ch 3.
Work dc around while distributing approximately 8–10 increases evenly.
Join.
Yoke Round 3
Ch 3.
Work 1 dc in each stitch, again distributing approximately 8–10 increases around the yoke.
Join.
Openwork Yoke Round
Ch 3.
Repeat:
*Dc in next 2 sts, ch 1, sk 1 st.*
Adjust the final repeat if necessary while keeping the openings evenly spaced.
Next Yoke Round
Work dc into each dc and 1 dc into each ch-1 space, distributing additional increases as required.
The yoke should lie flat. A cupped yoke needs additional increases; a strongly ruffled yoke has too many.
Continue the Yoke
Repeat a combination of solid dc rounds and openwork rounds until the yoke depth reaches approximately 10–11 cm for the reference size.
The photographed style uses repeated vertical openings around the upper chest, so place an openwork round every second or third round.
Stop increasing once the yoke has enough circumference for the chest plus comfortable wearing ease.
Separating the Armholes
Lay the yoke flat and divide the stitch count into four sections:
- approximately 30% for the front
- approximately 20% for the first sleeve
- approximately 30% for the back
- approximately 20% for the second sleeve
Mark all four division points.
Work across the back section.
Chain approximately 4–7 stitches for the first underarm.
Skip the sleeve stitches.
Work across the front.
Chain the same number for the second underarm.
Skip the second sleeve section and join to the beginning of the round.
Measure the chest before proceeding.
Upper Body
With pink yarn, work 3–5 rounds of dc around the joined body.
Work one stitch into each underarm chain.
The fabric should remain flat beneath the armholes. If a gap appears at either underarm, close it later with the yarn tail rather than forcing extra stitches into the round.
Beginning the Flared Skirt
The skirt needs more circumference than the bodice.
On the first skirt round, distribute increases evenly around:
*Dc in next 5 sts, 2 dc in next st.*
Repeat around, adjusting the final repeat as required.
Work another round of dc without increasing.
Check the skirt. It should begin to flare gently rather than gathering immediately below the waist.
Pink Skirt Section
Work 2–3 rounds in pink using dc.
For additional texture, alternate one standard dc round with one round worked in a small V-stitch:
*Dc, ch 1, dc* in the designated stitch or space.
Keep the distribution symmetrical around the skirt.
White Lace Stripe
Change to white.
White Round 1
Ch 1.
Sc in every stitch around.
White Round 2
Ch 3.
Repeat:
*Dc in next st, ch 2, sk 2 sts, dc in next st.*
Continue around.
White Round 3
Work into each ch-2 space:
(sc, ch 3, sc)
This creates the small decorative points visible between the broader pink sections.
Fasten off white.
Return to Pink
Join pink yarn.
Work one stabilizing round of sc, placing stitches evenly into the white lace spaces.
Then work 2–3 rounds of dc or V-stitch.
Add a small number of evenly distributed increases if additional flare is required.
Repeating the Stripe Sequence
Continue the skirt by alternating:
- 2–3 pink texture rounds
- 1 white foundation round
- 1 white openwork round
- 1 white decorative round
- Return to pink
For the 3–6 month reference size, approximately four or five white decorative bands create proportions similar to the photographed dress.
Measure the skirt after every color section rather than relying only on the number of repeats.
Skirt Flare Control
If the skirt becomes too straight, add approximately 8–12 increases during the next pink round.
If it begins to ruffle excessively, work the next two rounds without increases.
Distribute increases around the entire circumference. Concentrating them in four fixed positions creates visible corners.
Pink Scalloped Hem
Finish the skirt in pink.
Foundation Round
Sc evenly around.
Scallop Round
Repeat:
*Sk 2 sts, 5 dc in next st, sk 2 sts, sl st in next st.*
Continue around.
If the stitch count does not divide perfectly, adjust the skipped stitches slightly across the final few repeats rather than creating one oversized gap.
White Sleeve Edging
The photographed dress is essentially sleeveless with a small white decorative edge around each armhole.
Join white yarn at the bottom of one armhole.
Round 1
Sc evenly around.
Round 2
Repeat:
*Sl st, ch 3, sl st into next suitable stitch.*
Keep the loops small so the edging does not become a sleeve.
Repeat on the second armhole.
Neckline Edging
Join pink yarn at the back neckline.
Work one round of sc.
For a slightly raised finish, add one round of reverse sc or a second standard sc round.
The finished neckline should remain flexible enough to pass comfortably over the baby’s head.
Large Pink Bow
The front bow is made separately and attached at the waist.
Bow Rectangle
With pink yarn, ch 17.
Row 1: Sc in second ch from hook and across. (16)
Rows 2–9: Ch 1, turn, sc across. (16)
Fasten off.
Pinch the rectangle firmly at its center.
Bow Center
Ch 5.
Sc across for approximately 7–9 rows or until the strip wraps around the pinched bow center.
Sew the center strip around the bow.
Bow Tails — Make 2
Ch 8.
Sc in second ch from hook and across. (7)
Continue for approximately 12–15 rows.
Decrease one stitch at each side over the final rows to create a tapered end.
Make the second tail.
Sew both tails behind the bow center.
Attach the finished bow securely to the center front of the dress at the transition between bodice and skirt.
Matching Baby Hat
The hat repeats the pink and white stripe arrangement but uses a dense fabric rather than the skirt lace.
Crown
With pink yarn, make an MR.
Round 1: 12 dc in MR. (12)
Round 2: 2 dc in every stitch. (24)
Round 3: *Dc, 2 dc in next st* around. (36)
Round 4: *2 dc, 2 dc in next st* around. (48)
Round 5: *3 dc, 2 dc in next st* around. (60)
Continue increasing only until the crown diameter matches the required hat circumference.
Hat Sizing Formula
A useful starting calculation is:
Target head circumference ÷ 3.14 = approximate flat crown diameter.
For a 42 cm head circumference:
42 ÷ 3.14 ≈ 13.4 cm
Stop increasing near that crown diameter, then work downward without further increases.
Hat Sides
Work 2–3 pink dc rounds without increases.
Change to white and work 2 rounds.
Return to pink for 2–3 rounds.
Add another white stripe.
Finish with pink if additional depth is needed.
Hat Edge
Change to white.
Work one round of sc.
Add a second sc round for a firmer lower edge.
The finished hat depth for the reference size should be approximately 14–16 cm, depending on the intended fit.
Baby Booties — Make 2
Measure the baby’s foot whenever possible. For the reference size, target a sole length of approximately 10–11 cm.
Bootie Sole
With white yarn, ch 12.
Round 1
Work 2 hdc in second chain from hook.
Hdc across the foundation chain.
Work 5 hdc into the final chain.
Continue along the opposite side of the chain.
Work hdc across.
Place 3 hdc into the final end stitch.
Join.
Round 2
Increase around both rounded ends while working one hdc into the straight side stitches.
The sole should remain flat.
Round 3
Repeat the increase principle at the toe and heel until the sole reaches the required dimensions.
Do not continue increasing after the target sole size is reached.
Bootie Side Wall
Change to pink.
Work one round of sc in BLO. This creates a defined edge between the sole and upper.
Work another round of hdc without increases.
Shaping the Toe
Mark the center front of the bootie.
On the next round, work normally until approximately 8–10 stitches before the center-front marker.
Across the toe section, work hdc decreases evenly.
Continue normally around the heel.
Repeat the toe decreases for another 1–2 rounds until the upper curves over the foot.
Do not decrease around the heel.
Bootie Ankle
Once the toe has been shaped, work 2 rounds of pink hdc around the ankle.
Change to white.
Work one round of sc.
For the decorative upper edge, repeat:
*Sc, ch 3, sc into next suitable stitch.*
Fasten off.
Make the second bootie to the same measurements.
Optional Pink Detail on the Booties
For a more pronounced pink-and-white edge, add a final round of pink slip stitches below the white decorative loops.
Keep this round loose. A tight ankle edge can make a correctly sized bootie difficult to put on.
Adjusting the Dress for Other Baby Sizes
| Approx. Size | Chest Target | Dress Length | Hat Circumference | Sole Length |
|---|---|---|---|---|
| 0–3 months | 44–47 cm | 35–38 cm | 37–40 cm | 9–10 cm |
| 3–6 months | 48–51 cm | 38–42 cm | 40–43 cm | 10–11 cm |
| 6–12 months | 51–54 cm | 42–46 cm | 43–46 cm | 11–12 cm |
| 12–18 months | 54–57 cm | 46–50 cm | 45–48 cm | 12–13 cm |
Use these figures as starting targets rather than fixed sizing standards. Adjust the neckline, yoke depth, chest circumference, and footwear from actual measurements whenever available.
Changing the Skirt Length
To make the dress shorter, remove one complete pink-and-white stripe sequence rather than stopping halfway through a decorative band.
For additional length, add another complete repeat before the scalloped hem.
If more than two repeats are added, introduce a small number of additional increases so the lower skirt maintains its flare.
Color Placement
The strongest visual match comes from using pink for approximately two-thirds to three-quarters of the dress and treating white as the accent.
Keep the yoke primarily pink.
Use white in narrow skirt bands, sleeve edging, hat stripes, bootie trim, and the soles.
This distribution keeps all three pieces coordinated without allowing the contrast color to dominate the set.
Yarn Quantity Calculation
Yarn consumption changes considerably with size, fiber, hook, and skirt fullness. A weighed sample provides a more useful estimate than a fixed number of skeins.
Complete the yoke and first skirt stripe, then weigh the work.
If the completed section represents approximately one-third of the expected dress and weighs 80 g, a starting dress estimate is:
80 g × 3 = 240 g
Add yarn for the bow and finishing, then add approximately 10% as a working reserve.
Calculate the hat and booties separately if yarn supply is limited.
Assembly
- Complete the round yoke and check the neckline circumference before continuing to full yoke depth.
- Divide the yoke for the two armholes and measure the joined chest before starting the skirt.
- Work the pink skirt sections and white lace stripes until the dress reaches the target length.
- Finish the lower edge with the pink scallop round and check that the hem hangs evenly.
- Add matching white edging around both armholes and finish the neckline neatly.
- Make the pink bow, center band, and two tails; sew the completed bow to the center front.
- Crochet the matching hat from the crown downward and stop increasing when its crown reaches the calculated diameter.
- Make two identical bootie soles, then complete the pink uppers, toe shaping, and white ankle trim.
- Weave all yarn tails into the wrong side for several centimeters, changing direction once before trimming.
- Wash or lightly block the three pieces according to the yarn care instructions and recheck all finished measurements.
The completed set consists of one flared dress, one matching striped hat, and two equal-size booties.
7 Technical Tips
- The yoke forms waves: too many increases have been added. Lay the yoke flat after every two rounds; a strongly ruffled outer edge indicates that the next round should contain fewer or no increases.
- The armholes feel restrictive: the sleeve split was made before sufficient yoke depth was reached. For the reference size, check for approximately 10–11 cm of usable yoke depth before joining the front and back.
- The skirt hangs like a tube: there is insufficient expansion below the bodice. Add approximately 8–12 evenly spaced increases in a pink round rather than placing all increases at the side seams.
- The white lace bands pull inward: the openwork repeat is using less horizontal yarn than the pink rows. Increase the chain spaces slightly or add a few evenly distributed stitches when returning to pink.
- The scalloped hem ruffles: too many shells have been packed into the foundation round. A five-dc shell generally needs enough skipped stitches on both sides to lie flat rather than overlapping adjacent shells.
- The two booties finish at different sizes: toe decreases were placed differently. Mark the center front and count the exact number of stitches included in the decrease section on the first bootie before making the second.
- The hat becomes wider after the crown: increases have continued into the side section. Once the calculated crown diameter is reached, work every subsequent stitch one-for-one unless a specific shaping adjustment is required.
Finishing and Care
Weave in every yarn tail carefully, especially at the white-to-pink color changes. Avoid leaving knots or bulky ends on the inside of the dress where they could create hard areas against the fabric.
Block the skirt lightly rather than stretching the lace bands aggressively. Arrange the scallops individually while damp so the hem dries with a consistent outline.
Wash the set according to the yarn label. A machine-washable cotton blend or baby acrylic can make routine care easier, but the selected fiber determines the final washing method.
Conclusion
The pink and white baby crochet dress set works best when the yoke fit is established before decorative skirt repeats are added. Begin by making a gauge swatch, measure the intended chest and head circumference, then adjust the neckline and yoke before committing to the full dress length. Repeat the same pink and white distribution on the hat and booties for a coordinated three-piece set. After finishing, photograph the dress flat with the hat and booties beside it for Pinterest or Instagram and use #PinkWhiteBabyCrochetSet. For your version, would you keep the large pink waist bow or replace it with two smaller side bows?









