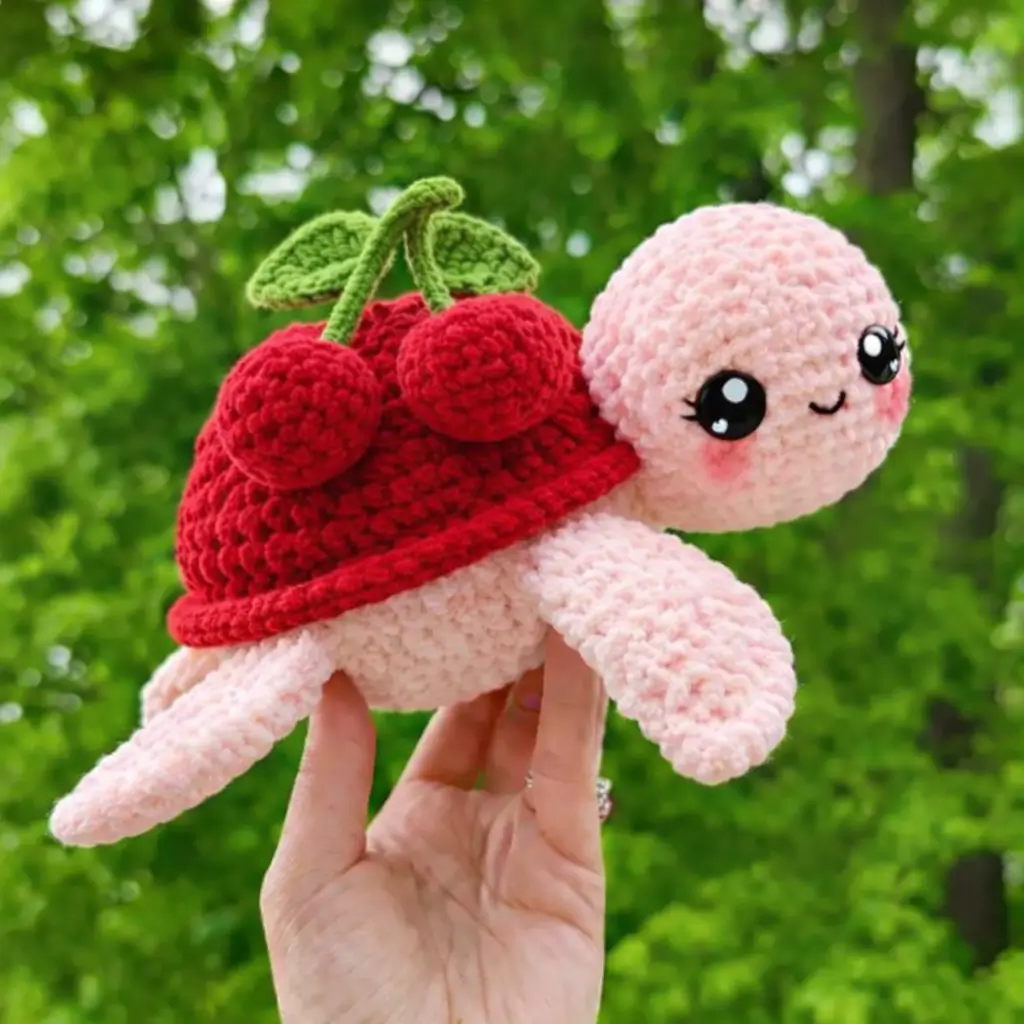
A turtle shell is supposed to read as a dome. This pineapple turtle amigurumi crochet pattern has to read as fruit texture first, turtle second, without losing balance. The build uses plush yarn, a 4.5 mm hook, 16 mm eyes, and a medium-size body that lands close to the verified 23 cm length range. It suits an intermediate maker and works well for summer market stock or display pieces.
The Design: What Makes Pineapple Turtle Different
The shell is the entire problem. Standard turtle patterns rely on a smooth half-sphere, but a pineapple shell needs segmented texture, a sharper outer rim, and a leaf crown that sits high without tipping the toy backward. That forces three structural decisions: a low body capsule, broad front flippers, and a separate shell cover rather than a single joined dome.
Proportion matters more here than cuteness. If the head is too large, the fruit effect disappears. If the shell sits too high, the turtle looks like it is carrying a hat instead of a carapace. One common mistake is placing the leaf crown at the exact center of the shell; most pineapple turtle crochet pattern versions look better when the leaves sit slightly forward. That keeps the silhouette readable from the side and matches what buyers expect from a fruit turtle amigurumi.
Project Info at a Glance
| Skill Level | Time | Finished Size | Hook | Best For |
|---|---|---|---|---|
| Intermediate | 4–6 hrs maker pace | 23 cm long / 15 cm tall | 4.5 mm body, 3.5 mm leaves | Market plush, shelf decor, themed gift |
Size and hook are verified from published listings. Time is a working estimate based on part count and plush-yarn pace.
Materials and Tools
Yarn
- Cream plush yarn — bulky / super bulky — about 43 g benchmark for body tone — YarnArt Dolce or similar plush polyester
- Golden yellow plush yarn — bulky / super bulky — about 13 g benchmark for shell tone, though textured shells may use more — YarnArt Dolce or similar
- Leaf green plush yarn — bulky / super bulky — small amount for crown leaves — matching plush polyester
- Brown yarn or embroidery thread — tiny amount for seed accents
- Black embroidery floss — tiny amount for smile
- Pink yarn or blush felt — optional for cheeks
Tools
- Hook 4.5 mm for head, body, flippers, tail, shell
- Hook 3.5 mm for leaves
- 16 mm safety eyes
- Polyfill stuffing
- Tapestry needle
- Stitch markers
- Scissors
Abbreviations
- MR = magic ring
- sc = single crochet
- inc = increase
- dec = invisible decrease
- sl st = slip stitch
- ch = chain
- BLO = back loop only
- FLO = front loop only
- bo = bobble stitch
Invisible decrease reduces bulk at the shaping line and matters most on plush yarn where a standard decrease leaves a visible ridge.
Pattern — Step by Step
Continuous spiral unless noted. This is an original photo-inspired pattern built with standard amigurumi math and calibrated to the verified size range for plush pineapple turtle designs.
Head (Make 1)
Yarn: cream — Source: standard amigurumi math calibrated to verified finished size
R1: 6 sc in MR (6)
R2: inc x6 (12)
R3: (1 sc, inc) x6 (18)
R4: (2 sc, inc) x6 (24)
R5: (3 sc, inc) x6 (30)
R6: (4 sc, inc) x6 (36)
R7-12: sc around (36)
Insert 16 mm eyes between R9 and R10, spaced 11 sts apart.
R13: (4 sc, dec) x6 (30)
R14: (3 sc, dec) x6 (24)
R15: (2 sc, dec) x6 (18)
Stuff firmly at the cheeks and lightly at the neck edge.
R16: (1 sc, dec) x6 (12)
R17: dec x6 (6)
Fasten off. Leave a 20 cm tail.
Body (Make 1)
Yarn: cream — Source: standard amigurumi math calibrated to verified finished size
R1: 6 sc in MR (6)
R2: inc x6 (12)
R3: (1 sc, inc) x6 (18)
R4: (2 sc, inc) x6 (24)
R5: (3 sc, inc) x6 (30)
R6: (4 sc, inc) x6 (36)
R7-10: sc around (36)
R11: (4 sc, dec) x6 (30)
R12: sc around (30)
R13: (3 sc, dec) x6 (24)
R14: sc around (24)
R15: (2 sc, dec) x6 (18)
Stuff evenly. Keep the top slightly flatter than the belly.
R16: (1 sc, dec) x6 (12)
R17: dec x6 (6)
Fasten off. Leave a 20 cm tail.
Front Flippers (Make 2)
Yarn: cream — Source: standard amigurumi math
R1: 6 sc in MR (6)
R2: inc x6 (12)
R3: (1 sc, inc) x6 (18)
R4-5: sc around (18)
R6: (1 sc, dec) x6 (12)
R7-9: sc around (12)
Light stuffing only in the first half. Flatten the opening.
Fasten off. Leave a 15 cm tail.
Back Flippers (Make 2)
Yarn: cream — Source: standard amigurumi math
R1: 6 sc in MR (6)
R2: inc x6 (12)
R3: (1 sc, inc) x6 (18)
R4: sc around (18)
R5: (1 sc, dec) x6 (12)
R6-7: sc around (12)
Stuff very lightly. Flatten the opening.
Fasten off. Leave a 15 cm tail.
Tail (Make 1)
Yarn: cream — Source: standard amigurumi math
R1: 6 sc in MR (6)
R2: inc x6 (12)
R3-4: sc around (12)
R5: (1 sc, dec) x6 (6)
Do not overstuff.
Fasten off. Leave a 12 cm tail.
Pineapple Shell Dome (Make 1)
Yarn: golden yellow — Source: standard amigurumi math with textured surface inspired by verified pineapple turtle listings
R1: 6 sc in MR (6)
R2: inc x6 (12)
R3: (1 sc, inc) x6 (18)
R4: (2 sc, inc) x6 (24)
R5: (3 sc, inc) x6 (30)
R6: (4 sc, inc) x6 (36)
R7: BLO sc around (36)
R8: sc around (36)
R9: (bo, 2 sc) repeat 12 times (36)
R10: sc around (36)
R11: (2 sc, bo) repeat 12 times (36)
R12: sc around (36)
R13: FLO (5 sc, inc) x6 (42)
R14-15: sc around (42)
Fasten off. Leave a 30 cm tail.
Embroider small brown seed dashes into some of the raised shell sections.
Shell Rim (Make 1)
Yarn: golden yellow — Source: original finishing band matched to photo
Ch 42. Join with sl st, taking care not to twist.
R1: sc in each ch around (42)
R2: sc around (42)
Fasten off. Leave a 30 cm tail.
Leaf Crown (Make 6)
Yarn: leaf green — Source: original leaf construction based on visible parts in photo
Ch 7.
Starting in 2nd ch from hook: sc, hdc, dc, dc, hdc, sc.
Fasten off. Leave a 12 cm tail.
Make 6 leaves. Stitch them together in a star cluster before attaching to shell.
Cheek Patches (Make 2)
Yarn: pale pink or blush yarn — Source: original optional detail based on photo
R1: 6 sc in MR (6)
R2: inc x6 (12)
Sl st to close.
Fasten off. Leave a 10 cm tail.
Face Embroidery
Yarn: black floss — Source: original finishing detail based on photo
Embroider a shallow curved smile centered one round below eye line. Keep the smile under 5 sts wide so the head still reads as a turtle, not a doll.
Assembly
- Sew the head to the front of the body, angling it slightly upward rather than straight out.
- Sew the tail to the back center of the body on the same axis as the head.
- Attach the front flippers to the lower body sides, one round behind the head join.
- Attach the back flippers near the tail end, spaced evenly so the turtle sits level.
- Place the shell dome on top of the body and pin it before sewing; the shell should cover the flipper joins but not the full side of the body.
- Sew the shell rim around the lower edge of the dome so it slightly overhangs the cream body.
- Stitch the leaf crown together and attach it slightly forward of shell center.
- Add the cheek patches or blush just below the eyes.
- Embroider the smile and the small brown seed marks on the shell.
- Check the balance on a flat surface and adjust stuffing through any remaining opening before closing fully.
The finished piece should sit low, with the shell reading as pineapple texture from both the side and top view.
7 Technical Tips
- Mark the first stitch of every round. Plush yarn hides row starts, and missing one stitch in a 36-st plateau will shift the head seam and throw off eye symmetry.
- Do not pack the body as hard as the head. A firm body lifts the shell too high and the turtle stops looking grounded against the surface.
- Use invisible decreases only on visible shaping rounds. Standard decreases on chenille yarn create blunt diagonal scars, especially on the head from rounds 13 to 17.
- Insert the eyes before the final third of head shaping. Waiting until after round 14 on plush yarn usually compresses the fabric so much that the eye posts distort the face.
- Keep front flippers 2 to 3 mm fuller than back flippers. That small volume change helps the head-heavy silhouette look intentional instead of sagging.
- Pin the shell in at least six points before sewing. Four pins are not enough on a 42-st edge, and the rim will drift toward one side.
- Weave the shell and leaf tails in different directions. When all ends are buried toward the shell center, the crown area forms a hard lump that pushes the leaves upright in a stiff cluster.
Conclusion
The main challenge in a pineapple turtle amigurumi crochet pattern is not the turtle base. It is the shell read. Texture, rim width, and crown placement decide whether the finished plush looks like a fruit hybrid or just a turtle with extra trim. This version keeps the body compact, the shell broad, and the leaves slightly forward so the profile stays clean. Next step: swatch your shell yarn with the 4.5 mm hook and check how sharply the bobbles stand. Share the finished piece on Pinterest and Instagram with #PineappleTurtlePattern. One question remains: did your leaf crown look better with six leaves, or did five give the shell a cleaner top line?









