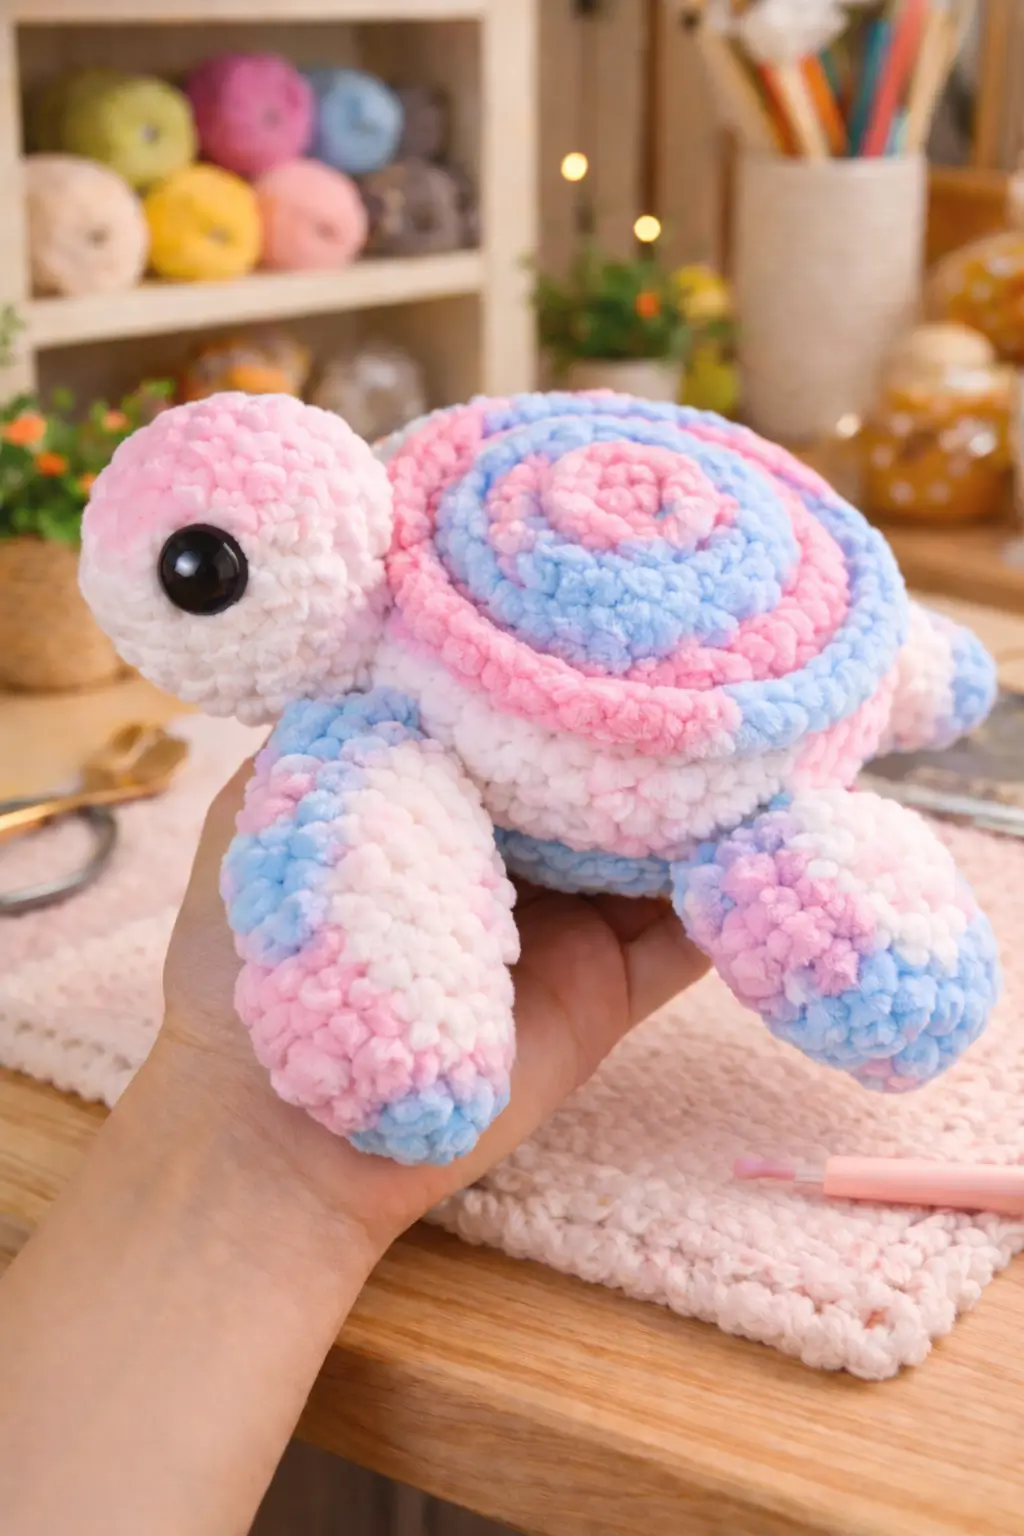
A turtle shell that curls into a rose still has to clear four flippers and a tail. This turtle amigurumi crochet pattern uses super bulky chenille yarn, a 4 mm hook, and a medium 36-stitch body plateau to produce a plush turtle about 20 cm long, suited to confident beginners who can track spiral rounds. It works well as nursery decor because the shell carries the color focus while the body stays stable in the hand.
The Design: What Makes This Turtle Different
The shell does most of the visual work here. Instead of a flat dome, the upper shell is built as a spiral base, then finished with a petal-style ridge so the turtle reads as both reptile and flower. That choice matters because a turtle body needs horizontal width, not vertical height; the shell has to sit low enough for the head to project forward and the flippers to stay visible.
The second design choice is the oversized head. You look at the face first, so the head is kept round and slightly larger than a realistic sea turtle profile. Then the body widens behind it, which stops the plush from tipping nose-first. Many no-sew turtle amigurumi patterns flatten the front too much. That mistake makes the eyes sit too close to the shell edge and shrinks the face field. In this plush turtle crochet pattern, the head stays distinct from the shell mass, while the rose turtle crochet pattern shell remains compact rather than sprawling.
Project Info at a Glance
| Skill Level | Time | Finished Size | Hook | Best For |
|---|---|---|---|---|
| Easy to intermediate | 3–5 hours | about 20 cm | 4 mm | Plush decor, baby-room shelf piece, gift make |
Materials and Tools
Yarn
- White chenille/velvet — super bulky — about 60 g — Premier Parfait Chunky or similar
- Pastel pink chenille/velvet — super bulky — about 20 g — Premier Parfait Chunky or similar
- Baby blue chenille/velvet — super bulky — about 15 g — Premier Parfait Chunky or similar
- Lavender chenille/velvet — super bulky — about 10 g — optional, for small shell and flipper accents
Tools
- Hook 4 mm
- Safety eyes 20–25 mm
- Polyester stuffing
- Tapestry needle
- Stitch markers
- Sharp scissors
Abbreviations
MR / sc / inc / dec / sl st / ch / hdc / dc / BLO / FLO
Invisible decrease joins the front loops of two stitches before finishing the sc, which reduces gaps on plush yarn.
Pattern — Step by Step
Continuous spiral unless noted.
Head (Make 1)
Yarn: white variegated plush
R1: 6 sc in MR (6)
R2: inc x6 (12)
R3: (sc, inc) x6 (18)
R4: (2 sc, inc) x6 (24)
R5: (3 sc, inc) x6 (30)
R6: sc around (30)
R7: sc around (30)
R8: sc around (30)
R9: (3 sc, dec) x6 (24)
R10: (2 sc, dec) x6 (18)
Insert 20–25 mm eyes between R6 and R7, spaced about 8 stitches apart. Stuff firmly at the muzzle and lightly at the back.
R11: (sc, dec) x6 (12)
R12: dec x6 (6)
Fasten off. Leave a 20 cm tail.
Body Base (Make 1)
Yarn: white variegated plush
R1: 6 sc in MR (6)
R2: inc x6 (12)
R3: (sc, inc) x6 (18)
R4: (2 sc, inc) x6 (24)
R5: (3 sc, inc) x6 (30)
R6: (4 sc, inc) x6 (36)
R7: sc around (36)
R8: sc around (36)
Do not fasten off. This 36-st plateau keeps the body broad enough for a low shell and four flippers.
Rose Shell Spiral Base (Make 1)
Yarn: pastel pink, baby blue, and white plush
Use color changes every round or every half-round for the marbled look.
R1: 6 hdc in MR (6)
R2: hdc inc x6 (12)
R3: (hdc, hdc inc) x6 (18)
R4: (2 hdc, hdc inc) x6 (24)
R5: (3 hdc, hdc inc) x6 (30)
R6: (4 hdc, hdc inc) x6 (36)
Do not fasten off if you want a joined shell rim later. Pull up a long loop and set aside.
Rose Petal Strip (Make 1)
Yarn: same shell colors
Work a decorative strip around the visible spiral ridge of the shell base. One petal spans 3 ridge stitches.
Petal formula across the ridge:
(sc, hdc) in first stitch, 3 dc in next stitch, (hdc, sl st) in third stitch.
Repeat around the spiral ridge until fully covered. Let colors shift irregularly for the pastel swirl look.
Fasten off. Leave a 15 cm tail for securing the outer petal edge where needed.
Front Flippers (Make 2)
Yarn: white with pink/blue accents
R1: 6 sc in MR (6)
R2: inc x6 (12)
R3: (sc, inc) x6 (18)
R4: sc around (18)
R5: sc around (18)
R6: (sc, dec) x6 (12)
R7: sc around (12)
Flatten lightly.
R8: 6 sc through both sides (6)
Stuff only the rounded tip. Keep the upper half soft so the flipper bends downward.
Fasten off. Leave a 20 cm tail.
Back Flippers (Make 2)
Yarn: white with pink/blue accents
R1: 6 sc in MR (6)
R2: inc x6 (12)
R3: (sc, inc) x6 (18)
R4: sc around (18)
R5: (sc, dec) x6 (12)
R6: sc around (12)
Flatten.
R7: 6 sc through both sides (6)
Back flippers are slightly shorter than the front pair so the turtle reads forward rather than square.
Fasten off. Leave a 20 cm tail.
Tail (Make 1)
Yarn: white or pastel blend
Ch 4.
Work back along chain: sc in 2nd ch from hook, hdc in next, dc in next.
Fasten off. Leave a 12 cm tail.
Cheek Patches (Make 2)
Yarn: pastel pink
R1: 6 sc in MR (6)
R2: inc x6 (12)
Sl st to finish.
Do not stuff.
Fasten off. Leave a 15 cm tail.
Lower Belly Closing Round
Yarn: white variegated plush
Return to the body after pinning parts in place.
R9: Join shell and body edges with 36 sc through both layers (36), catching flippers and head positions only if preferred during join
R10: (4 sc, dec) x6 (30)
R11: (3 sc, dec) x6 (24)
Add stuffing now. Keep the front chest full and the lower belly slightly softer.
R12: (2 sc, dec) x6 (18)
R13: (sc, dec) x6 (12)
R14: dec x6 (6)
Fasten off. Close opening.
Assembly
- Sew the head to the front of the body, centered across rounds 6 to 8 of the body base.
- Angle the head slightly downward so the shell clears the crown and the face projects forward.
- Sew the front flippers to each side of the body between rounds 7 and 9, about 1 stitch below shell level.
- Sew the back flippers between rounds 10 and 12, spaced evenly behind the midpoint.
- Attach the tail at the rear center, aligned with the shell spiral endpoint.
- Place the rose shell on top and tack the outer petal edge in four to six spots so the rim does not lift.
- Sew the cheek patches just below and slightly behind the eyes.
- Compress the belly lightly with your palm and check that the turtle stands low rather than spherical.
- Weave all tails inward through stuffed areas, changing direction once before trimming.
- Brush the chenille gently with fingers to hide joins and color-change knots.
The piece is complete when the shell sits flat, the head holds its angle, and all four flippers touch the resting surface.
7 Technical Tips
- Mark the first stitch of every round. Plush yarn drops stitch definition fast, and a missed increase on the shell will distort the spiral by the third round.
- Stuff the head in two densities. Pack the muzzle firmly, then reduce pressure at the back so the face stays round without pushing the head upward.
- Use invisible decreases on rounds 9–14 of the body. Standard decreases leave small gaps in chenille, and those gaps show white stuffing under tension.
- Install the eyes before the head closes below 18 stitches. After that point, thick pile blocks the washer backs and eye alignment drifts.
- Pin the shell in at least four spots before sewing. A rose shell with only one anchor point twists left or right, especially when the petal rim is taller on one side.
- Keep front flippers about 1 cm longer than the back pair. Equal-length limbs make the turtle read like a flat square plush instead of a forward-moving turtle.
- Weave tails through stuffed zones, not empty petal edges. Loose tail paths inside the shell rim can pull color segments inward and flatten the rose profile.
Conclusion
This build works because the shell, head, and flippers are scaled as separate masses instead of one rounded blob. The turtle amigurumi crochet pattern above keeps the body on a medium 36-stitch plateau, adds a compact rose shell, and leaves enough face room for large safety eyes. Next, swatch one flipper in your chosen chenille to check stitch visibility before starting the shell colors. Share the finished turtle on Pinterest and Instagram with the tag #PastelRoseShellTurtle. For this exact character, the useful question is simple: did your rose shell stay centered, or did it pull toward the tail?









