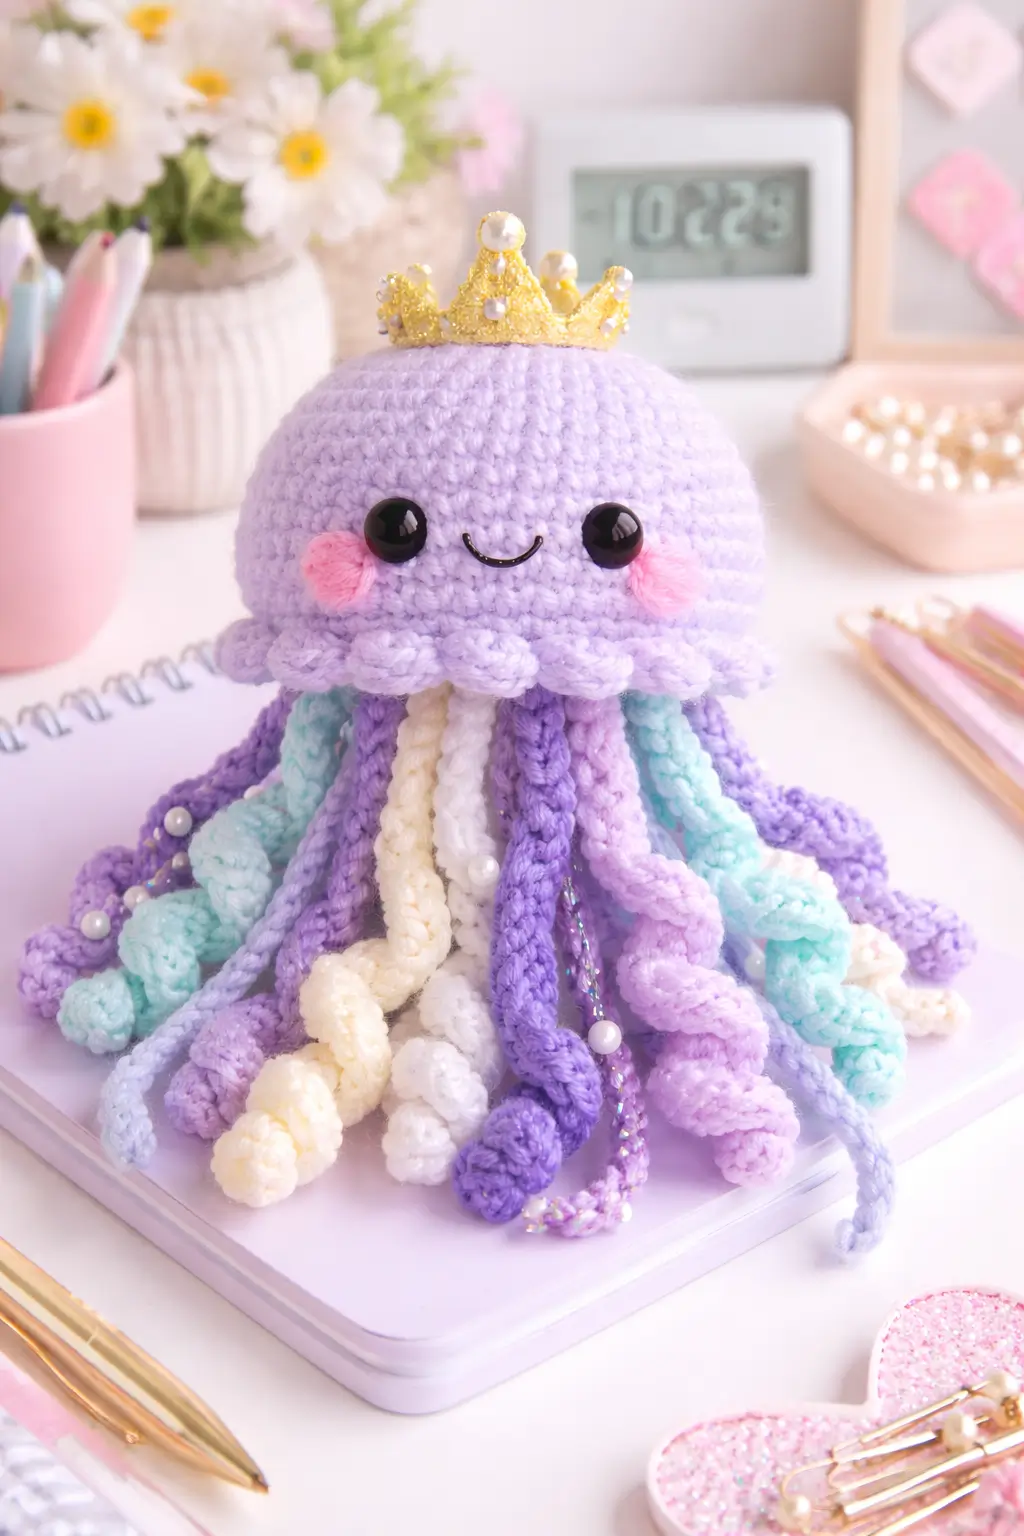
A jellyfish fails at the hem before it fails at the tentacles. This jellyfish amigurumi crochet pattern is built around a stable bell, a separate belly circle, pastel scrap tentacles, and a light crown accessory, giving you an advanced-beginner to intermediate project that finishes at roughly 8 cm across the bell and about 20 to 24 cm long with tentacles. It works well as nursery decor, desk decor, or a display plush.
The Design: What Makes This Jellyfish Different
This version uses three structural decisions that matter. First, the bell stops at a moderate stitch count instead of widening into an oversized dome, so the jellyfish keeps a rounded profile that matches the photo and does not flatten under the crown. Second, the belly is made as a separate flat circle and sewn to the underside after the tentacles are anchored. That gives cleaner spacing and better control over drape, which is important in a pastel jellyfish crochet pattern with mixed curly and straight strands. Third, the hem is worked into front loops to create a soft frill without adding another sewn piece. Makers often make this character top-heavy by overstuffing the bell, then compensating with longer tentacles. The better correction is a firmer upper third, lighter lower stuffing, and evenly distributed tentacle weight. That keeps the crochet jellyfish amigurumi upright and stops the crown from tilting forward.
Project Info at a Glance
| Skill Level | Time | Finished Size | Hook | Best For |
|---|---|---|---|---|
| Advanced beginner / intermediate | 3–5 hours | Approx. 8 cm bell, 20–24 cm total with tentacles | 3.5 mm for medium yarn | Decor plush, shelf styling, nursery mobile base |
Reference notes: 8 mm eyes and a 10 cm jellyfish are common in finer yarn builds, while 3.5–4 mm hooks and DK yarn are also widely used for jellyfish forms. A 2024 Ravelry listing places one jellyfish at 8 cm for the head/body and 24 cm with tentacles. Source 1 Source 2 Source 3
Materials and Tools
Yarn
- Light lavender — DK or light worsted — about 20 g — use for the bell and hem
- Pastel aqua — DK or light worsted — 8 to 10 g — tentacles
- Pastel lilac — DK or light worsted — 8 to 10 g — tentacles
- White — DK or light worsted — 8 to 10 g — tentacles
- Soft cream — DK or light worsted — 8 to 10 g — tentacles
- Pink — DK or sport — less than 5 g — cheek patches
- Gold metallic or embroidery thread — small amount — crown trim or attachment
Material references: medium-weight jellyfish versions use around 20 g of yarn for the main body; fine yarn versions commonly use YarnArt Jeans with a 2.0 mm hook; DK-weight jellyfish patterns are also established. Source 4 Source 5 Source 6
Tools
- Hook 3.5 mm
- Safety eyes 8 mm
- Polyester stuffing
- Tapestry needle
- Stitch markers
- Black embroidery floss or thin yarn for the smile
- Small lightweight crown or crocheted crown applique
Abbreviations
MR = magic ring, sc = single crochet, inc = 2 sc in one stitch, dec = invisible decrease, sl st = slip stitch, ch = chain, hdc = half double crochet, dc = double crochet, tr = treble crochet, BLO = back loop only, FLO = front loop only, FO = fasten off.
An invisible decrease is worked through the front loops of the next two stitches so the decrease line stays flatter on the outside of the bell.
Pattern — Step by Step
Work in a continuous spiral unless noted.
Head / Bell
Yarn: light lavender — standard amigurumi math adapted to a medium jellyfish bell
R1: 6 sc in MR (6)
R2: inc x6 (12)
R3: (sc 1, inc) x6 (18)
R4: (sc 2, inc) x6 (24)
R5: (sc 3, inc) x6 (30)
R6: (sc 4, inc) x6 (36)
R7–R11: sc around (36)
R12: FLO sc around (36)
Stuff the upper dome firmly, but keep the lower third lighter so the hem can sit softly.
FO only after the hem is completed if you prefer to work it directly from the front loops. Leave a 20 cm tail if working the hem separately.
Body / Belly Circle
Yarn: light lavender — flat circle construction follows common jellyfish underside methods
R1: 6 sc in MR (6)
R2: inc x6 (12)
R3: (sc 1, inc) x6 (18)
R4: (sc 2, inc) x6 (24)
R5: (sc 3, inc) x6 (30)
R6: (sc 4, inc) x6 (36)
This circle should sit flush against the opening without cupping. Do not overblock it.
FO. Leave a 35 cm tail for sewing.
Ruffled Hem
Yarn: light lavender — inspired by front-loop hem treatments used in jellyfish patterns
Join yarn to any front loop left from R12 of the bell.
Round hem: (sl st, ch 2, 2 dc in next st, ch 2, sl st in next st) repeat around 18 times
If the frill starts to fold sharply upward, replace each 2 dc group with 1 dc.
FO. Weave in ends toward the interior of the bell.
Curly Tentacles (Make 8)
Yarn: 2 aqua, 2 lilac, 2 white, 2 cream — curly chain method is standard for jellyfish tentacles and widely used in step-by-step jellyfish tutorials
For each tentacle:
Ch 41.
Starting in 2nd ch from hook: work 2 hdc in each chain across (80)
The curl comes from stitch density, not from twisting by hand. Keep chain tension loose and return stitches even.
FO. Leave a 20 cm tail for attachment.
Long Feature Tentacles (Make 4)
Yarn: 2 darker lavender, 1 pale blue, 1 iridescent or metallic strand — added to match the photo’s mixed tentacle lengths
For each tentacle:
Ch 56.
Starting in 2nd ch from hook: (hdc, 2 hdc in next ch) repeat across to end (110)
Use these as the lowest visual points under the bell. Space them in quarters rather than clustering them at the front.
FO. Leave a 22 cm tail.
Straight Accent Tendrils (Make 4)
Yarn: pale blue, white, lilac, metallic — narrow inner strands seen in many jellyfish builds
For each tendril:
Ch 36.
Starting in 2nd ch from hook: sl st in each chain across (35)
These do not carry visual weight. Their job is contrast and movement.
FO. Leave a 15 cm tail.
Cheek Patches (Make 2)
Yarn: pink
R1: 6 sc in MR (6)
R2: (sc 1, inc) x3 (9)
Flatten each cheek with your fingers before sewing so it reads as an oval blush patch instead of a bead.
FO. Leave a 15 cm tail.
Crown Accessory (Make 1)
Yarn: gold thread or fine metallic yarn held doubled
Ch 16, join with sl st to form a ring.
Round 1: sc around (16)
Round 2: (sl st, ch 3, dc, ch 3, sl st in same st) in next st, sl st in next 2 sts; repeat 4 times total to create 4 points
If using a premade mini crown, skip this step and stitch the accessory on after assembly with two anchor points at minimum.
FO. Leave a 20 cm tail.
Smile
Yarn: black embroidery floss
Embroider a shallow curved smile centered one round below the eyes. Keep the arc within 4 to 5 stitches wide.
Eye Placement
Insert 8 mm safety eyes between R7 and R8 of the bell, with 7 stitches between them. This placement gives the wider, low-set face shown in the photo and keeps the cheeks below rather than beside the eyes. Fine-yarn jellyfish patterns often use 7.5 to 8 mm eyes, while smaller keychain forms may use less. Source 7 Source 8
Assembly
- Finish the bell and check that the opening remains at 36 stitches.
- Insert the safety eyes between R7 and R8, spacing them evenly before locking the backs.
- Sew the smile one round below the eye line.
- Sew the cheek patches under the eyes, offset slightly outward rather than directly centered.
- Pin the 8 curly tentacles evenly around the belly circle, concentrating most of them on rounds 3 to 5.
- Add the 4 longer feature tentacles in quarter positions so the drape looks balanced from the front.
- Attach the 4 straight accent tendrils closer to the center to create depth behind the curls.
- Sew the belly circle to the bell using the front edge of the belly and the remaining back loops or inner edge of the bell opening.
- Position the crown on the top center of the dome and stitch through at least two opposite points so it does not rotate.
- Weave in all tails inside the bell, then trim only after checking the underside from every angle.
The finished piece should sit with the bell upright, the hem visible, and the tentacles spreading in mixed lengths below the center line.
7 Technical Tips
- Use a stitch marker on the first stitch of every round. Losing one increase in R5 or R6 shifts the eye line and the hem no longer lands symmetrically.
- Stuff the top half more firmly than the lower half. Too much filling near the opening pushes the belly circle outward and makes the jellyfish look bulbous instead of domed.
- Work invisible decreases only through front loops. Standard decreases leave a visible seam track that shows on pale lavender yarn.
- Install the eyes before the underside is closed. Once the belly is sewn on, correcting eye spacing means opening the seam or distorting the stuffing.
- Keep the foundation chains for curly tentacles loose by half a hook size in hand tension. Tight chains reduce the spiral and produce stiff cords rather than soft curls.
- Pin all tentacles before sewing any of them permanently. A difference of even 1 cm in front tentacle placement is noticeable on a centered desk-display jellyfish.
- Weave tails upward into the bell, not sideways across the belly seam. Sideways weaving adds bumps that show through the flat underside circle.
Conclusion
This build focuses on shape control first, then surface detail. The bell stays compact, the underside stays flat, and the tentacle mix creates the pastel volume that makes this crowned design readable from a distance. For the next step, crochet the bell and belly first, pin all tentacles dry, and check the silhouette before any permanent sewing. When you post your version, share one overhead photo for Pinterest and one straight-on photo for Instagram so the crown placement and hem line are visible. Use the tag #PastelCrownedJellyfish. Which version reads closer to the character in your photo: four long curls centered at the front, or a more even ring of mixed tentacles in this jellyfish amigurumi crochet pattern?









