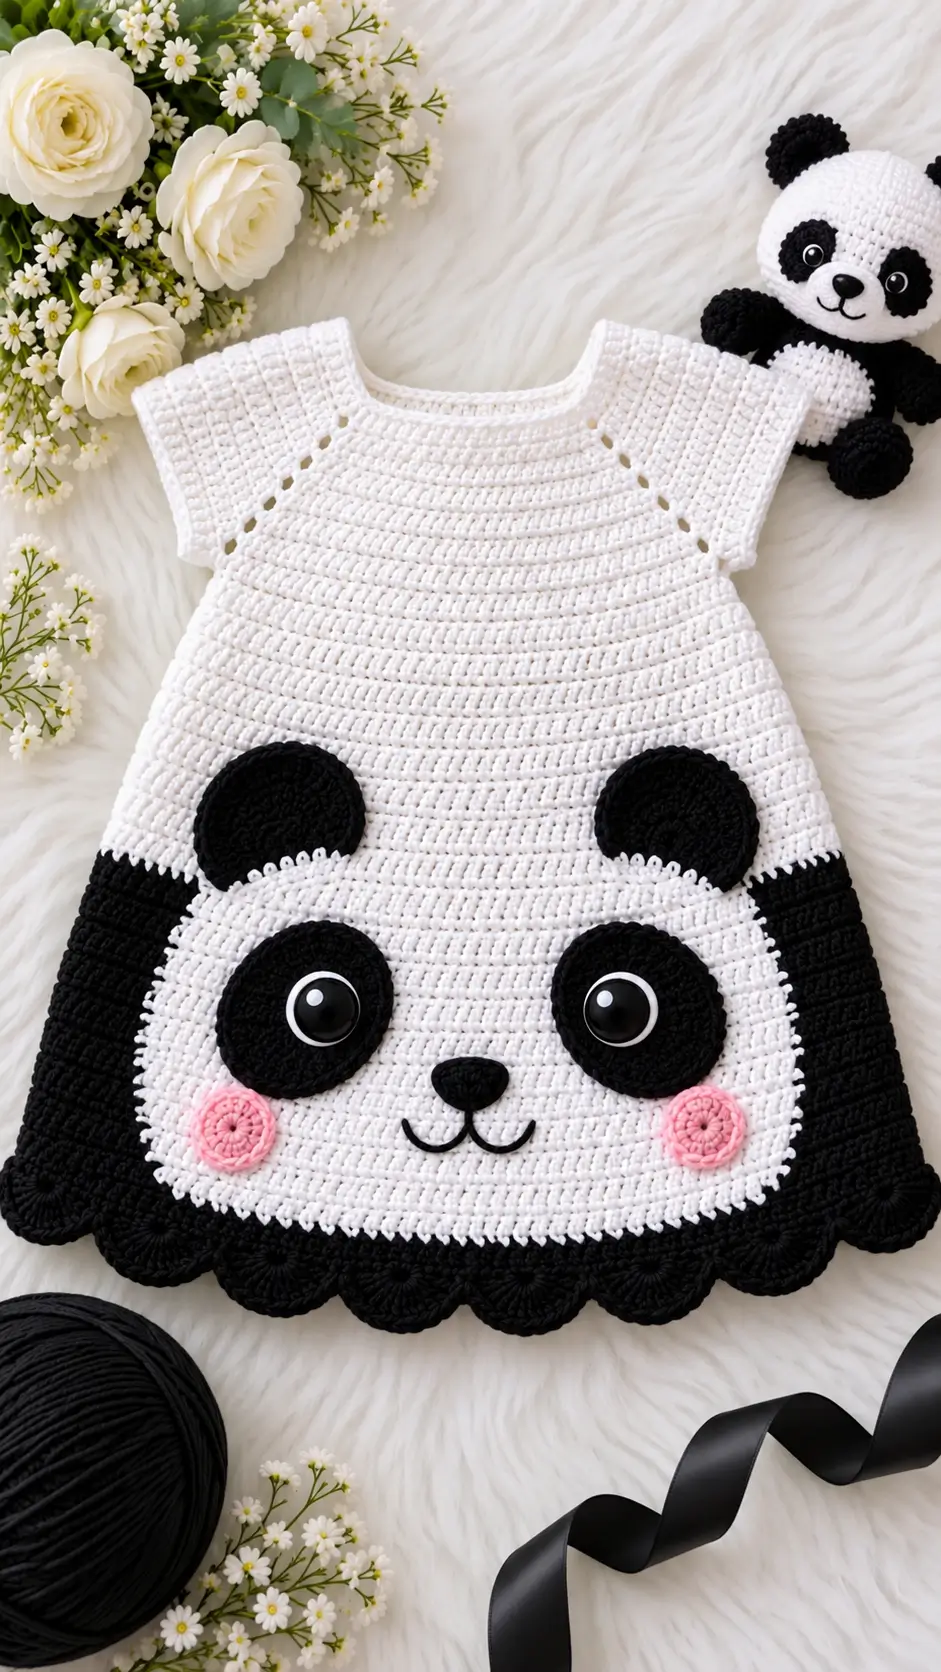
A panda’s black eye patches have to frame the eyes without turning the entire face black. This panda amigurumi crochet pattern uses DK yarn, a 3 mm hook, 10 mm safety eyes and a compact medium construction based on the supplied design. Expect an intermediate-level project with separate facial pieces and limbs. The modular construction makes misaligned facial components easier to correct before final assembly.
The Design: What Makes This Panda Different
The design depends on three structural decisions: oversized black eye patches, widely separated ears and small pink cheek circles. The eye patches are worked independently so their angle can be adjusted before sewing; crocheting the black markings directly into the head would make that positioning harder. The broad white head also needs enough depth behind the eyes to prevent the face from becoming flat after stuffing.
This crochet panda pattern uses a 36-stitch medium plateau for the original head and body geometry. Separate limbs create a compact seated silhouette. The panda plush crochet pattern also keeps the cheeks flat rather than stuffed, preserving the graphic appearance of the design.
A common mistake is placing the eye patches first and discovering later that the safety-eye posts no longer align with their centers. Fit all three layers before closing the head.
Project Info at a Glance
| Skill Level | Time | Finished Size | Hook | Best For |
|---|---|---|---|---|
| Intermediate | 4–6 hours | Approx. 9 cm | 3.0 mm | Small panda plush / display figure |
The finished measurement can vary according to yarn, hook, stuffing density and individual crochet tension.
Materials and Tools
Yarn
- White — DK / 8-ply — approximately 15 g or more
- Black — DK / 8-ply — approximately 5 g or more
- Pink — DK — small scrap for two flat cheek patches
Tools
- 3.0 mm crochet hook
- Two 10 mm safety eyes
- Polyester stuffing
- Yarn needle
- Stitch markers
- Scissors
- Pins
- Black embroidery yarn or DK yarn for the nose and mouth
Abbreviations
- MR — magic ring
- sc — single crochet
- inc — 2 sc in one stitch
- dec — invisible decrease
- sl st — slip stitch
- ch — chain
- BLO — back loop only
- st/sts — stitch/stitches
For an invisible decrease, insert the hook through the front loops of the next two stitches, yarn over and complete them as one single crochet.
Pattern — Step by Step
Work in a continuous spiral unless a section states otherwise. Place a stitch marker in the first stitch of each round and move it upward as the work progresses.
Head
Yarn: white
R1: 6 sc in MR (6)
R2: inc ×6 (12)
R3: (1 sc, inc) ×6 (18)
R4: (2 sc, inc) ×6 (24)
R5: (3 sc, inc) ×6 (30)
R6: (4 sc, inc) ×6 (36)
R7: sc around (36)
R8: sc around (36)
R9: sc around (36)
R10: sc around (36)
R11: sc around (36)
R12: sc around (36)
R13: (4 sc, dec) ×6 (30)
R14: (3 sc, dec) ×6 (24)
Stop here. Pin the eye patches and test the 10 mm safety-eye positions before installing the washers.
R15: (2 sc, dec) ×6 (18)
Stuff firmly, concentrating filling around the outer sides rather than directly behind the eye posts.
R16: (1 sc, dec) ×6 (12)
R17: dec ×6 (6)
Fasten off. Leave a 15 cm tail, thread it through the front loops of the remaining stitches and close the opening.
Body
Yarn: white
R1: 6 sc in MR (6)
R2: inc ×6 (12)
R3: (1 sc, inc) ×6 (18)
R4: (2 sc, inc) ×6 (24)
R5: (3 sc, inc) ×6 (30)
R6: (4 sc, inc) ×6 (36)
R7: sc around (36)
R8: sc around (36)
R9: sc around (36)
R10: sc around (36)
R11: (4 sc, dec) ×6 (30)
R12: sc around (30)
R13: (3 sc, dec) ×6 (24)
R14: sc around (24)
R15: (2 sc, dec) ×6 (18)
Stuff the lower half firmly enough to produce a stable sitting base. Keep the neck area slightly softer.
R16: (1 sc, dec) ×6 (12)
R17: dec ×6 (6)
Fasten off. Leave a 25 cm tail for attaching the body to the head.
Arms / Front Legs — Make 2
Yarn: black
R1: 6 sc in MR (6)
R2: inc ×6 (12)
R3: sc around (12)
R4: sc around (12)
R5: sc around (12)
R6: (2 sc, dec) ×3 (9)
R7: sc around (9)
R8: sc around (9)
Stuff the lower two-thirds lightly. Leave the upper section flexible for sewing.
Fasten off. Leave a 20 cm tail.
Back Legs — Make 2
Yarn: black
R1: 6 sc in MR (6)
R2: inc ×6 (12)
R3: (1 sc, inc) ×6 (18)
R4: sc around (18)
R5: sc around (18)
R6: (1 sc, dec) ×6 (12)
R7: sc around (12)
R8: sc around (12)
Stuff to approximately three-quarters firmness. Flatten the attachment edge slightly.
Fasten off. Leave a 25 cm sewing tail.
Ears — Make 2
Yarn: black
R1: 6 sc in MR (6)
R2: inc ×6 (12)
R3: (1 sc, inc) ×6 (18)
R4: sc around (18)
R5: sc around (18)
Do not stuff. Flatten each ear so nine stitches lie against nine stitches.
Fasten off. Leave a 20 cm tail.
Eye Patches — Make 2
Yarn: black
R1: 6 sc in MR (6)
R2: inc ×6 (12)
R3: (1 sc, inc) ×6 (18)
Sl st into the next stitch. Fasten off and leave a 20 cm tail.
Gently shape each circle into an oval during sewing. Place each safety-eye post through or near the center of its black patch before inserting it into the white head.
Cheek Patches — Make 2
Yarn: pink
R1: 6 sc in MR (6)
R2: inc ×6 (12)
Sl st into the next stitch. Fasten off and leave a 15 cm sewing tail.
Do not stuff. Keep both cheek circles flat against the head.
Muzzle
Yarn: white
R1: 6 sc in MR (6)
R2: inc ×6 (12)
R3: (1 sc, inc) ×6 (18)
R4: sc around (18)
Fasten off. Leave a 20 cm tail.
Add only a thin layer of stuffing while sewing the muzzle to the head. It should project slightly without covering the lower edges of the eye patches.
Nose
Yarn: black
R1: 6 sc in MR (6)
R2: (1 sc, inc) ×3 (9)
Fasten off. Leave a 15 cm tail.
Flatten the piece into a small triangular or oval shape while sewing. The nose can also be embroidered directly onto the white muzzle with black yarn.
Tail
Yarn: black
R1: 6 sc in MR (6)
R2: inc ×6 (12)
R3: sc around (12)
R4: sc around (12)
R5: dec ×6 (6)
Add a small amount of stuffing.
Fasten off. Leave a 20 cm sewing tail.
Optional Black Lower Accent
The black lower detail can be added as a decorative surface-crochet line after the panda has been assembled.
Yarn: black
Join black yarn at the back of the lower body. Work evenly spaced slip stitches around one body round, join at the back and fasten off. This decorative section does not alter the structural stitch count.
Assembly
- Pin the head centrally over the body. Check the facial center line before sewing through a complete ring of head and body stitches.
- Position the muzzle on the lower center of the face. Sew around its perimeter, adding a thin layer of stuffing before closing the final section.
- Place each black eye patch symmetrically around its safety eye. Sew around the outer edge without pulling the yarn tightly enough to pucker the white head.
- Attach the nose to the upper center of the muzzle. Embroider one short vertical line below it followed by two curved mouth branches.
- Sew the pink cheek patches to the left and right of the muzzle. Keep their upper edges below the lowest points of the black eye patches.
- Attach both ears near the upper sides of the head. Compare their height and distance from the facial center before completing either seam.
- Sew the arms to opposite sides of the upper body immediately below the head seam.
- Pin the back legs against the lower front and sides of the body. Place the panda on a flat surface to test its sitting position before sewing them permanently.
- Attach the tail at the center back near the lower third of the body. Keep it high enough that it does not push the seated panda forward.
- Weave every yarn tail through several internal stitches, trim the hidden ends and reshape the stuffing by hand.
The completed panda has a separate rounded head, compact seated body, four black limbs, two ears, black eye patches, a white muzzle, pink cheeks and a small black tail.
7 Technical Tips for a Cleaner Panda Amigurumi
- Control stitch-marker drift. Moving the marker one stitch late changes the visual center of the face after several spiral rounds. Transfer the marker immediately after completing the first stitch of every round.
- Watch stuffing pressure. Visible gaps between stitches indicate excessive stuffing. Add fiberfill in pieces roughly 1–2 cm wide and stop when the surface is firm without stretched stitch openings.
- Use invisible decreases. Conventional sc2tog decreases can produce visible raised bars across the closing rounds of the head. Work through the front loops of the next two stitches to reduce this effect.
- Test the eyes before locking them. Installing the 10 mm eye washers before positioning the black patches can trap the eyes off-center. Pin both patches first, insert the posts through their intended centers and then secure the washers.
- Monitor black-yarn tension. Changing yarn colors can alter gauge even when both yarns have the same DK weight. If a black 12-stitch arm is more than about 10% wider than expected, adjust tension instead of changing its stitch count.
- Measure ear placement. A difference of one crochet round is noticeable on a compact panda head. Count an equal number of head stitches from the facial center line to each ear before sewing.
- Secure sewing tails. Cutting a tail directly beside the final knot can allow a seam to loosen. Weave the tail through at least 3 cm of internal stitches, reverse direction once and trim it inside the piece.
Finishing the Panda
Check the eye patches before the final head closure; their angle controls most of this panda’s facial geometry. After assembly, measure the finished toy and record the yarn, hook and personal gauge beside the pattern so another panda can be reproduced at the same scale.
The next practical step is to pin the 18-stitch eye patches around the 10 mm eyes and photograph their positions before sewing. Save this panda amigurumi crochet pattern to Pinterest or share the completed version on Instagram with #PandaAmigurumiPattern.
Would you keep the panda’s pink circular cheeks, or replace them with embroidered blush marks?









